
If you’re looking to enhance the functionality of your laptop, a Startech docking station can be a game changer. Whether you want to connect multiple monitors, transfer data at high speeds, or expand your laptop’s connectivity options, the Startech docking station has you covered. But how do you actually connect it to your laptop? In this article, we’ll guide you through the step-by-step process of connecting a Startech docking station to your laptop, ensuring that you can enjoy all the benefits it has to offer. From setting up the hardware to installing the necessary drivers, we’ve got you covered. So, let’s dive in and learn how to connect your Startech docking station to your laptop for a seamless and efficient workstation setup.
Inside This Article
- Unboxing the Startech Docking Station
- Connecting the Docking Station to Your Laptop
- Configuring the Docking Station for Use
- Troubleshooting Common Connection Issues
- Conclusion
- FAQs
Unboxing the Startech Docking Station
When you first receive your Startech Docking Station, it’s important to unbox it carefully to avoid any damage to the device. Start by locating the box and carefully remove the packaging materials. The Startech Docking Station is usually packed securely to ensure its safety during transportation.
Once you have removed the outer packaging, you will find the Startech Docking Station itself along with the necessary accessories. These typically include a power adapter, USB cables, and possibly an installation guide or user manual. Take a moment to organize and familiarize yourself with the contents of the box.
Inspect the Startech Docking Station for any visible signs of damage. Look for any cracks, dents, or loose parts that may have occurred during shipping. If you notice any issues, it is recommended to contact the seller or Startech support for assistance or a potential replacement.
Before proceeding further, ensure that you have a compatible laptop or device that is capable of connecting to the Startech Docking Station. Check the product specifications or consult the user manual to verify the compatibility requirements.
Keep the Startech Docking Station and its accessories in a safe place during the unboxing process. It is always a good idea to retain the original packaging in case you need to transport or store the device in the future.
Now that you have successfully unboxed your Startech Docking Station, you are ready to move on to the next step of connecting it to your laptop or device.
Connecting the Docking Station to Your Laptop
Once you have unboxed your Startech docking station and are ready to set it up, the next step is to connect it to your laptop. Follow these simple steps to ensure a seamless connection:
- Check your laptop’s compatibility: Before connecting the docking station, make sure it is compatible with your laptop. Refer to the user manual or the manufacturer’s website for the list of supported laptops.
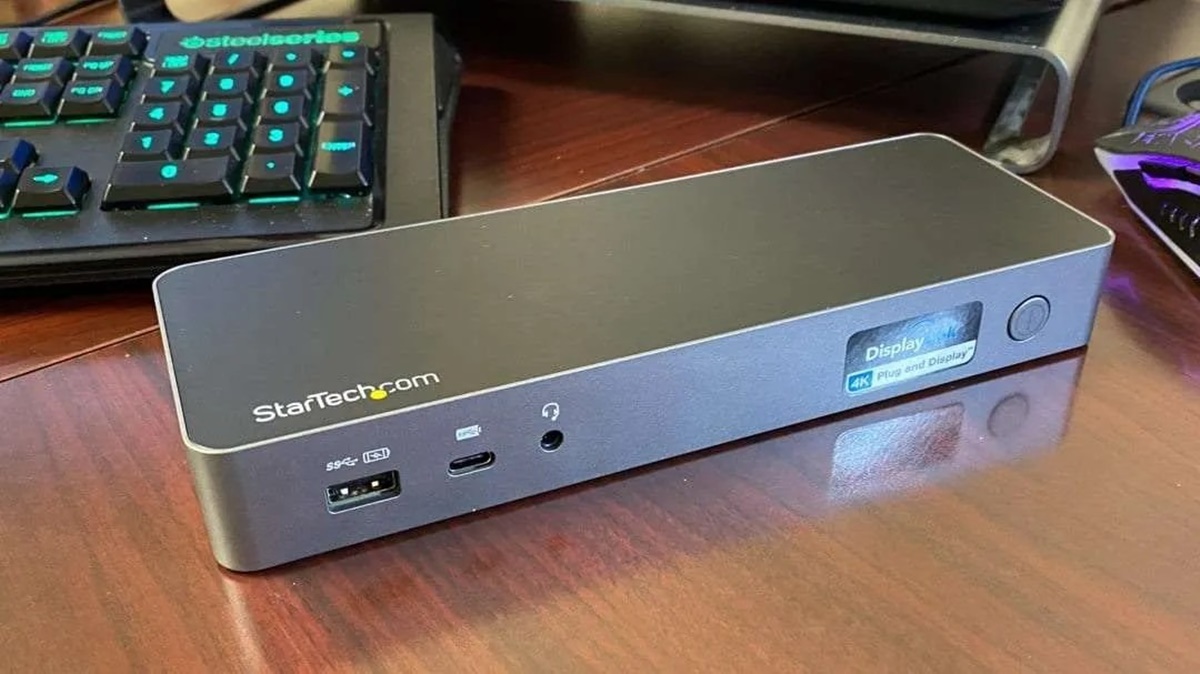
- Find the appropriate ports: Locate the ports on your laptop that correspond to the connectors on the docking station. The docking station will typically have a variety of ports such as USB-C, HDMI, DisplayPort, Ethernet, and audio.
- Connect the docking station to your laptop: Use the appropriate cables included with the docking station to connect it to your laptop. For example, if your laptop has a USB-C port, connect the USB-C cable from the docking station to the laptop’s USB-C port.
- Power up the docking station: Plug in the power adapter of the docking station to an electrical outlet to provide power. Ensure that the docking station is receiving power by checking if the LED indicators on the docking station are illuminated.
- Configure your laptop settings: Depending on the operating system of your laptop, you may need to adjust some settings to ensure that it recognizes the docking station. Check the laptop’s user manual or the manufacturer’s website for instructions on how to configure the settings.
- Test the connection: Once the docking station is connected and the necessary settings are configured, it’s time to test the connection. Connect peripherals such as monitors, keyboards, and mice to the docking station and check if they are recognized by your laptop.
- Update docking station firmware: It is recommended to check for firmware updates for your docking station regularly. Visit the manufacturer’s website and download the latest firmware update if available. Follow the instructions provided to update the firmware.
Following these steps will ensure a successful connection between your Startech docking station and your laptop. Enjoy the convenience of expanding your laptop’s capabilities with the additional ports and functionality provided by the docking station.
Configuring the Docking Station for Use
Once you’ve successfully connected your Startech docking station to your laptop, it’s time to configure it for use. Configuring the docking station involves making sure all the necessary settings are properly adjusted to optimize your experience. Here are the steps you need to follow:
1. Install the Required Drivers: Before you can fully utilize your docking station, it’s essential to install the necessary drivers. Startech typically provides driver software with their docking stations. You can find these drivers either on an installation CD or by downloading them from the Startech website. Once you’ve obtained the drivers, follow the provided instructions to complete the installation process.
2. Adjust Display Settings: If you plan on using an external monitor with your docking station, you need to adjust the display settings accordingly. Connect your external monitor to the docking station and access your laptop’s display settings. Depending on your operating system, you may need to go to the Control Panel or System Preferences to find the display settings. From there, you can select the desired resolution, screen orientation, and primary display options.
3. Set Audio Output and Input: If your docking station has audio capabilities, you’ll need to set the audio output and input accordingly. In the audio settings of your laptop, choose the docking station as the default audio output device. The process for doing this varies depending on your operating system, but you can typically find the audio settings in the Control Panel or System Preferences. Additionally, if your docking station has a microphone input, you can set it as the default audio input device if desired.
4. Configure USB Ports: The Startech docking station comes equipped with multiple USB ports for connecting various devices. You may need to adjust the settings for these USB ports to ensure they function properly. It is always recommended to connect devices directly to the docking station rather than through the laptop’s USB ports for optimal performance. However, if you encounter any issues with the USB ports on the docking station, you can try updating the USB drivers or adjusting the power settings in your laptop’s Device Manager.
5. Customize Network Settings: If your docking station has an Ethernet port, you may need to customize the network settings to establish a stable and secure network connection. Access the network settings on your laptop and configure them to use the Ethernet adapter from the docking station. You may need to enter the network settings manually or let your laptop obtain the settings automatically through DHCP.
6. Test the Configuration: After you’ve completed all the necessary configuration steps, it’s essential to test the setup to ensure everything is working correctly. Connect any peripheral devices you plan to use with the docking station, such as an external monitor, USB devices, and audio devices. Verify that the docking station recognizes these devices and that they function as expected. This step will help you identify and troubleshoot any issues that may arise.
By following these steps, you can effectively configure your Startech docking station to work seamlessly with your laptop. Remember, proper configuration ensures optimal performance and compatibility, allowing you to make the most of your docking station’s capabilities.
Troubleshooting Common Connection Issues
Although connecting a Startech docking station to your laptop is typically a straightforward process, you may encounter some common connection issues along the way. Don’t worry, as there are simple troubleshooting steps you can follow to resolve these problems. Let’s take a look at some of the most common connection issues and how to troubleshoot them:
1. No Power: If the docking station is not powering on, make sure that it is securely connected to a power source. Check if the power cable is plugged in correctly. If the docking station has an AC adapter, also ensure that it is plugged in properly. If the issue persists, try using a different power outlet or cable to rule out any potential power supply problems.
2. No Display: If you are not getting any display on your external monitor, double-check the video cable connections. Make sure that both ends of the cable are securely plugged into the docking station and the monitor. If you are using an HDMI or DisplayPort connection, try using a different cable to verify if the issue is with the cable itself. Additionally, make sure that your laptop’s display settings are configured to extend or duplicate the display to the external monitor.
3. USB Device Not Recognized: If you are experiencing issues with USB devices not being recognized by your laptop when connected to the docking station, try the following steps. First, disconnect and reconnect the USB devices, ensuring a secure connection. You can also try plugging the USB devices into different USB ports on the docking station. If the issue persists, check if the USB devices are working properly by connecting them directly to your laptop’s USB ports. If they work fine, there may be an issue with the docking station’s USB ports. In this case, you can try updating the docking station’s drivers or contacting Startech support for further assistance.
4. Audio Issues: If you are experiencing problems with audio output through the docking station, check the audio settings on your laptop. Ensure that the audio output is set to the docking station or the connected external speakers. You can access these settings through the Control Panel or the audio settings menu on your laptop. If the issue persists, try connecting headphones or external speakers directly to your laptop to check if the problem lies with the docking station’s audio output.
5. Network Connectivity Problems: If the docking station has Ethernet ports for a wired network connection, and you are experiencing issues with network connectivity, start by checking the Ethernet cable connections. Ensure that the Ethernet cable is securely plugged into both the docking station and the router. You can try using a different Ethernet cable to eliminate the possibility of a faulty cable. Additionally, verify the network settings on your laptop and ensure that they are configured correctly for a wired connection. If necessary, you can also try updating the docking station’s network drivers.
By following these troubleshooting steps, you can address common connection issues with your Startech docking station. Always refer to the user manual or contact Startech support for specific instructions and assistance. Remember to stay patient and methodical when troubleshooting, as it often requires a process of elimination to determine the root cause of the problem.
In conclusion, connecting a Startech docking station to your laptop is a simple and efficient way to expand your device’s capabilities. Whether you’re looking to connect multiple monitors, add extra USB ports, or enhance your audio experience, a docking station can provide the convenience and functionality you need. By following the step-by-step process outlined in this article, you can easily establish a seamless connection between your laptop and the docking station.
Remember to check the compatibility of the docking station with your laptop model and operating system before making a purchase. Additionally, ensure that you have the necessary cables and adapters to establish the connection. With the right equipment and a clear understanding of the connection process, you’ll be able to enjoy the benefits of a Startech docking station in no time.
FAQs
Q: What is a Startech Docking Station?
A: A Startech docking station is a device that allows you to connect your laptop or computer to multiple peripherals, such as monitors, keyboards, mice, and external storage devices, using a single cable connection.
Q: How do I connect a Startech Docking Station to my laptop?
A: Connecting a Startech Docking Station to your laptop is a simple process. First, make sure your laptop is powered off. Then, plug one end of the docking station’s cable into the appropriate port on your laptop. Next, connect your peripherals, such as monitors, keyboards, and mice, to the docking station. Finally, power on your laptop and the docking station should automatically recognize and configure the connected devices.
Q: Can I connect multiple monitors to a Startech Docking Station?
A: Yes, most Startech Docking Stations support multiple monitor connections. Check the specifications of your specific docking station model to determine the maximum number of monitors it can support. You may need additional adapters or cables to connect multiple monitors.
Q: Does my laptop need any special software to work with a Startech Docking Station?
A: In most cases, your laptop will not require any special software to work with a Startech Docking Station. The docking station’s drivers are typically installed automatically by your laptop’s operating system. However, it is always a good idea to check the Startech website for any updated drivers or software that may enhance the functionality of the docking station.
Q: Can I use a Startech Docking Station with different laptop brands?
A: Yes, Startech Docking Stations are designed to be compatible with a wide range of laptop brands and models. However, it is important to verify the compatibility of your specific laptop model with the docking station before making a purchase. The Startech website or customer support can provide you with the necessary information to ensure compatibility.