
Welcome to our comprehensive guide on how to get your Nintendo Switch headset working. As avid gamers, we know how crucial it is to have a great gaming experience, and a good headset is a key component. Whether you’re playing alone and want to fully immerse yourself in the game’s audio, or you’re playing with friends and need to communicate, a headset can make all the difference. However, getting your headset to work with the Nintendo Switch can sometimes be a bit tricky. That’s where we come in! In this article, we will provide you with step-by-step instructions on how to connect and set up your headset with your Nintendo Switch, as well as troubleshoot common issues. So, let’s dive in and get your headset working seamlessly with your Nintendo Switch!
Inside This Article
- Troubleshooting Common Issues
- Updating Nintendo Switch Firmware
- Connecting the Headset to the Nintendo Switch
- Adjusting Audio Settings on the Nintendo Switch
- Conclusion
- FAQs
Troubleshooting Common Issues
If you’re having trouble getting your Nintendo Switch headset to work, don’t worry – you’re not alone. Many users encounter common issues that can easily be resolved with a few simple troubleshooting steps. Let’s take a look at some of the most common issues and how to fix them.
1. No Sound or Low Volume: If you’re not hearing any sound or experiencing low volume, make sure the headset is properly connected to the Nintendo Switch. Check if the volume on the console is turned up and adjust it accordingly. Additionally, ensure that the audio settings on the console are not on mute or set to a lower volume level.
2. Poor Audio Quality: If the audio quality is poor or distorted, try disconnecting and reconnecting the headset. Make sure there are no physical obstructions or interference between the headset and the console. It’s also worth checking if the headset is fully charged or if the batteries need to be replaced.
3. Microphone Not Working: If the microphone on the headset is not working, check if it’s muted or if the microphone volume is turned down on the console. Some headsets may have a separate mute switch or button on the headset itself. Make sure it’s not accidentally toggled to mute. If the issue persists, try using the headset on another device to see if the problem is specific to the Nintendo Switch.
4. Bluetooth Connectivity Issues: If you’re using a wireless Bluetooth headset, ensure that the headset is in pairing mode and can connect to other devices. Check if the headset is within range of the Nintendo Switch and that there are no other Bluetooth devices causing interference. If necessary, follow the manufacturer’s instructions to fully pair the headset with the console.
5. Compatibility Issues: Not all headsets are compatible with the Nintendo Switch. It’s essential to check if the headset you’re using is specifically designed for the console. The official Nintendo Switch headset or headsets that are labeled as “Nintendo Switch compatible” are recommended for optimal performance.
If you’re still having trouble with your Nintendo Switch headset after trying these troubleshooting steps, it might be worth contacting the headset manufacturer’s customer support for further assistance. They will be able to provide specific troubleshooting tips or determine if the headset needs to be replaced or repaired.
Remember, patience and persistence are key when troubleshooting common issues. With a bit of troubleshooting, you should be able to enjoy gaming on your Nintendo Switch with a fully functional headset.
Updating Nintendo Switch Firmware
Keeping your Nintendo Switch firmware up to date is essential to ensure the best performance and compatibility with your headset. Here’s a step-by-step guide on how to update your Nintendo Switch firmware:
- Connect your Nintendo Switch to a stable internet connection.
- Ensure that your Switch is charged or connected to a power source to prevent any interruption during the update.
- From the home screen, navigate to the System Settings.
- Scroll down and select “System.”
- Choose “System Update” from the options.
- If there is a new firmware update available, your Switch will detect it and prompt you to download and install it.
- Select “Download” to begin the update process.
- Wait for the update to download and install. This may take several minutes, depending on your internet connection.
- Once the update is complete, your Nintendo Switch will restart automatically.
After updating your Nintendo Switch firmware, it’s important to ensure that your headset is still connected and functioning properly. If you encounter any issues, refer to the troubleshooting section or contact the manufacturer for further assistance.
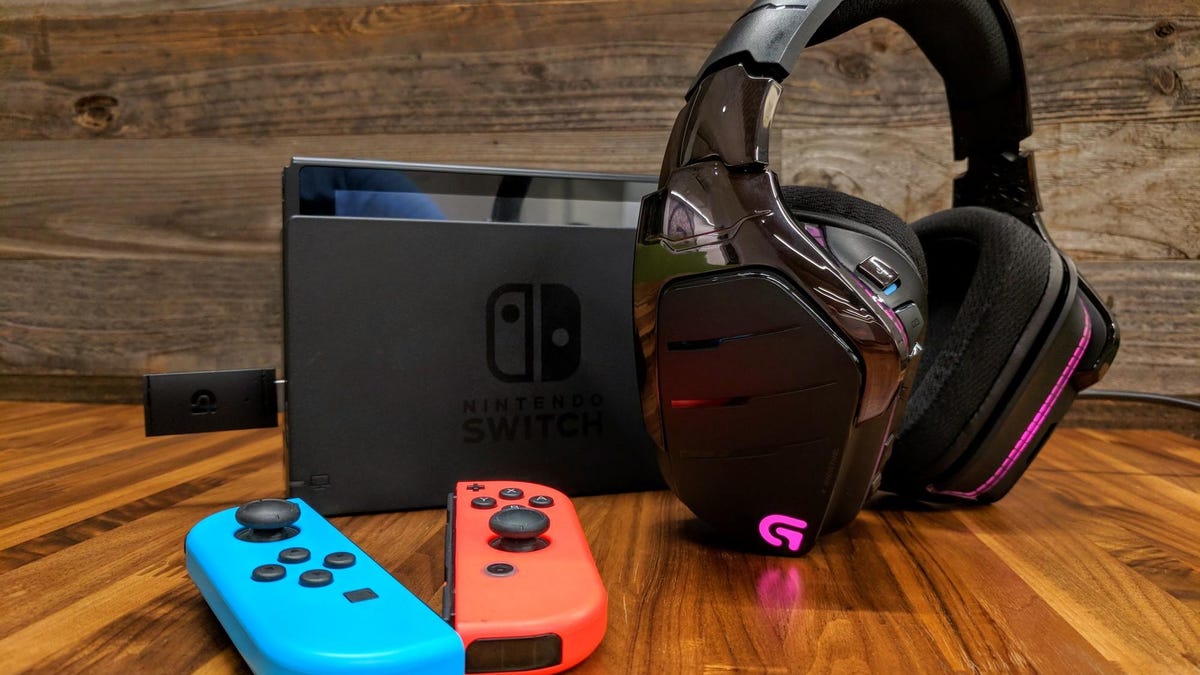
Connecting the Headset to the Nintendo Switch
Connecting a headset to your Nintendo Switch allows you to enjoy an immersive gaming experience with high-quality audio. Whether you have a wired or wireless headset, the process of connecting it to your console is relatively straightforward. Follow the steps below to get your Nintendo Switch headset up and running.
Step 1: Check compatibility
Before connecting your headset, ensure that it is compatible with the Nintendo Switch. Check the manufacturer’s specifications to confirm compatibility, as certain headsets may require additional adapters or software updates.
Step 2: Wireless headset
If you have a wireless headset, start by putting it into pairing mode. Refer to the headset’s user manual for instructions on how to do this. Once in pairing mode, go to the “System Settings” on your Nintendo Switch and navigate to “Controllers and Sensors.” From there, select “Change Grip/Order” and follow the on-screen instructions to pair your wireless headset with the console.
Step 3: Wired headset
For a wired headset, you will need to connect it directly to the Nintendo Switch. Locate the audio jack on the console, which is located on the top-left side when the console is in handheld mode or on the back of the dock when playing on a TV. Plug the headset’s audio cable into the audio jack and make sure it is securely connected.
Step 4: Adjust audio settings
Once your headset is connected, you may need to adjust the audio settings on your Nintendo Switch. To do this, go to the “System Settings” and select “System,” followed by “Audio Output.” From there, you can adjust the volume, balance, and other audio settings according to your preferences.
By following these steps, you can easily connect your headset to the Nintendo Switch and start enjoying an enhanced gaming experience. Whether you prefer a wireless or wired headset, make sure to check compatibility and adjust the audio settings to optimize the sound quality for your gaming sessions.
Adjusting Audio Settings on the Nintendo Switch
When it comes to enjoying your gaming experience on the Nintendo Switch, having the perfect audio settings is essential. Whether you’re playing a fast-paced action game or diving into the immersive world of a role-playing adventure, optimizing your audio settings can greatly enhance your gameplay. In this section, we will guide you through the process of adjusting the audio settings on your Nintendo Switch.
1. Start by accessing the System Settings menu on your Nintendo Switch. You can do this by selecting the “System Settings” icon located on the home screen of your Switch.
2. Once you’re in the System Settings menu, scroll down and select the “System” option. This will take you to a new menu with various system settings.
3. In the System menu, locate and select the “Sound” option. This is where you can customize your audio settings.
4. Within the Sound menu, you’ll find a few different options to adjust your audio settings. The first option is “TV Output,” which allows you to adjust the audio output specifically for when your Switch is connected to a TV or monitor.
5. If you’re using headphones or external speakers, you’ll want to adjust the “Headphone Volume” or “Speaker Volume” settings, depending on your setup. Use the volume slider to increase or decrease the volume to your desired level.
6. Additionally, you can adjust the “Surround Sound” settings if you’re using a surround sound system. This option allows you to enable or disable surround sound for a more immersive audio experience.
7. Lastly, make sure to test your audio settings by selecting the “Test Sound” option. This will play a test sound through your selected audio output, allowing you to verify that your settings are adjusted correctly.
By adjusting the audio settings on your Nintendo Switch, you can ensure that you have optimal sound quality and an immersive gaming experience. Experiment with different settings to find the perfect balance and volume levels that suit your preferences. Now, dive into your favorite games and enjoy every detail of the soundtracks, sound effects, and in-game dialogue.
In conclusion, getting your Nintendo Switch headset working is a relatively simple process that can greatly enhance your gaming experience. By following the steps outlined in this article, you can ensure that your headset is properly connected and functioning correctly with your Nintendo Switch console. Remember to check for any compatibility issues and ensure that your headset is specifically designed for use with the Nintendo Switch. Additionally, keep in mind that some headsets may require additional adapters or accessories to work seamlessly with the console. By selecting a high-quality headset and following the setup instructions carefully, you can enjoy clear, immersive sound while playing your favorite Nintendo Switch games. So, don’t wait any longer – get your headset working and dive into the world of gaming like never before!
FAQs
1. Can I use any headset with my Nintendo Switch?
Yes, you can use any headset with a 3.5mm audio jack with your Nintendo Switch. Simply plug it into the audio jack on the Switch console and you’re good to go. However, if you want to use a wireless headset, you’ll need to make sure it is compatible with the Switch.
2. How do I connect a wireless headset to my Nintendo Switch?
To connect a wireless headset to your Nintendo Switch, you’ll need to go to the system settings on your Switch console and navigate to the “Controllers and Sensors” section. From there, select “Change Grip and Order” and follow the instructions to pair your wireless headset with the Switch console.
3. Can I use Bluetooth headphones with my Nintendo Switch?
No, the Nintendo Switch does not have built-in Bluetooth support for headphones. However, you can purchase a Bluetooth adapter that plugs into the Switch’s audio jack, allowing you to use Bluetooth headphones.
4. How do I adjust the audio settings on my Nintendo Switch?
To adjust the audio settings on your Nintendo Switch, go to the system settings and select “System” from the menu. Then, navigate to “Audio Output” and adjust the volume and other audio settings according to your preferences.
5. Are there any recommended headsets for the Nintendo Switch?
While there are no specific headsets recommended by Nintendo, there are several popular options among Nintendo Switch users. Some popular choices include the SteelSeries Arctis 1 Wireless, HyperX Cloud Alpha, and Turtle Beach Stealth 600. It’s always a good idea to read reviews and choose a headset that fits your budget and preferences.