
When it comes to photography, one of the essential tools used by professionals and amateurs alike is a tripod. A tripod provides stability and ensures sharp, blur-free images, making it a crucial accessory for photographers. However, a tripod is only as good as its levelness. If your tripod isn’t levelled properly, it can lead to uneven or tilted shots, affecting the overall quality of your photographs. In this article, we will guide you on how to level a tripod effectively and efficiently. Whether you’re shooting landscapes, portraits, or any other subject, having a perfectly level tripod will greatly enhance the outcome of your images. So, let’s dive in and discover the steps to achieve tripod-leveling perfection.
Inside This Article
- Finding a Level Surface
- Adjusting the Leg Lengths
- Using a Bubble Level
- Final Adjustments
- Conclusion
- FAQs
Finding a Level Surface
When it comes to leveling a tripod, one of the first steps is finding a level surface. This is crucial for ensuring the stability and accuracy of your camera while taking shots. Here are a few tips to help you find a level surface:
1. Scout the area: Look around your shooting location and identify a spot where the ground appears to be as level as possible. Avoid uneven surfaces, slopes, or areas with obvious obstructions that could cause your tripod to tilt.
2. Use a leveling app: There are many smartphone apps available that use the device’s built-in sensors to determine the levelness of a surface. Simply place your phone on the ground and the app will indicate whether the surface is level or not.
3. Carry a leveling tool: Invest in a small bubble level or a tripod with a built-in bubble level. These tools can easily be attached to the tripod or placed on the ground to ensure that the surface is perfectly level.
4. Make adjustments: If the area you’re shooting in doesn’t have a perfectly level surface, you may need to make adjustments. You can place small wedges or tripod leg extenders underneath the legs to compensate for any unevenness and achieve a level position.
By taking the time to find a level surface, you’ll be able to set up your tripod properly and ensure that your camera remains steady throughout your shoot. This will result in sharper, more professional-looking photos and videos.
Adjusting the Leg Lengths
When it comes to leveling a tripod, one crucial aspect is adjusting the leg lengths. This step ensures that your tripod stands firmly on any surface and provides a stable base for your camera or other equipment.
To start, extend all the legs of your tripod fully. This will give you the most flexibility in adjusting the individual leg lengths. Pay attention to the bubble level on your tripod’s center column or tripod head as a reference point for leveling.
Once the legs are fully extended, examine the surface on which your tripod is standing. If you are on uneven ground, you’ll need to make adjustments to the individual leg lengths to achieve a level position.
Start with the leg that is on the highest side of the uneven surface. Loosen the leg lock mechanism and gradually shorten the length of that leg until the bubble level shows that it is level. You can do this by unlocking the leg sections and sliding them inwards. Make sure to tighten the leg lock once the leg is properly adjusted.
Next, move to the leg that is on the opposite side of the uneven surface. Repeat the process of loosening the leg lock, adjusting the leg length inward or outward as needed, and then tightening the lock once the level position is achieved.
Continue this process with the remaining leg or legs until your tripod is completely level and stable. Take your time and double-check the leveling by looking at the bubble level indicator.
Remember, it’s important to adjust each leg individually rather than relying on the center column’s adjustments. This allows for greater stability and ensures that your tripod can handle the weight of your equipment without tipping over.
Once all the legs are adjusted and level, you can further fine-tune the position and stability of your tripod by tightening the leg locks securely. This will prevent any accidental movement or shifting during use.
By following these steps and adjusting the leg lengths accordingly, you’ll be able to level your tripod in any environment quickly and efficiently. It may take a few tries to achieve the perfect level, but with practice, it will become second nature.
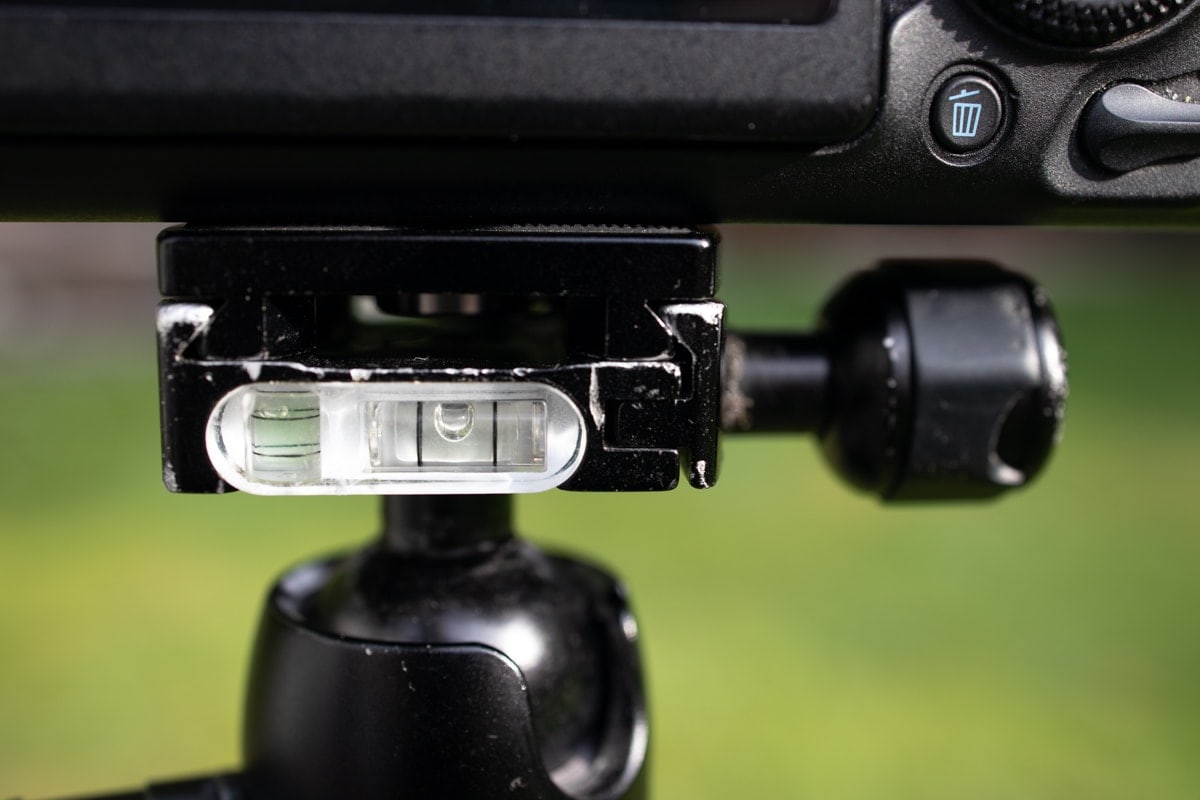
Using a Bubble Level
When it comes to leveling a tripod, a bubble level can be an invaluable tool. This small device, typically positioned on the tripod’s top plate, helps you ensure that your camera or other equipment is perfectly level.
To use a bubble level, follow these simple steps:
1. Attach the bubble level: Begin by attaching the bubble level to the top plate of your tripod. Ensure that it sits securely and does not move around.
2. Set up your tripod: Choose a level surface to set up your tripod. This could be indoors on a flat floor or outdoors on even ground. It’s important to start with a stable foundation.
3. Adjust the tripod head: Once your tripod is set up, adjust the head so that it is straight and level. Most tripods have a built-in leveling mechanism that allows you to adjust the tilt.
4. Check the bubble: Look at the bubble level on the top plate of your tripod. The bubble should be centered between the two lines or circles inside the level. If it is off to one side, your tripod is not level.
5. Make adjustments: To level your tripod, make small adjustments to the tripod legs. Extend or retract the legs slightly until the bubble is centered. Take your time and pay attention to each adjustment.
6. Double-check: Once you think your tripod is level, double-check the bubble level. It’s important to ensure that your adjustments did not inadvertently throw off the balance.
Using a bubble level is a quick and straightforward method to level your tripod. It greatly improves the stability and precision of your shots, especially when working with long exposures or panoramic images. By taking the time to level your tripod properly, you’ll avoid tilted or distorted photos, resulting in higher quality images.
Final Adjustments
Once you have followed the steps of finding a level surface, adjusting the leg lengths, and using a bubble level, you are close to achieving a level tripod. However, there may still be some minor adjustments required to ensure perfect stability for your camera.
1. Check the tripod head: Start by examining the tripod head to make sure it is securely fastened. Sometimes, the head may become loose during transportation or usage, which can cause the tripod to be unlevel. Tighten the head if necessary, using the appropriate tightening mechanism.
2. Fine-tune the leg angles: Take a moment to recheck the leg angles of your tripod. If you notice any discrepancies or unevenness, adjust the angles of the individual tripod legs accordingly. By doing so, you can fine-tune the stability of your setup.
3. Use the center column: If your tripod has a center column, you can use it for additional adjustments. Extend or retract the center column to achieve the desired height and levelness. Be aware that extending the center column too much can compromise the stability of your tripod, so find the right balance.
4. Test stability: After making the final adjustments, gently tap the tripod and observe if there is any wobbling or movement. If your tripod is still not level or stable, revisit the previous steps to ensure all aspects of the setup are properly adjusted. Remember, achieving a perfectly level tripod can greatly enhance the quality of your photographs or videos.
5. Lock everything in place: Once you are satisfied with the levelness and stability of your tripod, make sure to lock all the adjustment mechanisms tightly. This will ensure that your tripod remains in the desired position during the shooting process.
With these final adjustments, you can level your tripod to perfection, providing you with a stable and sturdy support for your camera. Taking the time to ensure a level tripod will result in sharper, more professional-looking images or videos.
Conclusion
Leveling a tripod is an essential skill for photographers and videographers to ensure stable and perfectly aligned shots. By following the steps mentioned in this guide, you can achieve a level tripod setup quickly and easily.
Remember to always start by selecting a flat surface and extend the tripod legs evenly. Then, use a bubble level or built-in level to adjust the legs until the bubble is centered. Lastly, double-check the levelness by rotating the tripod and ensuring the bubble remains centered.
With a level tripod, you can confidently capture stunning images and videos without the distortion caused by uneven ground. So, take the time to master the art of leveling to enhance your photography and videography skills.
Now that you have learned the essential techniques for leveling a tripod, it’s time to apply your newfound knowledge and start capturing stable and perfectly aligned shots. Happy shooting!
FAQs
1. Why do I need to level my tripod?
Leveling your tripod is important to ensure that your camera is perfectly horizontal or vertical, depending on the type of shot you’re trying to achieve. It helps prevent skewed or distorted images and provides stability for capturing sharp, well-balanced photos or videos.
2. How do I know if my tripod is not level?
There are a few ways to determine if your tripod is not level. One of the easiest ways is to use the built-in or external bubble level on your tripod’s head. If the bubble is off-center, it means your tripod is not level. Alternatively, you can visually check if the camera or tripod is tilting to one side or if the horizon in your frame appears uneven.
3. What tools can I use to level my tripod?
There are several tools available to help you level your tripod. The most common tool is a bubble level, which can be found on the tripod head or integrated into a camera hot shoe mount. Additionally, many tripod heads have built-in leveling indicators or spirit levels. Alternatively, you can use a tripod leveling base or a laser level for more precise adjustments.
4. How can I level my tripod without a built-in bubble level?
If your tripod doesn’t have a built-in bubble level, there are a few alternative methods you can use. One option is to use a smartphone app that has a leveling feature. Simply place your phone on the tripod’s head or mount it on the camera and use the app to find the level position. Another option is to use a small pocket spirit level that can be attached to the camera’s hot shoe or the tripod itself.
5. Can I level my tripod on uneven surfaces?
Yes, leveling your tripod on uneven surfaces is still possible. Some tripods come with adjustable legs that can be extended or shortened independently to accommodate uneven terrain. In situations where the ground is extremely uneven, you can also use tripod leg extensions or even place small objects under the tripod legs to level it out. Keep in mind that achieving a perfectly level position may be more challenging on uneven surfaces, so extra care and adjustments may be required.