
Welcome to our comprehensive guide on how to open the SnugZ USA Lanyard! If you’ve recently purchased this popular mobile accessory and are struggling to unlock its full potential, you’ve come to the right place. SnugZ USA has been a trusted name in the industry for years, offering high-quality and durable lanyards that are not only functional but also stylish. In this article, we’ll provide you with step-by-step instructions on how to effortlessly open your SnugZ USA lanyard, allowing you to wear it with ease and convenience. Whether you’re a tech-savvy individual or simply someone looking to accessorize their mobile device, this guide will ensure that you can fully enjoy the benefits of your SnugZ USA lanyard. So, let’s get started and unlock the possibilities!
Inside This Article
- Materials Needed
- Step 1: Unboxing the SnugZ USA Lanyard
- Step 2: Checking the Instructions
- Step 3: Identifying the Attachment Points
- Step 4: Opening the SnugZ USA Lanyard
- Step 5: Adjusting the Length
- Step 6: Securing the Attachment
- Step 7: Ensuring Proper Functionality
- Conclusion
- FAQs
Materials Needed
Opening a SnugZ USA lanyard requires a few basic tools and materials. Before you begin, make sure you have the following:
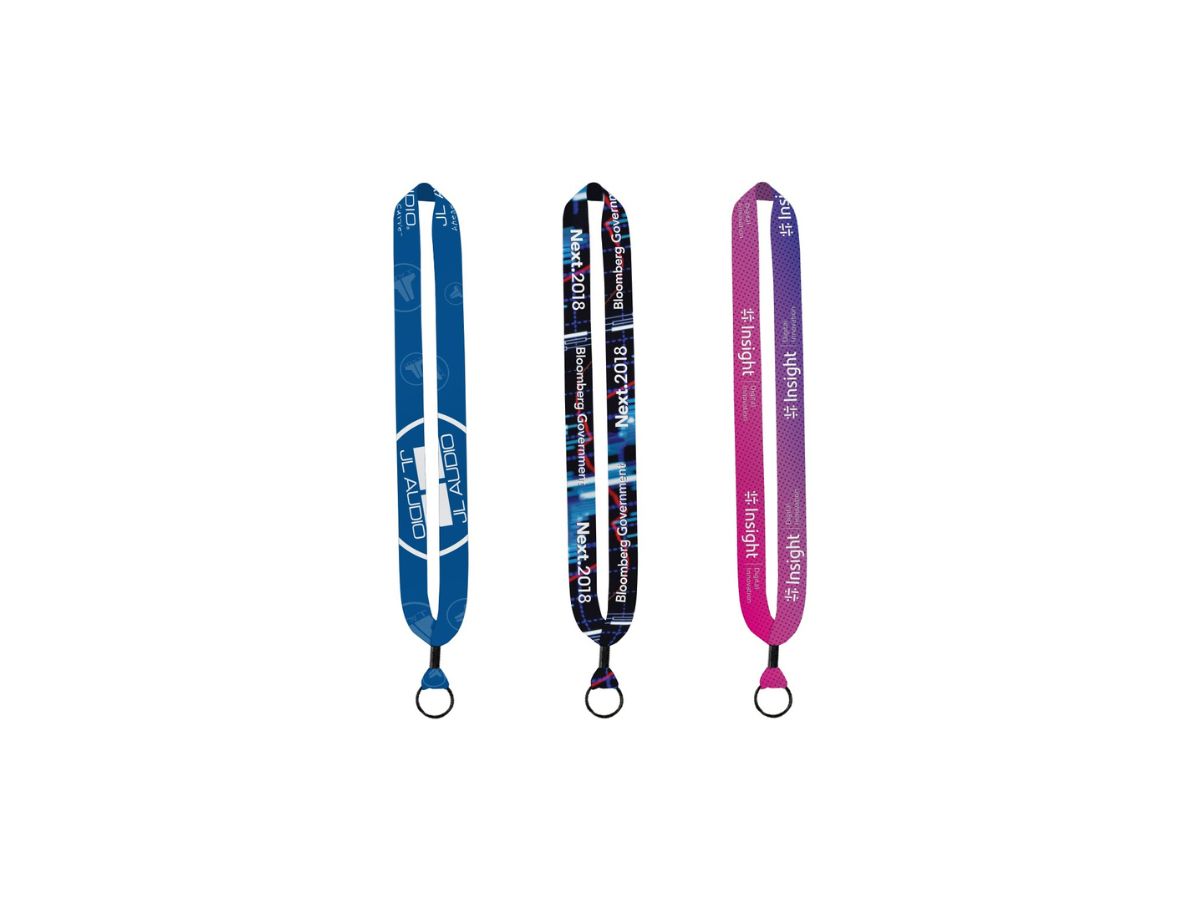
1. SnugZ USA lanyard: Ensure you have the lanyard you want to open. SnugZ USA offers a wide range of lanyards made from different materials, including nylon, polyester, and cotton. Choose the lanyard that matches your needs.
2. Safety pin or paperclip: You’ll need a small, thin object with a pointed end, like a safety pin or paperclip. This tool will help release the securing mechanism of the lanyard.
3. Patience and a steady hand: Opening a lanyard requires a bit of dexterity and patience. Take your time and be careful to avoid damaging the lanyard or accidentally hurting yourself.
With these materials ready, you’re all set to open your SnugZ USA lanyard.
Step 1: Unboxing the SnugZ USA Lanyard
When you receive your brand new SnugZ USA Lanyard, the first step is to unbox it. Carefully remove the lanyard from its packaging, ensuring that you don’t accidentally damage it in the process. SnugZ USA takes pride in their attention to detail, so you can expect your lanyard to be well protected during shipping.
As you unbox the lanyard, take a moment to appreciate its quality craftsmanship. SnugZ USA Lanyards are known for their durability, ensuring that your lanyard will withstand everyday wear and tear. The lanyard is designed to be comfortable and lightweight, making it ideal for extended use.
Inside the box, you will find the lanyard itself, neatly folded or coiled, depending on its length. Some SnugZ USA Lanyards come with additional accessories, such as badge holders or metal attachments. These accessories add functionality to the lanyard, allowing you to easily attach an ID card, keys, or other items.
Take a moment to inspect the lanyard for any visible defects or damage. SnugZ USA prides itself on producing high-quality products, but it’s always a good idea to double-check. If you notice any issues with your lanyard, don’t hesitate to reach out to customer support for assistance.
Once you’re satisfied with the condition of your SnugZ USA Lanyard, you’re ready to move on to the next step of opening and using it. In the following steps, we’ll guide you through the process of safely and effectively opening your lanyard and making the most of its features.
Step 2: Checking the Instructions
Before proceeding with opening the SnugZ USA lanyard, it’s important to carefully check the instructions provided with the lanyard. The manufacturer typically includes specific guidelines on how to properly open and close the lanyard to ensure its longevity and functionality. Taking a few moments to review the instructions can save you from any unnecessary damage or frustration.
Look for a small booklet or sheet of paper that comes packaged with the lanyard. This instructional material may contain important information about the lanyard’s construction, the type of securing mechanism used, and any particular steps to follow for opening it. It may also provide tips on proper usage and maintenance.
If you can’t locate the instructions or if they are not included with the lanyard, you can try visiting the SnugZ USA website or contacting their customer support for assistance. They may have digital copies of the instructions available for download or can provide guidance on opening the lanyard safely.
Remember, different lanyards may have varying mechanisms for opening them, so it’s crucial to follow the specific instructions provided by SnugZ USA. This will ensure that you can safely open the lanyard and potentially avoid any damage or issues that may arise from incorrect handling.
Step 3: Identifying the Attachment Points
When it comes to opening a SnugZ USA Lanyard, it’s crucial to first identify the attachment points. These are the areas where the lanyard is connected to a badge holder, keychain, or any other object. By understanding the attachment points, you’ll be able to navigate through the opening process with ease.
Typically, there are two main attachment points on a SnugZ USA Lanyard. The first attachment point is located at the top of the lanyard, near the neck area. This is where you’ll find a metal clasp, also known as a “split ring,” that holds the lanyard together. The split ring is designed to secure any item, such as a badge, ID card, or keychain, onto the lanyard.
The second attachment point is found at the bottom of the lanyard, near the end of the fabric loop. This attachment point is often a plastic or metal hook that enables you to easily detach and reattach the lanyard as needed. It’s important to note that not all lanyards have a bottom attachment point, as some may have a continuous loop design without any detachable components.
By identifying these attachment points, you’ll have a clear understanding of how the lanyard is constructed and where to focus your efforts when opening it. This knowledge will make the opening process more efficient and reduce the chance of accidentally damaging the lanyard or any attached items.
Now that you’re familiar with the attachment points on a SnugZ USA Lanyard, let’s proceed to the next step, Step 4: Opening the Lanyard Loop.
Step 4: Opening the SnugZ USA Lanyard
Once you have successfully released the securing mechanism in Step 3, it’s time to open the SnugZ USA lanyard loop. This step allows you to easily slip it over your neck or attach it to an ID card holder or keychain. Here’s how to do it:
1. Hold the lanyard loop firmly in one hand, making sure the attachment point is facing upwards.
2. Gently separate the two strands of the lanyard loop with your other hand. You’ll notice that the loop is divided into two separate sections.
3. Carefully slide your fingers along the length of the lanyard loop towards the attachment point. This will help loosen the strands and create a small opening between them.
4. Once you have created a small opening, insert your other hand or a small object like a pen or pencil through the gap. This will help widen the opening further.
5. Slowly and steadily continue to separate the strands by pulling them in opposite directions. This will gradually open up the lanyard loop, creating a larger opening.
6. Keep pulling until the opening is wide enough to comfortably fit over your head or attach to your desired accessory.
7. Once the lanyard loop is fully opened, you can wear it around your neck by slipping it over your head or attach it to an ID card holder, keychain, or any other item you wish.
Remember to handle the lanyard loop with care and avoid applying excessive force that could potentially damage the material or the securing mechanism. By following these steps, you’ll be able to open the SnugZ USA lanyard without any hassle.
Step 5: Adjusting the Length
Now that you have successfully opened the SnugZ USA lanyard, the next step is to adjust its length according to your preference. The adjustable feature of the lanyard allows you to customize it to fit comfortably around your neck or wrist.
To adjust the length, follow these simple steps:
- Hold the lanyard firmly with one hand, ensuring that the attachment point is securely held.
- Locate the adjustment mechanism, usually a sliding buckle or a plastic clip, positioned along the lanyard strap.
- Move the adjustment mechanism up or down the lanyard strap to increase or decrease the length as desired.
- Slide the mechanism smoothly and carefully, ensuring that the strap does not twist or tangle as you make the adjustment.
- Try on the lanyard after each adjustment to check the fit and make any additional changes if necessary.
Remember to make gradual adjustments to find the perfect length for you. It’s important to ensure that the lanyard is not too loose, as it may slip off, or too tight, as it may cause discomfort.
Once you have adjusted the length to your desired comfort level, you can proceed to attach any accessories or ID cards to the lanyard using the attachment point.
With the SnugZ USA lanyard now opened and properly adjusted, you are ready to use it for various purposes, such as holding your keys, ID cards, or even as a fashionable accessory.
Experiment with different lengths and styles to find the perfect fit that suits your needs and personal style. The versatility of the SnugZ USA lanyard ensures that it can be used in a wide range of settings, from casual to professional environments.
Enjoy the convenience and functionality of your SnugZ USA lanyard, knowing that you have successfully opened and customized it to your liking.
Step 6: Securing the Attachment
Now that you have successfully opened the SnugZ USA Lanyard, it’s time to secure it back in place. Securing the attachment is a crucial step to ensure that your lanyard stays in place and doesn’t accidentally come undone. Here’s how you can securely fasten the lanyard attachment:
1. Hold the lanyard loop in one hand and the attachment point in the other. You should have the loose ends of the lanyard in front of you.
2. Take the loose ends of the lanyard and thread them through the attachment point, making sure to insert them from the bottom up.
3. Pull the loose ends of the lanyard tight, ensuring that the attachment point is snugly secured within the loop.
4. Double-check the tightness of the attachment by giving it a gentle tug. It should feel secure and not easily come undone.
5. If the lanyard has an adjustable slider, adjust it to your desired length by sliding it up or down along the lanyard loop.
6. Once you are satisfied with the length and the attachment is secure, your SnugZ USA Lanyard is ready to be worn or used for your desired purpose.
Remember that the lanyard attachment should be securely fastened to avoid losing or misplacing your belongings. Whether you’re using the lanyard for keys, badges, or any other items, it’s important to ensure that they are properly secured to the attachment point.
By following these simple steps, you can confidently and securely secure the attachment on your SnugZ USA Lanyard, giving you peace of mind knowing that your items are safely attached.
Step 7: Ensuring Proper Functionality
After opening the SnugZ USA lanyard and attaching your desired accessory, it’s essential to ensure that the lanyard is functioning properly. Follow these steps to make sure everything is in order:
1. Check the attachment: Take a close look at the attachment point where you secured your accessory. Ensure that it is tightly fastened and properly aligned with the lanyard loop. A loose or misaligned attachment can result in the accessory becoming detached, which can be inconvenient and potentially lead to loss.
2. Test the connection: Gently tug on the lanyard and attached accessory to confirm that the connection is secure. It should withstand light pulling without coming loose. If you notice any signs of weakness or instability, reassess the attachment and make any necessary adjustments.
3. Evaluate the functionality: The primary purpose of a lanyard is to securely hold and display your accessory. Confirm that the lanyard is effectively fulfilling its intended function by observing whether your accessory is easily visible and accessible. Make sure the lanyard does not obstruct the use or operation of the accessory in any way.
4. Consider comfort and aesthetics: Pay attention to how the lanyard feels when worn around your neck or wrist. It should be comfortable and not cause any irritation or discomfort. Additionally, assess the visual appeal of the lanyard in combination with your chosen accessory. Ensure that the overall look is pleasing to the eye and aligns with your personal style.
5. Double-check safety features: If your SnugZ USA lanyard has any safety features such as a breakaway clasp or quick-release buckle, verify that these mechanisms are functioning correctly. These safety features are especially important in situations where the lanyard may be at risk of getting caught or tangled.
By thoroughly assessing these aspects, you can have confidence in the proper functionality of your SnugZ USA lanyard. It’s always a good idea to periodically re-evaluate the lanyard’s performance, especially if you’re using it in a high-activity environment or regularly changing attachments. Enjoy the convenience, style, and peace of mind that the SnugZ USA lanyard provides!
In conclusion, opening a SnugZ USA Lanyard is a simple and straightforward process. By following the steps outlined in this article and using the right tools, you can easily access and use your lanyard for various purposes. Whether you need it for identification at events, as a stylish accessory, or for promotional purposes, SnugZ USA lanyards are designed to meet your needs.
Remember to handle the lanyard with care and avoid any sharp objects or excessive force that may damage it. Always refer to the instructions provided by SnugZ USA for specific lanyard models to ensure proper usage and maintenance.
With your newly acquired knowledge, you can confidently unlock the full potential of your SnugZ USA Lanyard and enjoy its benefits. So, go ahead, open your SnugZ USA Lanyard, and start showcasing your unique style or promoting your brand with pride and confidence!
FAQs
1.
How do I open a SnugZ USA Lanyard?
Opening a SnugZ USA Lanyard is a simple process. Follow these steps:
- Locate the buckle or attachment point on the lanyard.
- Gently pull the two ends of the lanyard away from each other to release any tension.
- Look for a release mechanism, such as a small tab or button, near the buckle or attachment point.
- Press or slide the release mechanism to unlock the lanyard.
- Once unlocked, you can easily open the lanyard and adjust it to your desired length.
If you are still having trouble opening your SnugZ USA Lanyard, refer to the manufacturer’s instructions or contact their customer support for assistance.
2.
Can I adjust the length of a SnugZ USA Lanyard?
Yes, you can adjust the length of a SnugZ USA Lanyard. Most lanyards have a sliding buckle or attachment point that allows you to customize the length to suit your needs. Simply slide the buckle along the lanyard to make it longer or shorter. Some lanyards also have a detachable clip for easy length adjustment. Refer to the manufacturer’s instructions for specific details on adjusting the length of your SnugZ USA Lanyard.
3.
What are SnugZ USA Lanyards made of?
SnugZ USA Lanyards are typically made of high-quality materials such as polyester, nylon, or woven fabric. These materials are chosen for their durability, comfort, and ability to withstand daily use. The lanyards may also feature a variety of finishes, including smooth, textured, or reflective options. These materials and finishes ensure that SnugZ USA Lanyards are both functional and stylish.
4.
Are SnugZ USA Lanyards suitable for use with ID badges or other accessories?
Yes, SnugZ USA Lanyards are designed to be compatible with various accessories, including ID badges, badge holders, key cards, and more. They often come with a metal or plastic attachment point that securely holds these items. Additionally, some lanyards have different attachment options such as swivel hooks, bulldog clips, or breakaway safety mechanisms for added versatility and convenience. Always check the product specifications or consult with the manufacturer if you have specific accessory compatibility questions.
5.
Are SnugZ USA Lanyards customizable?
Yes, SnugZ USA Lanyards can be customized to suit your needs. Many lanyards offer options for custom printing, allowing you to add your company logo, slogan, or any desired design. Customization may include various imprint methods such as screen printing, dye sublimation, or heat transfer. Some lanyard models even allow for full-color printing, enabling vivid and eye-catching designs. If you’re looking to promote your brand or create personalized lanyards, reach out to the manufacturer or their authorized distributors to explore customizing options available.