
In today’s world, our smartphones have become an integral part of our lives. We rely on them for communication, entertainment, and staying connected with the world around us. With such constant usage, it is crucial to keep our precious devices protected from accidental drops and bumps. One popular option for keeping our smartphones safe is the Otterbox Popsocket case. However, there may come a time when you need to remove the Otterbox Popsocket case. Whether it’s to switch to a different case or to clean your device thoroughly, knowing the proper method to remove the Otterbox Popsocket case is essential. In this article, we will guide you through the step-by-step process of safely removing the Otterbox Popsocket case, ensuring you can enjoy the full functionality of your smartphone without any hassle.
Inside This Article
- Introduction
- Overview of the Otterbox Popsocket Case
- Step 1: Removing the Popsocket
- Step 2: Detaching the Otterbox Case
- Step 3: Removing the Phone from the Case
- Step 4: Reassembling the Otterbox Popsocket Case
- Conclusion
- Conclusion
- FAQs
Introduction
Welcome to our guide on how to remove the Otterbox Popsocket case! If you are a proud owner of an Otterbox case with a Popsocket attachment, you might be wondering how to take it off when needed. Maybe you want to change your Popsocket design, or perhaps you prefer to use your phone without the added bulk of the case. Whatever the reason may be, we’re here to help you through the process step by step to ensure a smooth and hassle-free removal.
The Otterbox Popsocket case is known for its dual functionality, providing excellent protection for your phone along with the convenience of an integrated Popsocket. The Popsocket allows for a secure grip and can also be used as a stand for hands-free viewing. However, there are times when you might want to remove it, which is why we’ve put together this comprehensive guide to assist you in doing just that.
Before we dive into the steps, it’s essential to note that while removing the Otterbox Popsocket case is a relatively straightforward process, you should always handle your phone and accessories with care. Make sure to follow the instructions precisely to avoid any damage to your device or the case itself.
Now, let’s get started and learn how to remove the Otterbox Popsocket case in a few simple steps!
Overview of the Otterbox Popsocket Case
The Otterbox Popsocket Case is a versatile mobile phone accessory that combines the protection of an Otterbox case with the convenience of a Popsocket grip. Made from durable materials, this case provides reliable protection against drops, impacts, and scratches while also offering a secure grip for one-handed use.
One of the standout features of the Otterbox Popsocket Case is the integrated Popsocket grip. The Popsocket is a collapsible and expandable grip that sticks to the back of the case, allowing you to comfortably hold your phone with just one hand. It also serves as a handy stand, enabling you to prop up your phone in both horizontal and vertical orientations, perfect for watching videos or video calling.
The Otterbox Popsocket Case is compatible with various smartphone models, including popular brands like iPhone and Samsung Galaxy. It is available in a range of colors and designs, allowing you to personalize your phone while offering reliable protection. Whether you prefer a sleek and minimalist design or a bold and vibrant pattern, there is a Popsocket Case style for everyone.
Another noteworthy aspect of the Otterbox Popsocket Case is its precise design and functionality. The case features precise cutouts for easy access to all ports, buttons, and the camera, ensuring uninterrupted usage without having to remove the case. The raised edges around the screen and camera provide additional protection against scratches and damage.
Furthermore, the Otterbox Popsocket Case is also compatible with wireless charging, making it convenient for users who prefer wireless charging options. You can simply place your phone on a wireless charging pad without the need to remove the case, making it a hassle-free and time-saving solution.
Overall, the Otterbox Popsocket Case is a practical and stylish accessory that offers both protection and functionality. Whether you’re a frequent traveler, a busy professional, or someone who loves to stay connected, this case provides the perfect balance of convenience and durability.
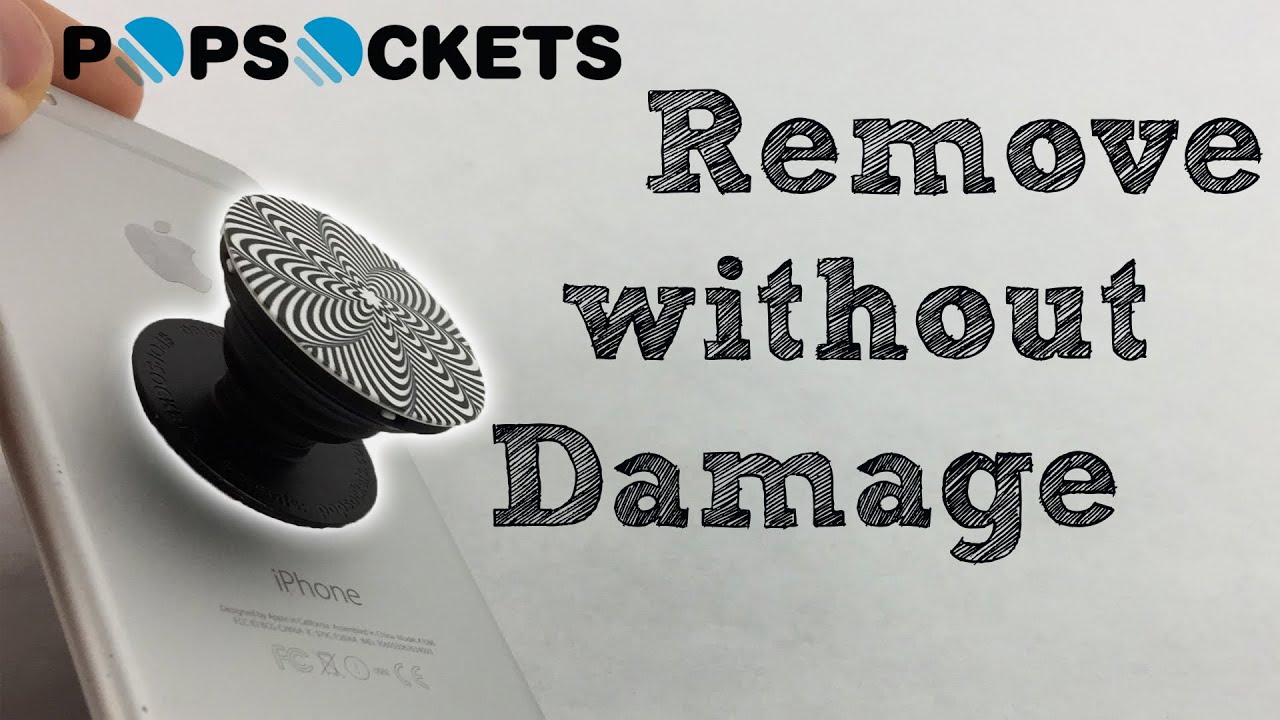
Step 1: Removing the Popsocket
The first step in removing the Otterbox Popsocket case from your phone is to detach the Popsocket itself. The Otterbox Popsocket case is designed to securely hold the Popsocket on the back of the case, making it easy to use and store when not in use. To remove the Popsocket, follow these steps:
- Start by gripping the base of the Popsocket firmly with your fingers.
- Apply steady pressure while twisting the Popsocket counterclockwise. This motion will loosen the adhesive and allow the Popsocket to detach from the case.
- Continue twisting until the Popsocket is fully released from the case.
Be cautious while twisting the Popsocket to avoid damaging it or the case. Take your time and apply gentle force to ensure a clean removal.
Once you have successfully removed the Popsocket from the case, you are ready to move on to the next step of detaching the Otterbox case itself.
Step 2: Detaching the Otterbox Case
Once you have removed the popsocket from your Otterbox case, the next step is to detach the case itself. The Otterbox case is known for its durability and protection, but it also features a secure fit that can make it a bit tricky to remove. Here’s how you can safely detach the Otterbox case:
- Inspect the case: Before attempting to remove the Otterbox case, take a moment to examine it. Look for any latches, clips, or screws that may be securing the case to your phone. Understanding the design of the case will make it easier to detach.
- Start from one corner: Begin by locating one corner of the case. Use your fingers to gently pry the corner away from the phone. Be careful not to apply too much force, as you don’t want to risk damaging your phone or the case itself.
- Work your way around: Once you have successfully detached one corner of the case, continue moving along the edges, gradually separating the case from the phone. Take your time and be patient, as some Otterbox cases may require a bit more effort to detach.
- Pay attention to any locks or mechanisms: As you are detaching the case, be mindful of any locks or mechanisms that may be in place. Some Otterbox cases have additional security features such as latches or tabs that need to be released before the case can be fully detached. Refer to the Otterbox case manual or online resources for specific instructions on how to handle these locks.
- Remove the case: Once you have worked your way around the entire case, gently lift it away from your phone. Take care not to put too much pressure on the phone or any attached accessories. If needed, use your fingers to help separate any remaining sections of the case that may still be connected.
By following these steps, you should be able to safely detach the Otterbox case from your phone. Remember, it’s important to be patient and gentle during this process to avoid any damage to your phone or case.
Step 3: Removing the Phone from the Case
Now that you have successfully detached the Otterbox case from the Popsocket, it’s time to remove your phone from the case. Here’s how to do it:
- Make sure the case is fully separated and there are no remaining attachments.
- Gently hold your phone and locate the opening on the top or bottom of the case.
- Apply a slight pressure on the edges of the case to loosen it.
- Slowly slide your phone out of the case, keeping a firm grip on it to prevent any accidental drops.
It’s important to note that Otterbox cases are designed to provide maximum protection for your phone, so they can fit snugly. If you encounter any resistance while removing your phone, don’t force it. Take your time and ensure that you are applying gentle pressure to avoid any damage to your device or the case.
Once you have successfully removed your phone, take a moment to inspect both the phone and case for any signs of dirt, dust, or debris. Use a soft cloth or a cleaning solution specifically designed for electronic devices to wipe away any contaminants. This will help to keep your phone and case in optimal condition and prolong their lifespan.
Remember to be cautious when handling your phone, as it is a delicate and expensive device. Avoid placing it on hard or uneven surfaces and be mindful of any potential hazards that could cause it to fall or get damaged.
Removing your phone from the Otterbox case is a simple process that doesn’t require any special tools or technical expertise. Just follow these steps carefully, and you’ll have your phone out of the case in no time.
Now that you have successfully removed your phone from the Otterbox case, you can proceed to the next step of reassembling the case with or without the Popsocket attached, depending on your preference.
Step 4: Reassembling the Otterbox Popsocket Case
Once you have successfully removed both the popsocket and detached the Otterbox case, it’s time to start putting everything back together. Follow the steps below to reassemble your Otterbox Popsocket case:
- Begin by taking your phone and making sure it is clean and free of any dust or debris. Use a microfiber cloth to gently wipe down the surface of your phone.
- Next, grab the Otterbox case and ensure that it is also clean and free of any dirt or residue. You can use a damp cloth or a mild cleaning solution to gently wipe down the case if needed.
- Carefully align the phone with the interior of the Otterbox case. Make sure that the camera and ports are properly aligned with the corresponding openings on the case.
- Once the phone is properly positioned, gently press down on the edges of the case to snap it back into place. You should hear a satisfying click as the case securely locks around the phone.
- Now it’s time to reattach the popsocket. Take the popsocket and align it with the designated spot on the back of the Otterbox case.
- Press down firmly on the popsocket to ensure that it is securely attached. It should stick firmly to the case, allowing you to easily grip your phone or prop it up for hands-free use.
- Finally, give your phone a quick once-over to make sure everything is properly aligned and secure. Check that the buttons and ports are easily accessible and that the popsocket is firmly attached.
With these simple steps, you have successfully reassembled your Otterbox Popsocket case. Your phone is now protected by the durable Otterbox case, with the added convenience of the popsocket for easy gripping and hands-free use.
Remember, it’s always a good idea to periodically clean your phone case and popsocket to maintain their appearance and functionality. Use a gentle cleaning solution and a soft cloth to remove any dirt or grime that may accumulate over time.
Now that you know how to reassemble your Otterbox Popsocket case, you can confidently enjoy the protection and convenience it provides for your phone.
Conclusion
In conclusion, removing the Otterbox Popsocket case from your mobile phone requires a few simple steps to ensure a smooth and safe process. By following the steps outlined in this guide, you can easily remove the Popsocket, detach the Otterbox case, remove your phone from the case, and reassemble everything back together.
Remember to handle your phone and accessories with care to avoid any damage during the removal process. Take your time and follow each step carefully to ensure a successful outcome.
With the knowledge and guidance provided in this article, you can confidently remove your Otterbox Popsocket case whenever needed. Whether you want to change the case, clean your phone, or simply switch to a different accessory, you now have the necessary steps to do it effectively.
By understanding the components of the Otterbox Popsocket case and following the step-by-step instructions, you can easily remove the case without any hassle. Always refer back to the manufacturer’s instructions or consult an expert if you have any concerns or doubts.
Remember, maintaining the functionality and appearance of your mobile phone is important, and being able to remove and reassemble your Otterbox Popsocket case is a skill worth having. Enjoy the flexibility and convenience of switching out your case and accessories whenever you desire.
So go ahead, confidently remove your Otterbox Popsocket case and customize your phone to suit your style and needs!
Conclusion
The Otterbox Popsocket Case is a popular choice for many smartphone users due to its durability and functionality. However, there may come a time when you need to remove the case for various reasons, such as cleaning your device or needing to switch to a different case. Fortunately, the process of removing an Otterbox Popsocket Case is relatively straightforward.
By following the steps outlined in this guide, you can safely and easily remove your Otterbox Popsocket Case without causing any damage to your phone. Remember to start by detaching the popsocket from the case, so it doesn’t interfere with the removal process. Then, carefully peel back the edges of the case, starting from one corner and working your way around until the case is completely removed. Take your time and exercise caution to avoid accidentally scratching or dropping your device.
With a little patience and attention to detail, you can successfully remove and replace your Otterbox Popsocket Case whenever the need arises. Whether you’re looking to clean your phone or switch up your case for a new style, these simple steps will ensure a smooth and hassle-free removal process. Remember to always refer to the manufacturer’s instructions if you have any concerns or questions specific to your Otterbox Popsocket Case model.
FAQs
1. How do I remove an Otterbox Popsocket case from my phone?
Removing an Otterbox Popsocket case can be done by following these steps:
- Start by sliding your fingernail or a thin, flat object, such as a credit card, under one corner of the case where it is slightly lifted.
- Gently pry the corner up, being careful not to apply too much force to avoid damaging your phone or the case.
- Once the corner is lifted, continue to move along the perimeter of the phone, gradually separating the case from the device.
- Repeat the process for each side until the case is completely free from your phone.
- If the case is particularly stubborn, you can try using a hairdryer to warm the adhesive between the case and the phone, which might make it easier to detach.
2. Will removing the Otterbox Popsocket case leave any residue on my phone?
While it is possible for the Otterbox Popsocket case to leave a small amount of residue on your phone, it is generally minimal and can be easily wiped away. If you encounter any residue, use a soft cloth or microfiber cloth with a gentle cleaning solution to gently rub away the residue. Avoid using harsh chemicals or abrasive materials that could damage your phone’s surface.
3. Can I reuse an Otterbox Popsocket case once it has been removed?
Yes, you can reuse an Otterbox Popsocket case once it has been removed. The case is designed to be reusable, and as long as it is in good condition and has not suffered any damage, you can simply reattach it to your phone or use it on another compatible device.
4. Can I still use the built-in popsocket feature after removing the Otterbox Popsocket case?
Once the Otterbox Popsocket case is removed, you can no longer use the built-in popsocket feature as it relies on the case’s design. However, you can still use a separate Popsocket accessory on your phone if you wish to have a popsocket-like functionality.
5. Will removing the Otterbox Popsocket case void my phone’s warranty?
Removing the Otterbox Popsocket case should not void your phone’s warranty as long as you handle the removal process carefully and do not cause any damage to your phone. However, it is always a good idea to check your phone’s warranty terms and conditions or consult with the manufacturer to ensure that you are not infringing upon any warranty policies.