
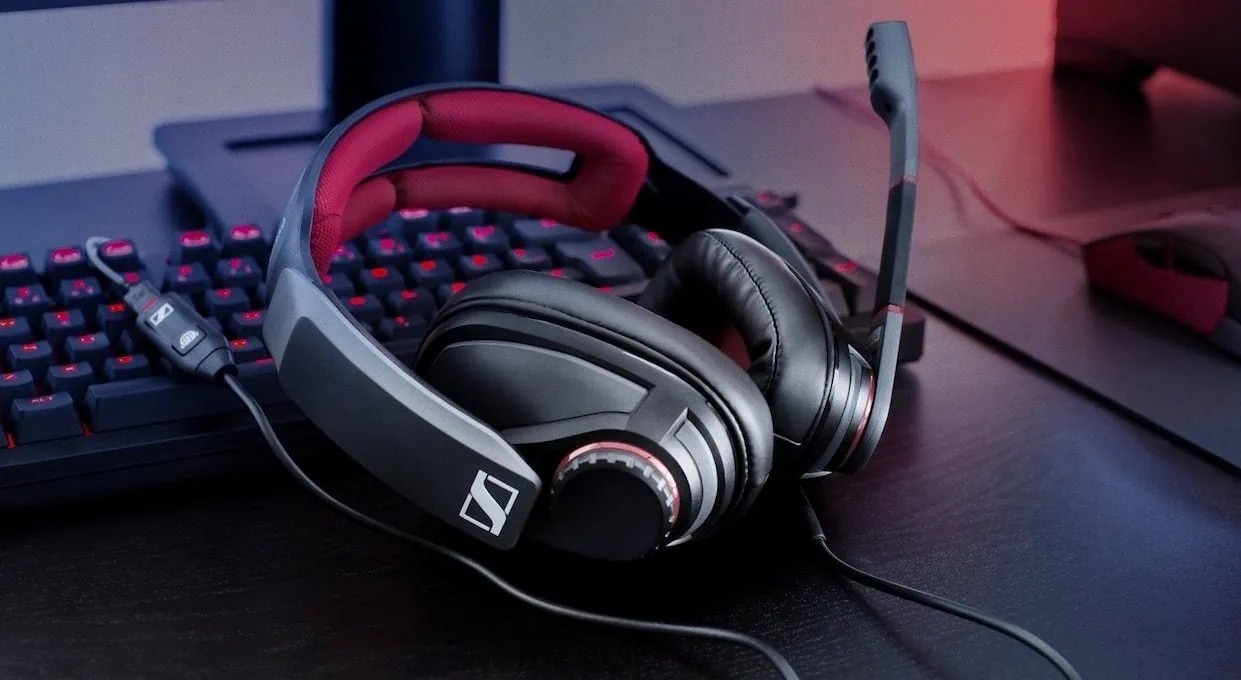
Are you tired of the hassle of untangling wires and dealing with the limitations of traditional headsets? A USB headset offers a convenient and easy-to-use solution for your PC audio needs. Whether you’re a gamer, work from home professional, or enjoy watching movies or listening to music, setting up a USB headset on your PC can significantly enhance your audio experience.
In this comprehensive guide, we will walk you through the step-by-step process of setting up a USB headset on your PC. From connecting the headset to troubleshooting common issues, we have got you covered. So grab your USB headset and let’s get started on optimizing your audio setup!
Inside This Article
- Overview
- Step 1: Check Compatibility
- Step 2: Install Drivers (if necessary)
- Step 3: Connect USB Headset to PC
- Step 4: Adjust System Settings
- Troubleshooting Tips
- Conclusion
- FAQs
Overview
Setting up a USB headset on your PC is a breeze and can greatly enhance your audio experience while using your computer. Whether you’re a gamer, a remote worker, or simply someone who loves to enjoy multimedia content, a USB headset offers convenience and high-quality sound. This article will guide you through the process of setting up your USB headset on your PC, from checking compatibility to troubleshooting any issues that may arise.
Before diving into the setup process, it’s important to ensure that your USB headset is compatible with your PC. Most modern PCs are equipped with USB ports that can support USB headsets, but it’s always recommended to check the system requirements provided by the headset manufacturer. This may include specific operating system versions or hardware specifications that are necessary for optimal performance.
If your USB headset requires driver installation, it’s crucial to follow the manufacturer’s instructions for proper installation. Typically, the drivers can be downloaded from the manufacturer’s website, or they may come bundled with the headset itself. Installing the drivers ensures that your PC recognizes and communicates with the headset effectively, enabling all its features to function as intended.
Once the drivers are installed, it’s time to connect your USB headset to your PC. Locate an available USB port on your computer and insert the USB connector of the headset. Some headsets may have multiple connectors, such as separate ones for audio and microphone. In this case, make sure to connect each connector to the corresponding port on your PC.
After connecting the USB headset, it’s essential to adjust the system settings on your PC to ensure that the audio is routed to the headset correctly. In Windows, you can access the sound settings by right-clicking on the speaker icon in the taskbar and selecting “Open Sound settings.” From there, you can choose your USB headset as the default audio playback device and adjust the volume levels. On Mac, you can access the sound settings by clicking on the Apple menu, selecting “System Preferences,” and then choosing “Sound.” Select your USB headset as the output device and adjust the volume accordingly.
If you encounter any issues during the setup process or while using your USB headset, don’t panic. Here are a few troubleshooting tips to help you resolve common problems:
- Ensure that the headset is securely connected to the USB port. Sometimes, a loose connection can cause audio problems.
- Double-check the system settings to make sure that the USB headset is selected as the default audio device.
- If the microphone on your USB headset is not working, verify that the microphone is not muted in the system settings.
- Try unplugging the USB headset and plugging it back in to reset the connection.
- If all else fails, consult the user manual or contact the manufacturer’s support for further assistance.
Now that you have a clear understanding of the setup process for a USB headset on your PC, you can enjoy crystal-clear audio while immersing yourself in your favorite activities. Whether you’re gaming, attending virtual meetings, or simply enjoying your favorite music, a USB headset can take your audio experience to the next level.
Step 1: Check Compatibility
Before setting up your USB headset on your PC, it’s important to ensure that the headset is compatible with your computer system. This step will help prevent any potential issues that may arise during the setup process.
Here are a few things to consider when checking compatibility:
- Operating System: Verify that the USB headset is compatible with your specific operating system, whether it’s Windows, macOS, or Linux.
- USB Port: Ensure that your PC has a available USB port that is compatible with the USB version of your headset. For example, if your headset is USB 2.0, make sure your computer has USB 2.0 ports.
- Driver Support: Check if your operating system automatically recognizes and supports the USB headset. If not, you may need to download and install drivers from the manufacturer’s website.
- Hardware Requirements: Verify any additional hardware requirements, such as minimum RAM or processor specifications, to ensure optimal performance of your USB headset.
- Compatibility with Applications: If you plan to use your USB headset with specific applications, such as VoIP software or gaming platforms, confirm that it is compatible with those applications.
Taking the time to check compatibility will save you from any frustration or potential issues that can arise if your USB headset is not compatible with your PC. Once you have confirmed compatibility, you can proceed to the next steps of setting up your USB headset.
Step 2: Install Drivers (if necessary)
Installing drivers for your USB headset is an essential step in ensuring that it works properly on your PC. Drivers act as communication bridges between your headset and the operating system, allowing for optimal performance and functionality. While many USB headsets come with plug-and-play compatibility, meaning they can work immediately without the need for additional drivers, some may require specific drivers to be installed.
To determine if your USB headset requires drivers, you can refer to the manufacturer’s instructions or visit their official website. They will typically provide a list of compatible devices and the necessary drivers to download. Make sure to choose the correct drivers for your specific headset model and the operating system of your PC.
Once you have identified the necessary drivers, follow these steps to install them:
- Visit the manufacturer’s website and navigate to the support or downloads section.
- Search for the drivers corresponding to your headset model and operating system.
- Download the driver package and save it to a location on your computer.
- Double-click on the downloaded driver file to start the installation process.
- Follow the on-screen prompts to complete the installation. Make sure to read any additional instructions provided by the manufacturer.
- Once the installation is finished, restart your computer to ensure that the drivers are properly activated.
After the drivers are successfully installed, your USB headset should be ready to use with your PC. It is important to note that some drivers may require periodic updates to improve performance or address compatibility issues. Therefore, it is a good practice to periodically check for driver updates on the manufacturer’s website and install them as needed.
If you encounter any issues during the driver installation process, make sure to refer to the troubleshooting tips section or seek assistance from the manufacturer’s customer support. They will be able to provide specific guidance based on your headset model and the problem you are experiencing.
Step 3: Connect USB Headset to PC
Connecting a USB headset to your PC is a simple process. Follow the steps below to ensure a successful connection.
1. Locate the USB port: Start by identifying an available USB port on your PC. These are usually found on the front or back of your computer tower, or on the side of your laptop.
2. Check the headset’s USB connector: Inspect the USB connector on your headset. It should be a standard USB Type-A male connector, which matches the female USB ports on your PC.
3. Insert the USB connector: Carefully plug the USB connector into an available USB port on your PC. Ensure that you insert it all the way in, until it is snugly connected.
4. Wait for driver installation: Once the USB headset is connected, your PC will automatically detect the device and attempt to install any necessary drivers. This process may take a few seconds or a couple of minutes, depending on your system.
5. Check device recognition: After the driver installation completes, check if your PC recognizes the USB headset. To do this, go to your computer’s sound settings or playback devices and look for the headset in the list of available devices. If it is listed, it means your PC has successfully detected the headset.
6. Set the USB headset as default: To ensure that audio is properly routed through your USB headset, set it as the default audio device. Right-click on the USB headset in the sound settings, click “Set as Default Device,” and confirm the changes.
7. Test the USB headset: To verify that the USB headset is working correctly, play some audio or make a test call. Adjust the volume levels using the headset’s controls or the sound settings on your PC.
Once you have completed these steps, you should have successfully connected your USB headset to your PC. Enjoy clear audio and a seamless communication experience!
Step 4: Adjust System Settings
Once you have successfully connected your USB headset to your PC, you will need to adjust the system settings to ensure that the headset is properly recognized and optimized for use. Follow these steps to adjust the system settings:
1. Open the Control Panel by clicking on the Start menu and selecting “Control Panel” from the list of options.
2. In the Control Panel, navigate to the “Sound” or “Audio” settings. This may vary depending on your operating system.
3. In the sound settings, look for the option to select the default audio playback device. This should be set to your USB headset. If it is not already selected, choose your USB headset from the list of available devices.
4. Next, adjust the sound settings for your USB headset. You can customize the volume levels, microphone sensitivity, and other audio settings to suit your preferences.
5. Test your USB headset to ensure that it is working properly. You can do this by playing a sound or video file and checking if the audio is coming through the headset.
6. If you are experiencing any issues with the sound quality or microphone detection, you may need to update the drivers for your USB headset. Visit the manufacturer’s website or use a driver update tool to download and install the latest drivers for your device.
7. Lastly, make sure that your USB headset is set as the default communication device. This will ensure that any communication applications, such as voice chat or video conferencing, use the headset for audio input and output.
By adjusting the system settings and optimizing your USB headset for your PC, you can enjoy a seamless and high-quality audio experience. Remember to regularly check for any driver updates and adjust the settings to meet your specific needs.
Troubleshooting Tips
Setting up a USB headset on your PC is usually a straightforward process. However, there may be times when you encounter issues while doing so. Here are some troubleshooting tips to help you resolve common problems:
1. Check USB Connections: Ensure that the USB headset is properly connected to your PC. Try disconnecting and reconnecting it to see if that resolves the issue. Use a different USB port if necessary.
2. Update Drivers: Make sure that you have the latest drivers installed for your USB headset. Check the manufacturer’s website for driver updates and download them as needed. Installing updated drivers can often fix compatibility issues.
3. Restart Your PC: Sometimes, a simple restart can solve many problems. Restart your computer and check if the USB headset starts working properly afterwards.
4. Adjust Sound Settings: Open the sound settings on your PC and make sure the USB headset is selected as the default audio output device. Also, check the volume settings to ensure they are not too low or muted.
5. Test on Another Device: To rule out any hardware issues with your headset, try connecting it to another device, such as a different PC or a smartphone. If it works fine on another device, the problem may be related to your PC’s settings or drivers.
6. Scan for Viruses or Malware: Malicious software can sometimes interfere with USB devices. Run a thorough scan of your PC using reliable antivirus software to check for any infections that may be affecting your USB headset.
7. Disable USB Power Management: Some PCs have power management settings that can cause issues with USB devices. Disable USB power management in your PC’s settings and see if that resolves the problem.
8. Reset USB Ports: If none of the above steps work, you can try resetting the USB ports on your PC. Unplug all USB devices, shut down your computer, and wait for a few minutes. Then, restart your PC and reconnect the USB headset.
If you have tried all the troubleshooting tips and are still unable to set up your USB headset on your PC, it may be worth contacting the manufacturer’s customer support for further assistance.
Conclusion
Setting up a USB headset on your PC is a simple process that can greatly enhance your audio experience. By following the steps outlined in this article, you can ensure that your USB headset is correctly recognized and configured for optimal performance.
Remember to check that your PC meets the system requirements for the USB headset and install any necessary drivers or software. Once connected, make sure to adjust the audio settings on your PC to ensure that the headset is selected as the default audio output device.
Whether you plan to use your USB headset for gaming, video conferencing, or simply enjoying your favorite music, the steps provided in this article will help you get started. So plug in your USB headset, immerse yourself in high-quality sound, and enjoy a seamless audio experience on your PC!
FAQs
1. Can I use a USB headset on my PC?
Absolutely! USB headsets are designed to be compatible with PCs. Simply plug in the USB connector into an available USB port on your PC, and your headset should be ready to use.
2. Do I need to install any drivers for my USB headset?
In most cases, no additional drivers are required. USB headsets often come with plug-and-play functionality, meaning they are automatically recognized by your PC and the necessary drivers are installed automatically. However, it’s always a good idea to check the documentation that comes with your headset to ensure you have the latest drivers for optimal performance.
3. How do I set my USB headset as the default audio device on my PC?
To set your USB headset as the default audio device on your PC, follow these steps:
a. Right-click on the sound icon in the system tray and select “Sounds” or “Playback Devices.”
b. In the playback tab, locate your USB headset and click “Set Default” or “Default Device.”
c. Click “Apply” and then “OK” to save the changes. Your USB headset should now be set as the default audio device.
4. Can I use a USB headset with my gaming console?
Most gaming consoles do not support USB headsets directly. However, there are adapters available that can convert the USB signal to a compatible format for the gaming console. These adapters typically connect to the console’s audio port and allow you to use your USB headset. Make sure to check the compatibility and requirements of the specific gaming console and adapter before making a purchase.
5. My USB headset is not working, what should I do?
If your USB headset is not working, there are a few troubleshooting steps you can try:
a. Ensure that the USB connector is securely plugged into an available USB port on your PC.
b. Try connecting the USB headset to a different USB port to rule out any port-related issues.
c. Restart your PC and check if the headset becomes functional.
d. Verify that the drivers for your USB headset are up to date.
e. If all else fails, contact the manufacturer’s support for further assistance.