
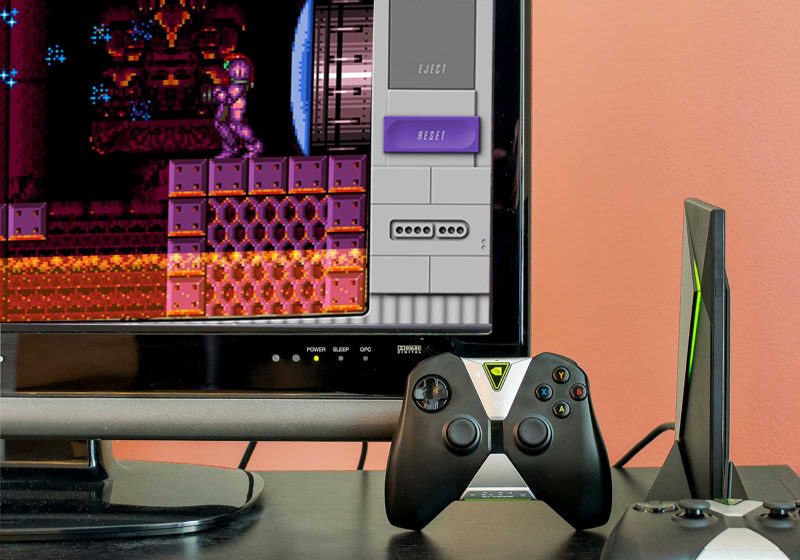
Are you an avid gamer looking to relive the nostalgia of classic Super Nintendo (SNES) games on your computer? Look no further than SNES9X, a popular emulator that allows you to play your favorite SNES titles right on your PC. One of the key aspects of an authentic gaming experience is using a gamepad to control your character. While playing with a keyboard can suffice, using a gamepad can truly enhance your immersion in the game. However, setting up a gamepad on Snes9X may seem like a daunting task for some. But fear not! In this article, we will guide you through a step-by-step process to help you seamlessly configure your gamepad on Snes9X, ensuring you can enjoy an authentic retro gaming experience comfortably. So, let’s dive in and get your gamepad set up for an unforgettable gaming adventure!
Inside This Article
Checking Gamepad Compatibility
Before setting up a gamepad on Snes9X, it’s crucial to ensure that your gamepad is compatible with the emulator. Here are a few steps you can follow to check the compatibility:
1. Determine the type of gamepad: Start by identifying the type of gamepad you have. Snes9X supports various types of gamepads, such as USB controllers, Bluetooth controllers, and even console-specific controllers like the Xbox or PlayStation controllers.
2. Review the Snes9X compatibility list: Visit the Snes9X website or forum and check the compatibility list. This list provides information about gamepads that have been tested and confirmed to work well with the emulator. Look for your gamepad model in the list to ensure compatibility.
3. Search for user experiences: Utilize online gaming communities, forums, and social media platforms to search for user experiences with your specific gamepad model and Snes9X. Look for any reports of successful gamepad integration or any known issues that might hinder compatibility.
4. Confirm driver availability: If your gamepad requires drivers to function properly, verify if the necessary drivers are available for your operating system. Without proper drivers, the gamepad may not be recognized or function correctly within Snes9X.
By following these steps, you can ensure that your gamepad is compatible with Snes9X before proceeding with the setup process.
Configuring Gamepad Controls
Configuring gamepad controls is a crucial step to ensure a seamless gaming experience on Snes9X. Follow these steps to set up and customize your gamepad controls:
1. Launch the Snes9X emulator on your computer and connect your gamepad to a USB port.
2. Navigate to the “Input” or “Controller” settings within the Snes9X menu. The exact location of these settings may vary depending on the version of the emulator you are using.
3. In the “Input” or “Controller” settings, you should see a list of available input devices. Locate your connected gamepad from the list.
4. Once you have selected your gamepad, you will typically have the option to map the buttons and directional inputs. This is where you can customize the controls to match your preferred layout.
5. To map a button to a specific input, select the corresponding option and press the desired button on your gamepad. Repeat this step for each button and directional input that you want to configure.
6. If your gamepad has analog sticks or triggers, you may also have the option to calibrate or adjust their sensitivity within the emulator settings. This can help fine-tune the responsiveness of these inputs.
7. Some emulators may offer preset profiles or configurations for popular gamepads. If available, you can choose a preconfigured profile for your gamepad model to simplify the setup process.
8. Once you have finished mapping and configuring the gamepad controls, save your settings and exit the configuration menu.
9. Finally, launch a game within the Snes9X emulator and test the functionality of your gamepad. Ensure that each button and directional input performs the intended action without any issues.
By properly configuring your gamepad controls on Snes9X, you can enjoy a more immersive and enjoyable gaming experience. Take the time to experiment with different button layouts and sensitivity settings to find the setup that works best for you.
In conclusion, setting up a gamepad on Snes9X is a simple and straightforward process that enhances your gaming experience. By following the step-by-step instructions and ensuring compatibility with your device, you can seamlessly connect your gamepad and enjoy a more immersive gaming experience. Whether you’re a nostalgic gamer reliving classic titles or a new player exploring the world of retro gaming, Snes9X and a gamepad provide the perfect combination of comfort and precision. So, grab your favorite gamepad, download Snes9X, and embark on a journey into the realm of timeless gaming adventures. Get ready to unlock the full potential of your gaming sessions and relish in the joy of playing your favorite games with ease and convenience.
FAQs
1. How do I set up a gamepad on Snes9X?
To set up a gamepad on Snes9X, follow these steps:
- 1. Connect your gamepad to your computer using a USB cable or wireless receiver.
- 2. Launch the Snes9X emulator on your computer.
- 3. Go to the “Input” menu and select “Input Configuration.”
- 4. In the Input Configuration window, you will see a list of available buttons on the gamepad.
- 5. Click on each button in the input list and press the corresponding button on your gamepad to assign it.
- 6. Go through the entire list and assign each button on the gamepad.
- 7. Once you have assigned all the buttons, click on “OK” to save your changes.
- 8. Your gamepad should now be set up and ready to use with Snes9X.
2. My gamepad is not being recognized by Snes9X. What should I do?
If your gamepad is not being recognized by Snes9X, try the following troubleshooting steps:
- 1. Make sure that your gamepad is properly connected to your computer.
- 2. Restart your computer and relaunch Snes9X to see if the issue resolves.
- 3. Check if your gamepad is compatible with Snes9X. Visit the official Snes9X website or the gamepad manufacturer’s website for compatibility information.
- 4. Update your gamepad drivers to the latest version.
- 5. Try using a different USB port or wireless receiver to connect your gamepad.
- 6. If none of the above steps work, consider using a different gamepad or contacting Snes9X support for further assistance.
3. Can I use multiple gamepads with Snes9X?
Yes, Snes9X supports multiple gamepads. To set up multiple gamepads, follow the same steps as mentioned earlier for setting up a gamepad. When assigning buttons, Snes9X will recognize each connected gamepad separately, and you can assign buttons individually for each gamepad. You can disconnect or connect additional gamepads at any time during gameplay without any issues.
4. Does Snes9X support wireless gamepads?
Yes, Snes9X supports wireless gamepads. If your wireless gamepad comes with a compatible USB receiver, you can connect it to your computer and follow the same steps as mentioned earlier to set it up in Snes9X. Ensure that your wireless gamepad is charged and within the range of the USB receiver for optimal performance.
5. Can I customize the button layout for my gamepad in Snes9X?
Yes, you can customize the button layout for your gamepad in Snes9X. After launching Snes9X and connecting your gamepad, go to the “Input” menu and select “Input Configuration.” In the Input Configuration window, select the button you wish to customize and press the desired button on your gamepad to assign it. Repeat this process for each button you want to customize. Once you have assigned all the buttons, click on “OK” to save the changes. You can now use your gamepad with the customized button layout in Snes9X.