
Are you a gaming enthusiast looking to elevate your gaming experience on your PC or console? Look no further than the Logitech Gamepad F310. This versatile gamepad offers precision control and seamless compatibility with a wide range of games.
Setting up the Logitech Gamepad F310 is a breeze, whether you’re a seasoned gamer or a beginner. In this article, we will guide you through the setup process step-by-step, ensuring that you can quickly get your gamepad up and running.
From connecting the gamepad to your device to configuring the control settings, we’ll cover all the necessary steps to ensure that you can start gaming with the Logitech Gamepad F310 in no time. So, let’s dive into the process and explore how to set up this fantastic gamepad.
Inside This Article
Compatibility
The Logitech Gamepad F310 is a versatile and highly adaptable controller that is compatible with a wide range of devices. Whether you’re a PC gamer, a console enthusiast, or someone who enjoys gaming on multiple platforms, the F310 is designed to offer seamless compatibility.
When it comes to PC gaming, the F310 is a plug-and-play controller that works with Windows XP, Vista, 7, 8, and 10. Simply connect the controller to your PC using the USB cable, and the necessary drivers will be automatically installed. This means you can start gaming without any hassle of searching for and manually installing drivers.
In addition to PC compatibility, the Logitech Gamepad F310 also supports popular gaming consoles such as PlayStation 3 and PlayStation 4. By simply connecting the F310 to your PlayStation console using a USB cable, you can enjoy a familiar console gaming experience with the comfort and familiarity of the F310’s ergonomic design.
Furthermore, the F310 is compatible with Android devices, making it an excellent choice for mobile gaming. Whether you’re playing games on your smartphone, tablet, or even a smart TV, you can easily connect the F310 via USB and enjoy a superior gaming experience with precise control and responsiveness.
It’s important to note that while the F310 is compatible with a wide range of devices, some games may have specific controller compatibility requirements. These requirements are usually mentioned in the game’s system requirements or on the official website. So, before purchasing or using the F310 for a specific game, it’s always a good idea to check for compatibility information.
Overall, the Logitech Gamepad F310 offers extensive compatibility across PC, PlayStation, and Android devices, allowing gamers to enjoy their favorite games on various platforms with ease. With its versatile compatibility, ergonomic design, and reliable performance, the F310 is a fantastic choice for both casual and hardcore gamers.
Driver Installation
To utilize the full functionality of your Logitech Gamepad F310, you need to ensure that the correct drivers are installed on your computer. Here’s a step-by-step guide on how to install the drivers:
1. Begin by connecting your Logitech Gamepad F310 to your computer using the USB cable. Make sure the gamepad is properly connected and powered on.
2. Visit the official Logitech website (www.logitech.com) and navigate to the “Support” or “Downloads” section.
3. Look for the drivers specifically designed for the Logitech Gamepad F310. You may find them under the “Gaming” or “Controllers” category.
4. Download the appropriate driver for your operating system. Logitech usually provides separate drivers for Windows and Mac operating systems.
5. Once the driver download is complete, locate the downloaded file on your computer and double-click it to initiate the installation process.
6. Follow the on-screen instructions provided by the driver installer. Typically, you will be asked to agree to the terms and conditions of use before proceeding.
7. After accepting the terms, the installer will automatically detect your Logitech Gamepad F310. If prompted, ensure that the gamepad is connected and powered on.
8. Proceed with the installation by following the prompts. The installer will copy the necessary files and configure the driver for your gamepad.
9. Once the installation is complete, you will receive a confirmation message. At this point, you can close the installer and safely disconnect your gamepad.
10. To verify that the drivers have been successfully installed, you can go to the “Device Manager” on your computer. Look for the gamepad under the “Human Interface Devices” or “Game Controllers” section.
11. If you see the Logitech Gamepad F310 listed without any error symbols, it means that the drivers are properly installed and your gamepad is ready to use.
By following these steps, you can easily install the necessary drivers for your Logitech Gamepad F310 and ensure a seamless gaming experience on your computer. Make sure to periodically check for driver updates on the Logitech website to stay up-to-date with the latest features and improvements.
Button Configuration
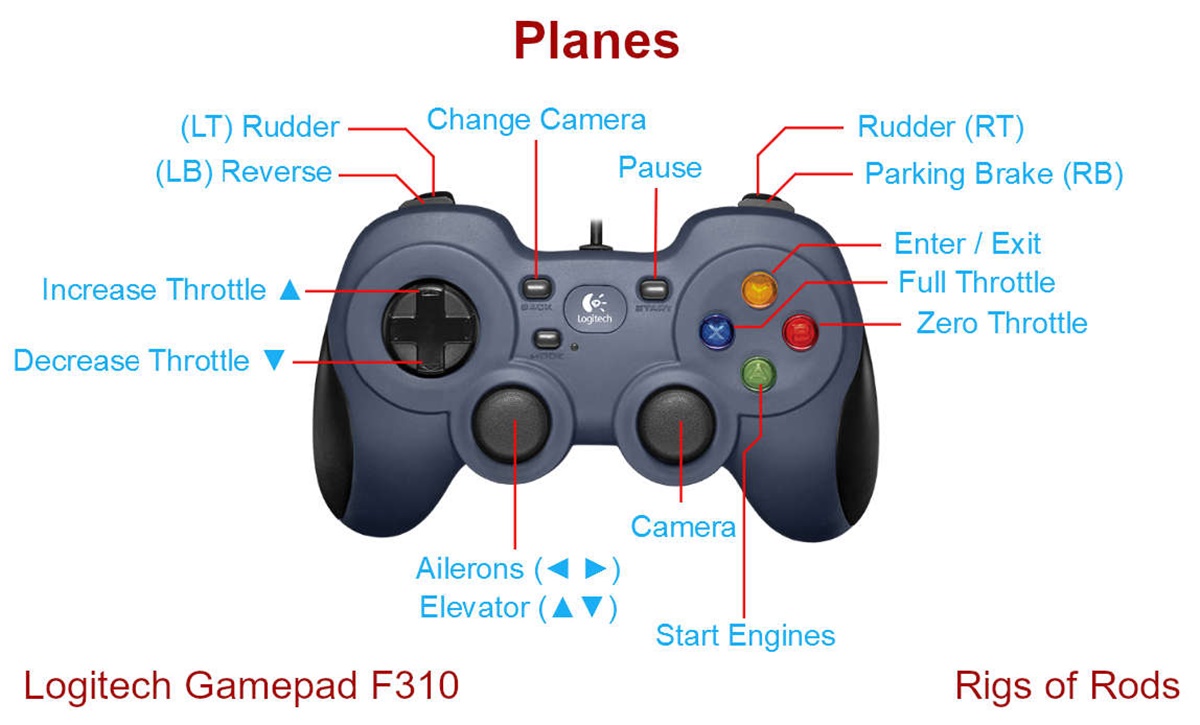
Configuring the buttons on your Logitech Gamepad F310 is a straightforward process that allows you to customize the controller to your preferred settings. Whether you want to remap the buttons for a specific game or adjust the sensitivity of the triggers, the F310 offers a variety of options to enhance your gaming experience.
To get started, you’ll need to install the Logitech Gaming Software on your computer. This software provides a user-friendly interface that allows you to configure the buttons and settings of your Gamepad F310.
Once the software is installed, connect your F310 to your computer via the USB cable. Launch the Logitech Gaming Software and select the F310 from the list of connected devices. This will open up the configuration panel for your controller.
Within the configuration panel, you’ll find a range of options for button configuration. You can remap the buttons to different functions, adjust the joystick sensitivity, and even create custom profiles for individual games.
To remap a button, simply click on the button you want to configure and select the desired function from the drop-down menu. You can choose from a wide range of options, including keyboard keys, mouse movements, and gamepad inputs.
For example, if you prefer to have the “A” button act as the “B” button, you can easily assign that function within the software. This allows you to tailor the controller to your own personal preferences and play style.
In addition to button remapping, the Logitech Gaming Software also allows you to adjust the sensitivity of the triggers. This is particularly useful for games that require precise control over acceleration and braking, such as racing or flight simulators.
By adjusting the trigger sensitivity, you can fine-tune the responsiveness of the triggers to match your desired level of control. This can make a significant difference in your gaming experience, allowing you to react quickly and accurately to in-game situations.
Furthermore, the Logitech Gaming Software lets you create custom profiles for different games. This means you can have a unique button configuration for each game you play, ensuring that your controller settings are optimized for maximum performance.
Overall, configuring the buttons on your Logitech Gamepad F310 is a simple and intuitive process. With the Logitech Gaming Software, you have full control over the button mapping and sensitivity settings, allowing you to customize the controller to your liking. So go ahead, dive into your favorite games, and make your gaming experience even better with the F310!
Conclusion
In conclusion, setting up the Logitech Gamepad F310 is a simple and straightforward process that can greatly enhance your gaming experience. By following the step-by-step instructions provided in this article, you can easily connect and configure the gamepad to work with your favorite games on both PC and Android devices. The Logitech Gamepad F310 offers a comfortable grip, precise controls, and customizable settings, making it a popular choice among gamers.
Whether you’re playing action-packed adventures or engaging in intense multiplayer battles, the Logitech Gamepad F310 is designed to deliver seamless and immersive gameplay. So, don’t hesitate to grab your gamepad, connect it to your device, and start enjoying a whole new level of gaming excitement. With its durability and versatility, the Logitech Gamepad F310 is sure to become your go-to accessory for countless gaming sessions.
So, dive into your favorite games, unleash your gaming skills, and experience the thrill like never before with the Logitech Gamepad F310!
FAQs
1. Can the Logitech Gamepad F310 be used on a PC?
Absolutely! The Logitech Gamepad F310 is specifically designed to be compatible with PC gaming. You can connect it to your computer using the USB cable provided and simply start gaming.
2. Can I use the Logitech Gamepad F310 with gaming consoles?
No, the Logitech Gamepad F310 is only compatible with PCs. It does not support connectivity with gaming consoles such as Xbox or PlayStation.
3. Does the Logitech Gamepad F310 require any drivers to be installed?
Yes, in order for the Logitech Gamepad F310 to work properly on your PC, you need to install the appropriate drivers. These drivers can be found on the official Logitech website. Simply download and install them, and your gamepad will be ready to use.
4. Can I customize the controls on the Logitech Gamepad F310?
Absolutely! The Logitech Gamepad F310 comes with software that allows you to customize the controls according to your preferences. You can remap buttons, adjust sensitivity, and create custom profiles for different games.
5. Is the Logitech Gamepad F310 wireless?
No, the Logitech Gamepad F310 is a wired gamepad that connects to your PC using a USB cable. This ensures a stable and lag-free gaming experience, as there is no need to worry about battery life or interference.