
When it comes to terminating a BNC connector, it’s important to have a solid understanding of the process. Whether you need to install a new connector or replace a faulty one, knowing how to properly terminate a BNC connector is essential for maintaining a reliable and secure connection. In this article, we will guide you through the step-by-step process of terminating a BNC connector, ensuring that you have a clear understanding of each stage. From preparing the cable and choosing the right tools to attaching the connector and testing the connection, we will cover all the essential information you need to successfully terminate a BNC connector. So, let’s dive in and learn how to properly terminate a BNC connector for your specific needs.
Inside This Article
- Overview of BNC Connectors
- Tools and Equipment Needed
- Step-by-Step Guide to Terminate a BNC Connector
- Troubleshooting Tips
- Conclusion
- FAQs
Overview of BNC Connectors
BNC (Bayonet Neill-Concelman) connectors are a popular type of RF (Radio Frequency) connector used in various applications where a reliable and secure connection is required. BNC connectors are commonly used in the telecommunications industry, video production, CCTV systems, and networking equipment.
These connectors are known for their quick-connect and disconnect feature, thanks to the bayonet-style locking mechanism. This mechanism allows for a secure and stable connection, preventing any accidental disconnections or signal interruptions.
BNC connectors are designed to operate in a wide range of frequencies, typically up to 4 GHz. They are commonly used for transmitting and receiving signals in applications such as video transmission, test equipment, and data networks. BNC connectors are known for their excellent signal integrity and low signal loss.
One key advantage of BNC connectors is their versatility. They are available in various sizes and configurations, including BNC male connectors and BNC female connectors. Additionally, there are various types of BNC connectors, such as BNC straight connectors, BNC crimp connectors, and BNC twist-on connectors, to suit different installation requirements.
BNC connectors have been widely adopted due to their ease of use and reliability. The bayonet-style locking mechanism allows for quick and secure connections, making them a preferred choice in time-sensitive applications. Furthermore, their robust construction and durable materials ensure long-lasting performance even in demanding environments.
Tools and Equipment Needed
In order to successfully terminate a BNC connector, you will need to gather a few essential tools and equipment. These tools will ensure that you have everything necessary to complete the termination process with ease and precision. Here are the tools and equipment you will need:
- BNC Crimping Tool: A BNC crimping tool is a specialized tool designed to crimp the connector onto the coaxial cable. It will help ensure a secure and reliable connection.
- BNC Connector: The BNC connector itself is an essential component. Make sure you have the correct type of connector for the coaxial cable you are working with, whether it is a BNC male or BNC female connector.
- Coaxial Cable Stripper: A coaxial cable stripper is used to strip away the outer layer of the coaxial cable without damaging the inner conductor. It is important to use a stripper specifically designed for coaxial cables to ensure clean cuts.
- Wire Cutter: A wire cutter is necessary to cut the coaxial cable to the desired length. Make sure you have a wire cutter capable of cleanly cutting through the cable without fraying or damaging the inner conductor.
- Wire Stripper: A wire stripper is used to remove the insulation from the inner conductor of the coaxial cable. This tool allows for precise and clean stripping, ensuring proper contact with the BNC connector.
- Heat Gun or Lighter: A heat gun or a lighter can be used to shrink the heat shrink tubing, if applicable. This step helps provide additional protection and strain relief to the terminated connector.
- Heat Shrink Tubing: Heat shrink tubing is used to provide additional protection and strain relief to the terminated connector. Make sure you have the appropriate size of heat shrink tubing for your connector.
- Optional: Multimeter: While not absolutely necessary, a multimeter can be useful for testing continuity and verifying a proper connection after the termination process is complete.
By ensuring you have all the necessary tools and equipment, you will be well-prepared to terminate a BNC connector successfully. Having the right tools will make the process easier and allow for a more reliable connection.
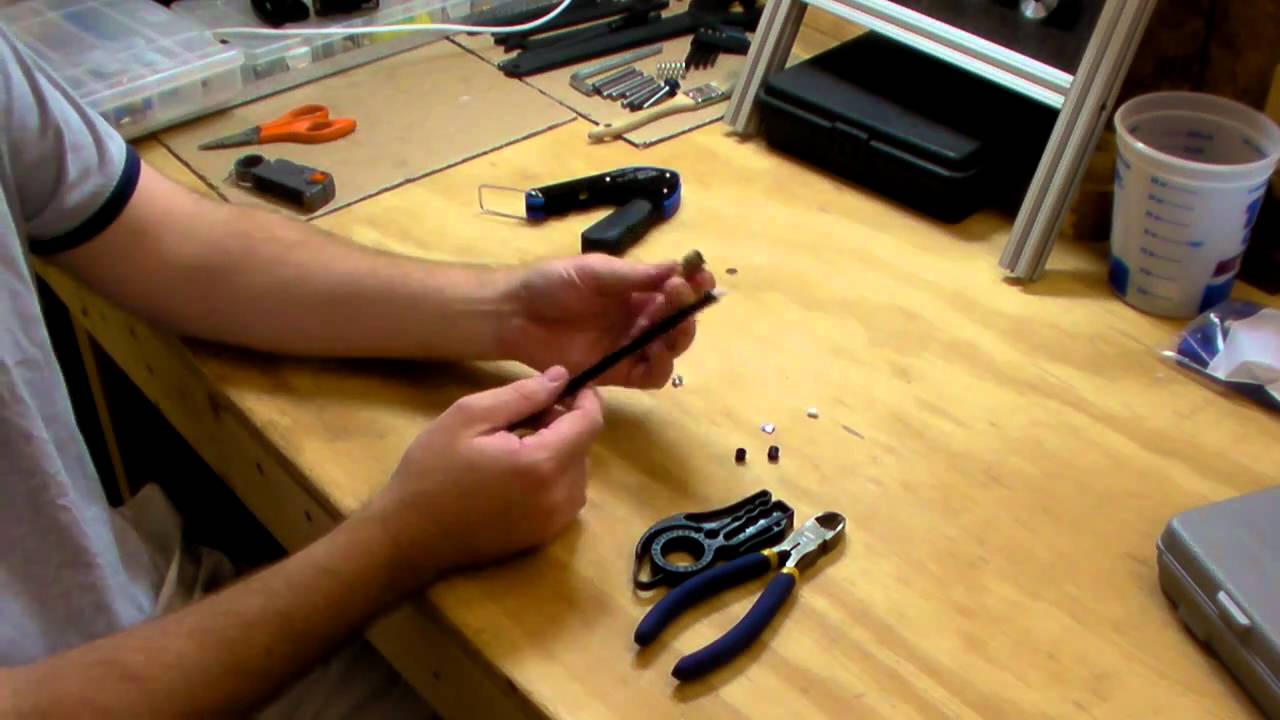
Step-by-Step Guide to Terminate a BNC Connector
If you are looking to terminate a BNC connector, you have come to the right place. In this step-by-step guide, we will walk you through the process of terminating a BNC connector easily and efficiently. With the right tools and a little bit of patience, you will be able to successfully terminate your BNC connectors.
- Step 1: Gather the necessary tools
- Step 2: Preparing the coaxial cable
- Step 3: Stripping the cable
- Step 4: Preparing the connector
- Step 5: Crimping the connector
- Step 6: Inspecting the termination
- Step 7: Repeat for the other end
- Step 8: Test the connection
The first step in terminating a BNC connector is to gather all the necessary tools and equipment. You will need a BNC connector, a coaxial cable, a wire stripper, a coaxial cable stripper, a BNC crimp tool, and a cable cutter.
Take the coaxial cable and use the cable cutter to carefully cut off the desired length of the cable. Make sure to cut the cable cleanly and avoid any frayed edges.
Using the wire stripper, carefully strip off about an inch of the outer sheath of the coaxial cable. Be cautious not to damage the inner conductor or the shielding while stripping.
Take the BNC connector and insert the stripped end of the coaxial cable into the connector barrel. Make sure that the inner conductor is fully inserted into the center pin of the connector, and the outer shielding is flush with the connector barrel.
Once the cable is properly inserted into the connector, it’s time to crimp it. Use the BNC crimp tool to apply firm and even pressure to the connector. Make sure that the crimp tool is properly aligned with the connector to ensure a secure connection.
After crimping the connector, inspect the termination to ensure that it is properly secured and aligned. Check for any loose connections or visible damage. If everything looks good, proceed to the next step.
If you need to terminate connectors on both ends of the coaxial cable, repeat the above steps for the other end as well.
Once you have terminated all the connectors, it’s time to test the connection. Connect the coaxial cable to the appropriate devices and check for a strong, clear signal. If you experience any issues, double-check the terminations and troubleshoot as necessary.
By following these step-by-step instructions, you can easily terminate BNC connectors and ensure a reliable connection for your coaxial cables. Remember to work carefully and double-check your work to avoid any issues or signal loss. With a little practice, you will be able to terminate BNC connectors confidently and efficiently.
Troubleshooting Tips
Even with proper technique and equipment, sometimes things don’t go as planned when terminating a BNC connector. Here are some troubleshooting tips to help you overcome common issues:
1. Poor Signal Quality: If you experience poor signal quality after terminating a BNC connector, check the cable for any damages or cuts. Ensure that the connector is properly crimped and securely attached to the cable.
2. Loose Connection: If the connector feels loose or keeps falling off, it may not be properly crimped. Double-check the crimping process to ensure a tight connection. Ensure that you are using the appropriate crimping tool and following the recommended procedure.
3. Signal Interference: If you notice interference or noise in your signal, it could be due to improper grounding. Make sure that your BNC connector is properly grounded and connected to a suitable grounding point. This will help minimize signal interference.
4. Inadequate Shielding: If you are experiencing excessive signal loss or interference, check the cable’s shielding. Make sure there are no gaps or damages in the shielding that could allow for signal leakage. Consider using high-quality cables with superior shielding for better performance.
5. Incorrect Pin Configuration: If your terminated BNC connector is not working at all, check the pin configuration. Ensure that the pins are aligned correctly and make proper contact with the corresponding ports. A misaligned or bent pin can lead to connectivity issues.
6. Using Low-Quality Connectors: If you consistently experience problems with terminated BNC connectors, it could be due to using low-quality connectors. Invest in high-quality connectors that are designed for your specific application or industry. This will improve reliability and reduce troubleshooting efforts.
7. Using the Wrong Cable Type: BNC connectors should be used with the appropriate cable type. Using the wrong cable, such as a coaxial cable incompatible with BNC connectors, can lead to connectivity issues. Make sure you are using the correct cable for your application to ensure optimum performance.
8. Insufficient Cable Preparation: Proper cable preparation is crucial for successful termination. Make sure to strip the outer jacket and shielding to the correct length without damaging the inner conductor. Any inconsistencies in cable preparation can lead to connectivity problems.
By following these troubleshooting tips, you can address common issues that may arise when terminating a BNC connector. Remember to always double-check your technique, equipment, and connections for optimal performance.
Conclusion
In conclusion, knowing how to terminate a BNC connector is a valuable skill for anyone working with audiovisual equipment or security systems. By following the step-by-step process outlined in this article, you can confidently and accurately terminate a BNC connector using the appropriate tools and techniques.
Remember, always start by preparing the BNC cable, cutting it to the desired length, and stripping off the outer jacket and shielding. Then, carefully arrange and insert the individual wires into the BNC connector, making sure they are properly seated and secured. Finally, use a crimping tool or soldering iron to complete the termination process.
By mastering the art of terminating BNC connectors, you’ll be able to seamlessly connect audio and video devices, ensuring optimal signal transmission and quality. So don’t hesitate to practice and refine your skills, as this knowledge will undoubtedly come in handy in a variety of professional and recreational settings.
FAQs
Q: What is a BNC connector?
A: A BNC (Bayonet Neill-Concelman) connector is a type of RF (Radio Frequency) connector commonly used for coaxial cable connections. It features a bayonet-style locking mechanism that ensures a secure connection.
Q: When would I need to terminate a BNC connector?
A: You might need to terminate a BNC connector when setting up a video surveillance system, connecting audio/video equipment, or working with various other applications that require high-quality coaxial connections.
Q: What tools are required to terminate a BNC connector?
A: To terminate a BNC connector, you will need a coaxial cable stripper, a BNC connector crimping tool, and a cable cutter. These tools are essential for properly preparing and connecting the coaxial cable to the BNC connector.
Q: What are the steps to terminate a BNC connector?
A: The process of terminating a BNC connector involves the following steps:
1. Begin by stripping the coaxial cable to expose the inner conductor and insulator.
2. Insert the prepared cable into the BNC connector, ensuring that the inner conductor aligns with the connector pin.
3. Use the crimping tool to secure the connector onto the cable, creating a stable and reliable connection.
4. Verify the continuity and signal integrity of the terminated connector using appropriate testing equipment.
5. Repeat the process for any additional BNC connectors required.
Q: Are there any precautions to keep in mind when terminating a BNC connector?
A: Yes, here are a few precautions to consider:
– Make sure to use the appropriate tools for the job to ensure a proper and secure connection.
– Double-check the compatibility of the coaxial cable and BNC connector to avoid any compatibility issues.
– Handle the coaxial cable with care to prevent any damage to the inner conductor or insulator.
– Test the terminated connector to ensure proper signal transmission and continuity.