
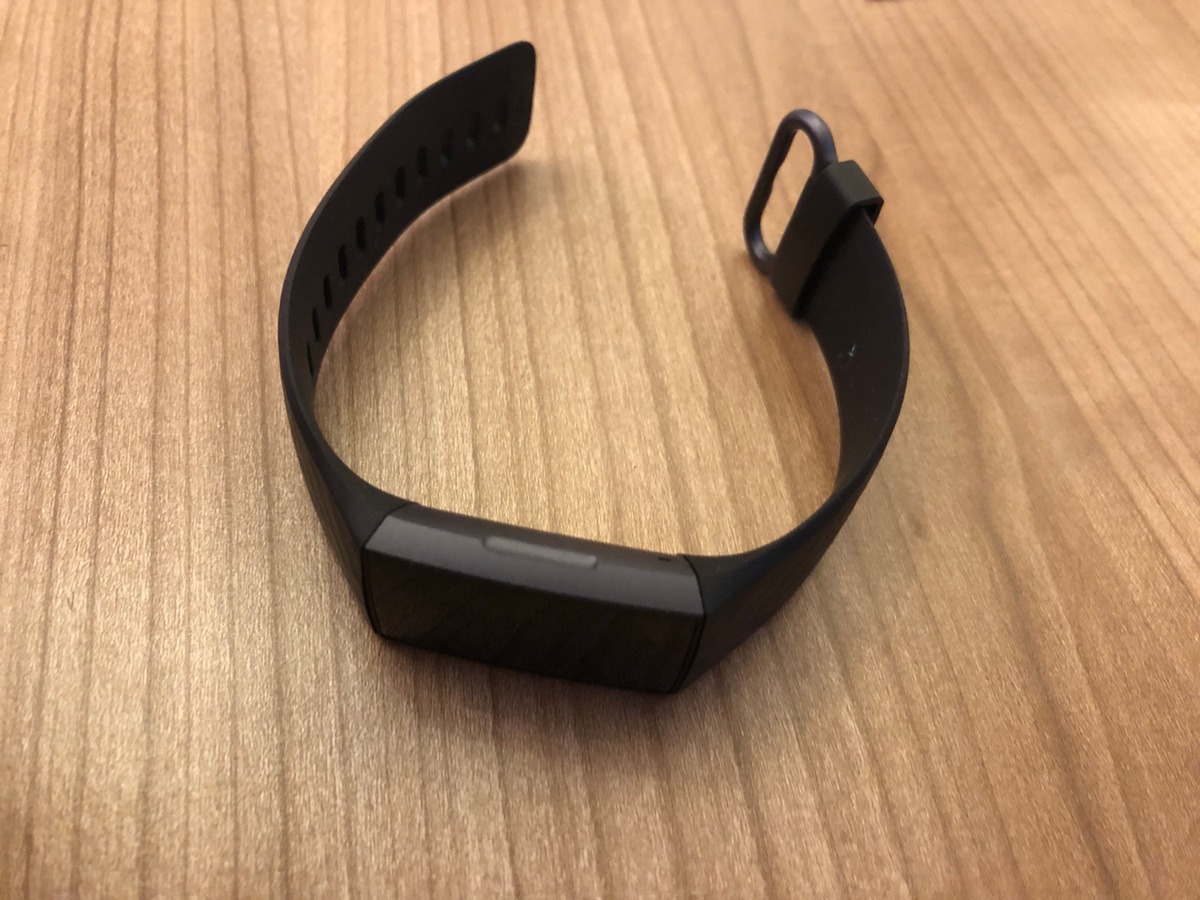
Are you struggling to figure out how to turn on the screen of your Fitbit Charge 3? Look no further! In this article, we’ll walk you through the steps to easily activate the screen on your Fitbit Charge 3. The Fitbit Charge 3 is a popular fitness tracker known for its sleek design and advanced features. With its vibrant display, you can easily track your daily activity, heart rate, sleep patterns, and much more. Whether you’re a fitness enthusiast or simply looking to stay on top of your health goals, knowing how to turn on the Fitbit Charge 3 screen is essential. Stay tuned as we guide you step-by-step, ensuring you make the most out of your Fitbit Charge 3 experience.
Inside This Article
- Setting up your Fitbit Charge 3
- Charging your device
- Syncing with your smartphone
- Navigating the Fitbit Charge 3 screen
- Understanding the touchscreen controls
- Accessing different modes and functions
- Adjusting the screen settings on your Fitbit Charge 3
- Customizing clock faces
- Changing brightness and timeout settings
- Troubleshooting common screen issues on Fitbit Charge 3
- Screen not turning on
- Unresponsive touchscreen
- Display issues and error messages
- Conclusion
- FAQs
Setting up your Fitbit Charge 3
When it comes to getting started with your Fitbit Charge 3, the initial setup process is quick and easy. Follow the steps below to ensure a smooth transition into a more active and healthier lifestyle.
Charging your device: Before diving into the setup process, make sure your Fitbit Charge 3 is fully charged. Use the included charging cable and connect it to a USB power source. Once connected, you will see a battery icon on the display, indicating that it is charging.
Syncing with your smartphone: To make the most out of your Fitbit Charge 3, it is recommended to sync the device with your smartphone. Download the Fitbit app from the App Store or Google Play Store and follow the on-screen instructions to connect your Charge 3 to your phone via Bluetooth.
Once your device is charged and synced, you are now ready to take full advantage of the features and functionalities of your Fitbit Charge 3.
Charging your device
One of the important aspects of using your Fitbit Charge 3 is ensuring that it has enough power to track your activities and provide you with the information you need. To keep your device charged, follow these simple steps:
- Step 1: Connect the charging cable
- Step 2: Plug it in
- Step 3: Connect to a power source
- Step 4: Charging indicator
- Step 5: Charging time
Start by locating the charging port on the back of your Fitbit Charge 3. It is a small, rectangular port in the center. Take the charging cable and align it with the port, making sure the connectors on both the cable and the port are properly lined up.
Once the cable is properly aligned, gently push it into the charging port until it clicks into place. Ensure that the cable is firmly connected to avoid any interruptions in the charging process.
Now, connect the other end of the charging cable to a power source. You can use the USB port of your computer, a wall adapter, or any other USB power source. Make sure the power source is working and capable of providing a sufficient amount of power.
Once the charging cable is connected and the Fitbit Charge 3 is receiving power, a battery icon will appear on the screen. This indicates that your device is charging. The battery icon will gradually fill up as the device charges.
The time it takes to fully charge your Fitbit Charge 3 may vary depending on its current battery level. On average, it takes about 1-2 hours to fully charge from empty. When the device is fully charged, the battery icon will be completely filled.
It’s important to note that you should always use the charging cable and power source provided by Fitbit to ensure optimal performance and safety. Using unauthorized charging accessories may damage your device or pose a risk of electrical hazards.
Syncing with your smartphone
Syncing your Fitbit Charge 3 with your smartphone is an important step to get the most out of your device. By syncing, you can track your activity, monitor your progress, and receive notifications directly on your wrist. Here’s how you can easily sync your Fitbit Charge 3 with your smartphone:
1. Begin by ensuring that your Fitbit Charge 3 and smartphone are within close proximity to each other.
2. Open the Fitbit app on your smartphone. If you don’t have the app, you can download it for free from the Apple App Store or Google Play Store.
3. If you already have a Fitbit account, log in with your email and password. If you’re new to Fitbit, follow the on-screen instructions to create an account.
4. Once you’re logged in, tap on the Account icon, usually located in the top left or bottom right corner of the screen, depending on your device.
5. In the Account menu, select “Set Up a New Device” and choose “Fitbit Charge 3” from the list of available options.
6. Follow the on-screen instructions to pair your Fitbit Charge 3 with your smartphone. Make sure to allow permissions for notifications, location access, and Bluetooth connectivity.
7. Once the pairing process is complete, your Fitbit Charge 3 will start syncing with your smartphone. This may take a few moments, so be patient.
8. After the sync is successful, you’ll receive a notification or prompt on your smartphone confirming the connection.
9. Now you can explore the Fitbit app and customize your settings to suit your preferences. You can choose which notifications you want to receive on your Fitbit device and set activity goals to track your progress.
10. Remember to keep your Fitbit Charge 3 and smartphone nearby for regular syncing to ensure accurate tracking and data synchronization.
Syncing your Fitbit Charge 3 with your smartphone allows you to have a seamless and connected experience. You can stay on top of your fitness goals, receive call and message notifications, and even compete with friends using the Fitbit app. So, make sure to sync your device regularly and enjoy the full benefits of your Fitbit Charge 3.
Navigating the Fitbit Charge 3 screen
Once you have set up your Fitbit Charge 3, you will need to familiarize yourself with the different functions and features of the device’s screen. The Fitbit Charge 3 comes with a sleek and responsive touchscreen interface that allows you to easily access various modes and settings.
To navigate the screen, simply tap or swipe on different areas to interact with the device. The screen is highly intuitive and designed to be user-friendly, ensuring a smooth and seamless experience.
Understanding the touchscreen controls is essential for making the most of your Fitbit Charge 3. Tapping on the screen allows you to select different options or activate certain functions. For example, tapping on the clock face can display additional details such as your daily stats or heart rate.
In addition to tapping, you can also swipe across the screen to scroll through different screens or menus. Swiping down from the clock face reveals notifications such as incoming calls, texts, or calendar reminders. Swiping up from the clock face displays the Fitbit Charge 3’s quick settings menu, where you can access features like the alarm, do not disturb mode, or music controls.
To access different modes and functions, you can navigate the screen using the inbuilt menus. Simply swipe left or right to switch between different screens, such as the exercise mode, heart rate monitor, or weather forecast. Each mode provides detailed information and options to track your activities, monitor your health, and customize your Fitbit experience.
Utilizing the touchscreen controls and navigating through different modes on your Fitbit Charge 3 allows you to take full advantage of all its features and capabilities. Whether you want to track your steps, monitor your heart rate, or analyze your sleep patterns, the Fitbit Charge 3 screen provides easy access to all these functionalities.
Make sure to explore and familiarize yourself with the various features and settings available on your Fitbit Charge 3 by navigating the screen. This will enable you to customize your Fitbit experience and make the most out of your fitness journey.
Understanding the touchscreen controls
The Fitbit Charge 3 features a sleek and responsive touchscreen that allows for easy navigation and control of the device’s functions. Familiarizing yourself with the touchscreen controls will ensure that you can effortlessly interact with your Fitbit and enjoy its full range of features. Here are some key aspects to understand:
1. Swipe: Swiping is one of the primary methods of navigating through the different screens and menus on your Fitbit Charge 3. You can swipe up, down, left, or right to access various apps, settings, and notifications.
2. Tap: Tapping on the touchscreen will allow you to select options, open apps, or confirm actions. For example, to start a workout, you can simply tap on the exercise icon and select the desired activity.
3. Long press: Performing a long press on the touchscreen will activate certain functions. For example, a long press on the main screen might bring up the quick settings menu, where you can adjust brightness or enable do not disturb mode.
4. Scroll: In some situations, you may need to scroll through lists or menus. To do this, use your finger to swipe up or down on the screen to move through the available options.
5. Back button: Fitbit Charge 3 features a built-in back button that allows you to navigate back to the previous screen or menu. This can be handy if you want to retrace your steps or go back to the main screen.
By mastering these touchscreen controls, you’ll have the ability to effortlessly access your Fitbit’s features, adjust settings, and explore its various functions. It’s important to note that the touchscreen is designed to be sensitive and responsive, ensuring a smooth user experience.
Now that you have a better understanding of the touchscreen controls on your Fitbit Charge 3, you can begin exploring all the incredible features and functions this fitness tracker has to offer.
Accessing different modes and functions
One of the great features of the Fitbit Charge 3 is its versatility, allowing you to access a variety of modes and functions to enhance your fitness tracking experience. Here are a few steps to access these different modes:
- Exercise Mode: To track your workouts, simply swipe left on the main screen until you find the Exercise mode. Tap on it to select the specific activity you want to track, such as running, cycling, or swimming. Once selected, the Charge 3 will start monitoring your heart rate, steps, distance, calories burned, and other relevant data.
- Sleep Mode: To track your sleep patterns, swipe left on the main screen until you see the Sleep mode. Tap on it to activate sleep tracking. The Charge 3 will monitor your sleep duration, sleep stages, and provide insights into the quality of your sleep.
- Notifications: To access your smartphone notifications on the Charge 3 screen, swipe down from the top of the main screen. You will be able to see incoming calls, texts, calendar alerts, and app notifications right on your wrist.
- Music Control: If you enjoy listening to music while working out, swipe right on the main screen to access the Music Control mode. From there, you can control the playback of your favorite music or podcasts directly from your wrist, without reaching for your phone.
- Settings: To access the settings menu, swipe up from the bottom of the main screen. From here, you can customize various options like display settings, alarms, notification preferences, and more. Exploring the settings menu will help you fine-tune your Fitbit Charge 3 to your specific needs.
By accessing these different modes and functions, you can make the most out of your Fitbit Charge 3 and enhance your fitness journey. Whether you’re tracking your workouts, monitoring your sleep, staying connected, or fine-tuning your device settings, the Charge 3 has you covered.
Adjusting the screen settings on your Fitbit Charge 3
The Fitbit Charge 3 offers a variety of options to customize and adjust the screen settings according to your preferences. These settings allow you to personalize your device and optimize its functionality. In this section, we will explore how to customize clock faces, change brightness, and adjust the timeout settings on your Fitbit Charge 3.
One of the great features of the Fitbit Charge 3 is the ability to customize the clock face. With a range of options available, you can choose a design that suits your style and provides the information you find most valuable. To change the clock face, simply open the Fitbit app on your smartphone, tap on the “Clock Faces” tab, and select the one that appeals to you. Your chosen clock face will be displayed on your Fitbit Charge 3, allowing you to glance at the time and other metrics at a glance.
In addition to customizing the clock face, you can also adjust the brightness of the screen on your Fitbit Charge 3. This is particularly useful in different lighting conditions, ensuring optimal visibility and preserving battery life. To change the brightness, swipe down from the top of your device to access the settings menu and select the “Brightness” option. From there, you can increase or decrease the brightness level according to your preference. Experiment with different settings until you find the ideal brightness for your needs.
Another important screen setting to consider is the timeout duration. The timeout determines how long the screen remains active before it automatically turns off to conserve battery power. To adjust the timeout duration, go to the settings menu on your Fitbit Charge 3, select “Display,” and then tap on “Timeout.” You can choose from various options ranging from 5 seconds to 1 minute. Select the desired duration that strikes the right balance between convenience and energy efficiency.
By customizing the clock face, adjusting the brightness, and setting the timeout duration, you can tailor the screen settings on your Fitbit Charge 3 to suit your individual preferences. These settings allow you to optimize the visual display and enhance your overall experience with the device. Experiment with different options and find the perfect combination that meets your needs and enhances your Fitbit Charge 3 experience.
Customizing clock faces
Your Fitbit Charge 3 allows you to personalize your device by customizing the clock face. With a variety of options to choose from, you can find a clock face that suits your style and preferences. Here are the steps to customize the clock face on your Fitbit Charge 3:
1. Open the Fitbit app on your smartphone and tap on the “Today” tab at the bottom of the screen.
2. Tap on your Fitbit Charge 3 device name, which should be listed at the top of the screen.
3. Scroll down and tap on “Clock Faces” to access the available options.
4. Browse through the various clock face options and tap on the one you want to use.
5. Once you have selected a clock face, tap on the “Select” or “Choose” button to apply it to your Fitbit Charge 3.
6. Wait a few moments for the clock face to sync with your device, and voila! Your Fitbit Charge 3 now sports a new look.
Some clock faces also have customizable settings, allowing you to further personalize your device. For example, you may be able to choose a color scheme, modify the information displayed, or add additional widgets.
To access these settings, follow these steps:
1. Go back to the “Clock Faces” menu in the Fitbit app.
2. Find the clock face you have selected and tap on it.
3. Look for an “Edit” or “Settings” button associated with the chosen clock face and tap on it.
4. Explore the available customization options and make any desired changes.
5. Once you have finished customizing the settings, tap on “Save” or “Apply” to update your Fitbit Charge 3.
Remember, you can change your clock face anytime by following these steps and selecting a different option from the clock face menu in the Fitbit app.
Customizing your clock face is a fun way to make your Fitbit Charge 3 uniquely yours. Experiment with different styles and designs to find the perfect look that inspires and motivates you on your fitness journey.
Changing brightness and timeout settings
One of the great features of the Fitbit Charge 3 is the ability to adjust the brightness and timeout settings of the screen. These settings allow you to customize your device to suit your preferences and save battery life. In this section, we will guide you through the process of changing these settings on your Fitbit Charge 3.
To start, you’ll need to access the Settings menu on your Fitbit Charge 3. From the clock face, swipe left to access the Quick Settings menu. Tap on the gear icon to enter the Settings menu. Scroll down and select “Settings” and then choose “Display”.
In the Display settings, you will find the options for adjusting brightness and timeout. To change the brightness, you can slide the brightness level from low to high using the touchscreen controls. Find the brightness level that is most comfortable for your eyes and preferences.
Next, you can adjust the timeout settings, which determine how long the screen stays on before it turns off automatically. This is useful to save battery life when you’re not actively using your Fitbit Charge 3. From the Display settings, tap on “Timeout”. You will see options to set the screen timeout to 5 seconds, 10 seconds, 15 seconds, or always on. Choose the option that suits your needs.
Keep in mind that setting the screen timeout to “always on” will significantly reduce battery life, so it’s recommended to choose a shorter timeout duration if you want to maximize battery usage.
After you have made your adjustments, simply tap on the back arrow or swipe right to go back to the previous screens. Your changes will be saved automatically, and you will start seeing the new brightness level and screen timeout setting reflected on your Fitbit Charge 3.
Changing the brightness and timeout settings on your Fitbit Charge 3 is a straightforward process that allows you to tailor your device to your preferences. By optimizing these settings, you can enhance your user experience and ensure efficient battery usage.
Troubleshooting common screen issues on Fitbit Charge 3
If you’re experiencing any screen-related problems with your Fitbit Charge 3, you’re not alone. While the device is generally reliable, there are a few common issues that users may encounter. However, most of these problems can be easily resolved with a few troubleshooting steps. In this section, we will address some of the most common screen issues and provide you with solutions to get your Fitbit Charge 3 screen back up and running.
Screen not turning on: One of the most frustrating issues that users may face is when the screen does not turn on. If you’re encountering this problem, the first thing you should do is make sure your device is charged. Connect your Fitbit Charge 3 to the charging cable and ensure that it is properly connected to a power source. Leave it charging for at least 10 minutes before attempting to turn it on again. If the screen still doesn’t turn on, try restarting your device by pressing and holding the button on the side for 8 seconds until you see the Fitbit logo appear.
Unresponsive touchscreen: Another common issue is an unresponsive touchscreen. If you’re unable to navigate through the menus or access any functions, there are a few steps you can take to resolve the problem. First, try cleaning the screen with a microfiber cloth to remove any dirt or debris that may be affecting its sensitivity. If the touchscreen is still unresponsive, restart your device by following the steps mentioned earlier. If the issue persists, perform a factory reset by going to the settings on your Fitbit app and selecting “Clear User Data”. Keep in mind that a factory reset will delete all your data, so make sure to sync your Fitbit before proceeding.
Display issues and error messages: If you’re experiencing display issues or error messages on your Fitbit Charge 3 screen, there are a few troubleshooting steps you can try. First, ensure that your device is running on the latest software version. Go to the Fitbit app, navigate to the device settings, and check for any available updates. If an update is available, follow the prompts to install it. You should also check if there are any error messages displayed on your device screen. If there are, write down the error message and search for it on the Fitbit support website or reach out to Fitbit customer support for further assistance.
Remember, if you’re still experiencing screen issues after trying these troubleshooting steps, it is recommended to contact Fitbit customer support. They will be able to provide you with more specific guidance tailored to your situation. Additionally, they may be able to provide you with a replacement device if necessary. By taking these steps, you can quickly resolve any common screen issues you may encounter with your Fitbit Charge 3 and get back to enjoying all the features and functions the device has to offer.
Screen not turning on
One of the common issues that Fitbit Charge 3 users may encounter is the screen not turning on. If you’re facing this problem, here are some troubleshooting steps you can try:
1. Check the battery: Ensure that your Fitbit Charge 3 has enough battery power. If the battery is low, it may prevent the screen from turning on. Connect your device to the charger and give it some time to charge. Once it has enough power, try turning on the screen again.
2. Restart your device: Sometimes, a simple restart can fix minor software glitches. Press and hold the button on the left side of your Fitbit Charge 3 until the screen turns off and then turns back on. Once it restarts, check if the screen turns on as normal.
3. Clean the charging contacts: Dirt or debris on the charging contacts can hinder the charging process, leading to a screen that doesn’t turn on. Gently wipe the charging contacts on both the device and the charger with a soft, lint-free cloth to ensure they are clean and making proper contact.
4. Perform a hard reset: If the above steps don’t work, you can try performing a hard reset on your Fitbit Charge 3. To do this, connect your device to the charger and then insert a paperclip or a small pin into the small hole on the back of the device. Hold the button in the hole for about five seconds until the device vibrates and restarts. Check if the screen starts working again.
5. Contact Fitbit support: If your Fitbit Charge 3 screen still doesn’t turn on after trying the above steps, it’s recommended to reach out to Fitbit customer support or visit their website for further assistance. They can provide you with additional troubleshooting steps or advice to resolve the issue.
Remember that these troubleshooting steps can help resolve the issue of the Fitbit Charge 3 screen not turning on. If the problem persists, it’s best to seek professional assistance from Fitbit support to get your device back in working order.
Unresponsive touchscreen
One common issue that Fitbit Charge 3 users may encounter is an unresponsive touchscreen. This can be quite frustrating, as it hinders your ability to navigate through the device and access various functions. If you are facing this problem, there are a few troubleshooting steps you can try to resolve the issue.
The first step is to make sure that your hands and fingers are clean and dry. Sometimes, moisture or debris on your hands can interfere with the touchscreen’s responsiveness. Give your hands a quick wipe and try using the touchscreen again.
If cleaning your hands doesn’t solve the problem, you can try restarting your Fitbit Charge 3. To do this, press and hold the side button on the device until you see the Fitbit logo appear on the screen. This will perform a reboot, which can often resolve minor software glitches causing the unresponsive touchscreen.
If a restart doesn’t work, you can try resetting your Fitbit Charge 3 to its factory settings. Note that performing a factory reset will erase all data on your device, so be sure to sync your data with the Fitbit app beforehand. To reset the device, go to the Settings menu on your Charge 3, scroll down to “About” and select “Factory Reset.” Follow the on-screen instructions to complete the reset process.
If none of these steps work, it could indicate a more significant hardware issue with your Fitbit Charge 3. In this case, it’s best to contact Fitbit customer support for further assistance. They will be able to provide guidance and help you troubleshoot the problem effectively.
Remember, an unresponsive touchscreen can happen occasionally, but most of the time, it can be resolved through simple troubleshooting steps. By keeping your Fitbit Charge 3 clean, performing restarts or resets, and reaching out to customer support if needed, you can overcome this issue and get back to using your device seamlessly.
Display issues and error messages
If you are experiencing display issues or seeing error messages on your Fitbit Charge 3 screen, don’t worry. Here are some common problems you may encounter and tips on how to resolve them:
1. Blurry or distorted display: If the screen appears blurry or distorted, try cleaning the screen with a soft, lint-free cloth. Sometimes, smudges or dirt on the screen can affect the display quality. Avoid using harsh chemicals or abrasive materials that could damage the screen.
2. Screen flickering: If you notice the screen flickering or flashing, it could be due to a low battery. Make sure your Fitbit Charge 3 is fully charged. If the problem persists, try restarting your device by holding the button on the side for 8 seconds until the Fitbit logo appears.
3. Freezing or unresponsive screen: If the screen becomes unresponsive or freezes, try restarting your Fitbit Charge 3 as mentioned in the previous tip. If that doesn’t work, make sure your device is running the latest firmware version. You can check for updates in the Fitbit app under the device settings.
4. Error messages: Occasionally, you may encounter error messages on your Fitbit Charge 3 screen. These messages can indicate a variety of issues such as syncing problems, software glitches, or hardware malfunctions. When you see an error message, take note of the specific text and perform a quick internet search or consult the Fitbit support website for troubleshooting steps related to that particular error.
5. Restarting or factory resetting your device: If none of the troubleshooting steps mentioned above resolve the display issues or error messages, you can try restarting your device or performing a factory reset. To restart, follow the steps outlined in the previous tip. To perform a factory reset, go to the settings menu on your Fitbit Charge 3 and look for the option to reset or restore the device to its default settings. Note that a factory reset will erase all of your data, so make sure to back up any important information before proceeding.
If you continue to experience display issues or encounter error messages on your Fitbit Charge 3, it may be best to contact Fitbit customer support for further assistance. They will be able to provide specific troubleshooting steps or help you determine if there is a hardware issue that needs to be addressed.
In conclusion, learning how to turn on the Fitbit Charge 3 screen is an essential step in maximizing your experience with this popular fitness tracker. By following the simple steps outlined above, you can easily activate the display and start enjoying the functionality of your device.
Whether you want to monitor your daily activity, track your workouts, or receive notifications from your smartphone, the Fitbit Charge 3 provides a convenient and user-friendly solution. With its sleek design and advanced features, it’s no wonder why it’s a favorite choice among fitness enthusiasts.
So, don’t let a blank screen hold you back from accessing all the benefits of your Fitbit Charge 3. Take a few moments to familiarize yourself with the power button and gestures needed to awaken the screen, and you’ll be well on your way to reaching your health and fitness goals.
Get ready to embrace the full potential of your Fitbit Charge 3 and embark on a wellness journey like never before!
FAQs
1. How do I turn on the screen of my Fitbit Charge 3?
To turn on the screen of your Fitbit Charge 3, simply raise your wrist or tap on the screen to wake it up. The display should light up and show the time or any other information that you have customized to be displayed.
2. Can I adjust the screen brightness on my Fitbit Charge 3?
No, unfortunately, the Fitbit Charge 3 does not have the option to adjust the screen brightness. The brightness is set at a default level which is optimized for visibility in different lighting conditions.
3. How can I change the clock face on my Fitbit Charge 3?
To change the clock face on your Fitbit Charge 3, first, open the Fitbit app on your smartphone. Then, navigate to the “Clock Faces” section in the app and choose your desired clock face from the available options. Sync your Fitbit Charge 3 with your phone, and the new clock face should be applied.
4. Why is the screen on my Fitbit Charge 3 not responding?
If the screen on your Fitbit Charge 3 is not responding, there could be a few possible reasons. First, make sure that the device has sufficient battery charge. If the battery is low, try charging your Fitbit Charge 3 using the provided charger. If the problem persists, try restarting your device by going to the settings menu and selecting the “Restart” option. If none of these solutions work, contact Fitbit customer support for further assistance.
5. Can I turn off the screen of my Fitbit Charge 3?
The Fitbit Charge 3 does not have a manual screen-off option. However, the screen automatically turns off after a few seconds of inactivity to conserve battery life. To wake up the screen again, just raise your wrist or tap on the screen.