
Have you ever captured a video on your iPhone that could benefit from some editing? Whether you want to trim out unwanted sections, add effects, or merge multiple clips together, knowing how to cut video on your iPhone can come in handy. With the advancement of mobile technology, editing videos on the go has become more accessible and convenient than ever before.
In this article, we will explore step-by-step instructions on how to cut video on your iPhone. We’ll take a look at the built-in editing features offered by iOS, as well as some popular third-party video editing apps available on the App Store. Get ready to unleash your creativity and unlock the full potential of your captured videos with these simple yet powerful techniques for editing videos on your iPhone.
Inside This Article
- Choosing the Right Video Editing App
- Importing Videos to the iPhone
- Editing Tools and Techniques
- Trimming and Cutting Videos
- Conclusion
- FAQs
Choosing the Right Video Editing App
When it comes to editing videos on your iPhone, having the right video editing app can make all the difference. With a plethora of options available in the App Store, it can be overwhelming to choose the one that best suits your needs. Whether you’re a beginner or an experienced video editor, finding an app with the right features and functionality is essential. Here are some factors to consider when choosing the right video editing app for your iPhone.
- User-Friendly Interface: Look for an app with an intuitive interface that is easy to navigate. A clutter-free layout, clearly labeled features, and a user-friendly design will make the editing process smooth and enjoyable.
- Editing Tools: Consider the range of editing tools available in the app. Basic tools such as trimming, cropping, and adjusting brightness are essential. Advanced features like adding effects, transitions, and filters can take your videos to the next level.
- Compatibility: Ensure that the app is compatible with your iPhone model and iOS version. Some apps may have limitations or require higher device specifications, so it’s important to check compatibility before downloading.
- Exporting Options: Look for an app that offers multiple exporting options. Whether you want to share your edited videos directly to social media platforms or save them to your device, having flexibility in exporting formats is crucial.
- Price: Consider your budget when choosing a video editing app. While many apps offer free versions with limited features, investing in a paid app can unlock a wider range of tools and provide a more professional editing experience.
Based on these factors, here are some popular video editing apps for iPhone:
- iMovie: This app comes pre-installed on most iPhones and offers a user-friendly interface with basic editing tools. It’s a great option for beginners or those looking for a simple editing experience.
- Adobe Premiere Rush: A powerful editing app that offers a range of features such as multi-track editing, color grading, and seamless integration with other Adobe Creative Cloud apps. It’s an ideal choice for more advanced users.
- Quik: Developed by GoPro, this app is perfect for those who want to create quick and visually appealing videos. It automatically analyzes your footage and creates impressive edits with minimal effort.
- KineMaster: Known for its professional-grade features, KineMaster offers multi-layer editing, blending modes, and precise control over audio and visual effects. It’s a popular choice among content creators and professional video editors.
Ultimately, the best video editing app for your iPhone depends on your specific editing needs and preferences. Take the time to explore different apps, read reviews, and consider trial versions before making a decision. With the right app in hand, you’ll be able to unleash your creativity and produce stunning videos right from your iPhone.
Importing Videos to the iPhone
Once you have chosen the perfect video editing app for your needs, the next step is to import your videos to your iPhone. Luckily, importing videos to your iPhone is a simple process that can be done in a few easy steps. Here’s how:
- Connect your iPhone to your computer using the USB cable that came with your device. Make sure your iPhone is unlocked and on the home screen.
- On your computer, open iTunes and select your iPhone from the device list.
- Navigate to the “File Sharing” section. This can usually be found under the “Apps” or “File Sharing” tab on the left-hand sidebar.
- Scroll down until you find the video editing app you have installed on your iPhone. Click on it to reveal the app’s document library.
- Now, simply drag and drop the videos you want to import from your computer to the document library of the video editing app.
- Wait for the videos to finish transferring. This may take some time depending on the size of the videos and the speed of your computer.
- Once the videos have been imported, disconnect your iPhone from your computer.
That’s it! Your videos are now imported and ready to be edited on your iPhone. You can access them within the video editing app you chose, and start applying various edits and enhancements to make your videos truly stand out.
It is worth noting that some video editing apps also offer the option to import videos directly from cloud storage services such as iCloud, Dropbox, or Google Drive. This can be handy if you prefer to keep your videos stored in the cloud or if you want to access videos from multiple devices.
Now that you know how to import videos to your iPhone, you are all set to unleash your creativity and create stunning videos right from your device. So go ahead, start importing those videos and let your editing skills shine!
Editing Tools and Techniques
Once you have imported your videos to the iPhone, it’s time to unleash your creativity with the editing tools and techniques available. Whether you’re a novice or a seasoned pro, these features will help you transform your raw footage into a polished masterpiece.
1. Trimming and Cutting
One of the fundamental editing techniques is trimming and cutting your videos. This allows you to remove unwanted sections and create a seamless flow. With just a few taps, you can trim the beginning or end of a clip to eliminate any unnecessary footage. Additionally, you can cut out specific segments from the middle of a video to refine the content even further.
2. Adding Transitions
Transitions are a great way to enhance the visual appeal and smoothness of your videos. They help create a seamless transition between different clips or scenes. Popular transitions include fade-ins, fade-outs, cross dissolves, and slide effects. By experimenting with different transitions, you can add a professional touch to your videos.
3. Applying Filters and Effects
Filters and effects can dramatically change the look and feel of your videos. From vintage tones to vibrant color grading, there are numerous options available to enhance the visual aesthetics. You can also experiment with effects like slow motion, time-lapse, and reverse playback to add creative elements to your footage.
4. Adding Music and Sound Effects
Music and sound effects play a crucial role in video editing, as they can evoke emotions and create a more immersive experience. Many video editing apps offer a library of royalty-free music and sound effects, allowing you to enhance your videos with the perfect audio accompaniment. You can also adjust the volume and add audio transitions to ensure a seamless audio experience.
5. Text and Titles
If you want to convey a message or provide context, adding text and titles to your videos is essential. You can use this feature to introduce yourself, provide captions, or highlight key points. Most video editing apps offer a variety of fonts, colors, and animations to customize your text and titles to suit your style.
6. Speed Control
Controlling the speed of your videos can add a dynamic element to your storytelling. By adjusting the speed, you can create slow-motion or fast-forward effects. This technique is particularly useful for emphasizing certain actions or capturing intricate details.
Remember, the key to effective video editing is to balance these techniques and ensure that they enhance your content without overpowering it. Experiment with different combinations and always keep your audience in mind.
Trimming and Cutting Videos
Once you have imported your videos and selected a suitable editing app, you are ready to start trimming and cutting your videos. This process allows you to remove unwanted sections, adjust the length, and create a more polished final product.
Below are some techniques and tools you can use to trim and cut videos on your iPhone:
- Trimming the Beginning or End: If you have a long video and want to remove unnecessary footage at the beginning or end, you can easily do this. Most video editing apps provide a drag-and-drop interface that allows you to trim the edges of the video by pulling the handles inward.
- Splitting Videos: Sometimes you may want to remove a specific section from the middle of your video. To do this, you can use the split tool. It allows you to cut the video into two separate parts and delete the unwanted section.
- Adding Transitions: Transitions can make your video look more professional and seamless. Most editing apps offer a variety of transition effects such as fading in/out, cross dissolve, and slide transitions. You can apply these effects to smooth the transition between clips.
- Adjusting Clip Speed: If you want to create a slow-motion or fast-forward effect in your video, you can change the speed of individual clips. This allows you to highlight certain moments or create a more dynamic visual experience.
- Applying Filters and Effects: Many video editing apps offer a wide range of filters and effects to enhance the visual appeal of your videos. You can experiment with different filters to achieve the desired look and mood for your footage.
- Merging Multiple Video Clips: If you have multiple video clips that you want to combine into one cohesive video, you can use the merging feature. This allows you to seamlessly join different clips together, creating a smooth transition from one scene to the next.
- Adding Music or Voiceover: Lastly, you can enhance your videos by adding background music or a voiceover. Many editing apps have a built-in library of royalty-free music or allow you to import your own audio files. This adds depth and emotion to your videos, making them more engaging to the viewers.
By utilizing these trimming and cutting techniques, along with the various tools provided by video editing apps, you can transform your raw footage into a professional-looking video. Experiment with different editing styles, effects, and transitions to bring your unique creative vision to life.
Conclusion
In conclusion, cutting videos on your iPhone is a simple and convenient process that allows you to trim and edit your favorite video clips with ease. With the advancements in mobile technology, the iPhone has become more than just a device for communication; it has transformed into a powerful tool for creating and editing multimedia content.
By utilizing the built-in video editing features and downloading specialized video editing apps, you can unleash your creativity and produce professional-looking videos right from your iPhone. Whether you want to remove unnecessary parts, create highlight reels, or add effects and transitions, the iPhone offers a plethora of options to help you achieve your desired results.
With the tips and tricks outlined in this article, you now have the knowledge and tools to cut videos on your iPhone like a pro. So, grab your iPhone, select your favorite video, and let your creativity shine through video editing. It’s time to bring your videos to life and share your masterpieces with the world. Happy video editing!
FAQs
1. Can I cut videos directly on my iPhone?
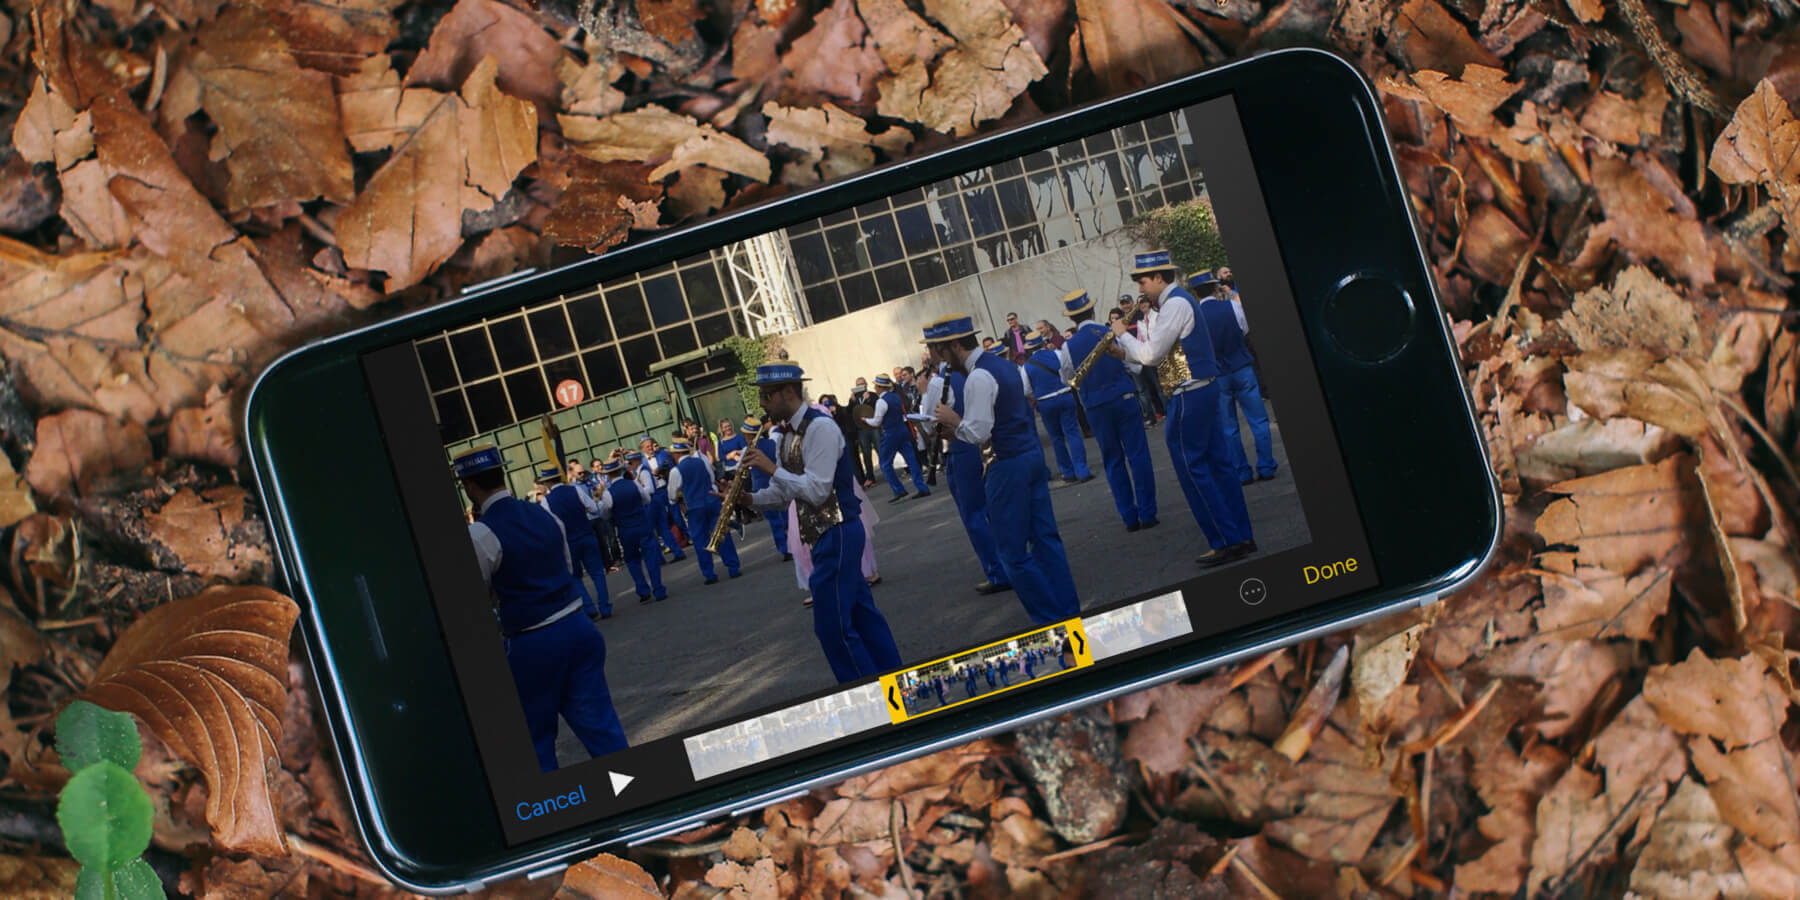
Yes, you can cut videos directly on your iPhone using the built-in Photos app. It provides basic editing features, including the ability to trim and cut videos.
2. How do I cut a video on my iPhone?
To cut a video on your iPhone, follow these steps:
- Open the Photos app and select the video you want to edit.
- Tap on the “Edit” button on the top right corner.
- At the bottom of the screen, you’ll find a timeline of your video. Drag the start and end sliders to select the portion you want to keep.
- Tap on the “Done” button to save the trimmed video.
3. Can I cut and merge videos on my iPhone?
While the Photos app on iPhone allows you to cut videos, it does not have a built-in feature for merging videos. However, there are various third-party video editing apps available on the App Store that can help you achieve this task.
4. What are some recommended video editing apps for cutting videos on iPhone?
There are several excellent video editing apps for iPhone that offer advanced editing features, including the ability to cut and merge videos. Some popular ones include iMovie, Adobe Premiere Rush, and InShot.
5. Will cutting a video on my iPhone affect its quality?
When you cut a video on your iPhone using the Photos app, it does not affect the quality of the original video. The app only trims the video by removing the selected portion, without altering the quality of the remaining footage.