
Are you eager to start creating and sharing high-quality videos on YouTube using your iPhone? Editing your iPhone videos for YouTube can seem like a daunting task, but with the right knowledge and tools, you’ll be able to produce content that stands out and engages your viewers. In this article, we’ll guide you through the process of editing iPhone videos specifically for YouTube, from selecting the right editing app to optimizing your videos for the platform. Whether you’re a beginner or have some experience, we’ll cover all the essential steps and give you tips to make your videos look professional and visually appealing. So, grab your iPhone, unleash your creativity, and let’s dive into the exciting world of editing iPhone videos for YouTube.
Inside This Article
- Overview of iPhone Video Editing Apps
- Importing and Organizing Footage
- Basic Editing Techniques
- Adding Transitions and Effects
- Adjusting Video Settings
- Adding Music and Audio
- Enhancing Video Quality
- Exporting and Uploading to YouTube
- Conclusion
- FAQs
Overview of iPhone Video Editing Apps
With the advent of smartphones, including the popular iPhone, video editing has become readily accessible to anyone. Gone are the days when editing videos required expensive software and advanced technical skills. Now, you can conveniently edit videos directly on your iPhone using a range of powerful video editing apps. These apps offer a plethora of features and tools to enhance your videos and create professional-looking content.
When it comes to choosing the right video editing app for your iPhone, you’ll find a variety of options available in the App Store. Each app has its own unique features and capabilities, allowing you to unleash your creativity and produce stunning videos. Whether you’re a beginner or an experienced editor, there’s an app out there that suits your needs.
Some of the most popular and highly recommended iPhone video editing apps include:
- iMovie: Developed by Apple itself, iMovie is a versatile and user-friendly app that offers a range of editing features. With iMovie, you can easily trim and combine video clips, apply filters and effects, add titles, and even create Hollywood-style trailers. It’s a great choice for both beginners and advanced users.
- KineMaster: KineMaster is a powerful app that provides professional-grade editing tools. It offers advanced features like multi-track editing, chroma key, and blending modes. With KineMaster, you can create complex videos with multiple layers and add stunning visual effects.
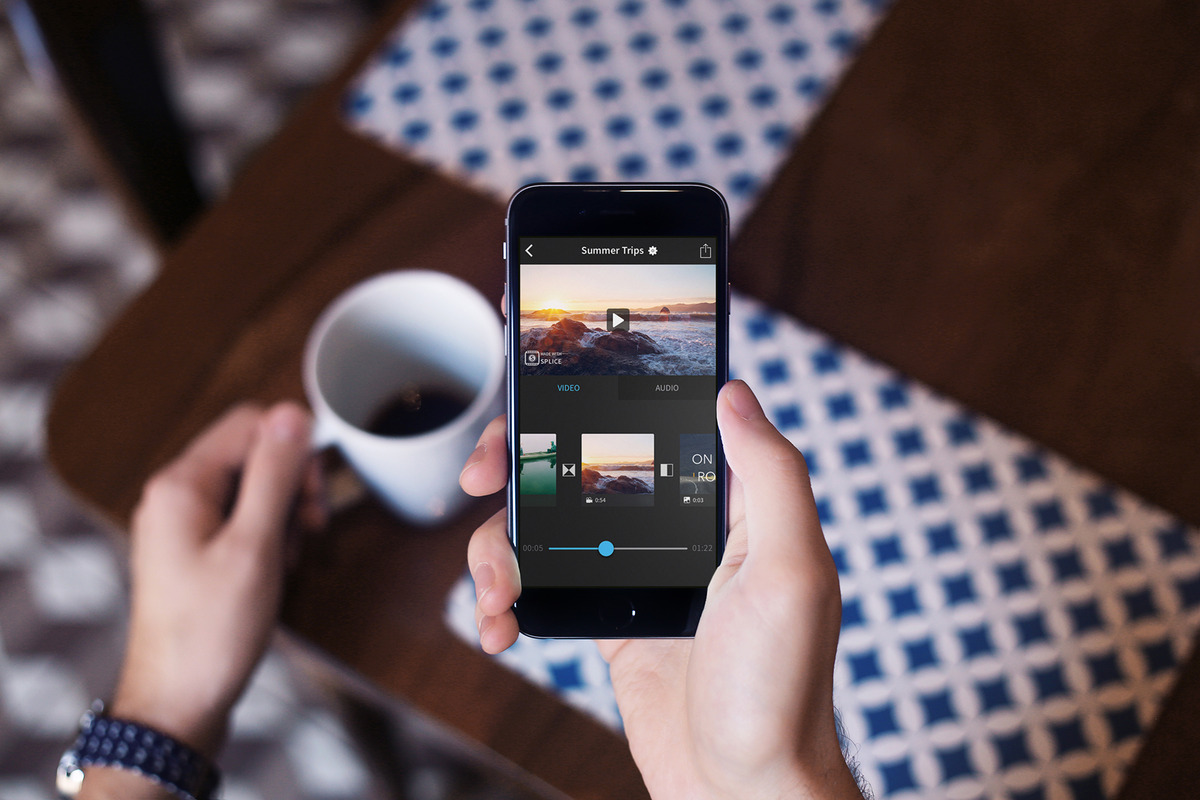
- Splice: Splice is a user-friendly app that offers a simple and intuitive editing experience. It allows you to trim and rearrange clips, add transitions and effects, and adjust the speed of your videos. Splice also provides a library of free soundtracks to enhance your videos.
- Adobe Premiere Rush: From the creators of the renowned editing software, Adobe Premiere Pro, comes Adobe Premiere Rush. This app offers a simplified editing process with a wide variety of editing tools. It allows you to edit videos on the go, sync projects across devices, and even use motion graphics templates.
These are just a few examples of the many video editing apps available for iPhone users. Each app has its own strengths and features, so it’s important to explore and find the one that best suits your needs and preferences.
Now that you have an overview of the different iPhone video editing apps, you can dive into the world of video editing with confidence and creativity. Whether you’re editing a vlog, a short film, or a social media video, these apps will empower you to unleash your imagination and create visually stunning content.
Importing and Organizing Footage
When it comes to editing iPhone videos for YouTube, the first step is to import and organize your footage. Thankfully, iPhones make this process a breeze. Follow these steps to get started:
1. Connect your iPhone to your computer: Use the USB cable that came with your iPhone to connect it to your computer. If prompted on your iPhone, select “Trust This Computer” to establish a connection.
2. Access your iPhone’s media folder: Once connected, open the file explorer or Finder on your computer. You should see your iPhone listed as a connected device. Click the iPhone icon to access its media folder.
3. Locate your videos: Navigate to the “DCIM” (Digital Camera Images) folder on your iPhone. This is where your videos are typically stored. Depending on the number of videos and folders, you may need to explore different folders to find your desired footage.
4. Copy the videos to your computer: Select the videos you want to edit by either dragging and dropping them to a folder on your computer or using the copy-paste command. Ensure that you have enough space on your computer to store the videos.
Once you have imported the videos to your computer, it’s time to organize them for easy access during the editing process. Here are some tips:
1. Create a dedicated folder: Before you start editing, create a new folder on your computer specifically for your project. Give it a meaningful name that reflects the content of your videos.
2. Rename your video files: It’s a good practice to rename your video files with descriptive titles. This helps you easily identify and locate specific clips during the editing process.
3. Sort your videos: Once you’ve renamed your files, arrange them in the order you want them to appear in your final video. This will make it easier to import them into your editing software and maintain a cohesive storyline.
4. Create subfolders: If your project includes multiple scenes or locations, consider creating subfolders within your main project folder. This will help you keep your footage organized and prevent any confusion during the editing process.
By following these steps to import and organize your footage, you’ll save time and frustration when it comes to editing your iPhone videos for YouTube. With your videos neatly stored and easily accessible, you can now move on to the next step in the editing process.
Basic Editing Techniques
When it comes to editing your iPhone videos for YouTube, mastering the basic editing techniques is essential. These techniques will allow you to enhance your footage, create a cohesive storyline, and capture the attention of your viewers. To help you get started, here are some fundamental editing techniques you can utilize:
- Cutting and trimming: One of the most basic editing techniques is cutting and trimming your video clips. This involves removing unwanted sections or trimming them down to create a seamless flow. Use the editing software’s timeline to easily locate and select specific sections of your video to trim or cut.
- Arranging clips: Arrange your video clips in the desired order to create a logical and engaging narrative. Rearrange the clips by dragging and dropping them on the timeline. This allows you to tell your story in a way that makes sense to your audience.
- Adding transitions: Transitions help to smoothly segue from one clip to another and add a professional touch to your videos. Experiment with different transitions, such as fade-ins, fade-outs, and dissolve, to find the ones that best suit your style and the flow of your video.
- Applying filters and effects: Enhance the visual appeal of your videos by applying filters and effects. These can range from adjusting the brightness, contrast, and saturation to applying artistic effects, such as black and white or sepia tones. Let your creativity shine through with the variety of effects available.
- Adding text and titles: Text and titles can be used to provide context, introduce scenes, or highlight important information in your videos. Use the editing software’s text tool to add text overlays that align with your content and design preferences. Experiment with font styles, colors, and animations to make your text visually appealing.
- Adjusting audio: Good audio quality is just as important as video quality. Adjust the audio levels to ensure that the dialogue or background music is clear and balanced. You can also add sound effects or adjust the audio’s EQ to create a more immersive viewing experience.
- Adding transitions between clips: Smoothly transition between different clips by adding crossfades or other transition effects. This helps avoid abrupt jumps or cuts, making your videos more visually pleasing and cohesive.
- Using slow motion and time-lapse: Harness the power of your iPhone’s camera by utilizing the built-in slow-motion and time-lapse features. These can add a unique perspective to your videos, capturing moments in a way that is visually captivating and engaging.
By mastering these basic editing techniques, you will be able to create videos that are polished, engaging, and ready to be shared on YouTube. Remember to experiment, be creative, and let your personality shine through in your editing choices. With practice, your editing skills will continue to improve, and you’ll be well on your way to becoming a YouTube video editing pro!
Adding Transitions and Effects
When it comes to creating engaging and professional-looking videos, adding transitions and effects can greatly enhance the visual appeal and flow of your content. Fortunately, editing apps on your iPhone provide a variety of options to help you achieve this. Let’s explore how you can easily add transitions and effects to your iPhone videos.
1. Choosing the Right Transitions: Transitions are visual effects that connect one video clip to another, creating a seamless transition between scenes. From basic cuts to more dramatic effects like fades, wipes, and dissolves, choose transitions that fit the style and mood of your video. Experiment with different options to find the one that best complements your content.
2. Applying Transitions: To apply transitions to your iPhone videos, simply follow these steps:
- – Open your video editing app and import your footage.
- – Select the video clip where you want to add a transition.
- – Look for the transition menu or icon in the editing interface.
- – Choose a transition and preview it to see how it looks with your video.
- – Once you’re satisfied, apply the transition to your selected video clip.
3. Adjusting Transition Duration: Most video editing apps allow you to adjust the duration of transitions. This feature is especially useful when you want to control the speed and timing of the transition. Explore the options in your editing app to find the transition duration settings and experiment until you achieve the desired effect.
4. Adding Effects: Effects are visual enhancements that can give your videos a unique and creative touch. You can apply effects such as filters, color adjustments, overlays, and even motion graphics to make your videos stand out. Play around with different effects in your editing app to find the ones that complement your video’s style.
5. Using Keyframes: Some advanced editing apps offer the ability to use keyframes for precise control over the application of effects and transitions. Keyframes allow you to adjust parameters such as opacity, position, and scale over time. This feature can add depth and complexity to your videos, giving you more creative freedom.
Remember, while adding transitions and effects can enhance your videos, it’s important to use them tastefully and purposefully. Avoid overusing flashy effects that may distract from your message or content. Keep your edits clean and seamless to maintain a professional look.
By adding transitions and effects to your iPhone videos, you can elevate the visual appeal and captivate your viewers. Experiment with different options and let your creativity shine through to create truly engaging and professional-looking content for YouTube and beyond.
Adjusting Video Settings
When it comes to creating professional-looking YouTube videos, adjusting the video settings is crucial. Fine-tuning the settings can make a significant difference in the overall quality and appearance of your videos. Whether you’re shooting in low light or need to adjust the color balance, here are some tips for adjusting video settings on your iPhone.
1. Exposure: The exposure setting controls the brightness of your video. If your footage appears too dark or too bright, you can manually adjust the exposure to get the perfect balance. Simply tap on the area of the screen where you want to adjust the exposure, and a sun icon will appear. Slide your finger up or down to increase or decrease the exposure.
2. White Balance: The white balance setting helps to correct the color temperature of your videos. It ensures that the colors appear accurate and natural. You can choose from preset white balance settings such as Auto, Daylight, Cloudy, or Tungsten. Experiment with different settings to find the one that best suits your shooting conditions.
3. Resolution and Frame Rate: The resolution and frame rate determine the quality and smoothness of your videos. Higher resolutions like 4K provide sharper details, but they also require more storage space. The frame rate determines how many frames are captured per second. Higher frame rates like 60fps result in smoother motion. Consider your storage capacity and the desired aesthetic when choosing these settings.
4. Slow motion and Time-lapse: The iPhone offers the ability to capture slow-motion and time-lapse videos. You can adjust the speed of your slow-motion videos by choosing the desired frame rate. Time-lapse videos are created by capturing frames at a slower rate and then playing them back at a normal speed. Experiment with these features to create unique and engaging videos.
5. Night mode: If you’re filming in low-light conditions, the night mode can significantly improve the quality of your videos. It automatically adjusts the exposure, reduces noise, and enhances details in darker areas. Enable the night mode by tapping on the moon icon that appears on the screen.
By adjusting these video settings on your iPhone, you can enhance the overall quality and appeal of your YouTube videos. Experiment with different settings to find the perfect combination for each shooting scenario. Remember, it’s always a good idea to review your footage before uploading it, ensuring that the colors, exposure, and overall look are to your liking. With some practice and experimentation, you’ll be able to create content that stands out and captivates your audience.
Adding Music and Audio
One of the key elements in creating engaging videos for YouTube is the use of music and audio. By incorporating the right soundtrack or narration, you can enhance the overall quality and impact of your content. Here are some steps to help you seamlessly add music and audio to your iPhone videos:
- Choose the right music: Selecting the appropriate music can set the mood and tone of your video. Consider the genre, tempo, and emotional effect you want to convey. There are various sources for royalty-free music that you can use, such as the YouTube Audio Library or external websites that offer licensed tracks.
- Import the music to your iPhone: After selecting the music, you need to transfer it to your iPhone. You can use iTunes or cloud storage services like Dropbox or Google Drive to upload the music and access it on your device.
- Open the video editing app: Launch your preferred video editing app on your iPhone.
- Import the video: Import the video you want to edit into the app. Most video editing apps allow you to either import directly from your iPhone library or access the files from cloud storage platforms.
- Find the audio track: Locate the imported music track within the app’s library. It should be listed along with other audio files or in a dedicated music section.
- Trim the audio: If the music or audio track is longer than your video, you can trim it to match the desired length. Look for the trimming or cutting tools within the app and adjust the start and end points of the audio accordingly.
- Adjust the audio levels: Ensure that the audio from the music or narration is appropriately balanced with the video’s original audio. Many video editing apps provide options to adjust the volume levels of both audio tracks. Experiment with different settings until you achieve the desired mix.
- Add fades or transitions: To smoothly transition in and out of the audio, you can apply fade-in and fade-out effects. These effects gradually increase or decrease the volume, creating a professional and polished result.
- Preview and fine-tune: Play a preview of your video to check if the music and audio blend well with the visuals. Make any necessary adjustments to the volume, timing, or effects to further refine the overall audio experience.
- Save and export: Once you are satisfied with the audio edits, save your video and choose the appropriate export settings. Typically, you will have options to adjust the resolution, format, and quality of the exported video. Select the settings that best suit your needs and proceed with the export process.
Adding music and audio to your iPhone videos can elevate them to new heights and captivate your audience. By following these steps and experimenting with different audio choices, you can enhance the impact of your videos and create a more immersive experience for your viewers.
Enhancing Video Quality
When it comes to creating captivating videos for YouTube, it’s important to pay attention to video quality. High-quality videos not only look professional but also keep viewers engaged. Fortunately, you can enhance the video quality of your iPhone videos with a few simple techniques. Let’s explore some tips and tricks to make your videos shine!
1. Adjust Exposure and Contrast: One of the easiest ways to improve video quality is by adjusting exposure and contrast. This helps to balance the lighting in your videos, making them look more vibrant and appealing. Many video editing apps for iPhone offer tools to tweak these settings, allowing you to achieve the desired look.
2. Sharpen the Footage: Sometimes, videos shot on a mobile phone may appear slightly soft or lacking in sharpness. To counteract this, you can use the sharpening feature in editing apps to enhance details and make your videos look crisper and more defined.
3. Reduce Noise: Low-light situations or improper camera settings can result in grainy or noisy footage. To reduce noise, utilize the noise reduction feature available in editing apps. It helps to smooth out the image and minimize visual distractions, resulting in a cleaner and more professional-looking video.
4. Stabilize Shaky Footage: Mobile phone footage can sometimes be shaky, leading to a less polished video. Fortunately, there are stabilization tools in editing apps that can smooth out the video and make it look more stable. This creates a more professional and enjoyable viewing experience.
5. Enhance Colors: To make your videos visually appealing, consider enhancing the colors. You can adjust saturation, vibrance, and hue to make the colors pop and create a more vibrant and eye-catching video. Experiment with these settings to find the right balance and make your videos stand out.
6. Crop and Frame: Another way to enhance video quality is by cropping and framing the footage. By removing unnecessary elements or adjusting the framing, you can create a more focused and visually appealing composition. This helps draw the viewer’s attention to the main subject and improves overall video quality.
7. Use Filters and Effects: Adding filters and effects can give your videos a distinct and personalized look. Many editing apps offer a variety of filters and effects that can be applied to your videos. From vintage styles to cinematic looks, these features allow you to add creative flair and enhance the visual appeal of your footage.
8. Upscale the Resolution: If you’re looking to improve video quality, upscaling the resolution can be an option. However, keep in mind that this technique works best when the original footage is of good quality and the upscaled resolution is not too extreme. Upscaling can help to make your videos appear sharper and more detailed, but it won’t magically improve the quality of low-resolution or heavily compressed footage.
By employing these techniques, you can significantly enhance the video quality of your iPhone videos for YouTube. Experiment with different settings and find the right combination that best suits your content and style. Remember, high-quality videos not only attract viewers but also reflect your professionalism and dedication to creating compelling content.
Exporting and Uploading to YouTube
After you have finished editing your iPhone videos, the final step is to export and upload them to YouTube. YouTube is the largest video-sharing platform in the world, and sharing your videos on this platform can help you reach a wider audience. Here’s a step-by-step guide on how to export and upload your edited iPhone videos to YouTube.
1. Exporting the Video:
The first step is to export your edited video from the editing app on your iPhone. Most editing apps have an export or share option that allows you to save the video to your camera roll. Choose the highest quality option available for the best viewing experience on YouTube.
2. Open the YouTube App:
Next, open the YouTube app on your iPhone and sign in to your YouTube account. If you don’t have a YouTube account, you’ll need to create one before you can upload videos.
3. Tap on the Camera Icon:
In the YouTube app, you will see a camera icon at the top right corner of the screen. Tap on it to start the upload process.
4. Select the Video:
In the upload screen, you will be prompted to select the video you want to upload. Tap on the “Select a video” option and choose the video from your camera roll.
5. Enter Video Details:
After selecting the video, you will be taken to a screen where you can enter the video details. Give your video a title, add a description, and choose relevant tags to optimize its searchability on YouTube. You can also select the privacy settings for your video.
6. Customize Settings:
YouTube allows you to customize additional settings for your video, such as the monetization options, visibility, and distribution options. Adjust these settings according to your preferences and requirements.
7. Start the Upload:
Once you have entered all the necessary details and customized settings, tap on the “Upload” button to start the upload process. The duration of the upload will depend on the size of your video and your internet connection speed.
8. Monitor the Upload Progress:
While the video is uploading, you can monitor the upload progress on the screen. You’ll see a progress bar that indicates how much of the video has been uploaded.
9. Add Additional Information:
After the video has finished uploading, you can add additional information such as end screens, cards, and annotations to enhance viewer engagement.
10. Publish your Video:
Finally, review all the information and settings once again and then tap on the “Publish” button to make your video public on YouTube. Congratulations! Your edited iPhone video is now live on YouTube and ready to be discovered by viewers around the world.
By following these simple steps, you can easily export and upload your edited iPhone videos to YouTube. Remember to optimize your video details and settings to make it more discoverable and engaging for your audience. Now, go ahead and share your amazing videos with the world!
In conclusion, editing iPhone videos for YouTube is a vital skill for any aspiring content creator or vlogger. The iPhone’s advanced camera capabilities and user-friendly editing apps make it a fantastic tool for capturing and producing high-quality videos. By following the steps outlined in this article, you can ensure that your YouTube videos stand out from the crowd with professional-level editing. Remember to experiment with different techniques, add your personal touch, and engage with your audience’s preferences. With practice and creativity, you can transform your iPhone videos into captivating content that will attract viewers and build your YouTube presence. So go ahead, grab your iPhone, unleash your creativity, and start creating amazing YouTube videos today!
FAQs
1. Can I edit iPhone videos directly on YouTube?
Unfortunately, YouTube does not have built-in editing tools to modify your iPhone videos directly on its platform. To edit your iPhone videos for YouTube, you’ll need to use third-party video editing software.
2. What are some popular video editing apps for iPhone?
There are several popular video editing apps available for iPhone, such as iMovie, Adobe Premiere Rush, Kinemaster, and LumaFusion. These apps offer various features and editing capabilities to help you create professional-looking videos for YouTube.
3. Can I add music to my iPhone videos?
Absolutely! Most video editing apps for iPhone allow you to add music to your videos. You can choose from a variety of soundtracks within the app, use your own music library, or even import royalty-free music to enhance the mood and atmosphere of your YouTube videos.
4. How can I trim or cut iPhone videos?
To trim or cut iPhone videos, you can use the built-in editing features of your iPhone’s Photos app or any third-party video editing app. Simply import the video into the app, locate the trimming tool, and select the portion of the video you want to keep. This will help you remove any unnecessary footage and create more concise and engaging YouTube content.
5. Are there any video editing tips for optimizing iPhone videos for YouTube?
Yes, there are a few tips you can follow to optimize your iPhone videos for YouTube. Firstly, make sure to shoot your videos in landscape mode for better viewing on different devices. Secondly, pay attention to lighting and audio quality to enhance the overall experience. Lastly, add engaging text, transitions, and interesting effects to make your videos visually appealing.