
Are you looking to merge or combine two videos on your iPhone? Whether you are creating a compilation of your favorite clips or trying to seamlessly merge footage for a professional project, knowing how to combine videos on your iPhone can come in handy.
In this article, we will guide you through the process of merging two videos directly on your iPhone, without the need for any third-party apps or software. We will explore the built-in features and functionalities of your iPhone that allow you to easily merge videos and create a single, cohesive video.
By following the step-by-step instructions provided, you will be able to effortlessly combine two videos on your iPhone and unleash your creativity through seamless video merging. So, let’s dive in and explore the world of video merging on your iPhone!
Inside This Article
- Step 1: Install a Video Editing App
- Step 2: Import the First Video
- Step 3: Import the Second Video
- Step 4: Arrange and Trim the Videos
- Step 5: Add Transitions (Optional)
- Step 6: Adjust Audio Settings
- Step 7: Preview and Save the Combined Video
- Conclusion
- FAQs
Step 1: Install a Video Editing App
Before you can combine two videos on your iPhone, you will need to install a reliable video editing app. This app will provide you with the necessary tools and features to merge your videos seamlessly. There are several video editing apps available in the App Store, so it’s important to choose one that suits your needs and preferences.
When selecting a video editing app, look for one that offers intuitive navigation, a user-friendly interface, and a wide range of editing options. Some popular video editing apps for iPhone include iMovie, Splice, and InShot. These apps offer robust video editing capabilities, including the ability to combine multiple videos, add transitions, apply filters, and adjust audio settings.
To install a video editing app, simply open the App Store on your iPhone and search for the app by name. Once you’ve found the app, tap on the “Get” or “Install” button to download and install it on your device. Depending on your internet connection, the installation process may take a few seconds or a few minutes.
Once the app is installed, you can launch it from your home screen and start using it to combine your videos. It’s a good idea to familiarize yourself with the app’s interface and features before proceeding to the next steps. This will ensure a smoother editing process and help you achieve the desired results.
Step 2: Import the First Video
Now that you have a video editing app installed on your iPhone, it’s time to import the first video you want to combine. Follow these simple steps to get started:
1. Open the video editing app on your iPhone. You may find it on your home screen or in the app drawer.
2. Look for an option that says “Import” or “+” symbol. Tap on it to open the import menu.
3. Depending on the app you are using, you will be presented with different options to import the video. You may have the choice to import from your camera roll, iCloud, or other cloud storage platforms. Select the appropriate option based on where your video is stored.
4. Once you have selected the import source, navigate to the location of your video file. This could be in a specific folder or the main gallery of your camera roll.
5. Tap on the video file you wish to import. The app will begin importing the video into its interface.
6. Depending on the size and duration of the video, the import process may take a few moments. Be patient and wait for the app to finish importing the video.
7. Once the video is imported, it will appear in the app’s media library or timeline. You can now proceed to the next steps to combine it with the second video.
Remember to repeat these steps for each video you want to import and combine into one final video. With these videos successfully imported, you are one step closer to creating your masterpiece!
Step 3: Import the Second Video
Now that you have successfully imported the first video into your video editing app, it’s time to bring in the second video to complete the combination process. Follow these simple steps to import the second video:
1. In the video editing app, locate the option to import media files. This could be represented by a “+” or “import” button.
2. Tap on the import button and a file browser will appear, allowing you to browse through your iPhone’s storage or cloud storage services.
3. Navigate to the location where your second video is stored. This could be in your camera roll, a specific folder, or a cloud storage service such as iCloud or Google Drive.
4. Once you’ve located the second video file, tap on it to select it. The video editing app will then begin importing the file into your project.
5. Depending on the size and duration of the video, the import process may take a few moments to complete. Be patient as the app transfers the video file into your project.
6. Once the import is finished, you will see the second video appear on your video timeline, right after the first imported video.
7. At this point, you have successfully imported both videos into the video editing app, and they are ready to be combined and edited further.
Remember, the order in which you import the videos may affect the final arrangement in your combined video. If you want the second video to play immediately after the first one, make sure to import it right after importing the first video.
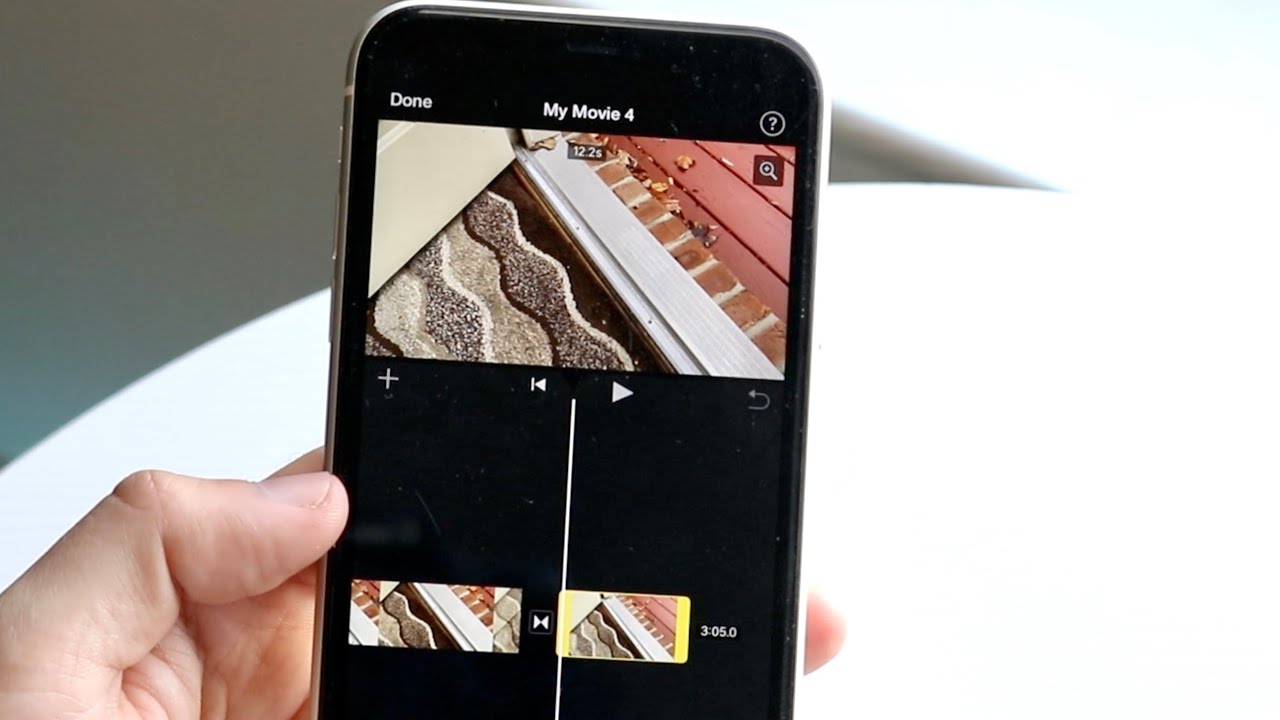
Step 4: Arrange and Trim the Videos
Once you have imported both videos into your chosen video editing app on your iPhone, it’s time to arrange and trim them to create a seamless combination. This step is crucial for ensuring that your final video flows smoothly and looks professional.
First, you will need to decide on the order in which you want the videos to appear. You can either place them one after the other, or if you have a more specific vision in mind, you can overlay them to create a picture-in-picture effect. This allows you to show both videos simultaneously, which can be particularly useful for tutorials or comparison videos.
After deciding on the arrangement, you can begin trimming the videos to remove any unwanted footage or unnecessary pauses. This is especially important if you are combining videos with different lengths or if there are sections that do not contribute to the main content. Trimming the videos will help you maintain the viewer’s attention and keep the final video concise.
To trim a video on your iPhone, you can use the video editing tools provided by your chosen app. Look for the trimming feature, which usually allows you to drag the edges of the video to set the desired start and end points. Make sure to preview the video as you trim it to ensure you are achieving the desired result.
When arranging and trimming the videos, it’s important to keep in mind the overall flow and story you want to convey. Consider the context and purpose of your video and make adjustments accordingly. You may also want to experiment with different transitions to smoothly transition between the videos.
Remember, the key is to maintain a cohesive and engaging narrative throughout the combined video. By arranging and trimming the videos effectively, you can create a visually appealing and well-paced final product.
Step 5: Add Transitions (Optional)
Once you have imported and arranged the videos in the desired order, you have the option to add transitions between them. Transitions are visual effects that help smoothen the transition between two clips, making the combined video look more professional and polished.
To add transitions, follow these simple steps:
-
Select the video clip before which you want to add a transition. This is usually the second video in the sequence.
-
In the video editing app, look for the “Transitions” or “Effects” tab, which usually contains a variety of transition options.
-
Browse through the available transitions and select the one that best suits your video. Popular options include fades, wipes, and dissolve effects.
-
Preview the transition by playing the video. Make any necessary adjustments to the duration or positioning of the transition to achieve the desired effect.
-
Repeat the process for any additional transitions you want to add throughout the video.
Adding transitions can greatly enhance the visual appeal of your combined videos, adding a level of professionalism and fluidity to the final output. However, it is important to use transitions judiciously and choose ones that complement the content and mood of the video. Too many or inappropriate transitions can make the video appear tacky or distract the viewer from the main message.
Remember, adding transitions is completely optional. If you prefer a more straightforward and seamless combination of the videos, you can choose to skip this step altogether.
Step 6: Adjust Audio Settings
After arranging and trimming the videos, it’s time to make sure the audio is in perfect sync. Adjusting the audio settings will ensure that both videos have clear and balanced sound.
First, check if the audio levels of the two videos are consistent. You don’t want one video to be significantly louder or softer than the other. Use the volume controls to adjust the audio levels accordingly. Most video editing apps have a simple slider that allows you to increase or decrease the volume of each track.
Next, consider the audio quality. If the videos have background noise or other audio issues, you can use the audio editing tools in the app to enhance the sound. Some apps offer features like noise reduction, equalizer settings, and audio filters to improve the audio quality. Experiment with these tools to find the right balance and clarity for your combined video.
If you have separate audio tracks for each video, you can also adjust the timing to make sure the audio aligns perfectly. Sometimes, when combining videos, the audio from one video may not sync properly with the other. Use the synchronization options in the app to align the audio tracks and ensure a seamless transition.
Additionally, you have the option to add background music or other audio effects to enhance the overall experience of the combined video. Look for the option to import audio files or use the built-in library of the video editing app to choose the perfect soundtrack or sound effects.
Remember to preview the combined video with the adjusted audio settings to ensure everything sounds as intended. Make any necessary adjustments until you are satisfied with the result.
Once you’re happy with the audio settings, proceed to the next step to preview and save your final combined video.
Step 7: Preview and Save the Combined Video
After arranging and editing your videos, it’s time to preview the final result and save the combined video on your iPhone. This step allows you to ensure that everything is as you intended before sharing or using the video for any purpose.
Most video editing apps have a preview feature that allows you to playback the combined video within the app itself. Tap on the play button or the preview option to watch the video from start to finish. Take this opportunity to check if the videos are seamlessly merged and all the edits are in place.
If you notice any issues or areas that need adjustment, you can go back to the respective steps and make the necessary changes. It’s crucial to have a thorough preview to avoid any surprises when you finally save the video.
Once you’re satisfied with the preview and confident that the combined video meets your expectations, it’s time to save it. Look for the “Save” or “Export” option within the video editing app. This will allow you to save the video to your iPhone’s camera roll or any other specified location.
Before saving, make sure to choose the desired video quality or resolution. Higher quality settings generally result in larger files, so keep that in mind if you have limited storage space on your device. Some apps may even offer different format options, allowing you to select the most compatible format for your needs.
Tap on the “Save” or “Export” button and wait for the app to process and save the combined video. The duration of this process will depend on the length and complexity of the video. Once it’s saved, you can access the video from your device’s gallery or any other designated location where you chose to save it.
Now that you have successfully previewed and saved the combined video on your iPhone, you can share it with friends, post it on social media, or use it for any other purpose you desire. Enjoy your creative masterpiece!
Conclusion
In conclusion, combining two videos on your iPhone is a simple and effective way to create unique and engaging content. With the advancement of technology, it has become easier than ever to edit videos directly on your mobile device. Whether you want to merge videos for a personal project or create captivating content for your social media platforms, the iPhone provides you with the tools you need.
By using the built-in iMovie app or third-party video editing apps, you can easily trim, arrange, and merge videos with just a few taps. The ability to combine videos on your iPhone empowers you to express your creativity and share your stories in a visually compelling manner.
Remember to follow the step-by-step instructions provided in this article and explore different editing techniques to make your videos truly stand out. So, grab your iPhone, unleash your imagination, and start creating captivating video content that will leave your audience amazed!
FAQs
FAQ 1: Can I combine two videos on my iPhone?
FAQ 2: What app can I use to merge videos on my iPhone?
FAQ 3: Is it possible to adjust the order of the videos before merging them?
FAQ 4: Can I add effects or filters to the merged video?
FAQ 5: What video formats are supported for merging on iPhone?