
Do you want to take perfectly aligned photos using your iPhone camera? Look no further! In this article, we will show you how to get a grid on your iPhone camera. The grid feature provides a helpful visual aid, allowing you to align your shots perfectly and create stunning, well-composed images.
Whether you’re an aspiring photographer or a casual snapping enthusiast, having a grid on your iPhone camera can greatly improve your photography skills. With the grid, you can adhere to the rule of thirds, balance elements in your frame, and capture more professional-looking photographs.
But how can you activate and use this feature? Don’t worry, we’ve got you covered. Read on to discover the step-by-step process to get a grid on your iPhone camera and start taking incredible photos with ease.
Inside This Article
- Setting up the Grid on iPhone Camera
- Benefits of Using a Grid on iPhone Camera
- Tips for Utilizing the Grid on iPhone Camera
- Conclusion
- FAQs
Setting up the Grid on iPhone Camera
Setting up the grid on your iPhone camera is a simple and effective way to improve your photography skills. The grid feature overlays a series of horizontal and vertical lines on your camera’s display, creating a grid pattern similar to a tic-tac-toe board. This grid helps you compose your shots by adhering to the rules of the “rule of thirds,” a popular compositional guideline in photography.
To enable the grid on your iPhone camera, follow these steps:
- Open the Settings app on your iPhone.
- Scroll down and tap on “Camera.”
- Under the Composition section, toggle the switch next to “Grid” to enable it.
Once you have enabled the grid, you can go back to the Camera app and start using it to capture better photos.
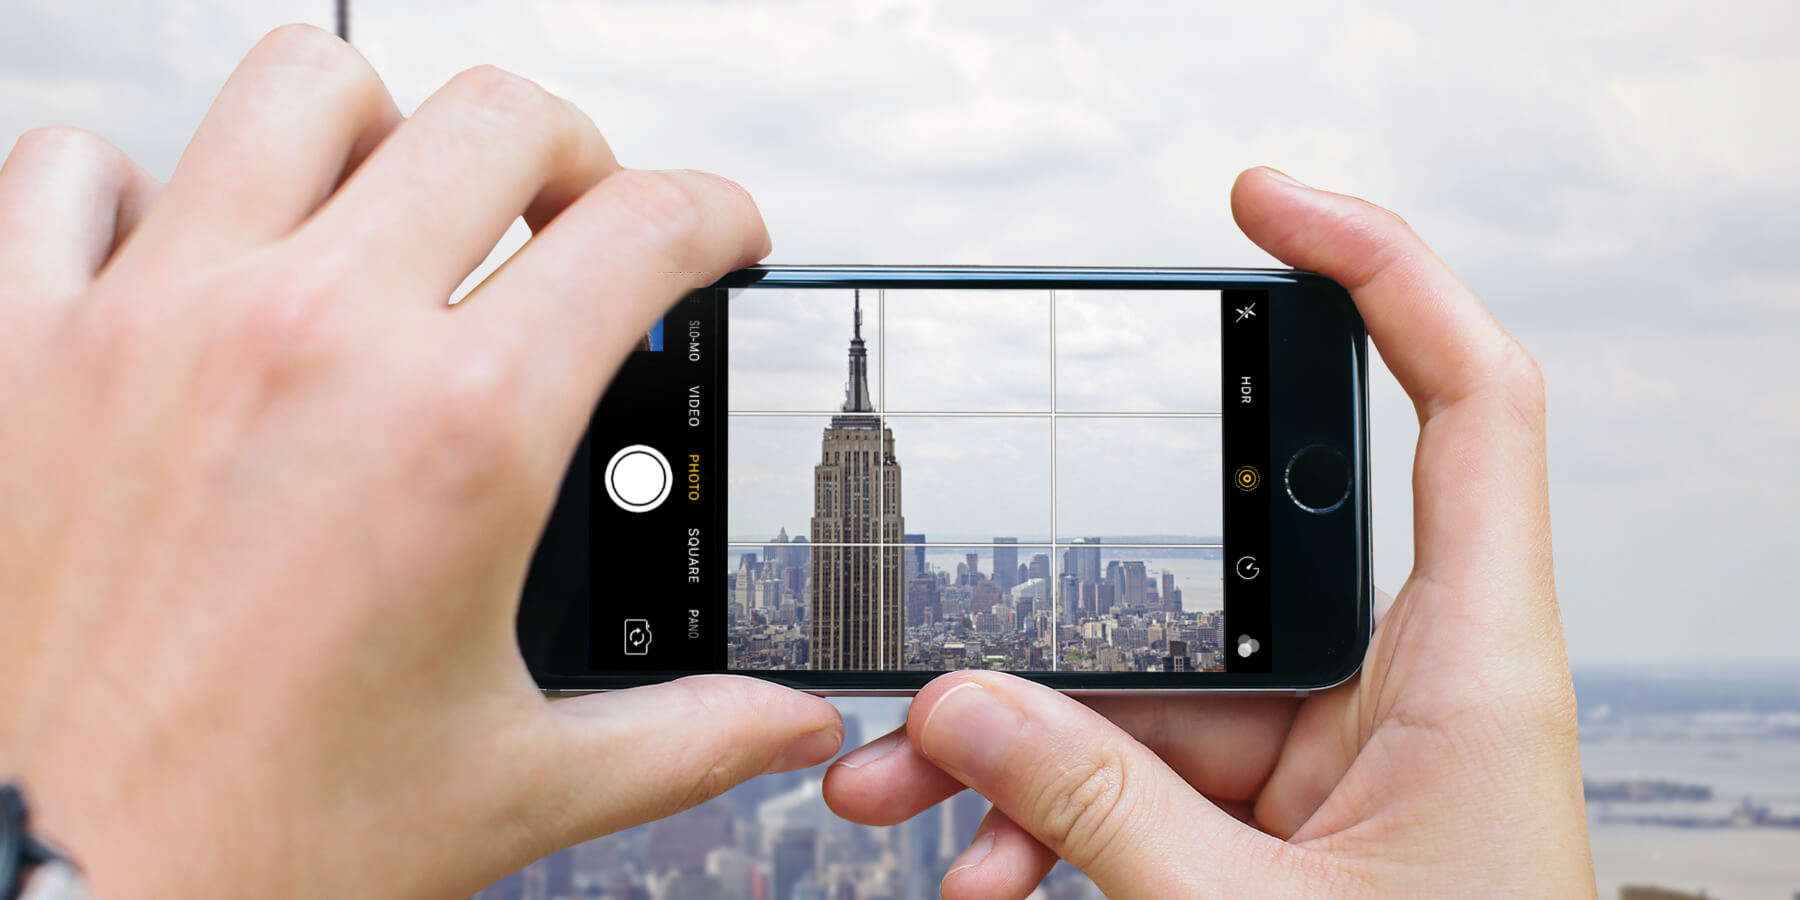
Now, when you open the Camera app on your iPhone, you will see the grid lines displayed on the screen. The grid consists of two horizontal lines and two vertical lines intersecting at four points, dividing the screen into nine equal parts. By aligning the subjects of your photos along these gridlines or at the intersection points, you can create more balanced and visually appealing compositions.
With the grid on your iPhone camera, you can also experiment with the placement of key elements within the frame. For example, you can position a subject along the vertical gridline to create a sense of symmetry. Or you can place the subject at one of the intersection points to draw attention and add visual interest to your photo.
Additionally, the grid can help you straighten your photos and ensure that the horizon or other important lines are level. By aligning the lines of your composition with the gridlines, you can achieve a more professional-looking image without the need for post-processing adjustments.
Overall, setting up the grid on your iPhone camera is a quick and easy process that can significantly enhance your photography skills. So go ahead, enable the grid feature on your iPhone camera, and start capturing stunning photos with improved composition.
Benefits of Using a Grid on iPhone Camera
Using a grid on your iPhone camera can greatly enhance your photography experience by providing several key benefits. Whether you’re a beginner or a seasoned photographer, the grid feature offers valuable assistance in composition and framing. Here are some of the top benefits of using a grid on your iPhone camera:
- Improved Composition: The grid on your iPhone camera helps you achieve better composition in your photos. It divides the frame into sections using horizontal and vertical lines, allowing you to position subjects and elements more effectively. By aligning key elements along these lines or at their intersections, you can create a visually balanced composition.
- Enhanced Rule of Thirds: The grid on your iPhone camera complements the rule of thirds, a fundamental principle in photography composition. The rule of thirds suggests that you should place key subjects or points of interest along the lines or at the intersection points of the grid. This helps to create a visually pleasing and well-balanced image.
- Straightened Horizons: One common challenge in photography is capturing straight horizons, especially when shooting landscapes or seascapes. With the grid, you can align the horizon with one of the horizontal lines to ensure a level and properly aligned shot.
- Guidance for Symmetry and Alignment: The grid is particularly helpful when capturing symmetrical subjects or when you want to align elements precisely. Whether you’re photographing architecture, patterns, or any other subject that requires symmetry, the grid provides a visual guide to ensure accurate alignment.
- Improved Framing and Balance: With the help of the grid, you can easily assess the balance and symmetry of your composition. It allows you to visually divide the frame and place elements in a way that creates a harmonious and visually appealing image.
- Assistance in Taking Straight Shots: Sometimes it can be challenging to keep your camera level and maintain straight lines in your photos. The grid helps you align your shot and ensure that your photos are straight and properly framed.
By utilizing the grid feature on your iPhone camera, you can enhance your composition skills, create visually balanced images, and improve the overall quality of your photos. It’s a simple yet powerful tool that can make a significant difference in your photography.
Tips for Utilizing the Grid on iPhone Camera
Once you have set up the grid on your iPhone camera, you can take full advantage of its features to improve your photography skills. Here are some tips to help you make the most of the grid:
1. Rule of Thirds: The grid on your iPhone camera is based on the rule of thirds, which states that an image is more visually appealing when the subject is placed along the intersecting lines or at the points of intersection. Use the grid to align your subject or key elements in your frame to achieve a well-balanced composition.
2. Horizon Alignment: When capturing landscapes or seascapes, use the grid to ensure a level horizon. Align the horizontal reference lines of the grid with the horizon in your frame to avoid tilted or crooked photos.
3. Symmetry and Balance: The grid can also help you achieve symmetry and balance in your photos. Experiment with aligning elements along the grid lines to create a sense of harmony and visual stability.
4. Leading Lines: Leading lines are powerful compositional tools that guide the viewer’s eye through the image. Look for natural lines, such as roads, fences, or pathways, and use the grid to position them in a way that adds depth and visual interest to your photos.
5. Framing: The grid can assist you in framing your subject within the image. Use the lines of the grid to position the subject within specific areas of the frame, creating a more compelling composition.
6. Angles and Perspectives: Play with different angles and perspectives by using the grid as a guide. Experimenting with tilting or placing your subject slightly off-center can result in unique and dynamic shots.
7. Enhancing Symmetry in Portrait Photography: When taking portraits, the grid can help you achieve better symmetry. Ensure that the eyes of your subject align with the horizontal grid lines to create a balanced and well-composed image.
8. Macro Photography: If you are interested in macro photography, the grid can help you achieve precise focus and composition. Use the grid to align and position your subject, making sure to capture the intricate details.
9. Experiment: Don’t be afraid to experiment and break the rules. While the grid provides useful guidelines, it’s always important to explore your own creativity and try different compositions. The grid can serve as a starting point, but sometimes the best shots come from thinking outside the lines.
By following these tips, you can take your iPhone photography to the next level. The grid on your iPhone camera is a powerful tool that can help you create visually stunning and well-composed images. So, go ahead, explore different perspectives, and let the grid assist you in capturing captivating moments.
The iPhone is undoubtedly a powerful device that is not only capable of capturing stunning photos, but also offers a plethora of features to enhance the photography experience. One such feature is the grid on the iPhone camera, which provides a helpful guide for composition and alignment.
By enabling the grid on your iPhone camera, you can improve your photography skills and take visually appealing photos. The grid helps you follow the rule of thirds, balance elements within the frame, and ensure straight horizons. It serves as a valuable tool for both amateur and professional photographers, allowing them to create well-composed and visually engaging images.
Whether you want to capture breathtaking landscapes, beautiful portraits, or artistic shots, the grid on your iPhone camera can assist you in achieving the desired results. With a simple flick of a switch, you can enable the grid and unlock new creative possibilities.
So, take advantage of this feature and start experimenting with different compositions and alignments to take your iPhone photography to the next level. Embrace the power of the grid and let it guide you towards capturing stunning images that are both visually striking and technically precise.
FAQs
1. How can I get a grid on my iPhone camera?
To get a grid on your iPhone camera, follow these steps:
– Open the “Settings” app on your iPhone.
– Scroll down and tap on “Camera”.
– Toggle the switch next to “Grid” to turn it on.
– Exit the settings and open the camera app. You will now see a grid overlay on your camera screen, helping you align your photos using the rule of thirds.
2. Why would I want to use a grid on my iPhone camera?
Using a grid on your iPhone camera can greatly improve the composition of your photos. The grid divides the screen into nine equal parts, with two horizontal and two vertical lines intersecting at four points. This follows the rule of thirds, a widely recognized principle of photography composition. By aligning elements along these gridlines or at the points where they intersect, you can create more balanced and visually appealing images.
3. Can I customize the grid on my iPhone camera?
Unfortunately, at the moment, there is no option to customize the grid on the iPhone camera. The grid follows a standard nine-part composition rule based on the rule of thirds. However, you can adjust your composition within this framework to create unique and visually interesting photos.
4. Does using the grid affect the quality of my iPhone photos?
Using the grid on your iPhone camera does not affect the quality of your photos. The grid is simply an overlay on your camera screen that helps you with composition. It does not alter the image quality or resolution in any way. You can capture stunning photos with or without the grid, depending on your preference and compositional needs.
5. Can I get a grid on the front-facing camera of my iPhone?
Yes, you can get a grid on the front-facing camera of your iPhone by following the same steps as mentioned earlier. Open the “Settings” app, tap on “Camera,” and toggle the switch next to “Grid” to turn it on. This will enable the grid overlay on both the rear and front-facing cameras, allowing you to compose your selfies or video calls more effectively.