
Discovering that your phone charger has come into contact with water can be an alarming situation. Whether it’s due to an accidental spill, rain, or even dropped in a water-filled environment, water and electronics simply don’t mix. However, there’s no need to panic just yet. In this article, we will explore effective methods to get water out of your phone charger and potentially save it from damage. By following these steps, you can increase the chances of salvaging your charger and getting it back to perfect working condition. So, if you’re facing a wet phone charger, read on to find out how to handle this pesky situation.
Inside This Article
- Method 1: Power Off and Shake
- Method 2: Use a Vacuum Cleaner
- Method 3: Absorb with Rice
- Method 4: Air Dry with Silica Gel Packs
- Conclusion
- FAQs
Method 1: Power Off and Shake
One of the first things you should do when you accidentally get water in your phone charger is to power off your phone immediately. This is crucial to prevent any short-circuits or further damage to your device. Once your phone is powered off, you can proceed to the next step.
Now, gently remove the charger from your phone and shake it to remove any excess water. Hold the charger with the port facing downwards and give it a few gentle shakes. The idea here is to let gravity assist in getting the water out. Be careful not to shake it too vigorously, as this could cause damage to the charger or the port.
Keep in mind that this method may not be completely effective in removing all the water from the charger. It primarily helps to get rid of the larger water droplets. To ensure the best possible results, you should consider combining this method with others to thoroughly dry your charger.
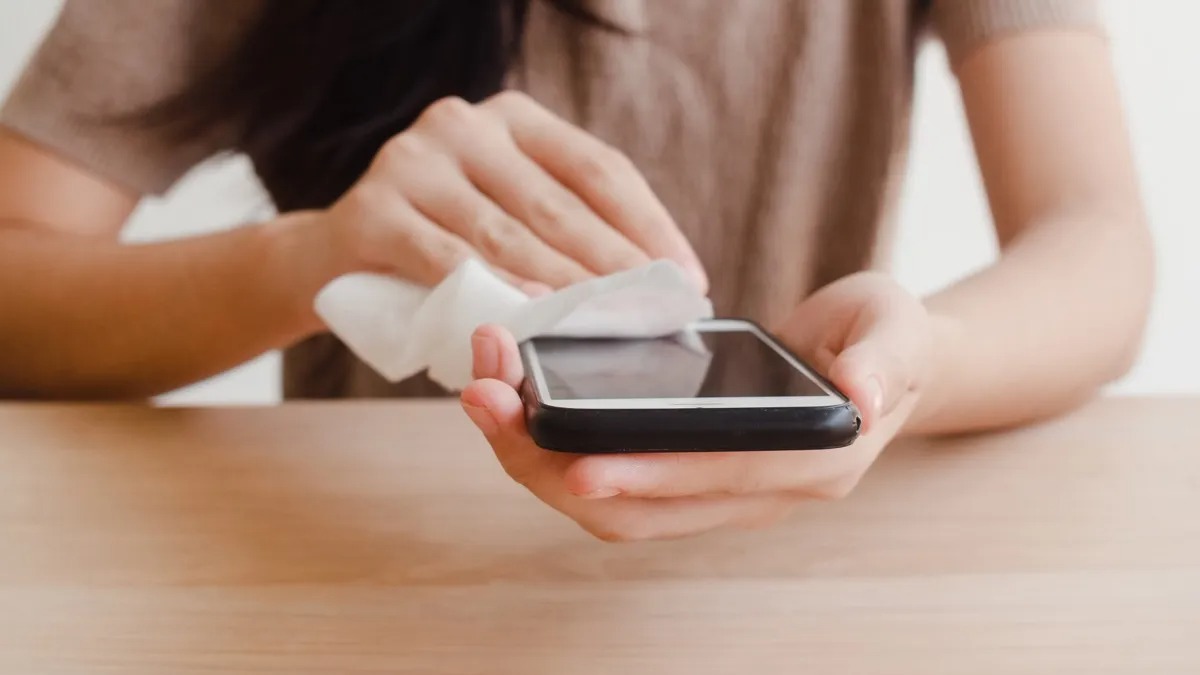
It’s important to note that water can sometimes travel inside the charger cable itself. In such cases, gently bend the cable to encourage any trapped water to come out. You can also use a clean, dry cloth or paper towel to carefully wipe the charger and cable to remove any moisture.
Once you’ve completed the shaking and wiping process, you can let the charger air-dry for a couple of hours before attempting to use it again. This will allow any remaining moisture to evaporate naturally. However, keep in mind that air-drying may not be sufficient in completely removing all the water, especially if it has seeped deep into the charger.
While this method can be helpful in certain situations, it’s always a good idea to proceed with caution. If you’re unsure about the extent of the water damage or if your charger continues to malfunction even after drying, it’s best to consult a professional or contact the manufacturer for further assistance.
Method 2: Use a Vacuum Cleaner
If your phone charger has come into contact with water, using a vacuum cleaner can be an effective method to remove the moisture. This method is particularly useful when the charger port is difficult to access or when you want to avoid using heat-based methods.
To begin, make sure your phone charger is disconnected from any power sources. This is important to avoid any potential damage to the charger or your phone. Next, take a vacuum cleaner with a small nozzle attachment. Ensure that the nozzle is clean and free from any debris.
Gently insert the nozzle into the charger port, applying a light amount of suction. Move the nozzle around inside the port to create a suction effect. The vacuum cleaner will help draw out any moisture that may be present in the charger.
While using the vacuum cleaner, be careful not to exert excessive force or damage the charger port. Use a gentle and controlled motion to avoid causing any harm. It is also important to avoid touching any metal components inside the charger port, as this could cause further damage.
Continue using the vacuum cleaner for a couple of minutes to ensure all the moisture is removed. Once you are satisfied, disconnect the vacuum cleaner and inspect the charger port for any remaining moisture. If you still notice any dampness, repeat the process until the charger port is completely dry.
After you have finished using the vacuum cleaner, make sure to let the charger air dry naturally for a few hours before attempting to use it again. This will ensure that any residual moisture is evaporated, preventing any potential damage to the charger or your phone.
Using a vacuum cleaner is a convenient and effective way to remove water from your phone charger. However, it is important to note that this method may not be suitable for chargers with delicate or sensitive components. If you are uncertain or if the charger continues to malfunction after attempting this method, it is recommended to seek professional assistance or consider replacing the charger altogether.
Method 3: Absorb with Rice
Accidents happen, and dropping your phone charger in water can be a common one. Don’t panic! One effective method to try is using rice to absorb the moisture. Rice is a natural desiccant that can help draw out the water from your charger.
Here’s what you need to do:
- Remove the charger from the water immediately. The longer it stays submerged, the higher the chances of internal damage.
- Wipe off any visible water using a clean cloth or tissue. Make sure to be gentle and avoid pushing water further into the charger.
- Fill a container or a plastic bag with uncooked rice. Place the charger inside the rice, ensuring it is completely covered. Rice works by absorbing moisture, so make sure there is enough to effectively draw out the water.
- Seal the container or bag and leave it undisturbed for at least 24 to 48 hours. This will give the rice enough time to work its magic and absorb the moisture from the charger.
- After the designated time, carefully remove the charger from the rice. Inspect it for any remaining moisture or rice particles. Use a soft brush or cloth to clean off any residue.
- Wait for a few more hours to ensure the charger is completely dry before attempting to use it. Plugging in a wet charger can risk further damage to your device.
Note that while using rice is a popular method, it is not foolproof. It may not work in all cases, especially if the water damage is severe or if the charger was submerged for an extended period of time. Additionally, rice grains can potentially get stuck in the charger port, so be cautious while handling the charger after using this method.
If your charger still doesn’t work after trying the rice method, it’s best to consult a professional or look for a replacement. Remember, prevention is better than cure, so always take precautions to keep your phone charger away from water and other liquids.
Method 4: Air Dry with Silica Gel Packs
If your phone charger has come into contact with water, you may be wondering how to remove the moisture and ensure it continues to function properly. One effective method is to use silica gel packs to absorb the moisture and dry out the charger.
Silica gel packs are tiny, translucent beads that are commonly found in packaging for products like shoes, electronics, or even food. They are actually a form of desiccant, which means they have a high affinity for water and can draw moisture out of the surrounding environment.
Here’s how to use silica gel packs to air dry your phone charger:
- Start by removing the wet charger from any power source and disconnect it from your phone or other devices.
- Wipe off any excess water from the charger using a dry cloth or paper towel.
- Take a few silica gel packs and place them in a small, sealable plastic bag.
- Gently place the wet charger inside the bag with the silica gel packs.
- Seal the bag tightly, ensuring no air can enter or escape.
- Leave the charger in the bag with the silica gel packs for at least 24 to 48 hours.
- During this time, the silica gel packs will absorb the moisture from the charger, helping to dry it out.
- After the specified time has passed, carefully remove the charger from the bag.
- Inspect the charger for any remaining moisture. If it seems dry and there are no signs of water, you can proceed to reconnect it to your phone or other devices.
It’s important to note that while silica gel packs can be effective in drying out wet electronics, they may not always guarantee a complete restoration of functionality. Water damage can be unpredictable, and some components may have already been affected beyond repair. However, using silica gel packs is still worth a try as it can significantly increase the chances of saving your phone charger.
In addition to using silica gel packs, it’s also essential to avoid using heat sources like hairdryers or ovens to dry your charger. The heat can potentially damage the internal components and exacerbate the water damage further.
By following the steps above and allowing the silica gel packs to absorb the moisture, you can increase the likelihood of saving your phone charger from water damage. Remember to exercise caution and patience throughout the drying process, and if all else fails, consult a professional for assistance.
In conclusion, dealing with a water-damaged phone charger can be a frustrating experience. However, by following the steps outlined in this article, you can increase your chances of salvaging and restoring your charger. Remember to act quickly, disconnect the charger from any power source, dry it thoroughly, and use rice or a desiccant to absorb any remaining moisture. It’s also essential to avoid using any heat sources or attempting to repair the charger yourself, as this may cause further damage or pose a safety risk.
By being proactive and taking immediate action, you can potentially save your phone charger and avoid the expense of purchasing a new one. However, if your charger is still not working or if you prefer to err on the side of caution, it’s always a good idea to contact a professional for assistance. They will have the expertise and tools necessary to diagnose and repair any internal damage.
Remember, prevention is always the best course of action. Protect your phone charger from water damage by keeping it away from liquids and investing in waterproof or water-resistant chargers whenever possible. Taking these steps will help ensure a long and reliable lifespan for your charger.
FAQs
Q: Can I use a hairdryer to dry my phone charger?
A: It is not recommended to use a hairdryer to dry your phone charger, as the heat can potentially damage or melt the internal components. Instead, it is best to allow the charger to air dry naturally or use a gentle heat source, such as sunlight.
Q: What should I do if my phone charger gets wet?
A: If your phone charger gets wet, the first step is to unplug it from the power source and disconnect it from your phone. Thoroughly dry the charger with a clean cloth or towel, and then leave it in a well-ventilated area to air dry completely before attempting to use it again.
Q: Can I use rice to dry out my phone charger?
A: While rice is commonly used to absorb moisture from electronic devices, it may not be the most effective option for drying out a phone charger. Rice can get stuck in the charging port, causing more damage. It is better to opt for other methods like air drying or using silica gel packets to absorb moisture.
Q: How can I prevent my phone charger from getting wet?
A: To prevent your phone charger from getting wet, it is important to keep it away from water sources, such as sinks, pools, or rain. Additionally, consider using a waterproof phone case or a charging cable with a waterproof cover for added protection.
Q: My phone charger is not working after getting wet. What can I do?
A: If your phone charger is not working after getting wet, it is advisable to discontinue using it to avoid any potential safety hazards. Instead, you can replace the charger with a new one or consult a professional technician to see if it can be repaired.