
The iPhone 11 is a powerful and sleek device with a host of impressive features. One important aspect of setting up your new iPhone 11 is inserting the SIM card. The SIM card is what connects your iPhone to your cellular network, allowing you to make calls, send messages, and access the internet. While the process of inserting a SIM card may seem daunting at first, it is actually quite simple once you know the steps. In this article, we will guide you through the process of inserting a SIM card into your iPhone 11, ensuring that you can quickly get connected and start enjoying all the amazing capabilities that the iPhone 11 has to offer.
Inside This Article
- Checking the SIM Card Slot location
- Gathering the Necessary Tools
- Inserting the SIM Card into the iPhone 11
- Activating the SIM Card
- Conclusion
- FAQs
Checking the SIM Card Slot location
Before you start inserting the SIM card into your iPhone 11, the first step is to locate the SIM card slot. The SIM card slot on the iPhone 11 is located on the right side of the device. It is a small tray that can be easily accessed using a SIM card ejector tool.
To find the exact location of the SIM card slot, hold your iPhone 11 with the screen facing you. Look towards the right edge of the device. You will see a small pinhole just below the power button. This is where the SIM card slot is located.
If you are having trouble locating the SIM card slot, refer to the user manual or the manufacturer’s website for a detailed diagram or illustration.
It’s important to ensure that your device is powered off before attempting to insert or remove the SIM card. This will prevent any potential damage to both the SIM card and your iPhone 11.
Gathering the Necessary Tools
Before inserting a SIM card into your iPhone 11, it’s essential to gather the necessary tools to ensure a seamless and hassle-free process. Here are the tools you’ll need:
- iPhone SIM card eject tool: This tool is designed specifically for removing SIM cards from iPhones. It typically comes with the original packaging of the device, but if you’ve misplaced it, you can purchase one separately from an Apple store or online.
- Paperclip or SIM card removal tool: If you don’t have an iPhone SIM card eject tool, you can use a paperclip or a similar small, pointy object as an alternative. However, be cautious not to damage the SIM card or the SIM card tray while using this makeshift tool.
- Clean cloth or microfiber cloth: It’s important to ensure that both the SIM card and the SIM card tray are free from any dust, dirt, or debris. Using a clean cloth or microfiber cloth will help clean the surfaces and prevent any issues with the SIM card connection.
Gathering these tools beforehand will make the process of inserting the SIM card into your iPhone 11 much easier and more efficient. Ensure that you have all the necessary tools readily available before proceeding with the next steps.
Inserting the SIM Card into the iPhone 11
When it comes to setting up your new iPhone 11, one of the first tasks you’ll need to tackle is inserting the SIM card. The SIM card is essential as it enables your phone to connect to your mobile network and make calls, send messages, and access the internet. Here’s a step-by-step guide to help you insert the SIM card into your iPhone 11:
1. Power off your iPhone 11: Before you begin, make sure your iPhone 11 is turned off. This will prevent any potential damage to your device or the SIM card during the process.
2. Locate the SIM card tray: The SIM card tray on the iPhone 11 is located on the right side of the device. It can be easily identified by a small circular pinhole.
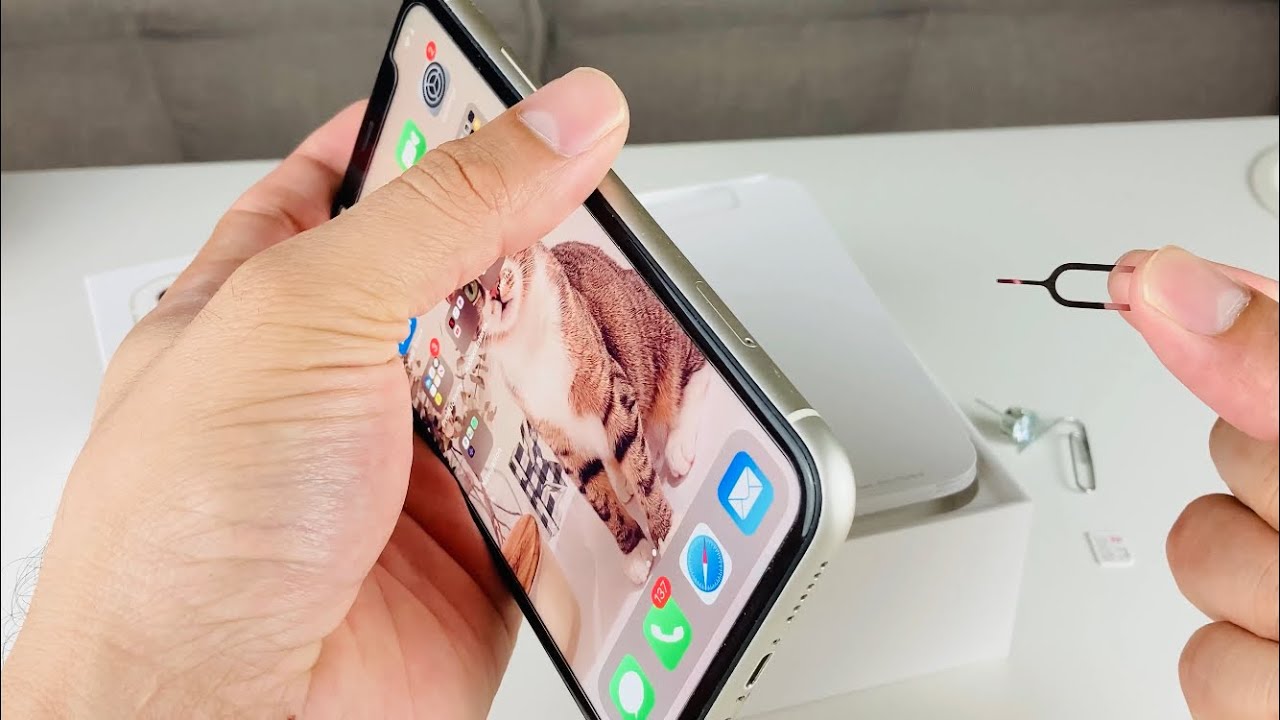
3. Gather the necessary tools: To access the SIM card tray, you’ll need a SIM eject tool or a small paperclip. If you don’t have either of these tools on hand, you can also use a push pin with a sharp tip.
4. Insert the SIM eject tool: Take the SIM eject tool or the paperclip and gently insert it into the pinhole on the SIM card tray. Apply a small amount of pressure until the tray pops out.
5. Remove the SIM card tray: Once the tray pops out, carefully pull it out from the iPhone 11. Take note of the orientation of the tray, as it will help you correctly position the SIM card.
6. Place the SIM card on the tray: Take your SIM card and ensure it is properly aligned with the tray. The iPhone 11 uses a nano SIM card, so make sure you have the correct size. Place the SIM card onto the tray, with the gold contacts facing downward.
7. Reinsert the SIM card tray: Once the SIM card is securely placed on the tray, carefully reinsert the tray back into the iPhone 11. Make sure it fits snugly and flush with the device.
8. Power on your iPhone 11: Now that the SIM card is inserted, you can power on your iPhone 11. Wait for a few moments as the device establishes a connection with your mobile network.
You have successfully inserted the SIM card into your iPhone 11! Now you can enjoy the full functionality of your device, including making calls, sending messages, and accessing the internet. If you encounter any issues, double-check that the SIM card is properly inserted and try restarting your iPhone 11.
Activating the SIM Card
Once you have successfully inserted the SIM card into your iPhone 11, the next step is to activate it. Activating the SIM card allows your device to connect to your cellular network and make calls, send messages, and use mobile data. Here are the steps to activate your SIM card:
- Connect to Wi-Fi: Before you can activate your SIM card, make sure that your iPhone is connected to a Wi-Fi network. This is essential for the activation process.
- Follow the on-screen prompts: Once connected to Wi-Fi, your iPhone will guide you through the activation process. You may be prompted to enter your Apple ID and password or create a new Apple ID if you don’t have one already.
- Wait for carrier activation: After following the on-screen prompts, your iPhone will begin the carrier activation process. This may take a few minutes, so be patient and avoid interrupting the process.
- Restart your iPhone: Once the activation process is complete, it is recommended to restart your iPhone. This helps ensure that all settings and configurations are properly applied.
- Test your SIM card: After restarting your iPhone, check if your SIM card is activated by making a test call or sending a text message. If successful, it means your SIM card is activated and ready to use.
It is important to note that the activation process may vary slightly depending on your cellular network provider. Some providers may require additional steps or authorization codes. If you encounter any issues during the activation process, it is recommended to contact your cellular network provider for assistance.
With your SIM card successfully activated, you can now enjoy all the features and benefits of your iPhone 11, including making calls, sending messages, and accessing the internet on a mobile data connection. Ensure that you have an active mobile plan with your cellular network provider to avoid any disruptions in service.
In conclusion, inserting a SIM card in your iPhone 11 is a straightforward process that can be done in just a few simple steps. By following the instructions provided in this guide, you can easily access cellular services, make calls, send messages, and connect to the internet using your iPhone 11. It’s important to note that the iPhone 11 utilizes a nano-SIM card, which is a smaller variant of the traditional SIM card.
Remember to power off your iPhone before inserting or removing the SIM card to avoid causing any damage to the device. Additionally, if you encounter any issues or difficulties during the SIM card insertion process, it is recommended to consult the user manual provided with your iPhone 11 or seek assistance from an authorized service center.
With your SIM card successfully inserted into your iPhone 11, you can now enjoy the full range of features and functionalities that it has to offer, ensuring seamless communication and connectivity wherever you go.
FAQs
Q: How do I insert the SIM card into my iPhone 11?
A: To insert the SIM card into your iPhone 11, follow these steps:
- Locate the SIM card slot on the side of your iPhone 11.
- Using the SIM card eject tool or a paperclip, gently insert it into the small hole next to the SIM card slot.
- Apply a little pressure to eject the SIM card tray.
- Place your SIM card on the tray, making sure the gold contacts are facing down.
- Gently push the tray back into the slot until it clicks into place.
- Your iPhone will now initiate the activation process for your SIM card.
Q: Can I use any SIM card with my iPhone 11?
A: Yes, the iPhone 11 is unlocked and can be used with any compatible SIM card from a supported carrier. However, it’s important to note that some carriers may require you to have a specific type of SIM card or activate the device on their network before usage.
Q: How do I remove the SIM card from my iPhone 11?
A: To remove the SIM card from your iPhone 11, follow these steps:
- Locate the SIM card slot on the side of your iPhone 11.
- Using the SIM card eject tool or a paperclip, gently insert it into the small hole next to the SIM card slot.
- Apply a little pressure to eject the SIM card tray.
- Take out the SIM card from the tray.
- Gently push the tray back into the slot until it clicks into place.
Q: Can I use a nano-SIM or eSIM on the iPhone 11?
A: Yes, the iPhone 11 supports the use of both a nano-SIM and eSIM. You can choose to use either a physical nano-SIM card or activate the eSIM functionality, depending on your preference and carrier support.
Q: What should I do if my iPhone 11 doesn’t recognize the SIM card?
A: If your iPhone 11 doesn’t recognize the SIM card, try the following troubleshooting steps:
- Ensure that the SIM card is properly inserted into the SIM card slot.
- Restart your iPhone 11 and check if the SIM card is detected.
- If the issue persists, try removing and reinserting the SIM card.
- Test the SIM card in another compatible device to determine if the problem lies with the iPhone or the SIM card itself.
- If none of the above steps resolve the issue, contact your carrier for further assistance.