
With the increasing importance of smartphones in our day-to-day lives, it is crucial to prioritize the security of our mobile devices. One of the most common security measures found in smartphones today is the ability to lock the screen and disable features like Face ID or fingerprint recognition. This provides an extra layer of protection, preventing unauthorized access to sensitive information.
In this article, we will explore how to lock the screen on an iPhone and disable Face ID in a pinch. Whether you find yourself in a situation where you need to quickly secure your device or if you simply want to familiarize yourself with these features for future use, we’ve got you covered.
So, if you’re ready to learn how to safeguard your iPhone and protect your privacy, let’s dive in and unlock the secrets of locking the iPhone screen and disabling Face ID.
Inside This Article
How to Lock iPhone Screen & Disable Face ID in a Pinch (2023)
Having the ability to quickly and easily lock your iPhone screen and disable Face ID can be incredibly useful, especially in situations where you want to protect your privacy or prevent unauthorized access to your device. In this guide, we’ll walk you through the steps to lock your iPhone screen and disable Face ID in a pinch.
Locking the iPhone screen is an essential security measure that ensures your device remains inaccessible to prying eyes. To lock your iPhone screen, simply press the Sleep/Wake button located on the side or top of your device, depending on the model. This will instantly turn off the screen and prevent anyone from accessing your device without your passcode or biometric authentication.
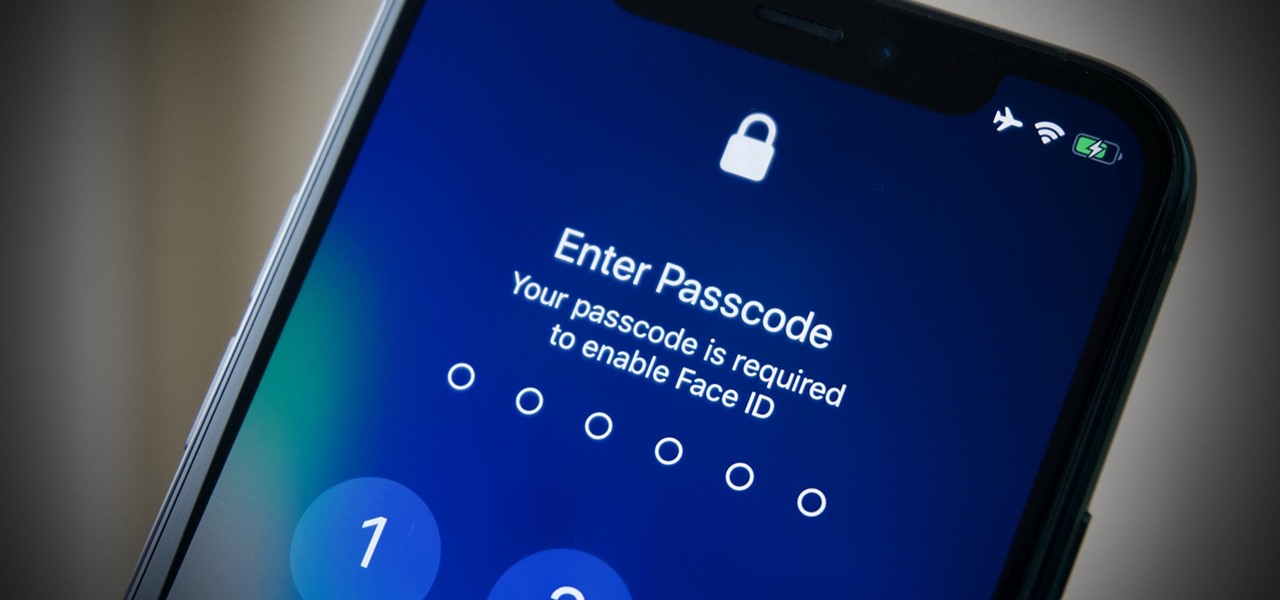
If you’re using an iPhone with Face ID, such as the iPhone X or newer models, you can also disable Face ID temporarily. This is particularly handy when you find yourself in a situation where you don’t want Face ID to unlock your device automatically. To disable Face ID, swipe up from the bottom of the screen to access the Control Center. Then, tap on the Face ID icon to temporarily disable it. This will require you to enter your passcode to unlock your iPhone.
Another helpful feature that can come in handy is Guided Access. Guided Access allows you to restrict access to a specific app and lock your iPhone into that app, preventing anyone from accessing other apps or features. To enable Guided Access, go to Settings, then Accessibility, and select Guided Access. From there, you can turn on Guided Access and set a passcode to prevent others from exiting the app without your permission.
Lastly, if you find yourself in an emergency situation and need to quickly disable Face ID, you can use the SOS Mode feature on your iPhone. Simply press and hold the Sleep/Wake button and one of the volume buttons simultaneously. This will activate the SOS Mode, which offers quick access to emergency services and temporarily disables Face ID until you enter your passcode.
Conclusion
Locking your iPhone screen and disabling Face ID are crucial steps to ensure the security and privacy of your device. Whether you need to quickly secure your phone in a pinch or temporarily disable Face ID for certain situations, it’s important to know the steps to take.
By following the instructions provided in this article, you can easily lock your iPhone screen using the side button or control center, as well as disable Face ID temporarily. These measures will help protect your personal information from unauthorized access and safeguard your device against potential threats.
Remember, even though technology continues to advance, malicious actors are constantly finding new ways to exploit vulnerabilities. By staying vigilant and taking proactive steps to secure your iPhone, you can enjoy the many benefits of your device while keeping your data and privacy intact. Don’t wait – take action today and keep your iPhone locked and secure!
FAQs
Here are some frequently asked questions about locking the iPhone screen and disabling Face ID:
1. How do I lock my iPhone screen?
To lock your iPhone screen, simply press the power button located on the side or top of your device. This will turn off the display and put your iPhone into sleep mode. Alternatively, you can also lock your screen by enabling the Auto-Lock feature in the Settings app. This feature automatically locks your screen after a specified period of inactivity.
2. Can I temporarily disable Face ID on my iPhone?
Yes, you can temporarily disable Face ID on your iPhone by pressing the power button and either volume button simultaneously. This action will activate the Emergency SOS feature, which automatically disables Face ID. You can also disable Face ID by going to the Settings app, selecting Face ID & Passcode, and turning off the toggle for Face ID.
3. Why would I want to disable Face ID?
There may be situations where you want to quickly disable Face ID on your iPhone, such as when traveling to a location where facial recognition may not be reliable or secure. Disabling Face ID can also be useful if you want to prevent others from unlocking your iPhone without your consent.
4. Can I use a passcode instead of Face ID to unlock my iPhone?
Yes, you can use a passcode instead of Face ID to unlock your iPhone. To set up a passcode, go to the Settings app, select Face ID & Passcode, enter your current passcode, and choose “Turn Passcode On.” You can then enter a new passcode of your choice. Once set up, you can use the passcode to unlock your iPhone instead of relying on Face ID.
5. How do I enable Face ID again after disabling it?
To enable Face ID again after disabling it, go to the Settings app, select Face ID & Passcode, and turn on the toggle for Face ID. You may be prompted to enter your passcode to complete the process. Once enabled, you can use Face ID to unlock your iPhone and authenticate various actions and apps.