
Are you someone who has been using Verizon as your cell phone carrier but is now considering making the switch to US Cellular? Look no further, as we have the ultimate guide to help you seamlessly transition from Verizon to US Cellular. Switching cell phone carriers may seem like a complicated process, but with the right information and guidance, it can be a smooth and hassle-free experience. In this article, we will provide you with step-by-step instructions on how to switch from Verizon to US Cellular, along with tips, tricks, and FAQs to ensure you have all the necessary information to make an informed decision. So, if you’re ready to embark on your journey to switch carriers, let’s dive right in!
Inside This Article
- Benefits of Switching to US Cellular
- Steps to Switch from Verizon to US Cellular
- Transferring Your Phone Number
- Setting Up and Activating Your New US Cellular Phone
- Transferring Your Contacts and Data
- Cancelling Your Verizon Service
- Common Issues and Troubleshooting Tips
- Conclusion
- FAQs
Benefits of Switching to US Cellular
Switching from Verizon to US Cellular comes with a multitude of benefits that can enhance your mobile phone experience. Here are some key advantages of making the switch:
- Expansive Coverage: US Cellular boasts an extensive network that covers a wide geographical area. Whether you’re in a bustling city or a rural area, you can expect reliable coverage and fewer dropped calls.
- Flexible Plans: US Cellular offers a variety of flexible plans to suit your needs. From unlimited data plans to family sharing options, you can find a plan that fits your lifestyle and budget.
- Competitive Pricing: The competitive pricing offered by US Cellular can save you money in the long run. With affordable plans and the option to bring your own device, you can enjoy top-notch service without breaking the bank.
- Excellent Customer Service: US Cellular is known for its exceptional customer service. Their knowledgeable representatives are readily available to assist you with any inquiries or concerns, ensuring a smooth transition and ongoing support.
- Growing 5G Network: US Cellular is rapidly expanding its 5G network to deliver faster speeds and improved connectivity. By switching to US Cellular, you can take advantage of this cutting-edge technology and enjoy seamless browsing, streaming, and downloading.
- Device Compatibility: US Cellular supports a wide range of devices, including the latest smartphones and tablets. Whether you have an iPhone, Samsung Galaxy, or any other popular brand, you can easily switch your device and continue using it with US Cellular’s network.
- Reward Programs: US Cellular offers various reward programs, such as loyalty rewards and referral bonuses, that allow you to earn discounts and perks. These programs can add extra value to your mobile phone experience and make switching even more appealing.
By switching from Verizon to US Cellular, you gain access to a reliable network, flexible plans, competitive pricing, excellent customer service, advanced technology, device compatibility, and rewarding programs. Take the leap and experience the benefits of US Cellular for yourself!
Steps to Switch from Verizon to US Cellular
Switching from Verizon to US Cellular is a straightforward process that will allow you to enjoy new network coverage and access to exclusive benefits. Whether you’re looking for better service, lower pricing, or a change of pace, making the switch can be done in just a few simple steps. Here’s a step-by-step guide to help you transition smoothly:
Step 1: Research US Cellular Plans
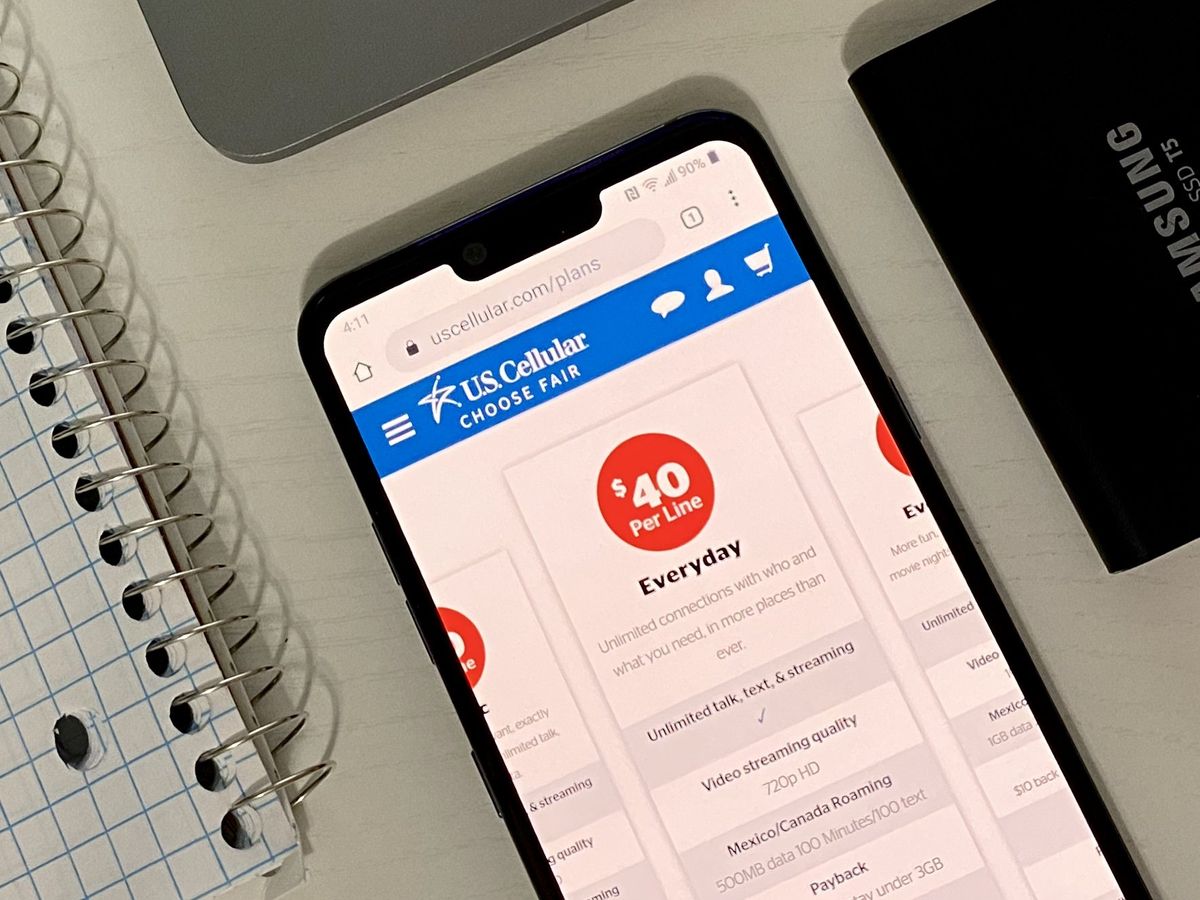
Start by researching the available plans and options offered by US Cellular. Compare them with your current Verizon plan to determine which one meets your needs and budget the best. Take into account factors such as data allowance, text and call packages, and any special deals or promotions.
Step 2: Check Coverage in Your Area
Visit the US Cellular website or contact their customer service to check the coverage in your area. It’s important to ensure that there is reliable service and good signal strength at your home, workplace, and other frequently visited locations. This step will help you avoid any potential connectivity issues later on.
Step 3: Purchase a US Cellular Phone
If you don’t already have a compatible phone, you will need to purchase one from US Cellular. You have the option to buy a new phone outright or choose a payment plan that works for you. Make sure to select a device that is compatible with the US Cellular network and meets your personal preferences.
Step 4: Backup Your Data
Before making the switch, it’s crucial to back up all your important data, including contacts, photos, and any files stored on your current phone. You can do this by using cloud storage services, transferring data to your computer, or using dedicated backup apps. This step will ensure a smooth transition without the risk of losing any valuable information.
Step 5: Activate your US Cellular Service
Once you have your new US Cellular phone and have backed up your data, it’s time to activate your US Cellular service. You can do this by either visiting a US Cellular store or by calling their customer service helpline. They will guide you through the activation process and help you set up your new phone.
Step 6: Port your Phone Number
If you wish to keep your existing phone number, you can request a “port-in” from Verizon to US Cellular. To initiate the process, provide US Cellular with your Verizon account details and let them handle the transfer of your number. It may take a few business days for the process to complete, so be prepared for a brief period with a temporary US Cellular number.
Step 7: Transfer Contacts and Data
Once your new US Cellular line is activated and your phone number has been transferred, it’s time to transfer your contacts and data from your old device to the new one. Most smartphones have built-in tools or apps that make this process quick and easy. Additionally, you can use cloud storage services or transfer data via Bluetooth or USB connections.
Step 8: Disconnect Verizon Service
After ensuring that everything has been successfully transferred and set up with US Cellular, it’s time to contact Verizon to cancel your service. Avoid any early termination fees by following their specific cancellation process. Make sure to return any rented or leased devices and settle any outstanding bills to complete the process smoothly.
By following these step-by-step instructions, you can seamlessly switch from Verizon to US Cellular and start enjoying the benefits of their network coverage, plans, and services. Remember to plan ahead, back up your data, and carefully follow each step to ensure a smooth transition.
Transferring Your Phone Number
One of the most crucial steps when switching from Verizon to US Cellular is transferring your phone number. Your phone number is essentially your identity in the digital world, and you wouldn’t want to lose it or go through the hassle of notifying all your contacts about a new number. Fortunately, transferring your phone number is a relatively simple process. Here’s how you can do it:
1. Check eligibility: Before initiating the transfer process, make sure that your current Verizon account is in good standing and eligible for porting out your phone number. Contact Verizon customer support to confirm your eligibility.
2. Gather information: To start the transfer, you’ll need some essential information. Collect all the necessary details, including your Verizon account number, account holder name, billing address, and the account’s Personal Identification Number (PIN).
3. Contact US Cellular: Once you have the required information, get in touch with US Cellular customer support. Inform them that you want to transfer your phone number from Verizon to US Cellular.
4. Provide details: During the conversation with US Cellular customer support, you’ll be asked to provide the information collected in step 2. Make sure to provide accurate and up-to-date details to avoid any delays in the transfer process.
5. Await confirmation: After providing all the necessary information, US Cellular will initiate the transfer process. This transfer process usually takes a few hours to a couple of days, depending on various factors such as the service provider and the complexity of the transfer.
6. Keep both phones active: During the number transfer process, it’s important to keep both your Verizon and US Cellular phones active. Do not cancel your Verizon service until the transfer is complete. This ensures that you have uninterrupted service during the transition.
7. Test the transfer: Once the transfer is completed, test your US Cellular phone by making a call or sending a text message. Ensure that all your contacts have been transferred correctly, and your phone number is active on your new US Cellular device.
It’s essential to note that while most phone numbers can be easily transferred, there are some limitations. For example, you may not be able to transfer a business or landline number. It’s advisable to check with US Cellular customer support for specific details regarding your number transfer.
Overall, transferring your phone number from Verizon to US Cellular is a straightforward process that allows you to maintain your existing number while enjoying the benefits of a new mobile service provider. Just follow these steps, and you’ll be well on your way to a seamless transition.
Setting Up and Activating Your New US Cellular Phone
Once you have made the switch from Verizon to US Cellular, the next step is to set up and activate your new US Cellular phone. This process is relatively straightforward, and you’ll be up and running in no time:
1. Unbox your new US Cellular phone:
Take your new US Cellular phone out of its packaging and remove any protective covers or films. Make sure to carefully read any included instructions or documentation.
2. Insert the SIM card:
Locate the SIM card slot on your US Cellular phone and ensure that it is powered off before proceeding. Most modern smartphones have a designated slot for the SIM card. Insert the SIM card provided by US Cellular into the slot according to the device’s instructions.
3. Power on your new phone:
Press and hold the power button on your new US Cellular phone to turn it on. Follow any on-screen prompts to complete the initial setup process, such as selecting your language, connecting to Wi-Fi, and accepting user agreements.
4. Activate your device:
Depending on the specific US Cellular phone model you have, the activation process may vary slightly. In general, you will either need to call US Cellular customer service or visit their website to complete the activation. Have your account information and IMEI or MEID number (usually found on the box or inside the phone) ready when contacting US Cellular.
5. Configure your settings:
Once your new US Cellular phone is activated, you can customize your settings to suit your preferences. This includes personalizing your wallpaper, adjusting sound and notification settings, and setting up your email and social media accounts.
6. Transfer your apps and data:
If you were using apps on your previous phone, you will need to reinstall them on the new device. Most app stores allow you to sign in and download previously purchased or downloaded apps. Additionally, you can transfer your contacts, photos, and other data from your old phone to your new US Cellular phone using methods such as cloud storage, Bluetooth, or a data transfer cable.
7. Test your phone and network connection:
Make a test call and send a text message to ensure that your new US Cellular phone is fully functional. Additionally, check that you have a strong network connection by browsing the internet or video streaming.
By following these steps, you will have successfully set up and activated your new US Cellular phone. Now you can enjoy the benefits of US Cellular’s network and services.
Transferring Your Contacts and Data
When switching from Verizon to US Cellular, one of the crucial steps is transferring your contacts and data to your new phone. You want to ensure that you have all your important information readily available without any hassle. Thankfully, the process is straightforward and can be accomplished in a few simple steps.
The first thing you will need to do is back up your contacts and data from your Verizon phone. Most modern smartphones have built-in backup options that allow you to save your information to a cloud service or export it to an external storage device. Make sure to explore the backup options available on your Verizon phone and choose the method that best suits your needs.
Once you have successfully backed up your contacts and data, it’s time to restore them on your new US Cellular phone. If you are staying within the same operating system, such as switching from one Android phone to another, the process is relatively straightforward. You can simply log in to your Google account on your new phone, and your contacts and data should automatically sync and be available for use.
However, if you are switching between different operating systems, such as from an iPhone to an Android phone, the process requires a few extra steps. In this case, you will need to transfer your contacts and data manually. One way to do this is by exporting your contacts from your Verizon phone as a CSV or vCard file. Then, using a computer, you can import this file into your Google account and sync it with your new US Cellular phone.
Another option for transferring contacts and data between different operating systems is to make use of third-party apps. There are various apps available on both the App Store and Google Play Store that allow you to transfer contacts, photos, videos, and other data from one phone to another. These apps typically use Wi-Fi or Bluetooth to establish a connection between the two devices and facilitate the transfer process.
Regardless of the method you choose, it’s essential to double-check the transferred data on your new US Cellular phone to ensure that everything was transferred correctly. Take the time to go through your contacts, messages, photos, and any other important data to make sure nothing was left behind during the transfer process.
Remember, transferring your contacts and data is just one aspect of the overall process of switching from Verizon to US Cellular. Make sure to follow the steps outlined in the previous sections to ensure a smooth and seamless transition to your new service provider.
Cancelling Your Verizon Service
When you decide to switch from Verizon to US Cellular, one of the important steps you’ll need to take is cancelling your Verizon service. Here are a few things you should keep in mind while cancelling your Verizon service:
1. Review Your Contract: Start by reviewing your contract with Verizon. Check if you are still under a contract term or if you are on a month-to-month basis. Keep in mind that cancelling your contract before it expires may incur early termination fees.
2. Contact Verizon: Get in touch with Verizon customer service to initiate the cancellation process. You can call their customer service number or visit a Verizon store near you. Be prepared to provide your account information, including your account number and PIN.
3. Check for Device Payoff: If you purchased a device through a payment plan with Verizon, ensure that you have paid off the remaining balance. If there is still a balance remaining, you may need to pay it off in full before cancelling your service.
4. Return Equipment: Verizon may require you to return any equipment you rented or leased from them, such as a router or set-top box. Make sure to gather all the equipment and return it to a Verizon store or follow their instructions for returning the equipment by mail.
5. Final Bill Settlement: After cancelling your service, Verizon will send you a final bill. Review the bill to ensure it reflects the correct cancellation date, any prorated charges, and any remaining balances. Pay the final bill promptly to avoid any further issues.
6. Follow Up: Once you have cancelled your Verizon service, it’s a good idea to follow up with the company to confirm the cancellation and ensure that there are no remaining obligations or charges associated with your account.
By following these steps and being proactive in cancelling your Verizon service, you can smoothly transition to your new US Cellular service without any complications.
Common Issues and Troubleshooting Tips
Switching from Verizon to US Cellular may not always be a seamless process, and you may encounter a few common issues along the way. Here are some troubleshooting tips to help you resolve them:
1. No Network Signal: If you’re experiencing no signal or poor network connection after switching to US Cellular, try restarting your phone. If that doesn’t work, check if your phone is correctly configured for US Cellular’s network. You may need to update your device’s network settings or contact US Cellular customer support for assistance.
2. Compatibility Issues: In some cases, your Verizon phone may not be fully compatible with US Cellular’s network. Before making the switch, ensure that your device is compatible with US Cellular’s frequency bands and network technology. You can visit US Cellular’s website or contact their customer support to check device compatibility and explore possible solutions.
3. Data Transfer Problems: If you encounter difficulties transferring your contacts, photos, or other data from your Verizon phone to your new US Cellular device, there are several options available. You can use cloud-based services like Google Drive or Apple iCloud to backup and restore your data. Alternatively, you can use a data transfer cable or software to migrate your data directly from one device to another.
4. Voicemail Set Up: Setting up voicemail can sometimes be tricky after switching providers. If you’re having trouble accessing or setting up your voicemail on your new US Cellular phone, consult their website or contact customer support. They can provide you with the necessary instructions or help you troubleshoot any issues you may be facing.
5. Billing and Account Problems: Occasionally, there may be issues with billing or account activation during the transition from Verizon to US Cellular. If you notice any discrepancies or have trouble accessing your new US Cellular account, reach out to their customer support immediately. They can assist you in resolving any billing or account-related concerns.
6. App Compatibility: Some applications may not function properly after switching providers. If you experience compatibility issues with specific apps on your new US Cellular phone, check for available app updates or contact the app’s support team for guidance. They may be able to provide a solution or offer advice on how to optimize app performance on your new device.
7. Network Coverage: While US Cellular has extensive coverage, there may be areas where the signal is weaker or non-existent. If you experience connectivity issues in certain locations, consider reaching out to US Cellular to determine if there are any network enhancements planned for those areas. In the meantime, you can try switching to Wi-Fi or using a signal booster to improve reception.
By keeping these common issues and troubleshooting tips in mind, you’ll be better prepared to navigate the process of switching from Verizon to US Cellular. Remember, if you encounter any challenges along the way, don’t hesitate to reach out to US Cellular’s customer support for assistance.
Conclusion
Switching from Verizon to US Cellular can be a seamless process, thanks to the advancements in mobile technology and the convenience provided by both carriers. By following the step-by-step guide outlined in this article, you can successfully transition your phone service while keeping your number, contacts, and important data intact.
Remember to thoroughly research the available plans and services offered by US Cellular to ensure that they meet your specific needs and preferences. Additionally, take advantage of any promotions or offers that may be available to new customers. With US Cellular, you can expect reliable network coverage, competitive pricing, and excellent customer service.
So, whether you’re looking for better network coverage, more affordable plans, or simply want to experience a different carrier, switching from Verizon to US Cellular can be a worthwhile choice. Stay connected and enjoy a seamless mobile experience with US Cellular!
FAQs
Q: Can I switch from Verizon to US Cellular?
A: Yes, you can switch from Verizon to US Cellular. US Cellular is a major wireless carrier in the United States, and they offer various plans and services that may suit your needs. However, it’s important to check if US Cellular has coverage in your area before making the switch.
Q: How do I switch from Verizon to US Cellular?
A: To switch from Verizon to US Cellular, follow these steps:
- Contact US Cellular: Reach out to US Cellular’s customer service or visit their website to initiate the switching process.
- Check your eligibility: Confirm if your Verizon device is eligible for use on the US Cellular network.
- Choose a plan: Explore US Cellular’s plans and select one that suits your needs and budget.
- Port your number: Provide US Cellular with your Verizon account details to initiate the number porting process.
- Activate your device: Once you receive your US Cellular SIM card, follow their activation instructions to set up your device on their network.
- Cancel Verizon service (optional): If you wish to cancel your Verizon service after switching, contact Verizon and follow their cancellation process.
Q: Will I be able to keep my phone number if I switch from Verizon to US Cellular?
A: Yes, you can typically keep your phone number when switching from Verizon to US Cellular. During the switching process, you will be asked to provide your Verizon account details and phone number, which US Cellular will use to initiate number porting. However, it’s always recommended to confirm this with US Cellular before proceeding.
Q: Are there any fees or charges for switching from Verizon to US Cellular?
A: It’s important to review the terms and conditions of switching from Verizon to US Cellular to understand any potential fees or charges. While US Cellular may have offers or promotions that waive certain fees, there might still be costs associated with device activation, plan changes, or early termination of your Verizon contract. Contact US Cellular directly or visit their website to get detailed information on any fees or charges involved.
Q: How long does it take to switch from Verizon to US Cellular?
A: The length of the switching process can vary. Typically, porting your phone number from Verizon to US Cellular can take anywhere from a few hours to a few days. The exact timeline may depend on factors such as the complexity of the switch, any outstanding balances or contract obligations with Verizon, and the processing speed of both carriers. It’s best to check with US Cellular for an estimate of how long the switch will take in your specific case.