
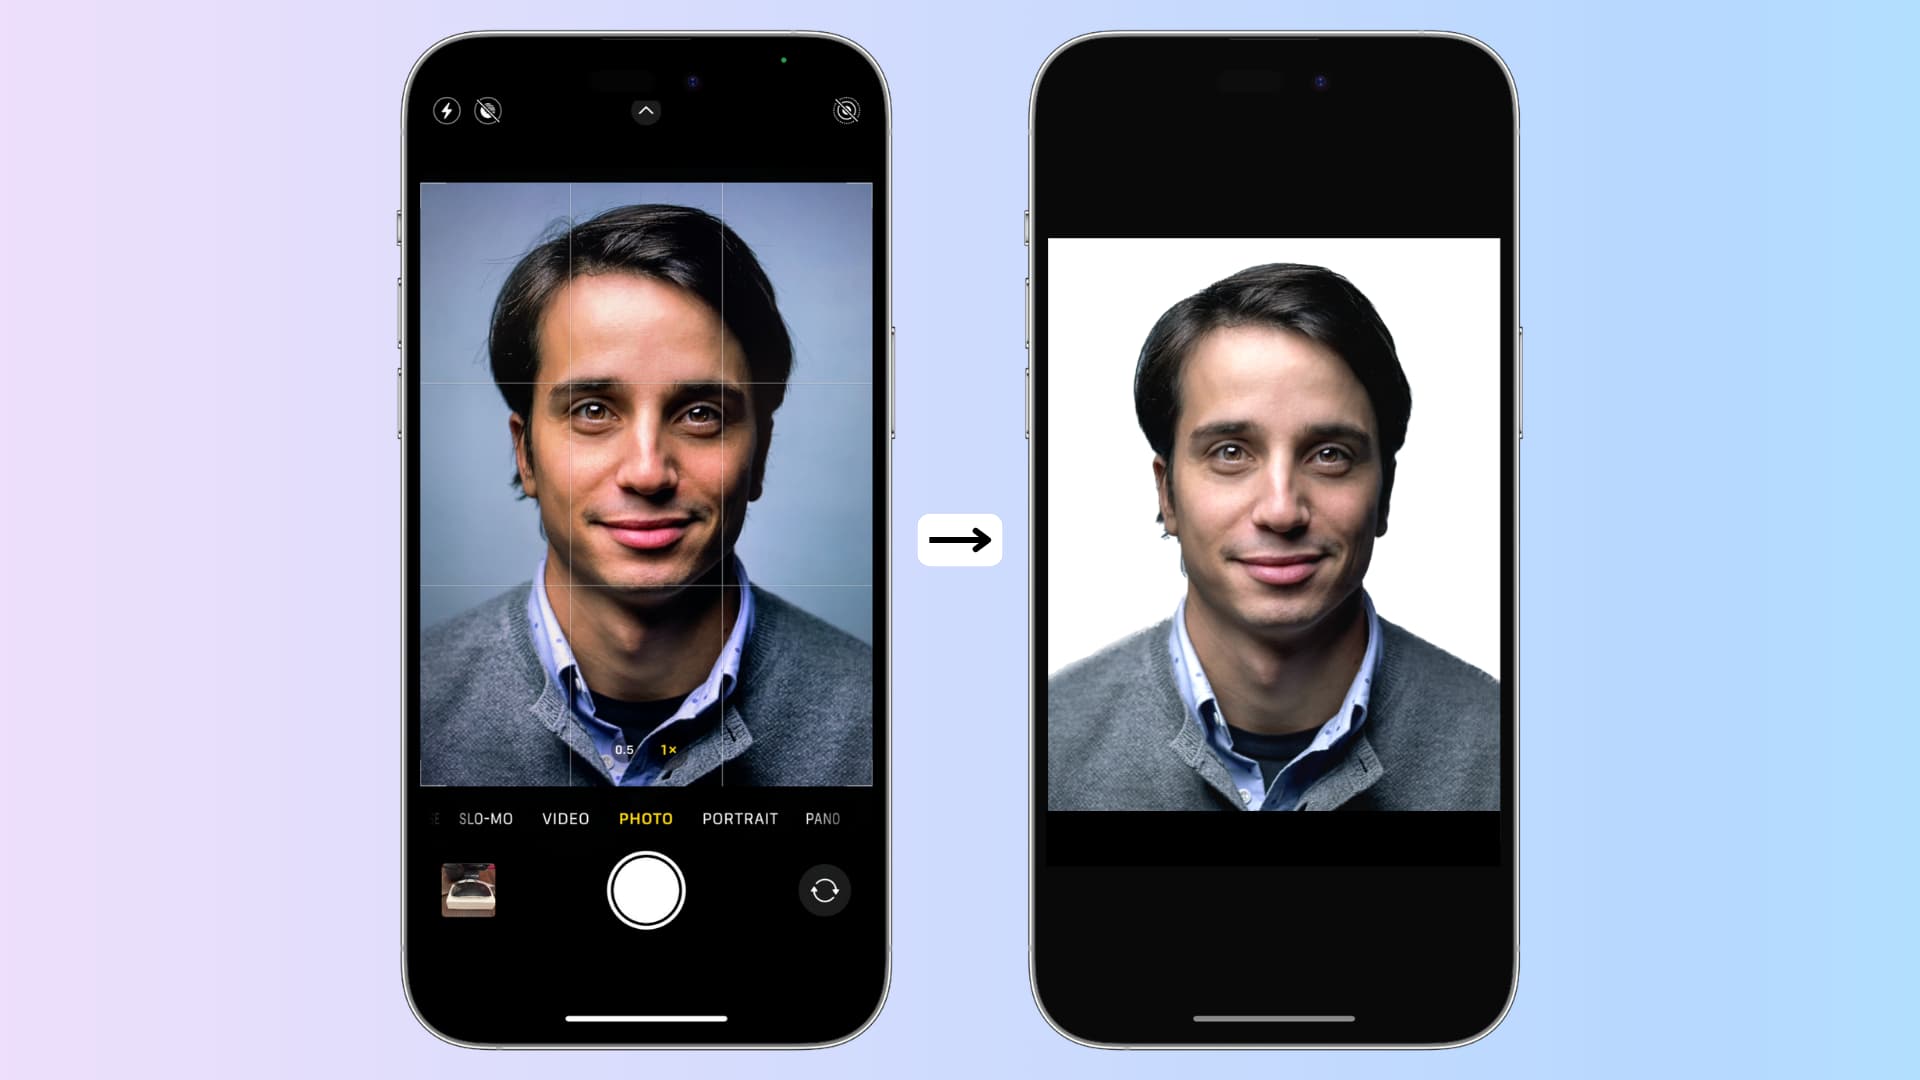
Are you wondering how to take a passport photo on your phone? Gone are the days when you had to rush to a professional photographer or a photo booth to get your passport photo taken. With the technological advancements in mobile phones, you can now capture your own passport-worthy photo with just a few clicks. Whether you’re applying for a passport, renewing one, or obtaining a visa, taking a photo on your phone is a convenient and hassle-free option. In this article, we will guide you through the process of taking a great passport photo using your phone. From setting up the right lighting to ensuring the correct dimensions, we’ll provide you with all the necessary tips and tricks. So grab your phone and let’s get started on capturing the perfect passport photo!
Inside This Article
- Choosing the Right Location and Lighting
- Setting up Your Phone for the Perfect Shot
- Posing and Framing for a Professional Look
- Editing and Adjusting the Photo
- Conclusion
- FAQs
Choosing the Right Location and Lighting
When it comes to taking a passport photo on your phone, selecting the right location and lighting is crucial for capturing a professional-looking shot. Here are some tips to help you find the perfect setting:
1. Natural Lighting: Opt for natural lighting whenever possible. Position yourself near a window or step outside to take advantage of the soft, diffused light. Avoid harsh overhead lighting or direct sunlight, as they can create unflattering shadows.
2. Neutral Background: Choose a plain, neutral-colored background for your passport photo. This will ensure that the focus remains on your face, without any distracting elements. A simple white or light-colored wall works best.
3. Avoid Clutter: Keep the area around you clutter-free. Remove any objects or distractions that may be present in the background. The focus should be solely on your face and shoulders.
4. Consistent Lighting: If you’re unable to find natural light, consider using a well-lit room or investing in a photography light. Make sure the lighting is evenly distributed, without any harsh shadows or bright spots.
5. Beware of Shadows: Pay attention to the positioning of lighting sources to avoid casting unwanted shadows on your face. Shadows can distort facial features, making the photo look less professional.
Remember, the goal is to capture a clear, well-lit photo that accurately represents your facial features. By choosing the right location and lighting, you can ensure a passport photo that meets all the necessary requirements and looks presentable.
Setting up Your Phone for the Perfect Shot
When it comes to taking a passport photo on your phone, having your camera settings properly configured can make a significant difference in the final result. Here are some key steps to ensure your phone is set up for the perfect shot:
1. Adjust the camera resolution: Check the settings of your phone’s camera app and set the resolution to the highest possible quality. This will ensure that your passport photo is clear and crisp, meeting the required standards.
2. Enable gridlines: Gridlines can act as a helpful guide when framing your photo. They can assist you in aligning your face properly and keeping it within the required dimensions. Enable this feature in your camera settings for accurate composition.
3. Choose the right camera mode: Opt for the manual or pro mode on your phone’s camera app if available. This will give you more control over the exposure, focus, and other settings, allowing you to capture a professional-looking passport photo.
4. Set the white balance: White balance is crucial for accurate color reproduction in your photo. Adjust this setting to match the lighting conditions and ensure that the colors appear natural and true to life.
5. Turn off filters and effects: While filters and effects can be fun for casual photos, it’s best to disable them when taking a passport photo. These enhancements can alter your appearance and may not meet the strict requirements of passport agencies.
6. Clean the camera lens: A smudged or dirty camera lens can impact the clarity of your photo. Before taking your passport photo, give the lens a quick wipe with a clean, lint-free cloth to ensure a clear and pristine image.
7. Use a tripod or stable surface: To avoid shake and blurriness, stabilize your phone by using a tripod or placing it on a steady surface. This will result in a sharper and more professional-looking passport photo.
8. Adjust focus and exposure: Tap on the screen of your phone to set the focus and exposure on your face. This will ensure that the most important element of the photo, your face, is sharp and properly exposed.
By following these steps and setting up your phone correctly, you can significantly improve the quality of your passport photo. Remember to review the guidelines provided by your local passport agency to ensure compliance with specific requirements.
Posing and Framing for a Professional Look
Once you have chosen the right location and lighting and set up your phone for the perfect shot, it’s time to focus on posing and framing to achieve a professional look for your passport photo. Follow these tips to ensure that your photo captures your best features and presents you in the best possible light:
1. Maintain a neutral facial expression: It’s important to keep a neutral facial expression when taking a passport photo. Avoid smiling, as it can distort your facial features and may not be accepted for official documentation. Keep your face relaxed and your lips closed. This will help create a professional and serious appearance in your photo.
2. Stand or sit up straight: Good posture is key to looking professional. Whether you’re standing or sitting, make sure to keep your back straight and your shoulders relaxed. This will not only make you look confident, but it will also help ensure that your face is properly aligned in the frame.
3. Face the camera directly: Position yourself directly facing the camera to ensure that both sides of your face are equally visible. Avoid tilting your head or turning it to the side, as this can distort your facial features and create asymmetry in the photo.
4. Keep your eyes open and focused: It’s important to have your eyes open and focused in a passport photo. Avoid blinking or squinting, as this can affect the clarity of the photo. Look directly into the camera lens to create a connection with the viewer and convey confidence.
5. Maintain a consistent background: Ensure that the background behind you is plain and uncluttered. Avoid standing in front of busy or distracting backgrounds as they can take away from the focus on your face. A solid-colored wall or a backdrop specifically designed for passport photos is ideal.
6. Follow the passport photo guidelines: Different countries have specific guidelines for passport photos, including the required size, head position, and background color. Familiarize yourself with these guidelines and make sure to adhere to them to avoid any potential issues with your passport application.
7. Take multiple shots: Don’t settle for just one shot. Take multiple photos to ensure that you have a variety of options to choose from. This will allow you to select the photo where you look the most professional and confident.
8. Experiment with different angles: While it’s important to face the camera directly, you can experiment with slight variations in angles to find the most flattering one for your face. Try tilting your head slightly or angling your body to see which position highlights your features the best.
By following these tips, you can pose and frame your passport photo in a way that presents you in the best possible light. Remember to review the photos you have taken and select the one that meets all the passport photo requirements. With the right pose and framing, you can achieve a professional look for your passport photo.
Editing and Adjusting the Photo
Once you have captured the perfect passport photo using your phone, it’s time to make some final edits and adjustments to ensure that the photo meets all the required specifications. These editing techniques will help enhance the image and make it look professional.
The first step in editing the photo is to make sure it is properly aligned. Use an editing app or software to rotate and straighten the image if necessary. Align the eyes with the horizontal line, ensuring that the head is centered in the frame.
Next, check the lighting and exposure of the photo. Adjust the brightness, contrast, and saturation levels to ensure that the image is clear and well-lit. Avoid overexposing or underexposing the photo, as it may result in a rejected passport application.
One crucial aspect to consider when editing the photo is the background. Ensure that the background is solid and preferably white or a light neutral color. Remove any distractions or shadows from the background that could detract from the focus on your face.
In some cases, it may be necessary to crop the image to meet the specific passport photo requirements. Follow the guidelines provided by your country’s passport office, and crop the photo accordingly to eliminate any unnecessary elements outside the required dimensions.
Additionally, make sure that the photo is free from red-eye and other blemishes. Use the red-eye correction tool available in most photo editing apps to remove any red-eye effect caused by the camera flash. You can also use the healing brush tool to retouch any minor imperfections on your face.
Finally, resize and save the photo in the appropriate file format and resolution. Most countries require passport photos to be in a specific size and format. Be sure to check the guidelines and adjust the dimensions accordingly. Save the edited photo as a JPEG or PNG file with the recommended resolution to ensure the highest quality and compatibility.
Remember, editing the photo should be done minimally and with the intention of enhancing the image, while still keeping it true to your natural appearance. Excessive editing or altering of the photo may result in rejection of the application.
By following these editing and adjusting techniques, you can make sure your passport photo meets all the necessary requirements while still looking professional and clear. With your edited photo in hand, you are now ready to submit your passport application and embark on your next adventure.
Conclusion
Taking a passport photo on your phone has become convenient and accessible, thanks to advancements in camera technology and mobile applications. With a few simple tips and tricks, you can capture a professional-quality photo that meets all the passport requirements.
Remember to find a well-lit area, use the rear camera for better quality, and make sure your face is well-positioned and visible. Utilize the gridlines and timer function to ensure a perfectly composed and steady shot. Additionally, take advantage of photo editing apps to adjust the brightness, crop the image, and achieve the necessary dimensions.
By following these guidelines, you can save time and money by taking your passport photo on your phone instead of visiting a professional studio. Just remember to check the specific passport photo requirements of your country or destination to ensure compliance.
So, grab your phone and get ready to take a picture-perfect passport photo hassle-free!
FAQs
Q: Can I use my phone to take a passport photo?
A: Yes, you can use your phone to take a passport photo. In fact, most modern smartphones have high-resolution cameras that are capable of capturing photos that meet the requirements for passport photos.
Q: Are there any specific guidelines I need to follow when taking a passport photo with my phone?
A: Yes, there are some guidelines you should follow to ensure that your passport photo is acceptable. These guidelines typically include specifications such as photo size, background color, and lighting conditions. It is recommended to consult the official guidelines provided by your country’s passport authority to ensure that your photo meets all the necessary requirements.
Q: Do I need any special equipment or apps to take a passport photo on my phone?
A: In most cases, you won’t need any special equipment or apps to take a passport photo on your phone. However, it’s a good idea to use a tripod or a stable surface to prevent any blurriness in the photo. Additionally, there are photo editing apps available that can help you adjust the size and dimensions of the photo to match the requirements set by the passport authority.
Q: How do I ensure that my passport photo meets the necessary size and dimensions?
A: To ensure that your passport photo meets the required size and dimensions, you can use photo editing apps or software to resize and crop the photo. These apps usually have pre-defined templates for passport photos that you can use to avoid any guesswork. Alternatively, you can also print the photo and manually measure the dimensions to ensure they are within the specified range.
Q: Can I retouch or edit the photo after taking it on my phone?
A: It is generally recommended not to retouch or heavily edit the passport photo, as any alterations may lead to the rejection of the photo. The passport authorities expect the photo to be an accurate representation of your appearance and any tampering with the photo may result in a discrepancy between the photo and your actual appearance when presenting your passport.