
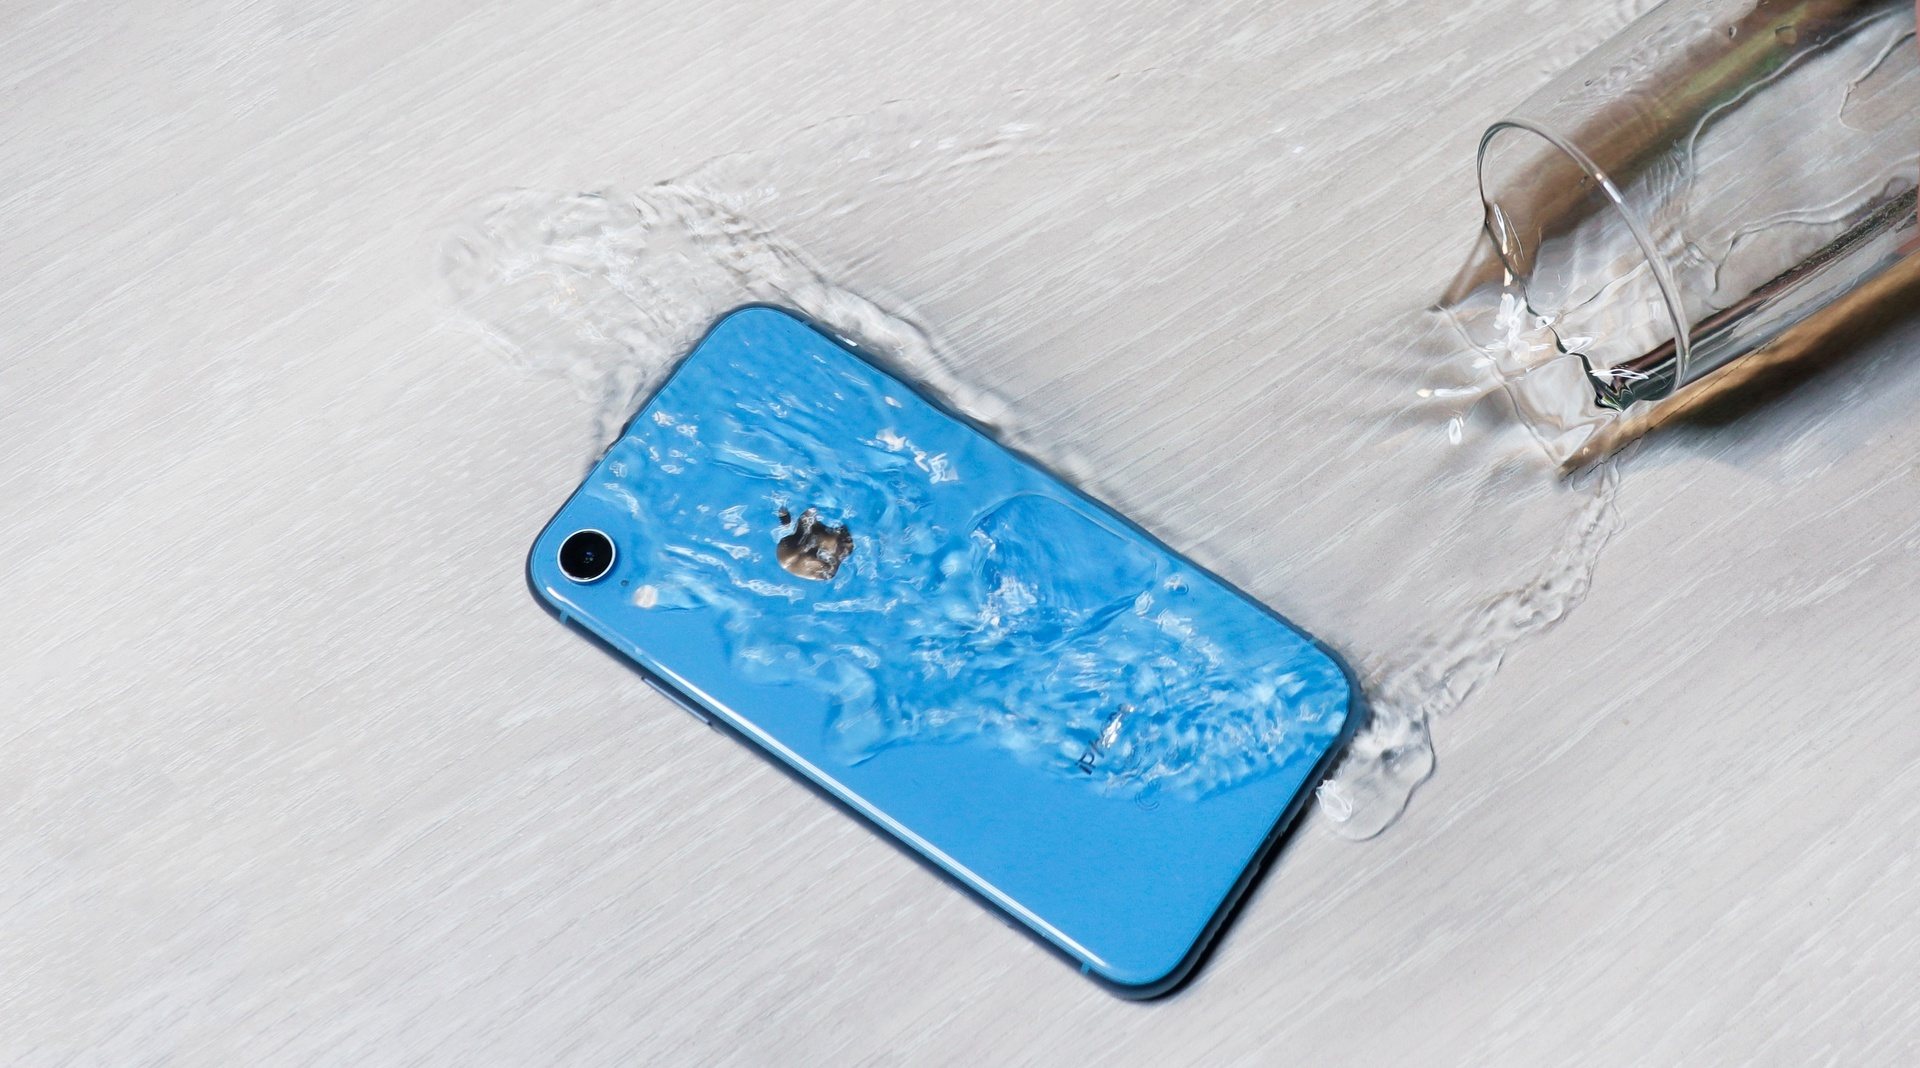
In today’s world, our phones have become an extension of ourselves. We rely on them for communication, social media, entertainment, and so much more. But what happens if your beloved phone accidentally comes into contact with liquid? Whether it’s a spilled drink, a sudden downpour, or an unfortunate drop into the toilet, liquid damage can quickly turn your beloved device into a seemingly useless brick. However, all hope is not lost! With some know-how and quick action, you may be able to save your phone from permanent damage. In this article, we will explore the steps you can take to safely and effectively remove liquid from your phone, preventing any further harm and potentially saving you from the need to invest in a costly replacement. So, let’s dive in and learn how to take liquid out of a phone!
Inside This Article
- Overview
- Tools Needed
- Method 1: Drying with Rice
- Method 2: Using Silica Gel Packets
- Method 3: Absorbing with Cat Litter
- Method 4: Using a Vacuum Cleaner
- Safety Precautions
- Additional Tips and Considerations
- Conclusion
- FAQs
Overview
Accidents happen, and one of the most common mishaps involving mobile phones is encountering liquid damage. Whether it’s dropping your phone in a puddle, a glass of water, or even a sink, getting liquid inside your phone can be a frustrating and potentially expensive situation. However, acting quickly and following the right steps can increase the chances of saving your phone.
In this article, we will discuss different methods to remove liquid from your phone and minimize the damage. From the traditional rice method to using silica gel packets, absorbing with cat litter, or even utilizing a vacuum cleaner, we’ll explore various strategies that might help salvage your beloved device.
Before we dive into the methods, it’s important to note that the effectiveness of these techniques will vary depending on the severity of the liquid damage and the phone model. It’s also vital to prioritize safety throughout the process and to be aware that attempting any DIY repairs may void your warranty. If you’re uncertain or uncomfortable with the steps involved, it’s always best to seek professional help.
Now, let’s explore the different methods that can aid in removing liquid from your phone and potentially save it from further damage.
Tools Needed
When it comes to extracting liquid from your phone, having the right tools can make the process much easier and more effective. Here are the essential tools you will need:
- Absorbent Material: This can include rice, silica gel packets, or cat litter. These materials will help draw out the moisture from your phone.
- Sealable Bag or Container: You’ll need a sealable bag or container to create an enclosed environment for your phone and the absorbent material to work its magic.
- Vacuum Cleaner: A vacuum cleaner with a small nozzle attachment can be useful for removing excess liquid or debris from your phone.
- Microfiber Cloth: A soft microfiber cloth is helpful for gently wiping off any remaining moisture from your phone’s surface.
- Cotton Swabs: Cotton swabs can be used to reach smaller crevices or ports that may be difficult to dry with a cloth.
- Compressed Air: Compressed air in a can or a handheld air blower can be used to blow away any residual moisture or particles.
With these tools at hand, you’ll be well-equipped to tackle the task of extracting liquid from your phone. Remember to exercise caution and follow the appropriate methods to ensure the best possible outcome without causing any damage to your device.
Method 1: Drying with Rice
Accidents happen, and if you accidentally drop your phone in water, one of the most common methods to help salvage it is by using rice. This tried and tested method involves using the absorbent properties of rice to draw out the moisture from your phone.
Here’s how you can use rice to dry your phone:
- Immediately remove your phone from the water and turn it off. It’s crucial to power off your device to prevent short circuits.
- Remove any accessories, such as cases or SIM cards, and pat dry the exterior of the phone with a soft cloth or paper towel.
- Fill a container or a sealable plastic bag with uncooked rice.
- Place your phone in the container or bag, ensuring that it is completely submerged in the rice. Make sure to cover the phone from all sides.
- Seal the container or bag and leave it undisturbed for at least 24 to 48 hours. The rice acts as a desiccant, absorbing the moisture from your phone.
- After the specified time, carefully remove your phone from the rice and check for any signs of moisture.
- Turn on your phone and see if it functions properly. If it does, congratulations! If not, you may need to seek professional help.
Remember, using rice to dry your phone is not a foolproof method, but it can increase the chances of saving your device. It’s essential to act quickly and follow the steps correctly for the best results.
However, it’s important to note that rice can sometimes leave small particles or dust inside your phone, which may affect its functionality. So, be mindful of this potential side effect.
If your phone is valuable or if you’re uncertain about attempting the rice method, it’s better to consult a professional technician who can provide specialized assistance in repairing water-damaged phones.
Method 2: Using Silica Gel Packets
When it comes to removing liquid from your phone, using silica gel packets can be a highly effective method. Silica gel is a desiccant that absorbs moisture, making it ideal for drying out electronic devices such as mobile phones.
Here’s how you can use silica gel packets to remove liquid from your phone:
- Step 1: Take your phone out of the liquid immediately. The longer it stays submerged, the higher the chance of permanent damage.
- Step 2: Do not try to turn on your phone or press any buttons. This could further damage the internal components.
- Step 3: Remove any visible water by gently dabbing the phone with a soft cloth or paper towel. Be careful not to press too hard, as this could push the water deeper into the phone.
- Step 4: Place your phone in a ziplock bag or a container with silica gel packets. Make sure the silica gel packets do not come into direct contact with the phone.
- Step 5: Seal the bag or container tightly to prevent moisture from getting in.
- Step 6: Leave the phone in the bag or container with the silica gel packets for at least 24 hours. This will allow the silica gel to absorb the moisture from the phone.
- Step 7: After 24 hours, remove the phone from the bag or container and check if all the moisture has been absorbed.
- Step 8: If there are any remaining moisture or signs of liquid, repeat the process for another 24 hours.
Using silica gel packets can significantly increase the chances of reviving a liquid-damaged phone. However, it is essential to note that this method may not work in severe cases of liquid damage, particularly if there has been significant exposure to water. In such cases, it is advisable to seek professional assistance or consult a certified technician.
Remember to handle silica gel packets with care and keep them out of reach of children as they can be harmful if ingested.
Now that you know how to use silica gel packets to remove liquid from your phone, give it a try if you ever find yourself in this unfortunate situation. With a little patience and the right tools, you may be able to save your phone from permanent damage.
Method 3: Absorbing with Cat Litter
If your mobile phone has been submerged in liquid, one effective method to remove the moisture is by using cat litter. Cat litter is a highly effective absorbent material commonly used for removing moisture from various items, including electronics.
Here’s how you can use cat litter to absorb the liquid from your phone:
- Start by removing your phone from the liquid as quickly as possible. The longer it stays submerged, the higher the chances of irreversible damage.
- Take out the battery and any removable components, such as the SIM card or memory card. Wipe them dry with a clean cloth and set them aside.
- Place a layer of cat litter in a container with a lid. Make sure the container is large enough to accommodate your phone.
- Embed your phone in the cat litter, ensuring that it is completely covered. Gently press it down to allow the cat litter to absorb the moisture.
- Close the lid of the container tightly and leave it undisturbed for at least 24 to 48 hours. This will give the cat litter enough time to absorb the moisture from your phone.
- After the specified time has passed, remove your phone from the cat litter. Use a soft, dry cloth or a gentle brush to clean off any remaining cat litter particles.
- Reassemble your phone, insert the battery and other components, and power it on. Hopefully, your phone should be free from moisture and functioning properly.
It is important to note that cat litter works best for absorbing moisture from phones that have been submerged in clean, fresh water. If your phone has been exposed to other liquids such as soda, coffee, or saltwater, it is advisable to seek professional help or try other drying methods.
Remember, time is of the essence when dealing with liquid damage to your phone. The sooner you take action and remove the moisture, the better the chances of saving your device.
Method 4: Using a Vacuum Cleaner
If you’ve accidentally spilled liquid on your phone, using a vacuum cleaner can be an effective method to remove it. The suction power of a vacuum can help draw out the moisture from the phone, leaving it dry and potentially saving it from any damage.
Before you begin, it’s crucial to ensure that the liquid hasn’t caused any short circuits or damage to the internal components. Do not attempt to use the vacuum cleaner if you suspect any electrical issues, as it may worsen the situation.
To start the process, follow these steps:
- First, power off your phone immediately to avoid any further damage.
- Remove any external accessories, such as phone cases or covers, to expose the phone completely.
- Choose a vacuum cleaner with adjustable suction levels or use a handheld vacuum with a brush attachment.
- Set the vacuum cleaner to a low or medium setting to prevent the risk of damaging delicate components.
- Gently position the nozzle of the vacuum cleaner near the openings of the phone, such as the charging port or headphone jack.
- Ensure a tight seal by holding the nozzle firmly against the phone’s surface.
- Move the nozzle around to cover all the openings and areas where liquid may have penetrated.
- Allow the vacuum cleaner to run for a few minutes, ensuring that it effectively draws out the moisture.
After using the vacuum cleaner, it’s essential to inspect your phone for any remaining traces of liquid. If you notice any, you may need to repeat the process or consider using an alternative method.
Remember, this method works best for removing liquid that is not deeply absorbed into the phone’s internal components. If you’re unsure about using a vacuum cleaner or if the liquid damage is severe, it’s advisable to seek professional assistance to prevent any further harm to your device.
Safety Precautions
When dealing with liquid damage to your phone, it’s essential to take certain safety precautions to prevent any further damage and ensure your personal safety. Here are a few important safety tips to keep in mind:
- Power off the phone: Before attempting any liquid removal method, always turn off your phone to avoid short circuits or electrical damage. Do not attempt to charge or power it on until the liquid has been completely removed.
- Disconnect from power sources: If your phone is connected to a charger or any other external power source, unplug it immediately to prevent any potential electrical hazards.
- Remove the battery (if possible): If your phone has a removable battery, take it out as soon as possible to minimize the risk of electrical damage. This step is crucial in preventing any power flow through the device.
- Avoid shaking the phone: While it may be tempting to shake the phone to remove any excess liquid, this can actually cause the liquid to spread further inside the device. Instead, gently pat the phone dry with a soft cloth or paper towel.
- Avoid applying heat: Using a hairdryer, microwave, or any other source of heat to dry your phone is highly discouraged. Excessive heat can cause further damage to the internal components and possibly melt the plastic casing.
- Avoid using compressed air or blowing into the device: Blowing air into the phone can force the liquid deeper into the internal circuitry and cause more harm. It’s best to avoid this method altogether.
- Handle with care: When working with your phone, handle it with care and caution. Avoid dropping or applying excessive pressure to prevent any physical damage to the device.
- Keep it in a dry and safe place: After removing the liquid, make sure to keep your phone in a dry and well-ventilated area. Avoid exposing it to extreme temperatures or high humidity, as it can cause further damage.
- Consider professional assistance: If you’re uncertain or uncomfortable with the liquid removal process, it’s always best to seek professional help. A certified technician can assess the damage and provide appropriate solutions.
By following these safety precautions, you can minimize the risk of further damaging your phone and increase the chances of successful liquid removal. Remember, taking prompt action and handling your phone with care are key in salvaging the device.
Additional Tips and Considerations
When dealing with a liquid-damaged phone, there are a few additional tips and considerations to keep in mind to increase the chances of a successful recovery. Here are some key points to remember:
1. Act quickly: Time is of the essence when it comes to liquid damage. The longer the liquid remains in contact with the phone’s internal components, the higher the risk of permanent damage. So, it is crucial to begin the drying process as soon as possible.
2. Power off the device: Before attempting any of the drying methods mentioned earlier, make sure to turn off the phone. This helps prevent short circuits and further damage to the phone’s electrical components.
3. Remove all accessories and covers: Take off any protective cases, screen protectors, and other accessories from the phone. These covers can trap moisture and hinder the drying process. It is best to expose the phone as much as possible to facilitate drying.
4. Avoid heat sources: While it may be tempting to use a hairdryer or place the phone near a heater, excessive heat can damage the phone’s internal components. It is best to stick to gentle drying methods like the ones mentioned in the previous sections.
5. Do not shake or blow into the phone: Shaking or blowing into the phone can push liquid further into its internal parts, causing more harm than good. It is essential to handle the phone with care and avoid any unnecessary movements that could worsen the situation.
6. Use a desiccant: In addition to the methods discussed earlier, you can also try using a desiccant like uncooked rice or silica gel packets. These substances have natural moisture-absorbing properties and can aid in the drying process. Place the phone in a sealed bag with the desiccant for better results.
7. Consult a professional: If all your efforts fail or if you are hesitant to attempt the drying methods yourself, it is advisable to seek professional help. A certified technician will have the necessary expertise and tools to handle liquid damage effectively.
Remember that these tips and considerations are meant to improve the chances of saving a liquid-damaged phone. However, there is no guarantee of success. In some cases, the damage may be irreversible, and you may need to consider repairing or replacing the device. Ultimately, prevention is always better than cure, so be cautious when using your phone around liquids to avoid such situations in the first place.
Overall, learning how to remove liquid from a phone is crucial in order to prevent further damage and potentially save your device. Acting quickly and following the appropriate steps can greatly increase the chances of successfully recovering your phone.
Remember, the first course of action should be to power off your phone and remove it from the liquid source. Then, carefully dry it using absorbent materials and air-drying methods. If the liquid damage is severe or the phone does not turn on after drying, it may be necessary to seek professional assistance or consider a replacement.
By taking immediate action and following the tips provided in this guide, you can increase the likelihood of salvaging your water-damaged phone and potentially avoiding the need for costly repairs or a replacement.
FAQs
1. Can I remove the liquid from my phone by myself?
Yes, it is possible to remove liquid from your phone by yourself, but it can be tricky and risky as it requires proper knowledge and tools. It is always recommended to seek professional help to avoid further damage to your phone.
2. What should I do if my phone gets wet?
If your phone gets wet, the first thing you should do is to turn it off immediately to prevent any short circuits. Remove any covers or cases and then gently pat the phone dry with a soft cloth or towel. It is important not to use any heat sources such as hair dryers, as this can cause further damage. You should then take your phone to a professional technician who can properly assess and fix any internal damage caused by the liquid.
3. How long does it take to remove liquid from a phone?
The time required to remove liquid from a phone depends on various factors such as the extent of the liquid damage, the type of phone, and the expertise of the technician. It can take anywhere from a few hours to several days to completely remove the liquid and repair the phone. It is important to be patient and allow the technician to properly diagnose and fix the issue to avoid any further damage.
4. Can liquid damage be repaired?
Yes, liquid damage to a phone can often be repaired, especially if the damage is addressed promptly. However, it is important to note that not all liquid damage can be completely fixed. In some cases, parts of the phone may need to be replaced to restore full functionality. It is always best to consult with a professional technician who can assess the extent of the damage and provide the appropriate solution.
5. How can I prevent liquid damage to my phone?
To prevent liquid damage to your phone, there are several precautions you can take. Avoid using your phone near water bodies or in humid environments. Keep your phone away from liquids such as drinks, sinks, and baths. Invest in a waterproof phone case for added protection. Additionally, consider getting phone insurance that covers liquid damage. Taking these preventative measures can significantly reduce the risk of liquid damage to your phone.