
If you’re a proud owner of an iPhone, you may have come across the term “HDR” while exploring the camera app. But what exactly is HDR? HDR stands for High Dynamic Range, a feature that enhances the quality of your photos by capturing a wider range of light and color. It allows you to capture more detail in both the shadow and highlight areas of your images, resulting in stunning, well-balanced photographs. In this article, we will delve into the world of iPhone HDR and guide you on how to use it effectively in the camera app. Whether you’re a photography enthusiast or just someone who wants to elevate their iPhone photography game, understanding and utilizing HDR can take your images to a whole new level.
Inside This Article
- What is HDR?
- How does HDR work in the Camera App?
- Enabling HDR in the Camera App
- Tips for Using HDR Effectively in the Camera App
- Conclusion
- FAQs
What is HDR?
HDR stands for High Dynamic Range, a feature that is commonly found in modern smartphones, including iPhones. It is a technique used to capture photos with a greater range of tones and colors, resulting in more detail and improved image quality.
Typically, when you take a photo with a smartphone, the camera exposes for the overall brightness of the scene, which can result in the loss of details in both bright and dark areas. This is where HDR comes into play.
HDR works by taking multiple photos at different exposure levels and then combining them into a single image. The camera captures one photo at a normal exposure, another underexposed to highlight the details in bright areas, and a third overexposed to capture the details in the shadows. These photos are then merged together, utilizing the best elements of each exposure to create a well-balanced and vibrant image.
The result? An HDR photo that showcases the full range of tones and colors in a scene, from the brightest highlights to the darkest shadows. This allows for a more realistic and visually captivating image, especially in high-contrast situations.
It is important to note that HDR is not suitable for every scenario. In certain situations, such as capturing moving subjects or scenes with extreme contrasts, it may not produce the desired results. However, for landscapes, architecture, and still-life photography, HDR can significantly enhance the final image.
How does HDR work in the Camera App?
High Dynamic Range, commonly known as HDR, is a feature found in most modern smartphones, including the iPhone. It is designed to capture stunning photos by combining multiple images taken at different exposure levels. But how exactly does HDR work in the Camera App?
When you enable HDR mode in the Camera App, your iPhone will capture a series of photos at various exposure settings. This includes an underexposed image, a properly exposed image, and an overexposed image. The Camera App then uses advanced algorithms to blend these images together, retaining the details from the shadows, midtones, and highlights.
The main goal of HDR is to create a final image with a wider dynamic range, meaning it will showcase both the bright and dark areas with more detail and accuracy. This is especially useful in situations where there is a high contrast between the subject and the background, such as a sunset landscape or a backlit portrait.
By combining the different exposure levels, HDR photography enhances the overall image quality and reduces the loss of detail in bright or dark areas. It creates a well-balanced photo with improved color accuracy and richer tones, resulting in a more visually appealing image.
Furthermore, the Camera App in the iPhone has a built-in auto HDR feature that automatically analyzes the scene and determines whether HDR should be used. If the app detects a high contrast scene, it will enable HDR mode to capture the best possible image.
It is important to note that HDR is most effective when there is minimal subject movement and a stable shooting environment. If the subject or camera moves during the capturing process, it may cause slight blurring or ghosting in the final HDR image.
Overall, HDR in the Camera App is a powerful tool that allows you to capture stunning photos with improved dynamic range and enhanced details. It is a feature that can significantly elevate your photography game and help you capture scenes with incredible realism.
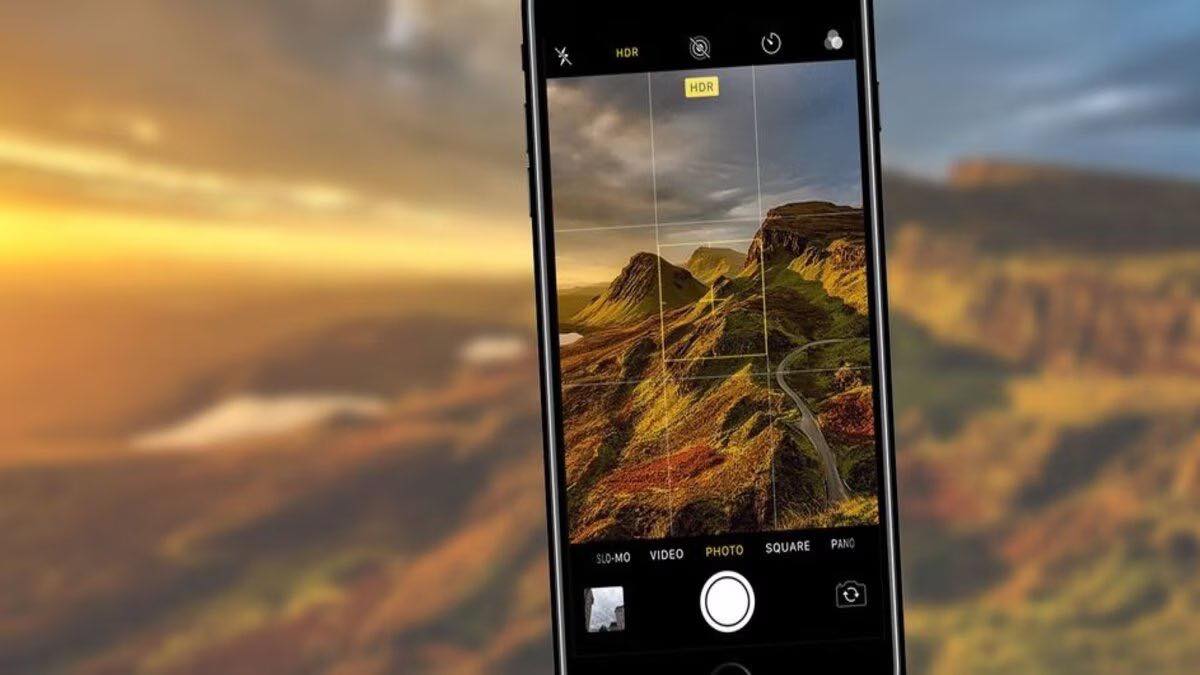
Enabling HDR in the Camera App
Enabling HDR (High Dynamic Range) in the Camera App allows you to capture stunning photos with enhanced detail and vibrant colors. HDR works by blending multiple exposures of the same scene to create a single, well-balanced image.
To enable HDR in the Camera App on your iPhone, follow these simple steps:
- Launch the Camera App on your iPhone.
- Tap on the “HDR” icon located at the top of the screen.
- You will have three options to choose from: “Auto,” “On,” and “Off.”
- If you select “Auto,” your iPhone will intelligently determine when HDR should be used and automatically enable it.
- If you choose “On,” HDR will be enabled for every photo you capture.
- Alternatively, selecting “Off” will disable HDR entirely.
It’s worth noting that enabling HDR may slightly increase the time it takes to capture a photo, as your iPhone needs to process and combine multiple exposures. However, the result is often well worth the wait, with images that have a wider range of tones and improved highlights and shadows.
While the “Auto” setting is convenient and works well in most situations, manually enabling HDR can be beneficial in certain scenarios. For example, when capturing a landscape with a bright sky and darker foreground, using HDR can help retain detail in both areas.
Experiment with different HDR settings in the Camera App to see what works best for your needs. Don’t be afraid to toggle between “Auto,” “On,” and “Off” depending on the lighting conditions and the desired effect you want to achieve.
Remember, HDR can enhance your photos, but it’s not always necessary or ideal for every situation. There may be times when the standard photo mode produces the desired result more effectively.
Now that you know how to enable HDR in the Camera App, go ahead and start capturing stunning, well-balanced photos with your iPhone. Don’t be afraid to explore the world of HDR photography and unlock the full potential of your device’s camera capabilities.
Tips for Using HDR Effectively in the Camera App
If you’re an avid smartphone photographer, you may already be familiar with the concept of HDR (High Dynamic Range) photography. HDR is a technique that allows you to capture a wider range of details and colors in your photos, especially in scenes with high contrast. If you’re using an iPhone with the Camera app, here are some valuable tips to help you make the most of HDR.
1. Understand When to Use HDR:
HDR is particularly useful in situations where there is a significant difference in lighting between the foreground and background. For example, if you’re taking a photo of a landscape with a bright sky and shadowy foreground, activating HDR can help balance the exposure and capture more details in both areas.
2. Keep Your Hands Steady:
When taking HDR photos, it’s crucial to keep your hands as steady as possible to avoid any blurring or ghosting effects. Use both hands to hold your iPhone firmly or consider using a tripod for more stability. This will ensure that each frame in the HDR sequence aligns perfectly, resulting in a sharp and well-composed image.
3. Avoid HDR for Moving Subjects:
Since HDR captures multiple exposures and merges them together, it’s best to avoid using HDR when your subject is in motion. The camera app may struggle to align the different frames, leading to ghosting or blurring. Instead, reserve HDR for still subjects or scenes where the movement is minimal.
4. Experiment with Different Scenes:
Don’t limit your HDR photography to landscapes and cityscapes. Try using HDR in various scenarios to see how it enhances details and colors. It can be particularly stunning when capturing indoor scenes with mixed lighting, such as a well-lit room with a view of a sunny patio outside.
5. Use the HDR Auto Option:
With the latest iPhone models, the Camera app offers an “Auto HDR” feature. When enabled, the app intelligently determines whether the scene requires HDR and automatically enables it when necessary. This can be a handy option, especially if you’re unsure about when to use HDR or simply want to streamline your photography process.
6. HDR Editing and Post-Processing:
While the Camera app on your iPhone does a great job of capturing HDR photos, you can further enhance them using editing tools. There are a plethora of editing apps available, such as Snapseed, Adobe Lightroom, or even the built-in Photos app on your device. Experiment with adjusting the exposure, contrast, and saturation to fine-tune your HDR images.
7. Practice and Explore:
As with any photography technique, practice is key. Take the time to explore different scenes and lighting conditions to gain a better understanding of when and how to use HDR effectively. By experimenting and pushing the limits of HDR photography, you’ll be able to capture stunning images with rich details and vibrant colors.
By following these tips, you can take full advantage of the HDR feature in the Camera app. Whether you’re capturing breathtaking landscapes or indoor architecture, HDR can help you bring out the true beauty of the scene with enhanced details and dynamic range. So grab your iPhone, open the Camera app, and start exploring the world of HDR photography!
In conclusion, the iPhone HDR feature is a powerful tool that allows users to capture stunning photos with enhanced dynamic range. By automatically merging multiple exposures, HDR mode creates images that capture a wider range of light and shadow details, resulting in more balanced and vibrant photos.
With just a few taps in the iPhone Camera app, users can enable HDR and enjoy the benefits of this feature. Whether you’re capturing landscapes, portraits, or challenging lighting conditions, HDR can help you achieve professional-looking photos with improved clarity and richness.
Remember, HDR works best in scenes with high contrast, so don’t be afraid to experiment and try it out in different shooting scenarios. Keep in mind that HDR may not be suitable for capturing moving subjects or scenes with excessive motion, as it relies on merging multiple exposures.
So, the next time you’re out capturing precious memories with your iPhone, don’t forget to leverage the power of HDR and elevate your photography to new heights.
FAQs
Q: What is HDR in the iPhone camera app?
A: HDR stands for High Dynamic Range, and it is a feature in the iPhone camera app that helps to capture photos with a greater range of light and shadow. It combines multiple exposures of the same scene to create a single image with enhanced detail and balanced exposure.
Q: How does HDR work on the iPhone?
A: When you enable HDR on your iPhone camera, it takes three different exposures of the same scene – one overexposed, one underexposed, and one balanced. The iPhone then combines these three exposures to create a final image with more detail in both the highlights and shadows.
Q: How do I enable HDR on my iPhone?
A: Enabling HDR on your iPhone is simple. Open the camera app, and tap on the “HDR” option at the top of the screen. On newer models, you may see “Auto HDR” instead. You can choose either “On” or “Auto” depending on your preference. When enabled, the HDR icon will appear in yellow.
Q: When should I use HDR on my iPhone?
A: HDR is best used in situations with high contrast lighting, such as bright skies with deep shadows. It helps to balance the exposure and bring out more detail in both the highlights and shadows. Additionally, it can be beneficial when capturing landscapes, architecture, or any scene where you want to capture more detail in the entire frame.
Q: Are there any downsides to using HDR on the iPhone?
A: While HDR can greatly improve the overall quality of your photos, there are a few downsides to consider. Firstly, when capturing moving subjects, such as people or animals, there could be slight blurriness or ghosting due to the merging of multiple exposures. Additionally, HDR processing takes a bit longer, so there might be a slight delay between each shot.