
Are you tired of constantly dealing with tangled charging cables? Are you looking for a convenient and wireless way to charge your devices? Look no further – we have the perfect solution for you! In this article, we will guide you through the process of building your own wireless charger.
Gone are the days of fumbling around in the dark to plug in your phone. With a wireless charger, you can simply place your device on the charging pad and watch as it powers up without any hassle. Plus, it eliminates the need for multiple chargers and cables cluttering up your space.
Whether you’re a tech enthusiast or a DIY enthusiast, building your own wireless charger can be a fun and rewarding project. Not only will you save money, but you’ll also gain a sense of accomplishment by creating something practical and innovative.
So, let’s dive into the world of wireless charging and learn how to build a wireless charger from scratch!
Inside This Article
- Understanding Wireless Charging
- Components Required for Building a Wireless Charger
- Step-by-Step Guide to Building a Wireless Charger
- Conclusion
- FAQs
Understanding Wireless Charging
Wireless charging is a technology that allows you to charge your electronic devices without the need for traditional charging cables. Instead, it uses electromagnetic fields to transfer energy between a charging pad or mat and your device.
At its core, wireless charging relies on the principles of electromagnetic induction. When an alternating current passes through a coil of wire, it creates an oscillating magnetic field. This field can then induce a current in a nearby coil, which is used to charge the device.
One of the key advantages of wireless charging is its convenience. With a wireless charger, you can simply place your device on the charging pad, and it will start charging automatically. No more messing with cables or worrying about finding the right charging port.
Wireless charging is not a new concept. It has been around for several years, but it has only recently gained popularity with the widespread adoption of devices that support this technology, such as smartphones and smartwatches.
Another benefit of wireless charging is that it helps reduce clutter. With fewer cables and wires, your workspace or bedside table can look cleaner and more organized. Plus, there is less wear and tear on charging cables, which can prolong their lifespan.
It’s important to note that wireless charging is not as efficient as traditional wired charging. Some energy is lost in the process of transferring power wirelessly, which means it may take longer to charge your device. However, advancements in wireless charging technology are constantly being made to improve efficiency.
Overall, understanding wireless charging opens up a world of convenience and tidiness. Embracing this technology can simplify your charging routine and contribute to a more streamlined and organized lifestyle.
Components Required for Building a Wireless Charger
Building a wireless charger may seem like a complex task, but with the right components, it can be a fun and rewarding DIY project. To get started, here are the key components you will need:
- Coil: The coil is an integral part of a wireless charger as it generates the magnetic field that transfers power to the device. It is typically made of copper wire and comes in different shapes and sizes. Look for a coil that is suitable for your charging needs.
- Power Source: In order for the wireless charger to function, you will need a power source. This can be a USB power adapter, a power bank, or even a computer USB port. Ensure that the power source has enough output to provide sufficient power to the wireless charger.
- Bridge Rectifier: The bridge rectifier converts the alternating current (AC) from the power source into direct current (DC) that can be used by the wireless charger. It is an essential component for ensuring compatibility with various devices.
- Capacitor: A capacitor is used to store and regulate electrical energy. It helps smoothen the flow of current in the circuit, thereby preventing sudden power surges and ensuring consistent charging. Choose a capacitor with the appropriate voltage and capacitance ratings for your wireless charger.
- Transistor: The transistor acts as a switch in the wireless charger circuit. It controls the flow of current and enables efficient charging. Look for a suitable transistor that can handle the power requirements of your wireless charger.
- Diode: A diode allows current to flow in only one direction and prevents any reverse current from damaging the circuit. It is crucial for protecting the components of the wireless charger and ensuring safe operation.
- LED: Adding an LED to your wireless charger can provide visual feedback on the charging status. It illuminates when the device is placed correctly on the charger and charging is in progress.
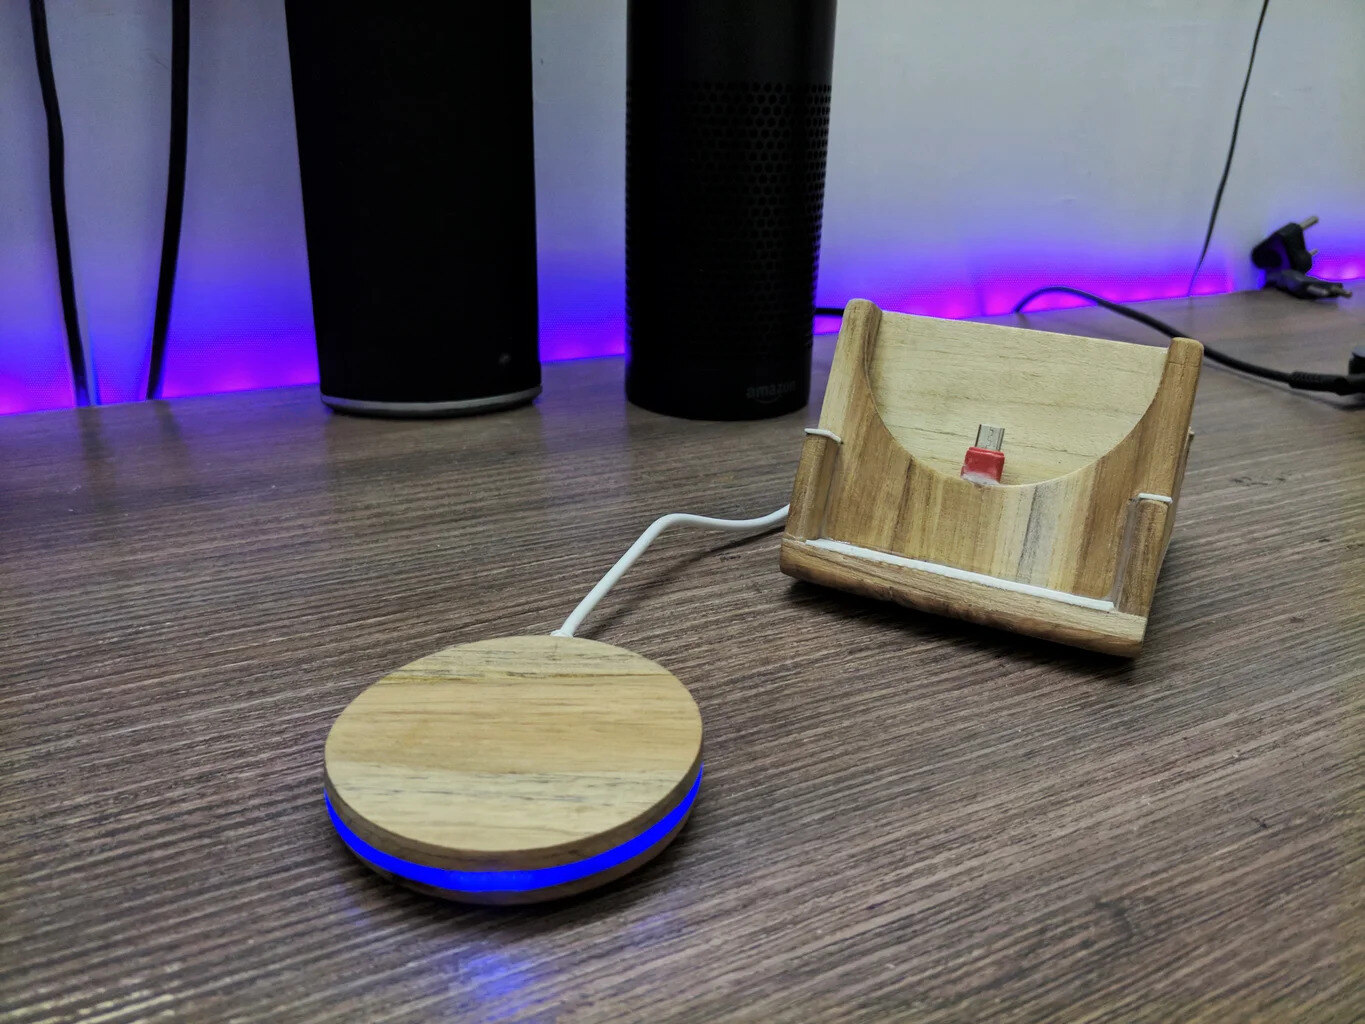
- Enclosure: An enclosure is optional but recommended to protect the internal components of the wireless charger. It can be a 3D-printed case, a wooden box, or any other suitable enclosure that provides both functionality and aesthetics.
These are the main components required for building a wireless charger. Depending on your specific design and requirements, additional components may be necessary. It is always advisable to consult circuit diagrams or follow tutorials for a more detailed understanding of the components and their connections.
The content for the section “Step-by-Step Guide to Building a Wireless Charger” is as follows:
Step-by-Step Guide to Building a Wireless Charger
Building your own wireless charger can be a rewarding and cost-effective project. Follow these step-by-step instructions to create your very own wireless charger:
1. Gather the necessary components: You will need a wireless charging transmitter module, a power source (such as a USB wall adapter), a coil, and a smartphone or device compatible with wireless charging.
2. Prepare the transmitter module: Connect the power source to the wireless charging transmitter module according to the manufacturer’s instructions. This module will generate the electromagnetic field necessary for wireless charging.
3. Construct the coil: Wind a wire tightly into a circular shape, making sure the wire is insulated. The size of the coil will depend on the size of your device. Consult online resources or tutorials for specific guidelines on coil construction.
4. Connect the coil to the transmitter module: Attach the wires from the coil to the corresponding terminals on the transmitter module. Ensure that the connections are secure and insulated to prevent any electrical hazards.
5. Position the coil: Place the coil in the desired location for charging. It should be positioned close to the device’s charging port but not directly touching it. Experiment with different orientations and distances to determine the most efficient charging position.
6. Test the wireless charger: Connect the transmitter module to the power source and place your device on top of the coil. If everything is set up correctly, your device should start charging wirelessly. Monitor the charging process to ensure that it is functioning effectively.
7. Optional: Customize the charger: If you want to enhance the aesthetics of your wireless charger, consider adding a protective casing or incorporating materials that match your personal style. However, ensure that any modifications do not interfere with the charging process or cause any safety risks.
With these step-by-step instructions, you can successfully build your own wireless charger. Enjoy the convenience of wire-free charging while also gaining a sense of accomplishment from creating it yourself.
After reading this article, you should now have a solid understanding of how to build a wireless charger. Wireless charging technology is becoming increasingly popular due to its convenience and ease of use. By following the steps outlined in this article, you can create your own wireless charger setup and free yourself from the hassle of tangled wires and cables.
Remember, safety should always be a top priority when working with electronics. Take necessary precautions and consult professional resources if you are unsure about any step of the process. Enjoy the freedom of wireless charging and the convenience it brings to your everyday life.
FAQs
Here are some frequently asked questions about building a wireless charger:
1. How does a wireless charger work?
A wireless charger uses electromagnetic induction to transfer energy between the charger and the device being charged. The charger contains a coil that generates an alternating magnetic field. This field induces a current in a coil present in the device, which in turn charges the battery.
2. Can I build my own wireless charger?
Yes, it is possible to build your own wireless charger. You would need to acquire the necessary components such as a charging coil, a power source, and a wireless charging receiver module. However, it is important to have a good understanding of electronics and safety precautions before attempting to build one.
3. What are the benefits of a wireless charger?
Wireless chargers offer convenience and eliminate the need for cables or plugs. They provide a clutter-free charging experience and reduce wear and tear on charging ports. Additionally, some wireless chargers support fast charging, allowing you to charge your devices more quickly than traditional wired chargers.
4. Are all devices compatible with wireless charging?
No, not all devices are compatible with wireless charging. Most modern smartphones, such as iPhones and Android devices, support wireless charging, but you should check the specifications of your device to ensure compatibility. Some older devices or devices with metal backs may not be compatible.
5. Are there any safety concerns with wireless charging?
Wireless charging technology is generally safe, but it is important to use certified chargers and follow manufacturer’s instructions. Overheating can be a concern if the charger or device is not properly designed. It is also recommended to avoid charging devices with thick cases or foreign objects on the charging pad, as this can affect the charging efficiency or cause excessive heat generation.