
Are you running out of storage space on your MacBook? Need to transfer your precious data to an external hard drive? Look no further! In this article, we will guide you through the process of transferring data from your MacBook to an external hard drive, enabling you to free up space on your device and ensure the safety of your files. Whether you have important documents, photos, videos, or any other valuable data, transferring them to an external hard drive is a smart move to keep your MacBook running smoothly. So, let’s dive in and discover the step-by-step process of effortlessly transferring data from your MacBook to an external hard drive.
Inside This Article
- Step 1: Connect the External Hard Drive to your MacBook
- Step 2: Open Finder and Locate the Files you Want to Transfer
- Step 3: Copy and Paste the Files to the External Hard Drive
- Step 4: Safely Eject the External Hard Drive
- Conclusion
- FAQs
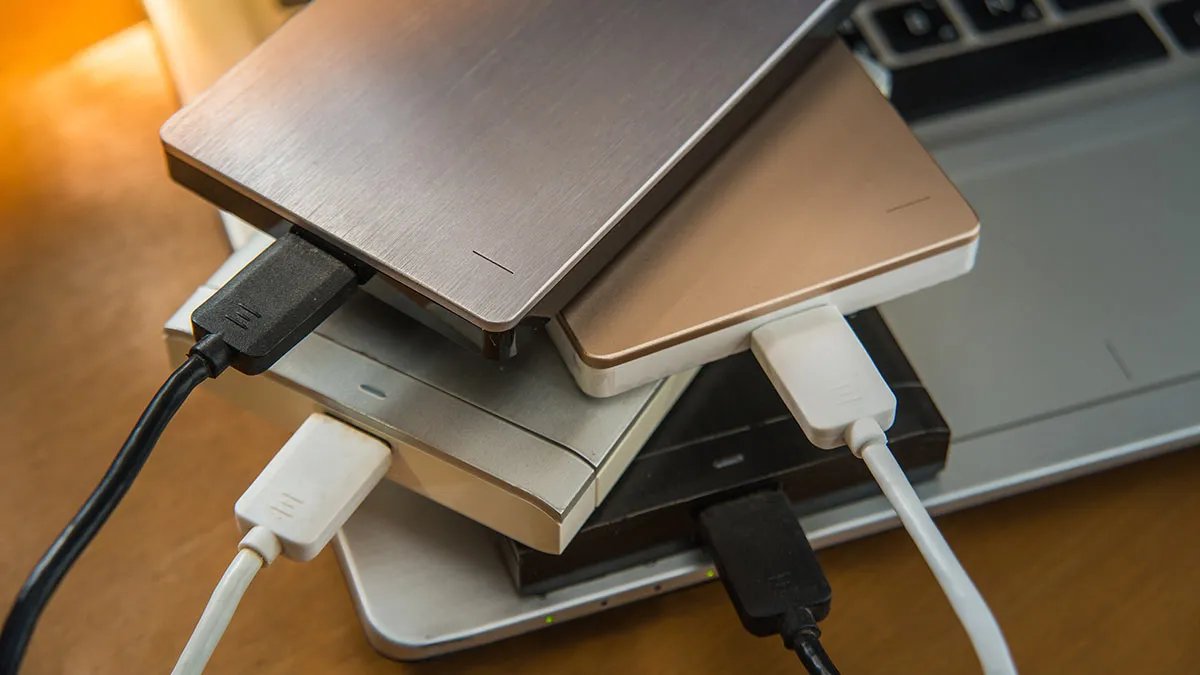
Step 1: Connect the External Hard Drive to your MacBook
Transferring data from your MacBook to an external hard drive is a convenient way to free up space on your computer and create a backup of important files. To begin the process, you’ll need to connect the external hard drive to your MacBook. Follow these simple steps to get started:
1. Start by locating the USB or Thunderbolt port on your MacBook. These ports are typically located on the sides or back of the laptop. Check the specifications of your MacBook model if you’re unsure about the exact location of the ports.
2. Once you’ve located the appropriate port, plug in one end of the USB or Thunderbolt cable into the port on your MacBook.
3. Insert the other end of the cable into the corresponding port on the external hard drive. Ensure that the cable is securely connected to both devices.
4. Some external hard drives may require a power source, especially if they have additional features like built-in displays or multiple drives. If your external hard drive needs power, connect it to an electrical outlet or use a separate power cable provided with the device.
5. Once the external hard drive is connected, your MacBook should recognize it and display an icon on the desktop or in the Finder sidebar. This indicates that the device is ready to use.
Congratulations! You’ve successfully connected your external hard drive to your MacBook. Now you’re ready to move on to the next step and start transferring your desired files.
Step 2: Open Finder and Locate the Files you Want to Transfer
Once you have successfully connected your external hard drive to your MacBook, it’s time to open Finder and locate the files you want to transfer. Finder is the default file manager on Mac computers and allows you to easily navigate through your files and folders.
To open Finder, you can either click on the blue face icon on your dock, which is usually located at the bottom of the screen, or you can use the shortcut Command+Spacebar and type in “Finder” in the search bar. Press Enter and the Finder window will open up.
Once you have opened Finder, you will see a sidebar on the left-hand side of the window. This sidebar displays a list of commonly used folders such as Documents, Downloads, and Applications. You can click on any of these folders to access their contents.
If the files you want to transfer are located in one of these folders, simply navigate to that folder by clicking on it. If the files are located in a different folder or directory, you can use the search bar at the top right corner of the Finder window to search for them. Just type in the name of the file or a keyword related to the file, and Finder will display the search results.
You can also use the navigation buttons at the top of the Finder window to move back and forth between folders. The back arrow button, located on the top left corner, allows you to go back to the previous folder you were in. The forward arrow button, located next to the back arrow, enables you to move forward if you have gone back.
Once you have located the files you want to transfer, you can either select individual files or select multiple files by holding down the Command key and clicking on each file. You will see a blue highlight around the selected files.
If you want to transfer an entire folder along with its contents, simply click on the folder and drag it to the external hard drive icon, which should be visible in the sidebar of the Finder window.
To ensure a smooth transfer process, it’s important to double-check that you have selected all the files or folders you want to transfer. You wouldn’t want to miss any important files!
That’s it! You have successfully opened Finder and located the files you want to transfer. In the next step, we will cover how to copy and paste the files to the external hard drive.
Step 3: Copy and Paste the Files to the External Hard Drive
Now that you have located the files you want to transfer to the external hard drive, it’s time to copy and paste them. Follow these simple steps to complete the process:
- Highlight the files or folders you wish to transfer by clicking and dragging your cursor over them. You can also select multiple files or folders by holding down the Command key (?) while clicking on each item.
- Right-click on the highlighted files and select “Copy” from the context menu. Alternatively, you can press the Command key (?) + C on your keyboard to copy the files.
- Open the Finder window and navigate to the external hard drive. This can typically be found under the “Devices” section in the left sidebar of the Finder window.
- Once you have accessed the external hard drive, right-click on an empty space within the window and select “Paste” from the context menu. Alternatively, you can press the Command key (?) + V on your keyboard to paste the files.
- The files will now begin to copy from your MacBook to the external hard drive. The time it takes to complete the transfer will depend on the size of the files and the speed of the hard drive.
- You can monitor the progress of the file transfer by viewing the status bar or progress indicator. Once the transfer is complete, you will see the files appear in the external hard drive window.
It is important to note that during the file transfer, it is advisable not to turn off or disconnect your MacBook or the external hard drive. Doing so can interrupt the transfer process and potentially corrupt the files.
After successfully copying the files to the external hard drive, you can disconnect it from your MacBook by safely ejecting it. This will help prevent any data loss or damage to the files stored on the external hard drive.
Now that you have completed the file transfer process, you can confidently free up storage space on your MacBook and have a backup of your important data on the external hard drive.
Step 4: Safely Eject the External Hard Drive
After successfully transferring your files to the external hard drive, it is important to safely eject it from your MacBook to avoid data corruption or loss. Ejecting the external hard drive ensures that all file transfers have been completed and that it is safe to disconnect it from your computer.
To safely eject the external hard drive, follow these steps:
1. Locate the external hard drive icon: On your MacBook’s desktop, you will see the icon representing your external hard drive. It may appear as a standard hard drive symbol or be labeled with the name of the drive.
2. Right-click on the external hard drive icon: Position your cursor over the external hard drive icon and right-click on it. This will open a drop-down menu with various options.
3. Select the “Eject” option: From the drop-down menu, select the “Eject” option. This will initiate the ejection process for the external hard drive.
4. Wait for the ejection process: Once you have selected the “Eject” option, your MacBook will begin the ejection process. It is essential to wait for this process to complete before disconnecting the external hard drive.
5. Check the external hard drive LED indicator: Some external hard drives have LED indicators that show the status of the drive. Ensure that the LED light is not blinking or showing any activity before proceeding to disconnect the drive.
6. Safely disconnect the external hard drive: Once the ejection process is complete and there is no activity on the LED indicator, you can safely disconnect the external hard drive from your MacBook. This can be done by gently unplugging the USB cable or using any other applicable mechanism specified by the manufacturer.
Remember: It is crucial to only remove the external hard drive once it has been safely ejected. Abruptly disconnecting the drive while data is being transferred or when the drive is still in use can cause data corruption or loss. Taking the extra few seconds to properly eject the drive will greatly minimize the risk of any potential issues.
By following these steps, you can ensure the safe ejection of your external hard drive after transferring your files from your MacBook. This simple precaution will help protect your data and maintain the integrity of your external storage device.
Conclusion
Transferring data from your MacBook to an external hard drive is a simple and effective way to free up storage space and keep your important files safe. By following the steps outlined in this article, you can easily transfer your data with confidence. Whether you are looking to back up your files or need to make space for new content, transferring data to an external hard drive is a reliable solution.
Remember to choose a compatible external hard drive, format it correctly, and follow the recommended steps for data transfer. By taking these precautions, you can ensure a smooth and secure transfer of your data. Don’t forget to regularly back up your files to keep them protected against potential computer issues or data loss. With the convenience of external storage, managing your MacBook’s data has never been easier!
FAQs
1. Can I transfer data from my MacBook to an external hard drive?
Absolutely! Transferring data from your MacBook to an external hard drive is a seamless process. This allows you to free up space on your MacBook and keep your important files safe and accessible on the external hard drive. In this article, we will guide you through the steps to transfer data from your MacBook to an external hard drive.
2. What do I need to transfer data from my MacBook to an external hard drive?
To transfer data from your MacBook to an external hard drive, you will need the following:
- A MacBook with available USB or Thunderbolt ports
- An external hard drive with sufficient storage capacity
- A USB or Thunderbolt cable (depending on the ports available on your MacBook and the external hard drive)
3. How do I physically connect the external hard drive to my MacBook?
Connecting your external hard drive to your MacBook is a simple process. Follow these steps:
- Locate the USB or Thunderbolt port on your MacBook.
- Plug one end of the USB or Thunderbolt cable into the port on your MacBook.
- Plug the other end of the cable into the corresponding port on the external hard drive.
- Wait for your MacBook to recognize the external hard drive. You may see a notification or icon appearing on your screen.
4. How do I transfer data from my MacBook to the external hard drive?
Once you have connected your external hard drive to your MacBook, follow these steps to transfer data:
- Open the Finder application on your MacBook.
- Locate the files or folders you want to transfer to the external hard drive.
- Click and drag the files/folders from their current location to the external hard drive in the Finder sidebar.
- Release the mouse button to start the transfer process.
- Wait for the transfer to complete. The time it takes depends on the size of the files and the transfer speed.
5. Can I safely disconnect the external hard drive from my MacBook after transferring data?
Yes, it is important to safely disconnect the external hard drive from your MacBook to avoid any potential data corruption or loss. Follow these steps to safely eject the external hard drive:
- Click on the external hard drive icon on your MacBook’s desktop.
- Click on the “Eject” button next to the external hard drive’s name.
- Wait for the MacBook to confirm that it is safe to disconnect the external hard drive.
- Once the confirmation message appears, you can unplug the USB or Thunderbolt cable from your MacBook and the external hard drive.