
The LG G5 is a powerful and feature-packed smartphone that offers a diverse range of photography options. One of the standout features of the LG G5 is its manual mode, which allows users to have complete control over their camera settings. By using the manual mode on the LG G5, users can adjust parameters such as ISO, shutter speed, white balance, and focus to capture stunning, professional-quality photos. Whether you are an amateur photographer looking to experiment or a seasoned pro wanting to fine-tune your shots, the manual mode on the LG G5 is a tool that can take your smartphone photography to the next level. In this article, we will guide you through the different steps to use the manual mode effectively on your LG G5, ensuring that you can unleash your creativity and capture the perfect shot every time.
Inside This Article
- Overview of the Manual Mode on the LG G5
- Steps to Access the Manual Mode
- Adjusting the Shutter Speed and ISO Settings
- Controlling White Balance and Exposure Compensation
- Using Manual Focus and Auto Focus Lock
- Utilizing the Gridlines and Histogram Features
- Tips for Capturing Great Photos in Manual Mode
- Troubleshooting Common Issues in Manual Mode
- Conclusion
- FAQs
Overview of the Manual Mode on the LG G5
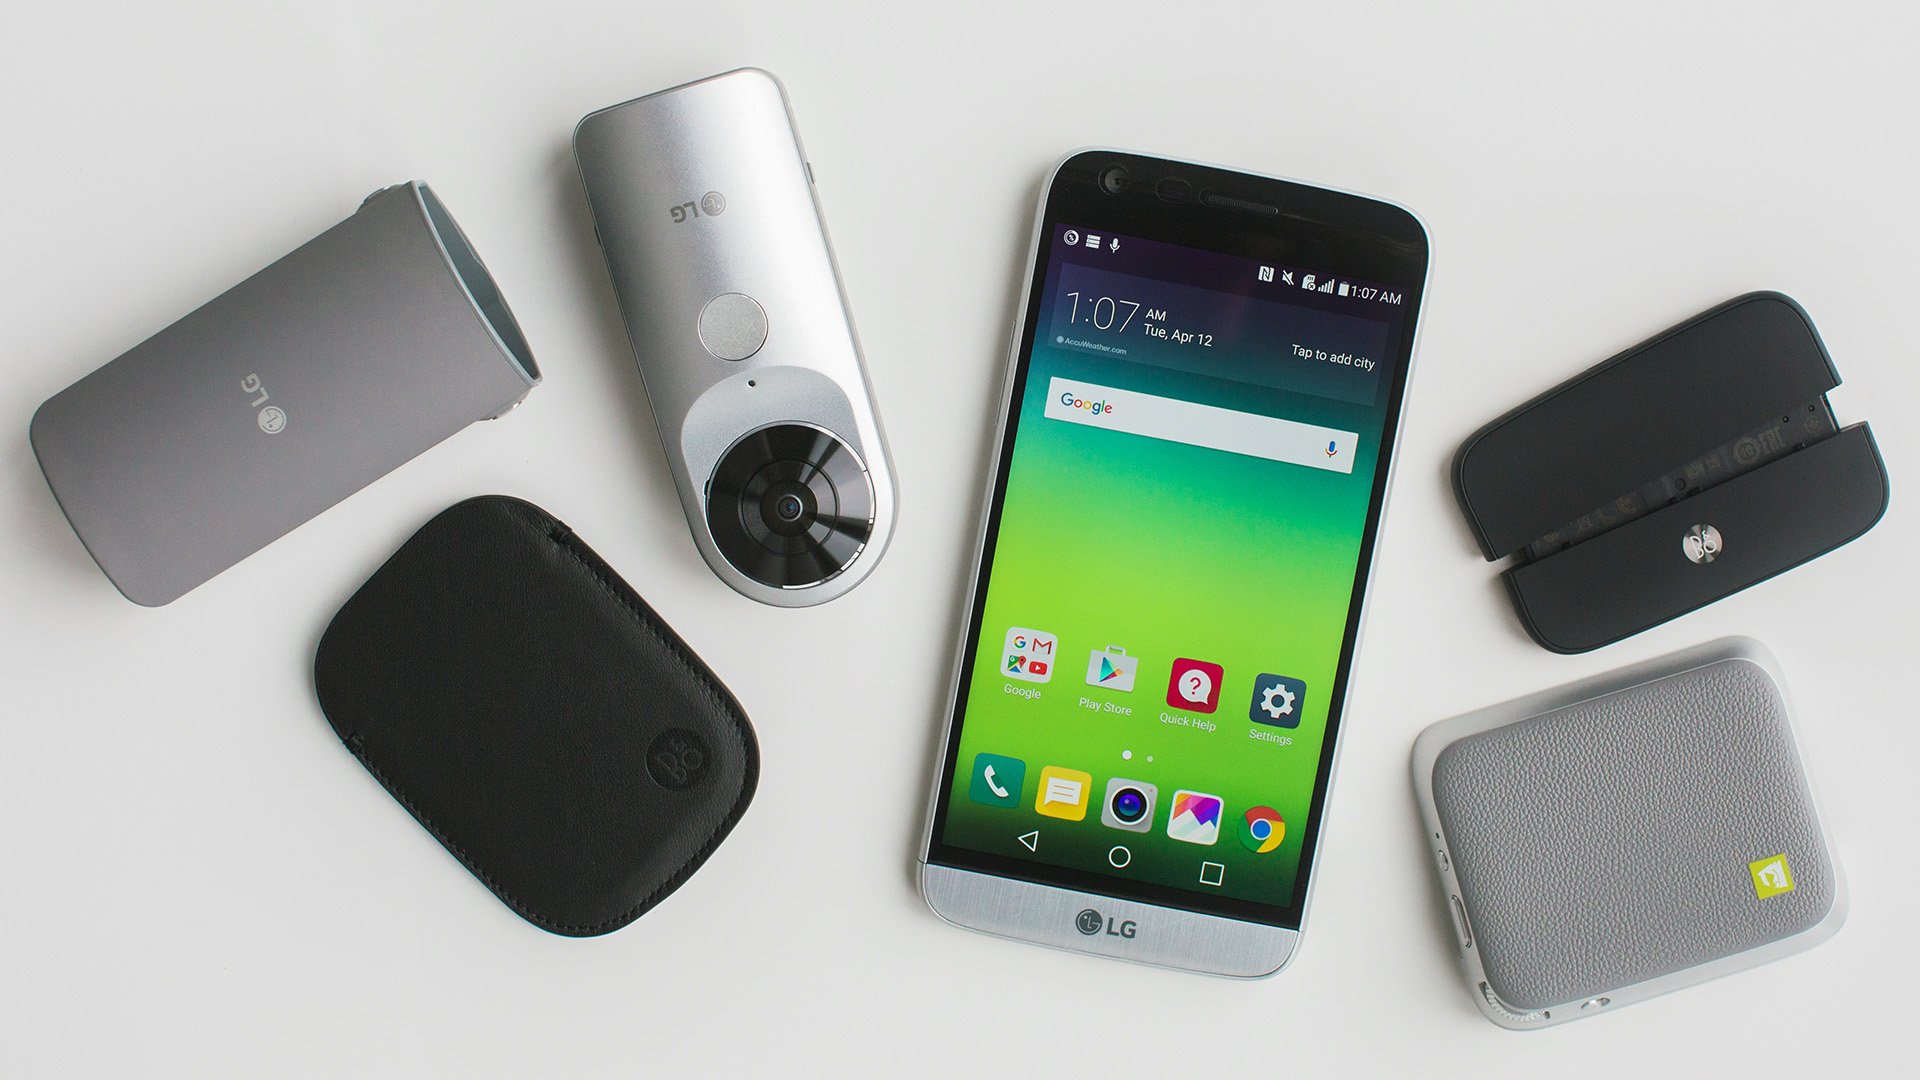
The LG G5 is a powerful smartphone that offers a range of features to enhance your photography experience. One of its standout features is the Manual Mode, which allows you to have complete control over your camera settings to capture stunning photos.
When using the Manual Mode on the LG G5, you have the ability to adjust various settings such as shutter speed, ISO, white balance, exposure compensation, focus, and more. This gives you the freedom to create your desired look and feel for your photos, whether you’re shooting landscapes, portraits, or other subjects.
By using the Manual Mode, you can take your photography skills to the next level and have more creative control over the outcome of your images. This mode is especially useful in situations where you want to capture fast-moving subjects, low-light scenes, or when you have a specific aesthetic in mind.
Whether you’re a professional photographer or simply enjoy capturing great moments with your smartphone, the Manual Mode on the LG G5 will provide you with the tools you need to unleash your creativity and capture stunning photos with ease.
Steps to Access the Manual Mode
The manual mode on the LG G5 allows you to have full control over the camera settings, giving you the ability to capture stunning photos with precision. To access the manual mode, follow these simple steps:
- Open the camera app: Locate the camera app on your LG G5 and open it by tapping on the icon.
- Switch to the manual mode: Once the camera app is open, look for the mode selector located on the screen. It typically appears as a circle with different shooting modes. Swipe left or right until you find the manual mode option.
- Select the manual mode: Tap on the manual mode option to activate it and switch your camera to manual mode.
And that’s it! You have successfully accessed the manual mode on your LG G5. Now, you can take full control of your camera settings and unleash your creativity to capture stunning photos.
Adjusting the Shutter Speed and ISO Settings
When it comes to capturing the perfect shot in manual mode on the LG G5, adjusting the shutter speed and ISO settings can make a significant difference. These settings allow you to have fine control over the exposure and the amount of light that enters the camera sensor.
The shutter speed refers to the duration for which the camera’s shutter remains open. A faster shutter speed, such as 1/1000s, captures fast-moving objects without any motion blur. On the other hand, a slower shutter speed, like 1/30s, captures motion blur, allowing you to create artistic effects or capture more light in low-light situations.
To adjust the shutter speed on the LG G5, follow these steps:
- Open the camera app and switch to manual mode.
- Tap on the shutter speed icon, usually represented by the letter “S” or a fraction.
- Drag the slider left or right to increase or decrease the shutter speed.
ISO, on the other hand, determines the camera’s sensitivity to light. A low ISO setting, such as ISO 100, is ideal for well-lit environments and produces images with minimal noise. In contrast, a higher ISO setting, like ISO 800 or above, is useful in low-light situations but can introduce more noise or graininess to the image.
To adjust the ISO setting on the LG G5, follow these steps:
- Open the camera app and switch to manual mode.
- Tap on the ISO icon, usually represented by the letters “ISO” or an icon resembling a grain of rice.
- Drag the slider left or right to increase or decrease the ISO value.
Keep in mind that adjusting the shutter speed and ISO settings is a balancing act. If you increase the shutter speed to freeze motion, you may need to raise the ISO to ensure the image is properly exposed. Conversely, if you lower the ISO for less noise, you may need to decrease the shutter speed to allow more light into the sensor.
Experimenting with different combinations of shutter speed and ISO settings will allow you to find the perfect balance for each unique photography situation. Practice and trial-and-error will help you master the art of manually adjusting these settings on the LG G5.
Controlling White Balance and Exposure Compensation
When it comes to photography, getting the right white balance and exposure is crucial for capturing the perfect shot. With the manual mode on the LG G5, you have full control over these settings to achieve the desired results. Let’s explore how you can control white balance and exposure compensation on the LG G5.
White balance refers to the color temperature of the light in your scene. It determines how your camera interprets the colors in your photo. The LG G5 offers a range of white balance presets, such as Auto, Incandescent, Fluorescent, Daylight, and Cloudy, to help you adjust the colors based on the lighting conditions. To access these white balance presets, simply tap on the white balance icon in the manual mode interface.
If you want even more control over the white balance, you can choose the Kelvin temperature option. This allows you to manually adjust the color temperature by specifying the exact Kelvin value. For example, lower Kelvin values like 2500K will produce a warmer, yellowish tone, while higher values like 8000K will result in a cooler, bluish tone.
Exposure compensation, on the other hand, is a setting that allows you to adjust the overall brightness and darkness of your photo. It is particularly useful when you want to override the camera’s automatic exposure settings. With the LG G5’s manual mode, you can easily tweak the exposure compensation by using the slider located next to the shutter button.
By dragging the slider to the right, you can increase the exposure, making the photo brighter. Conversely, dragging it to the left will decrease the exposure, making the photo darker. It’s important to note that exposure compensation is measured in EV (Exposure Value), with a positive value indicating a brighter photo and a negative value indicating a darker photo.
Experimenting with different white balance settings and exposure compensation values can help you add depth and mood to your photos. Keep in mind that the ideal settings may vary depending on the lighting conditions and the effect you want to achieve. Don’t be afraid to try different combinations and see what works best for your specific shot.
Remember, the manual mode on the LG G5 offers you full control over white balance and exposure compensation, allowing you to unleash your creativity and capture stunning photos in any lighting situation. So go ahead, play around with these settings, and take your photography to the next level!
Using Manual Focus and Auto Focus Lock
When it comes to photography, achieving precise focus is essential for capturing sharp and detailed images. Thankfully, the LG G5 offers a Manual Focus feature that allows users to take complete control over focus. Additionally, the Auto Focus Lock option is available for locking the focus on a specific subject. Let’s delve into how to use these features effectively.
To utilize the Manual Focus feature on the LG G5, follow these simple steps:
- Open the camera app on your LG G5.
- Swipe left to access the camera modes, and tap on “Manual.”
- Tap on the “MF” (Manual Focus) icon located on the top toolbar.
- An adjustable focus slider will appear on the screen.
- Drag the slider left or right to adjust the focus.
Once you’ve set the focus to your desired point, you can take advantage of the Auto Focus Lock for maintaining the focus position. Here’s how:
- While in Manual Focus mode, tap on the screen to choose the focus area.
- A green rectangle will appear over the selected area, indicating the focus lock.
- The focus will remain locked on that specific area, even if you move the camera or the subject moves.
Using the Manual Focus and Auto Focus Lock features provides you with more control over your images. You can creatively blur the background by adjusting the focus point, or ensure that a particular subject remains in sharp focus regardless of movement.
Keep in mind that Manual Focus is particularly useful in situations where the camera’s autofocus might struggle, such as low light conditions or when capturing subjects with little contrast. It allows you to fine-tune the focus and achieve the desired level of sharpness.
Experimenting with Manual Focus and Auto Focus Lock can lead to stunning and unique photographs. Play around with different focus points and lock onto intriguing details to add depth and interest to your images.
Remember, practice makes perfect. Take some time to familiarize yourself with the Manual Focus and Auto Focus Lock features on your LG G5 and start capturing extraordinary photos!
Utilizing the Gridlines and Histogram Features
When it comes to capturing great photos in manual mode on the LG G5, utilizing the gridlines and histogram features can greatly enhance your photography experience. These features provide valuable visual aids that can help you compose your shots and ensure proper exposure.
The gridlines feature overlays a grid onto your camera viewfinder, dividing the frame into a 3×3 or 4×4 grid. This grid serves as a guide to help you align your subjects and create well-balanced compositions. It adheres to the rule of thirds, a popular principle in photography that states that images are more pleasing to the eye when the subjects and points of interest align with the gridlines or their intersections.
To activate the gridlines feature, open the camera app on your LG G5 and access the manual mode. Inside the manual mode interface, you can find the gridlines option by tapping on the settings icon. From there, you can choose the grid size that best suits your preferences.
Once the gridlines are enabled, you can start using them to improve your composition. For example, if you’re taking a landscape photo, you can align the horizon with one of the horizontal gridlines to create a more balanced and pleasing shot. If you’re capturing a portrait, you can position the subject’s eyes along one of the vertical gridlines for better symmetry.
In addition to gridlines, the histogram feature on the LG G5 provides valuable information about the exposure levels in your photos. The histogram is a visual representation of the distribution of light and dark areas within an image. It is displayed as a graph, with shadows on the left, highlights on the right, and midtones in the middle.
By analyzing the histogram, you can ensure proper exposure in your photos. If the graph is skewed towards the left, it indicates underexposure, meaning your image is too dark. Conversely, if the graph is skewed towards the right, it indicates overexposure, meaning your image is too bright. Ideally, you want the graph to be evenly distributed, with a smooth curve representing a balanced exposure.
To access the histogram feature, make sure you are in manual mode and tap on the settings icon. Look for the histogram option and enable it. The histogram will then be displayed on your screen, allowing you to evaluate the exposure levels of your photos in real-time.
Utilizing the gridlines and histogram features on the LG G5 can greatly improve your photography skills and help you capture stunning photos in manual mode. By using the gridlines to compose your shots and the histogram to ensure proper exposure, you’ll be able to take your photography to the next level and unleash your creativity.
Tips for Capturing Great Photos in Manual Mode
Capturing great photos in manual mode can be a thrilling experience that allows you to have full control over your LG G5 camera settings. Here are some tips to help you make the most out of manual mode and capture stunning photos:
- Understand your lighting: Lighting plays a crucial role in photography. Take the time to observe and understand the natural light in your environment. Adjust your camera settings accordingly to achieve the desired exposure and mood.
- Experiment with shutter speed and ISO: Manual mode gives you the flexibility to adjust shutter speed and ISO settings. Experiment with different combinations to achieve the desired effect. Lower shutter speed can create motion blur, while higher ISO settings can help you capture photos in low-light conditions without much noise.
- Master the art of composition: Composition is the key to captivating photos. Use the rule of thirds to place your subject off-center and create a more visually pleasing image. Experiment with different angles and perspectives to add depth and interest to your composition.
- Focus on details: Manual focus allows you to control the sharpness and depth of field in your photos. Take advantage of this feature to highlight specific details or create a shallow depth of field effect. Pay attention to the smallest details, as they can make a big impact on the final image.
- Utilize the gridlines: The gridlines feature in manual mode can help you align your shots and create a sense of balance and symmetry in your composition. Use the gridlines as a guide to ensure that your horizon is straight and elements are properly positioned within the frame.
- Experiment with white balance: White balance can drastically change the mood and color temperature of your photos. Play around with different white balance settings to achieve the desired effect. For example, a warmer white balance can create a cozy and intimate atmosphere, while a cooler white balance can give your photos a more surreal and ethereal look.
- Prioritize stability: To capture sharp and clear photos in manual mode, it’s important to keep your camera steady. Use a tripod or stabilize your hands against a solid surface to minimize camera shake. You can also set a timer or use a remote shutter release to avoid any accidental movement.
- Learn from your mistakes: Don’t be afraid to experiment and take risks in manual mode. If a photo doesn’t turn out as expected, take note of what went wrong and learn from your mistakes. This will help you improve your skills and become more comfortable with manual mode over time.
- Edit your photos: Post-processing can enhance the visual impact of your photos. Use editing software or apps to adjust exposure, contrast, color balance, and other parameters. However, remember to maintain the authenticity and integrity of the image by not over-editing or heavily manipulating it.
By following these tips and practicing regularly, you’ll be able to capture stunning photos in manual mode on your LG G5. Enjoy the creative freedom and express your unique perspective through your photography!
Troubleshooting Common Issues in Manual Mode
Manual mode on the LG G5 provides a great degree of control over your photography, allowing you to make precise adjustments to settings like shutter speed, ISO, white balance, and more. However, even with all this control, you may encounter some common issues while using the manual mode. Don’t worry; we’ve got you covered! In this section, we will discuss some troubleshooting tips to help you overcome these challenges and capture stunning photos.
1. Blurry Photos:
One common issue you may encounter in manual mode is blurry photos. This can be caused by several factors, such as camera shake or incorrect focus settings. To address this, make sure to hold your phone steady while taking the shot. You can also try using a tripod or stabilizing your hand against a solid surface. Additionally, check your focus settings and ensure that the subject is in sharp focus before taking the photo.
2. Overexposure or Underexposure:
In manual mode, you have control over the exposure settings, such as shutter speed and ISO. If your photos are consistently overexposed (too bright) or underexposed (too dark), adjust the exposure compensation. Increase the compensation for underexposed photos and decrease it for overexposed ones. Take test shots and make incremental adjustments until you achieve the desired exposure.
3. White Balance Issues:
White balance plays a vital role in determining the color accuracy of your photos. If you notice that the colors are too warm or too cool, adjust the white balance setting. The LG G5 offers preset white balance options like Auto, Daylight, Cloudy, Incandescent, and Fluorescent. Experiment with these settings to find the one that best matches the lighting conditions for accurate color reproduction.
4. Grainy Photos:
Excessive grain or noise in your photos can be a result of using high ISO settings. In manual mode, take note of the ISO setting and try to keep it as low as possible in well-lit conditions to minimize the noise. However, in low-light situations, you may need to increase the ISO to maintain a proper exposure. Strike a balance between ISO and shutter speed to avoid excessive noise in your photos.
5. Focusing Issues:
If you are having trouble getting the subject in focus, double-check that you have turned off the auto-focus feature. In manual mode, you are responsible for adjusting the focus manually. Use the camera’s focus peaking or zoom features to ensure precise focus. Take your time to manually adjust the focus until the subject appears sharp and clear in the viewfinder.
6. Out-of-Focus Background:
In some cases, you may want to capture a photo with a blurred background, also known as a shallow depth of field. To achieve this effect, use a wide aperture setting, such as f/1.8 or f/2.8, which allows more light to enter the sensor and creates a shallow depth of field. Make sure to focus on the subject while keeping the background at a distance to maintain a blurred effect.
7. Battery Drainage:
Using the manual mode extensively can consume more battery power. Ensure that your LG G5’s battery is adequately charged before using manual mode. Additionally, try closing other apps running in the background, reducing screen brightness, or activating power-saving mode to maximize your battery life during extended manual photography sessions.
By troubleshooting these common issues in manual mode, you can take full advantage of the LG G5’s capabilities and capture stunning photos with precision. Don’t be afraid to experiment and practice with different settings until you achieve the desired results. Enjoy the freedom that manual mode provides and unleash your creativity in photography!
By mastering the manual mode on the LG G5, users can take their smartphone photography skills to the next level. This feature offers unparalleled control over key settings like exposure, focus, and shutter speed, allowing users to capture stunning images in any lighting condition. Whether you are a photography enthusiast or simply want to elevate your Instagram game, the manual mode on the LG G5 is a powerful tool in your hands.
With a little practice and experimentation, you’ll be able to unleash your creativity and capture breathtaking shots that truly stand out. So don’t be afraid to dive into the manual mode on your LG G5 and explore its full potential. It’s time to take control of your smartphone photography and create stunning visuals that leave a lasting impression.
FAQs
1. How do I access the manual mode on the LG G5?
To access the manual mode on the LG G5, open the camera app and tap on the mode button at the top of the screen. From there, scroll through the available modes until you find the manual mode, which is represented by the letter “M” surrounded by a circle.
2. What are the benefits of using the manual mode on the LG G5?
The manual mode allows you to have complete control over your camera settings on the LG G5. This means you can adjust parameters like ISO, shutter speed, focus, and white balance to capture the perfect shot. Using manual mode can greatly enhance your photography skills and give you more creative freedom.
3. Can I shoot in RAW format using the manual mode on the LG G5?
Yes, the manual mode on the LG G5 gives you the option to shoot in RAW format. RAW files retain more information compared to standard JPEG files, giving you more flexibility in post-processing. You can edit RAW images to achieve a higher level of detail and make adjustments without significant loss in image quality.
4. How can I adjust the ISO settings in manual mode on the LG G5?
To adjust the ISO settings in manual mode on the LG G5, simply tap on the ISO button and use the slider that appears on the screen to increase or decrease the ISO value. A higher ISO value allows you to capture brighter images in low light conditions, while a lower ISO value is suitable for well-lit environments.
5. Is it possible to use manual focus with the LG G5’s manual mode?
Yes, manual focus is available in the manual mode on the LG G5. To use manual focus, tap on the focus button and a focus slider will appear on the screen. Slide your finger along the slider to manually adjust the focus point. This feature is particularly useful when you want to achieve selective focus or capture subjects at varying distances.