
Have you ever found yourself in a situation where you needed to extract the SD card from your Samsung Galaxy A smartphone? Whether it's to transfer data, upgrade the storage, or troubleshoot issues, knowing how to safely remove the SD card is essential. In this article, we'll delve into the step-by-step process of extracting the SD card from a Samsung Galaxy A, providing you with valuable insights and tips to ensure a smooth and hassle-free experience. So, if you've been wondering, "How do I extract the SD card from my Samsung Galaxy A?" – you're in the right place! Let's dive into the details of this essential smartphone task.
Inside This Article
- Precautions before removing the SD card
- Removing the back cover
- Extracting the SD card
- Reinserting the back cover
- Conclusion
- FAQs
**
Precautions before removing the SD card
**
Before removing the SD card from your Samsung Galaxy A, it’s crucial to ensure that your device is powered off. Removing the SD card while the device is still on can lead to data corruption and potential damage to the card itself. Therefore, always power down your device before attempting to remove the SD card.
Additionally, it’s essential to handle the SD card with care. Avoid touching the gold contacts on the card, as oils and debris from your fingers can interfere with the card’s functionality. To prevent static electricity from damaging the card, try to touch a metal object to discharge any static before handling the SD card.
Furthermore, if your SD card is being used to store apps or as internal storage, it’s important to ensure that you have a backup of any essential data. This can include photos, videos, documents, and any other files stored on the SD card. Having a backup ensures that you won’t lose any crucial data during the removal process.
Removing the back cover
Before you begin the process of removing the back cover of your Samsung Galaxy A, it’s crucial to ensure that the device is powered off. This precaution helps prevent any potential damage to the phone or the SD card during the removal process.
Once the device is turned off, locate the small notch on the bottom edge of the device. Gently insert your fingernail or a plastic opening tool into the notch. Apply slight pressure to lift the back cover away from the device. It’s important to exercise caution and avoid using excessive force to prevent any damage to the cover or the phone.
As the back cover starts to detach, continue to carefully run your fingers along the edges, gradually releasing the clips holding the cover in place. Take your time and ensure that the cover is being removed evenly without putting strain on any specific area. With patience and gentle movements, the back cover will be successfully detached, providing access to the SD card slot.
Sure, here's the content for the "Extracting the SD card" section:
html
Extracting the SD card
Once the back cover is removed, you can easily access the SD card slot. Gently press the SD card inward to release it from the slot. Carefully pull the SD card out of the slot, ensuring a smooth and steady motion to avoid any damage to the card or the slot.
It’s essential to handle the SD card with care, holding it by the edges to prevent any contact with the metal connectors. This helps maintain the integrity of the data stored on the card and ensures its longevity.
After removing the SD card, it’s advisable to keep it in a safe place to prevent loss or damage. Additionally, it’s crucial to protect the exposed slot from dust or debris by promptly reinserting the back cover or using a temporary cover to shield the open slot.
Sure, here's the content for "Reinserting the back cover" section:
Reinserting the back cover
After successfully removing and extracting the SD card from your Samsung Galaxy A, it’s time to reinsert the back cover. This process is crucial to ensure the proper functioning and protection of your device.
Start by aligning the back cover with the edges of the device. Gently press around the perimeter of the back cover to secure it in place. You should hear a series of satisfying clicks as the cover snaps back into position.
Ensure that the cover is flush with the edges of the device, with no gaps or misalignments. This step is essential to maintain the device’s water and dust resistance, as well as to prevent any potential damage from external elements.
Once the back cover is securely in place, power on your Samsung Galaxy A and verify that the device recognizes the reinserted SD card. If everything is in order, you can continue using your device with the added storage and functionality provided by the SD card.
Conclusion
Extracting the SD card from a Samsung Galaxy A is a straightforward process that allows you to expand the device’s storage capacity, transfer files, and manage data efficiently. By following the simple steps outlined in this guide, you can safely remove the SD card from your Samsung Galaxy A, ensuring that your device continues to function optimally. Whether you need to upgrade your SD card or transfer files to another device, this knowledge empowers you to make the most of your smartphone’s capabilities. With the ability to access, remove, and replace the SD card as needed, you can enjoy a seamless and versatile mobile experience with your Samsung Galaxy A.
FAQs
1. How do I extract the SD card from my Samsung Galaxy A?
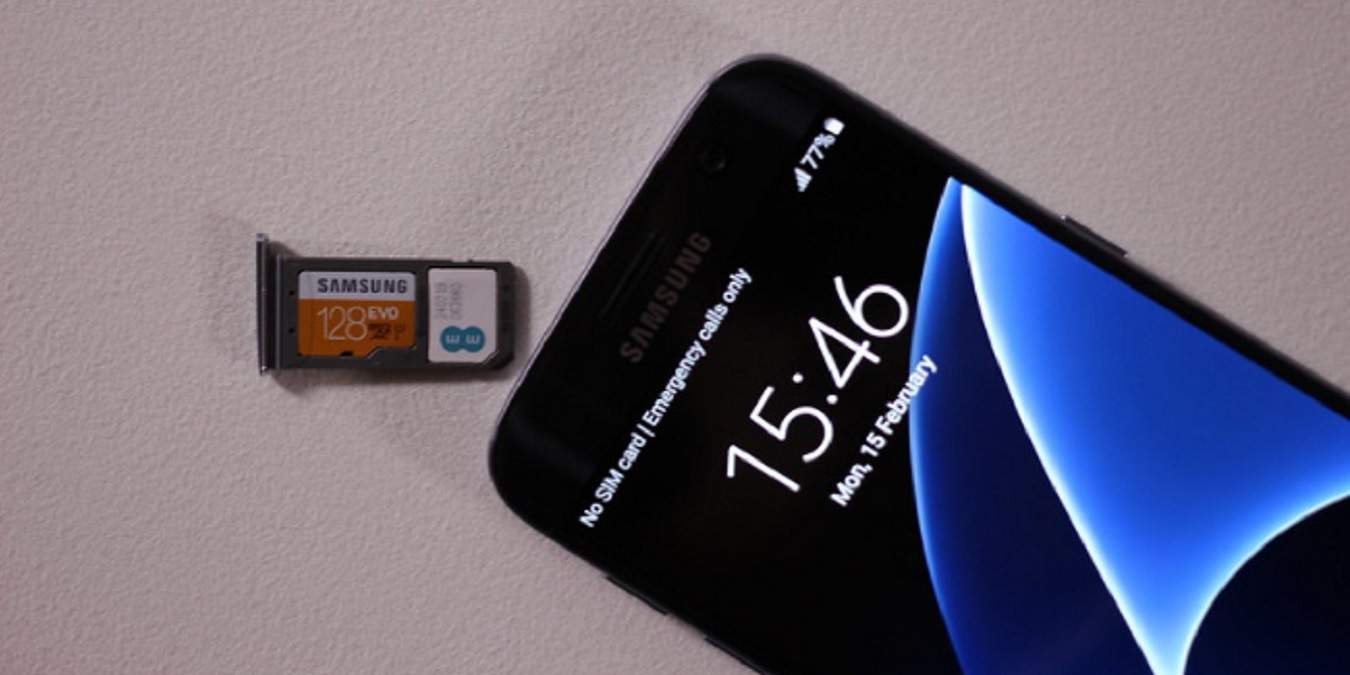
To remove the SD card from your Samsung Galaxy A, first, power off your device. Then, locate the SIM card tray slot on the side of your phone. Use the SIM ejection tool (or a small paperclip) to gently press into the small hole next to the tray. The tray will pop out slightly, allowing you to pull it out fully. Once the tray is removed, carefully push the SD card to release it from the slot and remove it from the tray.
2. Can I remove the SD card while my phone is powered on?
It’s recommended to power off your Samsung Galaxy A before removing the SD card to avoid potential data corruption or damage to the card. Powering off the device ensures that all processes involving the SD card are safely terminated, reducing the risk of data loss or card malfunction.
3. What should I do if my SD card is stuck in the slot?
If your SD card is stuck in the slot, avoid using excessive force to remove it, as this can cause damage to both the card and the slot. Instead, gently wiggle the card back and forth while applying light pressure to release it from the slot. If the card remains stuck, seek assistance from a professional technician or the manufacturer’s support service to avoid causing further damage.
4. Will removing the SD card erase its data?
Removing the SD card from your Samsung Galaxy A will not erase its data, as long as the device is powered off before extraction. However, it’s essential to handle the card carefully to prevent data corruption or physical damage. Always power off your phone before removing the SD card to ensure the safety of your data.
5. Can I use the SD card from my Samsung Galaxy A in another device?
Yes, you can use the SD card from your Samsung Galaxy A in another compatible device, such as another smartphone or a computer with an SD card reader. Ensure that the receiving device supports the SD card’s format and capacity to access its data effectively. It’s important to handle the SD card with care and avoid exposing it to extreme temperatures or physical damage during the transfer process.