
The OnePlus Nord is a highly popular smartphone that offers a wide range of features and functionalities. If you’re a proud owner of a OnePlus Nord and looking to import your contacts from another device, you’ve come to the right place. In this article, we will guide you through the process of importing contacts in OnePlus Nord, ensuring that all your important contacts are seamlessly transferred to your new device. Whether you’re switching from an iPhone or another Android device, the OnePlus Nord makes it easy to transfer your contacts and stay connected with your friends, family, and colleagues. So let’s dive in and discover how to import contacts in OnePlus Nord and simplify your transition to this fantastic smartphone.
Inside This Article
- Setting Up OnePlus Nord
- Method 1: Import Contacts from SIM Card
- Method 2: Import Contacts from Google Account
- Method 3: Import Contacts from External Storage
- Conclusion
- FAQs
Setting Up OnePlus Nord
Congratulations on your new OnePlus Nord! Getting started with a new phone can be both exciting and overwhelming. In this guide, we will help you set up your OnePlus Nord and get you up and running in no time.
Before we begin, make sure you have your SIM card ready and a stable internet connection. Let’s dive in:
1. Power on your OnePlus Nord by pressing and holding the power button located on the side of the phone. Follow the on-screen instructions to select your preferred language and set up your Wi-Fi network.
2. Once connected to Wi-Fi, you will be prompted to log in to your Google Account. If you already have a Google Account, simply enter your email address and password. If you don’t have a Google Account, you can create one from this screen.
3. After signing in, you can choose to restore your apps and data from a previous device or set up your OnePlus Nord as a new device. If you have a backup of your previous device, you can restore it now. Otherwise, select “Set up as new” to start fresh.
4. Next, you’ll be prompted to enable various features, such as location services, customization options, and Google Assistant. You can customize these settings according to your preferences.
5. Now it’s time to import your contacts to your OnePlus Nord. There are a few methods you can choose from:
- Method 1: Import Contacts from SIM Card: If you have contacts stored on your old SIM card, you can import them by going to Settings > Contacts > Import/Export > Import from SIM card.
- Method 2: Import Contacts from Google Account: If your contacts are synced with your Google Account, they will automatically be imported to your OnePlus Nord when you sign in with the same account during the initial setup.
- Method 3: Import Contacts from External Storage: If you have contacts saved on an external storage device, such as an SD card, you can import them by going to Settings > Contacts > Import/Export > Import from storage.
6. Once your contacts are imported, you can further personalize your OnePlus Nord by downloading your favorite apps from the Play Store, setting up your preferred wallpaper, and exploring the various customization options available in the settings.
With these simple steps, you have successfully set up your OnePlus Nord and imported your contacts. Take some time to explore the features and functionalities of your new phone to make the most out of your OnePlus experience.
Remember to keep your device updated with the latest software patches and security updates for an optimized and secure user experience. Enjoy your new OnePlus Nord!
Method 1: Import Contacts from SIM Card
One of the easiest ways to import contacts into your OnePlus Nord smartphone is by using a SIM card. This method is especially useful if you have previously saved your contacts on your old phone’s SIM card. Follow the steps below to transfer your contacts to your OnePlus Nord:
- Insert the SIM card that contains your contacts into your OnePlus Nord’s SIM card slot.
- On your OnePlus Nord, go to the “Settings” menu by swiping down from the top of the screen and tapping on the gear icon.
- Scroll down and tap on “System.”
- Tap on “Import/Export” under the “System” menu.
- Select “Import from SIM card” from the options.
- Your OnePlus Nord will now scan the SIM card for contacts. Once the scan is complete, you will see a list of contacts.
- Choose the contacts you want to import by tapping on the checkboxes next to their names.
- After selecting the desired contacts, tap on the “Import” button.
- Your selected contacts will now be imported into your OnePlus Nord’s phonebook.
That’s it! Your contacts from the SIM card are now successfully imported into your OnePlus Nord. You can access and manage them by opening the Contacts app on your device.
Method 2: Import Contacts from Google Account
One of the easiest and most convenient ways to import contacts to your OnePlus Nord is through your Google account. If you have previously synced your contacts with your Google account, you can quickly import them to your new phone. Here’s how you can do it:
1. On your OnePlus Nord, go to “Settings” and select “Accounts”.
2. Tap on “Google” and choose the Google account that you used to sync your contacts.
3. Once you select the Google account, you will see a list of syncable items. Make sure that “Contacts” is enabled by toggling the switch to the right.
4. After enabling contact sync, go back to the “Settings” menu and select “System”.
5. Tap on “Backup” followed by “Restore” to restore the contacts from your Google account to your OnePlus Nord. Wait for the restoration process to complete.
6. Once the restoration is finished, you can open the Contacts app on your OnePlus Nord, and you will find all your contacts imported from your Google account.
Importing contacts from your Google account ensures that all your contact information is effortlessly synced across devices. It is a great option for those who have previously stored their contacts on their Google account and want to transfer them to their OnePlus Nord without any hassle.
Method 3: Import Contacts from External Storage
If you have your contacts saved on an external storage device, such as an SD card or a USB drive, you can easily import them to your OnePlus Nord. Follow these steps to import contacts from external storage:
1. Insert the external storage device (SD card or USB drive) into your OnePlus Nord.
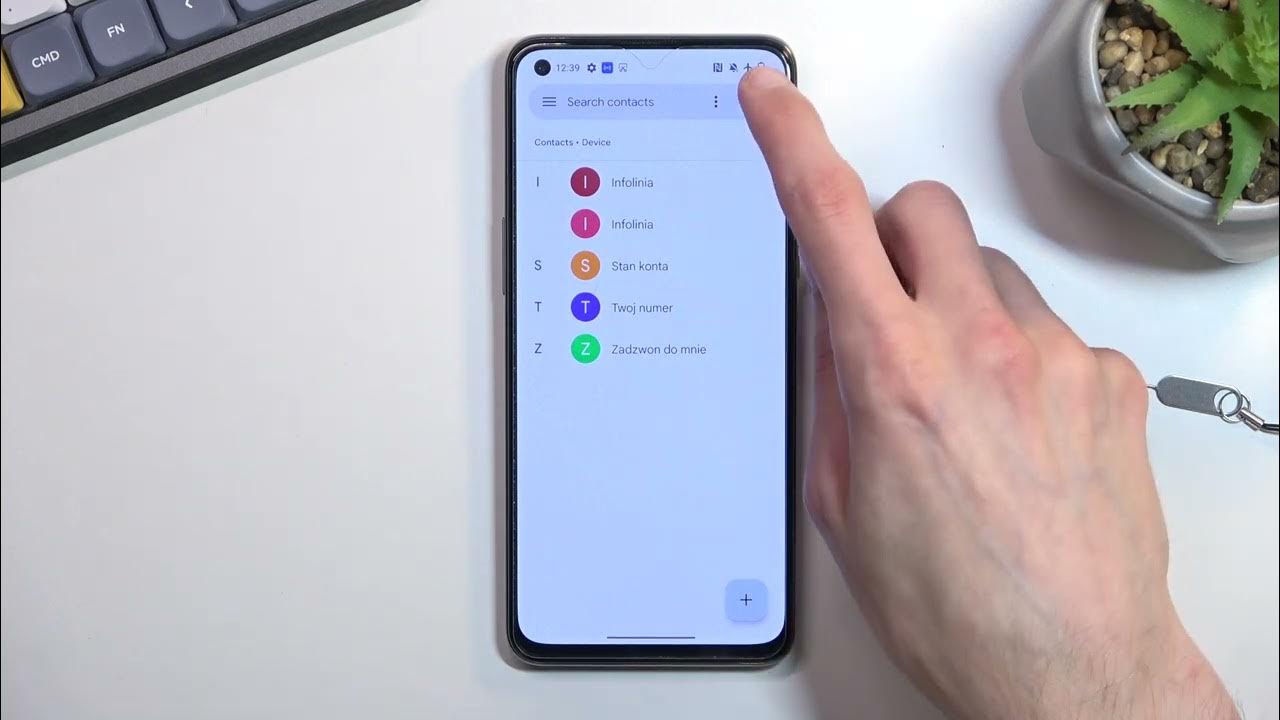
2. Open the Contacts app on your OnePlus Nord. You can find it by navigating to the app drawer and searching for “Contacts.
3. Tap on the three dots in the top-right corner of the screen to open the menu.
4. From the menu, select “Import/Export”.
5. In the Import/Export options, choose “Import from storage”.
6. The Contacts app will scan the external storage device and display a list of compatible files.
7. Tap on the file that contains your contacts. The file format should be vCard (.vcf) or CSV (.csv).
8. The Contacts app will begin importing the contacts from the selected file. This may take a few moments, depending on the number of contacts.
9. Once the import process is complete, the imported contacts will be synced with your OnePlus Nord’s contact list.
10. You can now access and manage your imported contacts from the Contacts app on your OnePlus Nord.
Importing contacts from external storage is a convenient way to transfer your contacts from an old device or backup. Make sure to properly organize your contacts file and choose the appropriate format for seamless importing.
By following these steps, you can effortlessly import your contacts from an external storage device to your OnePlus Nord, ensuring that your important contacts are easily accessible on your new smartphone.
Conclusion
Importing contacts to your OnePlus Nord has never been easier. With the variety of methods available, you can choose the one that suits your needs the best. Whether you prefer using Google’s cloud storage, a SIM card transfer, or a third-party app, the process is quick and hassle-free.
By following the steps outlined in this article, you can easily import your contacts into your OnePlus Nord and ensure that your important phone numbers are readily accessible. Whether you’re upgrading from a previous phone or simply need to transfer contacts from one device to another, the OnePlus Nord offers multiple options to ensure a seamless transition.
Now that you have all your contacts safely imported, you can fully make use of the features and capabilities of your OnePlus Nord. Stay connected with your friends, family, and colleagues with ease, and enjoy all the benefits of your smartphone with a seamless contact management experience.
FAQs
1. How do I import contacts in Oneplus Nord?
Importing contacts in Oneplus Nord is a simple process. You can follow these steps:
– Open the “Contacts” app on your Oneplus Nord.
– Tap on the three-dot menu icon located in the top right corner of the screen.
– Select the “Settings” option from the menu.
– In the Settings menu, choose “Import/Export contacts”.
– Select the location from where you want to import contacts (SIM card, Google account, etc.).
– Follow the on-screen instructions to complete the import process.
2. Can I import contacts from an iPhone to Oneplus Nord?
Yes, you can import contacts from an iPhone to Oneplus Nord. Here’s how you can do it:
– On your iPhone, go to “Settings” and tap on your Apple ID at the top of the screen.
– Tap on “iCloud” and make sure that the “Contacts” toggle is enabled.
– Wait for the contacts to sync with your iCloud account.
– On your Oneplus Nord, go to “Settings” and tap on “Accounts & sync”.
– Tap on “Google” and sign in with the same Google account used on your iPhone.
– Make sure the “Contacts” toggle is enabled for synchronization.
– Wait for the contacts to sync with your Oneplus Nord.
3. Is it possible to import contacts from a different Android phone?
Yes, it is possible to import contacts from a different Android phone. Here’s how you can do it:
– On your old Android phone, open the “Contacts” app.
– Tap on the three-dot menu icon and select “Import/Export”.
– Choose the option to export contacts to a storage location (such as the internal storage or SD card).
– Once the export is complete, remove the storage (SD card or internal storage) from your old phone.
– Insert the storage into your Oneplus Nord.
– On your Oneplus Nord, go to the “Contacts” app and select the three-dot menu icon.
– Choose the “Settings” option and then select “Import/Export contacts”.
– Choose the location from where you want to import contacts and follow the on-screen instructions.
4. Can I import contacts from a CSV file?
Yes, you can import contacts from a CSV file to your Oneplus Nord. Here’s how you can do it:
– Make sure your contacts are saved in a CSV file format.
– Open the “Contacts” app on your Oneplus Nord.
– Tap on the three-dot menu icon and select “Settings”.
– In the Settings menu, choose “Import/Export contacts”.
– Select the “Import” option and choose the CSV file from your storage location.
– Follow the on-screen instructions to complete the import process.
5. What happens to my existing contacts when I import new ones?
When you import new contacts to your Oneplus Nord, the existing contacts will be merged with the newly imported ones. If there are any duplicate contacts, the phone will prompt you to merge or overwrite them. It is advisable to review the imported contacts and manually resolve any duplicate entries to maintain a clean and organized contact list.