
Turtle Beach headsets are highly regarded for their superior audio quality and immersive gaming experience. Whether you’re a casual gamer or a dedicated enthusiast, connecting your Turtle Beach headset to your PC opens up a world of possibilities. By linking your headset to your computer, you can enjoy crystal-clear communication with your teammates during online multiplayer sessions and fully immerse yourself in the rich soundscapes of your favorite games.
In this article, we will guide you through the step-by-step process of connecting your Turtle Beach headset to your PC, ensuring you have the best audio experience possible. From selecting the right connection options to configuring the necessary settings, we’ll cover everything you need to know to seamlessly integrate your headset with your PC.
So, if you’re ready to enhance your gaming experience and take advantage of your Turtle Beach headset’s full potential on your PC, let’s dive in and get started!
Inside This Article
- Connecting Turtle Beach Headset to PC via USB
- Connecting Turtle Beach Headset to PC via 3.5mm Audio Jack
- Configuring Audio Settings on PC for Turtle Beach Headset
- Troubleshooting Common Issues with Turtle Beach Headset Connectivity to PC
- Conclusion
- FAQs
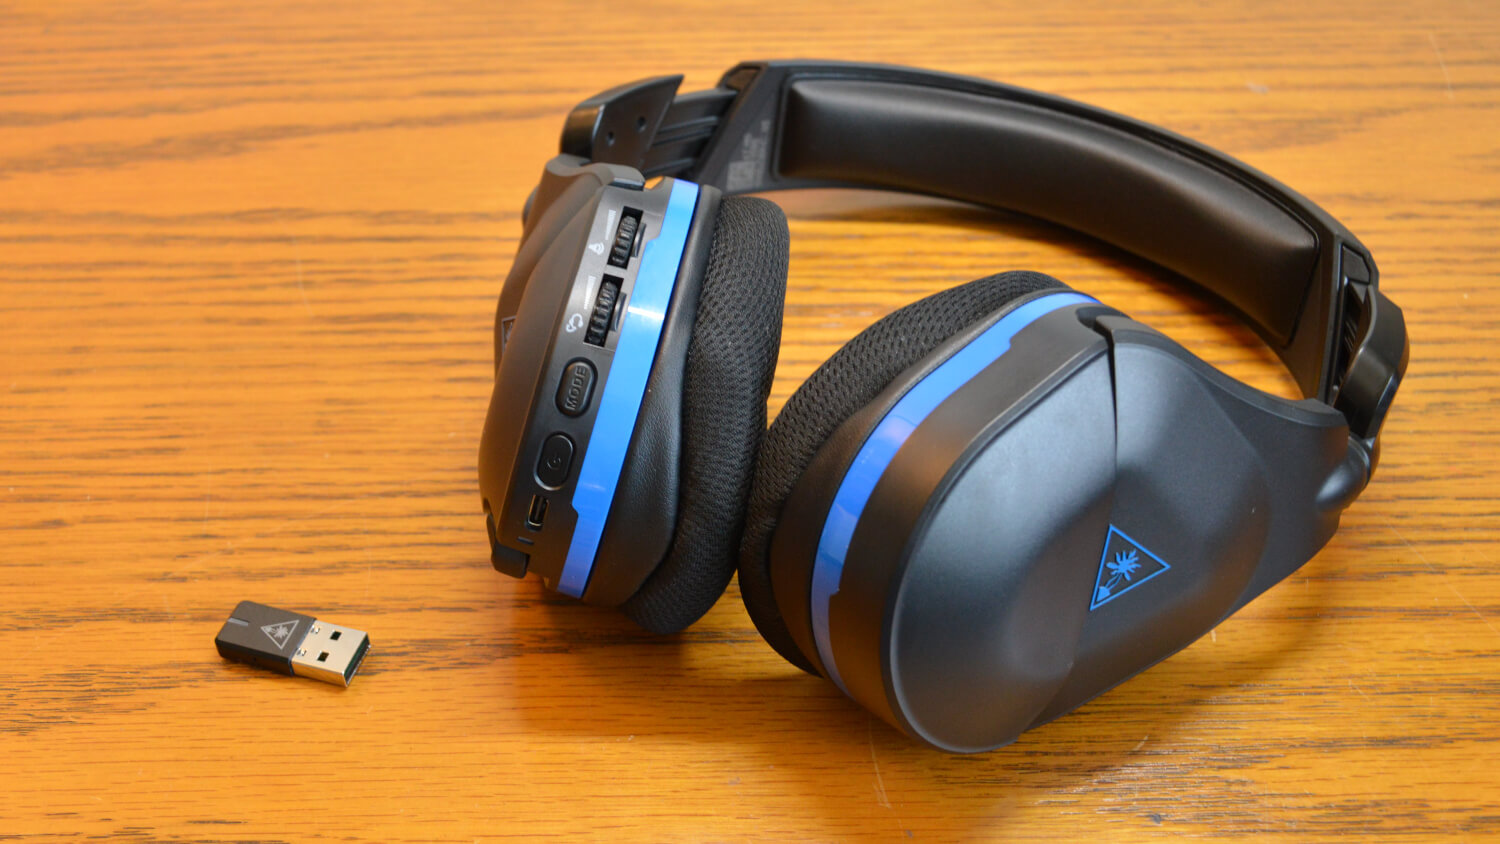
Connecting Turtle Beach Headset to PC via USB
If you’re looking to connect your Turtle Beach headset to your PC, using the USB connection is one of the most straightforward methods. This allows you to enjoy the immersive sound and comfortable design of your headset while gaming or engaging in other activities on your computer. Here’s a step-by-step guide to help you connect your Turtle Beach headset to your PC using a USB connection:
- Locate the USB port on your PC. It is usually located on the front or back of your computer tower. If you’re using a laptop, you’ll typically find the USB port on the sides or back.
- Take the USB cable that comes with your Turtle Beach headset and plug it into the USB port on your PC. Make sure the connection is secure.
- Once the headset is connected to your PC via USB, your computer should recognize it automatically. It may take a few moments for the drivers to install, so be patient.
- Check the audio settings on your PC. Right-click on the speaker icon in the taskbar and select “Playback Devices.” Look for your Turtle Beach headset in the list of devices and set it as the default playback device.
- You can also adjust the volume and other audio settings for your Turtle Beach headset in the same “Playback Devices” menu. Simply select your headset and click on the “Properties” button.
- Now you’re ready to use your Turtle Beach headset with your PC. Whether you’re gaming, listening to music, or video chatting, the USB connection ensures a seamless and high-quality audio experience.
It’s important to note that some Turtle Beach headsets come with additional features or settings that may require additional setup or configuration. For detailed instructions, refer to the user manual or support documentation provided by Turtle Beach.
By following these simple steps, you can connect your Turtle Beach headset to your PC via a USB connection and enjoy an enhanced audio experience while engaging in various activities on your computer.
Connecting Turtle Beach Headset to PC via 3.5mm Audio Jack
If you’re looking to connect your Turtle Beach headset to your PC using the 3.5mm audio jack, you’re in luck! This straightforward method allows you to enjoy your favorite games, music, and other media with exceptional audio quality. Here’s how to do it:
- Step 1: Locate the 3.5mm audio jack on your PC. It is usually found on the front or back of the computer tower.
- Step 2: Connect one end of the 3.5mm audio cable to the headset’s audio jack. This is typically located on the earcup or inline control module.
- Step 3: Insert the other end of the 3.5mm audio cable into the PC’s audio jack.
- Step 4: Ensure that the headset’s volume is turned down before connecting it to the PC.
- Step 5: Once connected, adjust the volume on both the PC and the headset to a comfortable level.
That’s it! You’ve successfully connected your Turtle Beach headset to your PC using the 3.5mm audio jack. Now you can immerse yourself in your favorite games or enjoy crystal-clear audio while watching movies or listening to music.
Please note that some Turtle Beach headsets may require additional steps or configuration to ensure optimal performance. Consult the user manual or the Turtle Beach website for specific instructions related to your headset model.
Configuring Audio Settings on PC for Turtle Beach Headset
Once you have successfully connected your Turtle Beach headset to your PC, the next step is to configure the audio settings to ensure optimal sound performance. Follow these steps to set up your audio settings on your PC:
- Open the Control Panel on your PC. You can do this by searching for “Control Panel” in the Windows Search bar or by navigating to it through the Start menu.
- Click on the “Hardware and Sound” option in the Control Panel menu.
- Next, click on “Sound” to open the Sound settings window.
- In the Sound settings window, you will see a list of audio devices connected to your PC. Locate your Turtle Beach headset in the playback devices list. It may appear as “Turtle Beach Headset” or with a specific model name.
- Once you have found your Turtle Beach headset, right-click on it and select “Set as Default Device.” This will ensure that audio output is directed to your headset rather than the PC’s speakers.
- In some cases, you may also see a separate “Turtle Beach Microphone” or similar option in the recording devices list. If you want to use the microphone on your Turtle Beach headset, right-click on the microphone option and select “Set as Default Communication Device.”
- After setting your Turtle Beach headset as the default playback and communication device, click on “OK” to save the changes.
- Navigate to the “Playback” tab in the Sound settings window. Locate your Turtle Beach headset and click on it to select it.
- Click on the “Properties” button below the playback devices list.
- In the Properties window, go to the “Levels” tab. Adjust the volume slider to your desired level. You can also check the “Enhancements” tab to further customize the audio settings if necessary.
- Once you have made the desired adjustments, click on “OK” to apply the changes.
With the audio settings properly configured on your PC, you should now be able to enjoy high-quality sound through your Turtle Beach headset. Remember to adjust the volume control on your headset itself for optimal listening experience.
Troubleshooting Common Issues with Turtle Beach Headset Connectivity to PC
Connecting a Turtle Beach headset to your PC can enhance your gaming experience, allowing you to immerse yourself in high-quality audio. However, there may be instances where you encounter issues with the headset’s connectivity. Don’t worry, though. In this article, we will address common problems and provide troubleshooting steps to help you resolve them.
1. No audio or sound from the headset: If you’re unable to hear any sound from your Turtle Beach headset when connected to your PC, there are a few troubleshooting steps you can try:
- Ensure that the headset is properly connected to your PC. Check the cables and ensure they are securely plugged into the correct ports.
- Verify that the volume on both the PC and the headset is not muted or set to the lowest level.
- Check your PC’s audio settings to ensure that the correct playback device is selected. Right-click on the volume icon in the system tray and select “Playback Devices.”
- If you’re using a USB connection, try connecting the headset to different USB ports on your PC to rule out any issues with a specific port.
- Update your PC’s audio drivers. Visit the manufacturer’s website for your PC or sound card to download and install the latest drivers.
2. Microphone not working: If you’re experiencing issues with the microphone on your Turtle Beach headset, follow these troubleshooting steps:
- Ensure that the microphone is properly connected to your PC. Make sure the mic cable is securely plugged into the correct port.
- Check your PC’s audio settings and ensure that the correct recording device is selected. Right-click on the volume icon in the system tray and select “Recording Devices.”
- Test the microphone on another device to determine if the issue is with the headset or your PC. If it works on another device, the problem may lie with your PC’s settings or drivers.
- Update your PC’s audio drivers. Go to the manufacturer’s website and download the latest drivers for your PC or sound card.
- Adjust the microphone settings in your PC’s audio control panel. Ensure that the microphone is not muted or set to low volume.
3. Interference or static noise: If you’re experiencing interference or static noise in your Turtle Beach headset, try the following troubleshooting steps:
- Keep your headset away from devices that may cause interference, such as routers, cordless phones, or other wireless devices.
- Ensure that the cables are properly shielded and not damaged. Replace any faulty cables if necessary.
- Change the wireless frequency on your headset. Refer to the manufacturer’s instructions for guidance on adjusting the frequency settings.
- Check for any firmware updates for your headset and install them according to the manufacturer’s instructions.
- If the interference persists, try using your headset in a different location to determine if the issue is specific to your PC’s environment.
By following these troubleshooting steps, you should be able to resolve common connectivity issues with your Turtle Beach headset and enjoy uninterrupted sound and communication while gaming on your PC.
In conclusion, connecting a Turtle Beach headset to your PC is a relatively simple process that allows you to enjoy immersive audio while gaming or engaging in other activities on your computer. By following the steps outlined in this article, you can ensure a seamless and high-quality audio experience.
Remember to check for compatibility between your Turtle Beach headset and PC, and make sure you have the necessary cables and adapters. Additionally, keep in mind that software settings may need to be adjusted to optimize your audio output.
Whether you’re a gamer looking for an enhanced audio experience or simply someone who enjoys high-quality sound, the ability to connect your Turtle Beach headset to your PC opens up a world of possibilities. Enjoy crisp, immersive audio as you embark on your digital adventures!
FAQs
1. How do I connect my Turtle Beach headset to my PC?
To connect your Turtle Beach headset to your PC, follow these steps:
- Make sure your PC has the necessary audio ports. Most Turtle Beach headsets use a 3.5mm audio jack or a USB connection.
- If your headset uses a 3.5mm audio jack, locate the headphone jack on your PC. It is usually found on the front or back panel of the computer tower.
- Insert the corresponding audio jack from your Turtle Beach headset into the headphone jack on your PC.
- If your headset uses a USB connection, simply plug the USB connector into an available USB port on your PC.
- Once connected, your PC should automatically recognize the Turtle Beach headset as the default audio device. If not, you may need to adjust the sound settings in your PC’s control panel.
- You’re now ready to use your Turtle Beach headset with your PC!
2. Can I use my Turtle Beach headset with both my PC and gaming console?
Yes, many Turtle Beach headsets are designed to be compatible with both PCs and gaming consoles. However, compatibility may vary depending on the specific model of the headset and the gaming console you are using. Some Turtle Beach headsets come with multiple connection options, such as 3.5mm audio jacks and USB connectors, that allow you to connect to both your PC and gaming console. Before purchasing a Turtle Beach headset, make sure to check the product specifications and compatibility to ensure it will work with your desired devices.
3. How can I optimize the audio settings on my Turtle Beach headset for the best gaming experience?
Optimizing the audio settings on your Turtle Beach headset can greatly enhance your gaming experience. Here are a few tips to help you get the best audio quality:
- Make sure the headset is properly connected to your gaming device.
- Adjust the volume and game/chat balance according to your preferences. Most Turtle Beach headsets have built-in controls for adjusting these settings.
- Experiment with different audio presets or EQ settings available on your headset, if applicable.
- Enable any surround sound features supported by the headset to enhance spatial audio.
- Ensure that the headset’s firmware is up to date. Visit the Turtle Beach website or use the Turtle Beach Audio Hub app to check for firmware updates.
4. Can I use my Turtle Beach headset with my mobile device?
Yes, many Turtle Beach headsets are compatible with mobile devices such as smartphones and tablets. If your headset uses a 3.5mm audio jack, simply plug it into the headphone jack of your mobile device. If your headset utilizes a USB connection, you may need a compatible USB adapter or connector to connect it to your mobile device. Some Turtle Beach headsets also offer wireless connectivity options, allowing you to connect via Bluetooth or with a mobile gaming app. Check the product specifications and compatibility of your Turtle Beach headset to ensure it can be used with your mobile device.
5. How do I update the firmware on my Turtle Beach headset?
Updating the firmware on your Turtle Beach headset can often improve its performance and add new features. To update the firmware, follow these steps:
- Visit the Turtle Beach website and navigate to the support section.
- Search for your specific headset model and locate the firmware update file.
- Download the firmware update file to your computer.
- Connect your Turtle Beach headset to your computer using a compatible USB cable or wireless connection, as instructed in the firmware update guide.
- Open the firmware update software provided by Turtle Beach.
- Follow the on-screen instructions to initiate the firmware update process. Make sure not to disconnect the headset during the update.
- Once the update is complete, your Turtle Beach headset will have the latest firmware installed.