
Are you looking to add a personal touch to your cell phone? Why settle for a generic phone case when you can create a unique one using 3D printing technology? 3D printing has revolutionized manufacturing, allowing individuals to design and produce customized products, including phone cases.
In this article, we will guide you through the process of 3D printing a phone case, from the initial design to the final product. Whether you want to showcase your creativity or protect your phone in style, 3D printing offers endless possibilities. So, grab your imagination and let’s dive into the world of 3D printing to create a phone case that is as unique as you are!
Inside This Article
- Materials Needed
- Finding or Creating a Phone Case Design
- Preparing the Design File for Printing
- 3D Printing the Phone Case
- Finishing and Testing the Printed Phone Case
- Optional: Post-processing and Customization
- Conclusion
- FAQs
Materials Needed
Before you embark on the exciting journey of 3D printing your own phone case, it’s essential to gather all the necessary materials. Here’s a comprehensive list of what you’ll need:
- 3D printer: The core component of this project is, of course, a 3D printer. Whether you own one or plan to use a community or commercial printer, make sure it is capable of printing phone case-sized objects.
- Filament (PLA, ABS, etc.): Filament is the material that will be used to create your phone case. There are various types available, such as PLA (polylactic acid) and ABS (acrylonitrile butadiene styrene). Choose a filament that suits your preferences in terms of durability, flexibility, and appearance.
- Phone case design file: You’ll need a design file for your phone case. Fortunately, there are numerous resources available online where you can find pre-made designs in different styles and sizes. Alternatively, you can create your own design using 3D modeling software.
- Computer with slicing software: Slicing software is essential for converting your design file into printable instructions for the 3D printer. This software takes your 3D model and divides it into thin layers, determining factors such as print speed, layer height, and support structures. Make sure you have a computer with compatible slicing software installed.
- Optional: sandpaper or file for finishing: After the phone case is printed, you may want to refine its surface texture or make minor adjustments. Sandpaper or a file can be useful for smoothing out rough edges or achieving a desired finish.
By gathering these materials, you’ll be well-prepared to dive into the 3D printing process and create your own personalized phone case. Remember to check the compatibility of your design file and slicing software to ensure a seamless experience. Now, let’s move on to the next step: designing the phone case!
Finding or Creating a Phone Case Design
When it comes to 3D printing a phone case, you have a couple of options – you can either download a pre-designed phone case file or create a custom design of your own. Let’s take a look at the different methods you can use to find or create a phone case design.
Downloading a Pre-designed Phone Case File
If you’re looking for a quick and easy way to 3D print a phone case, downloading a pre-designed file is the way to go. There are numerous websites and online repositories where you can find a wide variety of phone case designs, ready to be printed. Some popular platforms include Thingiverse, MyMiniFactory, and Cults3D. Simply search for your phone model and choose a design that catches your eye. Ensure that the file format is compatible with your 3D printer.
Modifying an Existing Design or Creating a Custom Design
If you want to add a personal touch to your phone case or have specific design requirements, you can modify an existing phone case design or create one from scratch. Software tools like Tinkercad, Fusion 360, or SolidWorks can help you in designing and customizing your phone case. You can adjust dimensions, add unique patterns, or even incorporate your name or logo. Remember to export the design in a suitable format for 3D printing.
Using Online Design Repositories or Software Tools
If you’re not familiar with 3D modeling software or don’t have the time to create your own design, you can take advantage of online design repositories or software tools. Platforms like Customiz3D, where you can customize pre-designed phone cases by changing colors, patterns, or even adding text, can be a great option. These tools make it easy to personalize your phone case without the need for complex design skills.
Once you have chosen or created your desired phone case design, you’re ready to move on to the next step – preparing your 3D printer for the printing process.
Preparing the Design File for Printing
Once you have found or created the perfect phone case design, it’s time to prepare the design file for 3D printing. This step is crucial to ensure that your phone case is printed accurately and with high quality. Here’s a step-by-step guide on how to prepare your design file:
- Importing the design file into slicing software: The first step is to import the design file into slicing software. Slicing software is a program that converts the 3D design into a format that the 3D printer can understand. There are several slicing software options available, such as Ultimaker Cura, Simplify3D, or PrusaSlicer. Simply open the software and import your design file.
- Adjusting settings: Once the design file is imported, you will need to adjust various settings to optimize the printing process. These settings include infill density, layer height, print speed, support structures, and more. The ideal settings may vary depending on your specific printer and filament type. It’s essential to consult the printer and filament manufacturer’s guidelines or experimentation to find the best settings for your print.
- Orienting the design: Proper orientation of the design can greatly impact the final print quality. Consider factors such as overhangs, support requirements, and aesthetics when orienting the design. Orienting the design in the slicing software ensures that the printer deposits layers in the most optimal way, minimizing the need for excessive support material and improving the overall strength and appearance of the printed phone case.
- Generating the G-code file: The slicing software will convert your adjusted design into a G-code file, which is the language that the 3D printer understands. The G-code file contains instructions for the printer’s movements, extrusion rates, and various other parameters needed to print the design. Once you have configured all the settings, generate the G-code file and save it to a location accessible by your 3D printer.
By following these steps, you are now ready to move on to the final stage of 3D printing your phone case: printing the design! Properly preparing the design file ensures that your phone case comes out with precision, accuracy, and a professional finish.
3D Printing the Phone Case
Once you have prepared the design file, it’s time to bring your phone case to life through 3D printing. This process involves several steps to ensure a successful print:
Preparing the 3D Printer
Before you begin the printing process, it is essential to properly prepare your 3D printer. This includes leveling the bed to ensure a smooth and even print surface. Additionally, you need to ensure that the filament is loaded correctly into the printer, allowing for a continuous flow of material throughout the print.
Loading the G-code File onto the 3D Printer
Once your printer is ready, you will need to transfer the G-code file, which contains the instructions for the printer, onto the 3D printer. This can usually be done through an SD card or by connecting your computer directly to the printer.
Initiating the Printing Process
With the G-code file loaded, it’s time to initiate the printing process. This usually involves navigating through the printer’s interface and selecting the file you want to print. Make sure to double-check that all settings are correct before you start the print.
Monitoring the Print and Addressing Any Issues
Once the printing process begins, it’s important to monitor the progress of the print to ensure its success. Keep an eye on the first few layers to check for adhesion and proper filament flow. If you notice any issues, such as warping or filament clogs, it’s crucial to address them immediately to prevent further problems.
Throughout the print, you may also want to periodically check on the progress, especially during long prints. This will allow you to catch any potential problems early on and make adjustments if necessary.
Remember, each 3D printer may have its own specific requirements and settings, so it’s important to consult the printer’s manual or manufacturer’s guidelines for the best results.
By following these steps, you can successfully 3D print your phone case and enjoy the satisfaction of creating a custom accessory that perfectly fits your device.
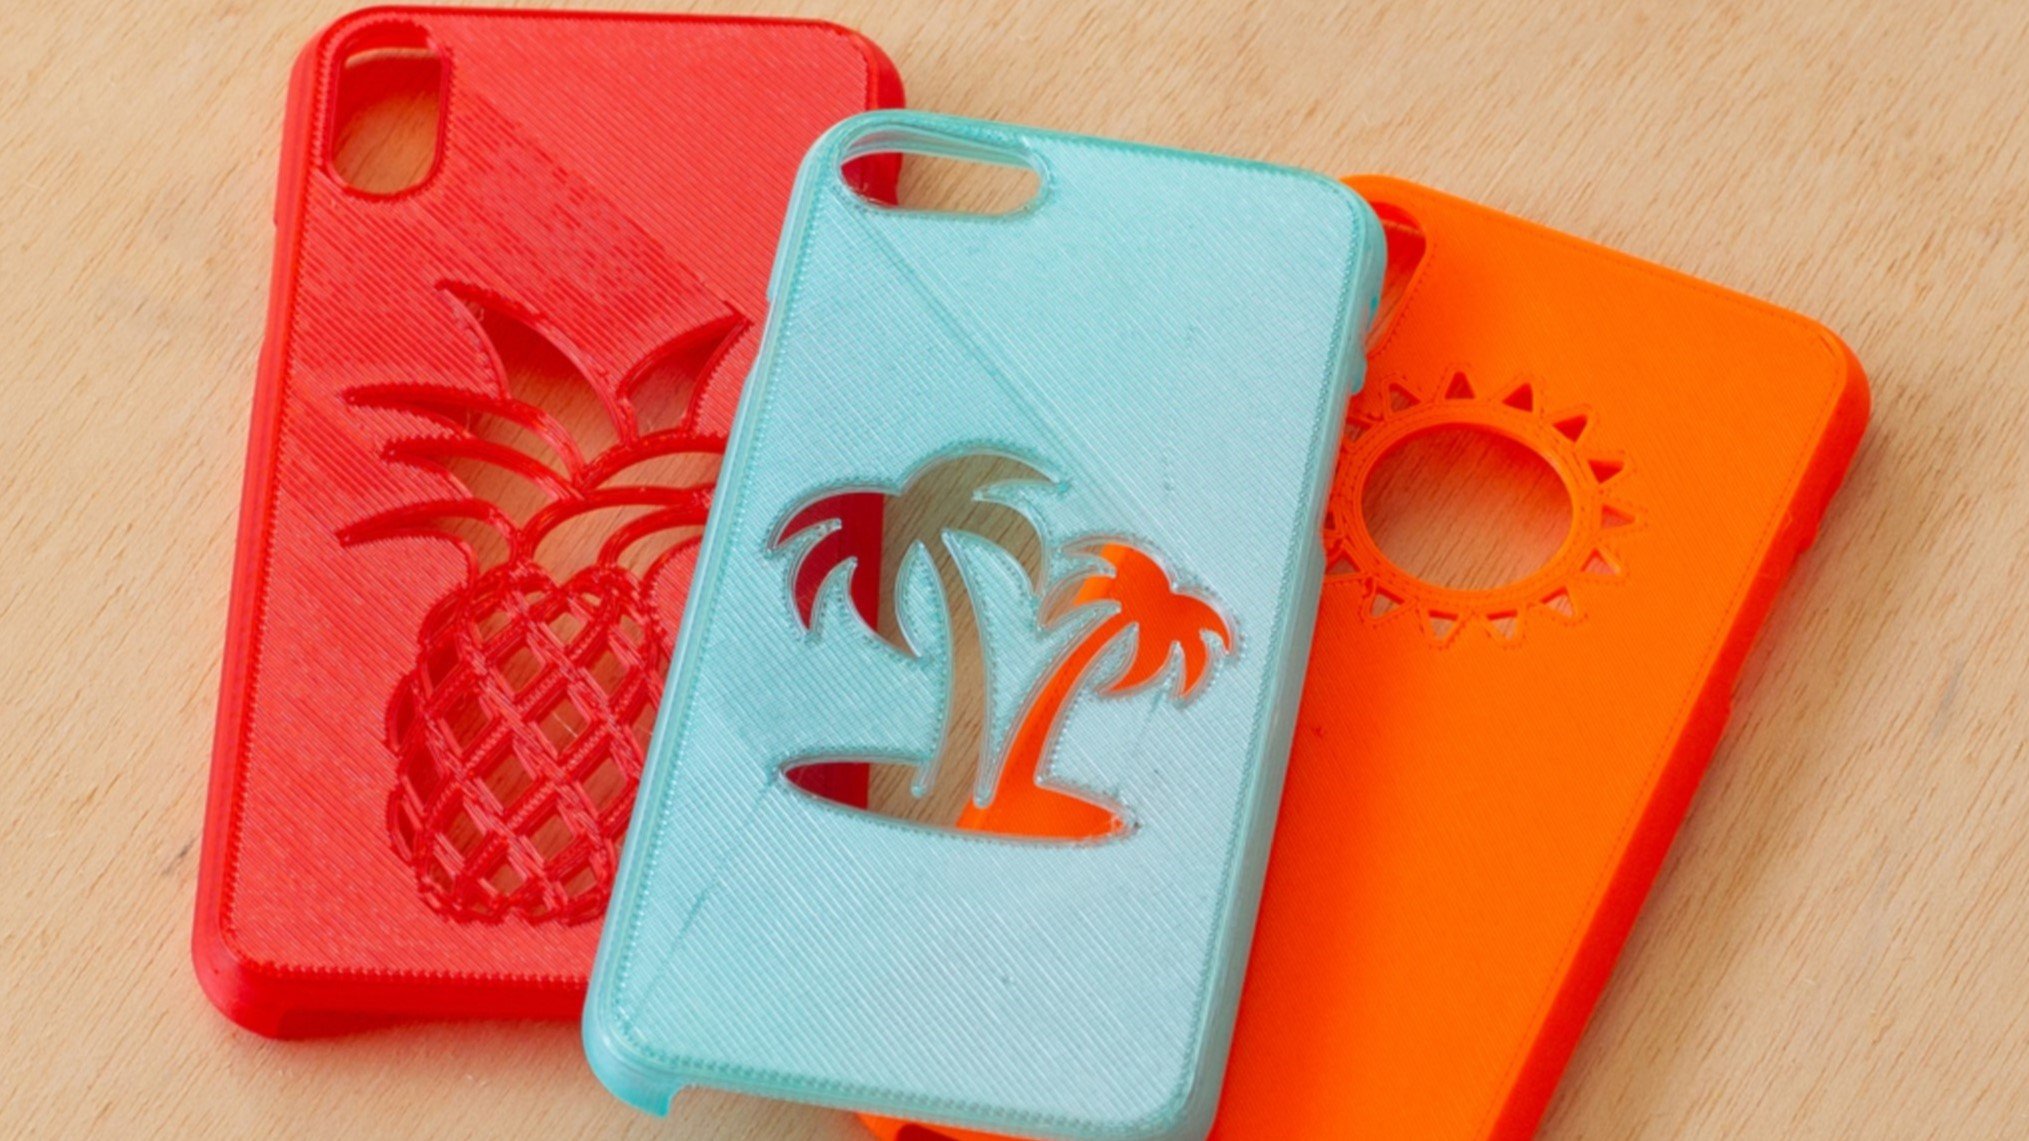
Finishing and Testing the Printed Phone Case
Once the 3D printer has completed the printing process, it’s time to remove the printed phone case from the print bed and give it a final touch to ensure a smooth and functional end product.
The first step is to carefully remove the printed phone case from the print bed. Depending on the 3D printer and print bed material, you may need to use a spatula or scraper to gently detach the printed object. Be cautious not to apply excessive force, as it can damage both the print and the print bed.
After removing the phone case from the bed, you may notice some support structures that were added during the printing process to ensure stability and accuracy. These supports can be removed using a pair of pliers or cutters. Take your time and remove them carefully to avoid any damage to the printed phone case.
Next, you might want to refine the surface of the phone case for a smoother finish. Depending on your preference, you can use sandpaper or a file to smooth out any rough edges or imperfections. Start with a coarse-grit sandpaper to remove any large bumps, gradually moving to finer grits for a smoother finish. Be patient and work evenly to ensure a consistent result.
Once you are satisfied with the surface of the printed phone case, it’s time to test its functionality. Fit the phone case onto your phone, ensuring that it aligns properly with the device’s buttons, ports, and camera. Test the buttons and ensure that they are easily accessible and responsive. Check the fit and make any necessary adjustments to ensure a snug and secure fit on your phone.
It is also crucial to test the functionality of the phone case in terms of providing protection. Drop your phone from a short height to simulate accidental falls and check if the case adequately absorbs the impact and protects the device. Additionally, test the accessibility of the charging port, headphone jack, and any other relevant features to ensure the case doesn’t obstruct their use.
By following these steps, you can ensure that your 3D printed phone case is not only aesthetically pleasing but also functional and offers the necessary protection for your device. Enjoy the satisfaction of using a unique and customized phone case that you printed yourself!
Optional: Post-processing and Customization
Painting or applying a finish to the printed phone case
Once you have successfully 3D printed your phone case, you may want to take it a step further by adding a personal touch with paint or applying a finish. There are several options available for painting your phone case, depending on the materials used. For PLA filament, acrylic paints can be used, while ABS filament can be painted with enamel paints.
To paint your phone case, begin by cleaning it thoroughly to remove any dust or debris. Use sandpaper to gently roughen the surface, which will help the paint adhere better. Next, apply a primer layer to ensure even coverage and better adhesion of the paint. Once the primer is dry, you can apply your chosen color or design using a small brush or airbrush. Allow the paint to dry completely before handling or applying any additional layers. Finally, consider applying a clear coat to protect the paint and give it a glossy finish.
Adding decorative elements or personalization
If you want to further customize your phone case, you can add decorative elements or personalize it to make it truly unique. One option is to use vinyl or sticker decals to create designs, patterns, or images on the phone case. These decals are readily available in various designs and can be easily applied to the surface of the case.
Another creative option is to incorporate 3D printed accessories or decorative elements into your phone case design. You can print small attachments such as logos, symbols, or even tiny figurines to attach to the case using a strong adhesive or by incorporating slots or holes into your design to secure them.
Experimenting with different filament colors or materials
If you want to explore different looks and styles for your phone case, consider experimenting with different filament colors or materials. Most commonly used filaments like PLA and ABS come in a wide range of colors, so you can choose a color that matches your style or preference. In addition to solid colors, you can also find filaments with special properties, such as glow-in-the-dark or transparent.
Moreover, there are even filaments made from alternative materials like wood or metal-infused filaments that can give your phone case a unique and eye-catching appearance. It’s important to note that these specialty filaments may require different printing settings and techniques, so make sure to adjust your slicer software settings accordingly.
Remember, these customization options are optional and allow you to express your creativity and personal style. Feel free to mix and match techniques and materials to achieve the exact look and feel you desire for your 3D printed phone case.
Conclusion
3D printing has revolutionized the way we create and customize products, and phone cases are no exception. With the advancements in technology and the increasing accessibility of 3D printers, creating your own phone case has become both achievable and exciting.
The process of 3D printing a phone case may seem daunting at first, but with the right tools and knowledge, it is a rewarding and creative endeavor. From designing your case using CAD software to selecting the appropriate materials, each step allows for personalization and customization.
Not only does 3D printing offer the opportunity to express your individuality, but it also opens the door to endless possibilities. You can experiment with intricate designs, play with different textures, and even incorporate functional features into your phone case.
Whether you are a tech enthusiast, a creative DIYer, or simply looking for a unique and personalized accessory, 3D printing a phone case is a fantastic way to showcase your style and showcase your passion for technology. So, why wait? Start exploring the world of 3D printing and create the phone case of your dreams.
FAQs
1. What is 3D printing?
3D printing is a manufacturing process that creates a physical object layer by layer, using a computer-generated design. It allows for the creation of complex and customized objects, including phone cases, by adding material layer upon layer until the final product is complete.
2. Can I 3D print a phone case at home?
Yes, you can 3D print a phone case at home if you have access to a 3D printer. There are many 3D models available online that you can download and print. However, keep in mind that you will need a compatible 3D printer and the necessary materials to produce the phone case.
3. What materials are commonly used for 3D printing phone cases?
Some of the common materials used for 3D printing phone cases include PLA (Polylactic Acid) and ABS (Acrylonitrile Butadiene Styrene). PLA is a biodegradable and environmentally friendly material, while ABS is known for its durability and flexibility. There are also other materials available that offer different properties and finishes.
4. Do I need any special software to create a 3D printed phone case?
Yes, you will need 3D modeling software to create a design for your phone case. There are various software options available, ranging from free beginner-friendly programs to more advanced ones with extensive features. Some popular choices include Tinkercad, Fusion 360, and Blender. You can also find pre-made phone case designs online that you can customize to your liking.
5. Can I customize the design of a 3D printed phone case?
Absolutely! One of the main advantages of 3D printing is the ability to customize designs. You can modify existing designs or create your own unique design from scratch. You can personalize the phone case with your preferred patterns, logos, or even your name. With 3D printing, the possibilities for customization are endless.