
When it comes to capturing stunning photographs, having the right equipment is crucial. One essential accessory for professional photographers is a speedlight, also known as an external flash. These powerful units can significantly enhance the quality of your images by providing additional light in low light conditions or to soften harsh light. While using a speedlight on top of your camera can be effective in certain situations, attaching it to a monopod offers even greater flexibility and control over the lighting.
In this article, we will delve into the step-by-step process of attaching a speedlight to a monopod. We will explore the advantages of using this setup, such as improved stability and the ability to position the light source independently from the camera. Whether you are shooting portraits, events, or any other genre of photography, understanding how to attach a speedlight to a monopod will expand your creative possibilities and allow you to achieve stunning results.
Inside This Article
- Attaching a Speedlight to a Monopod
- Step 1: Gather the necessary equipment
- Step 2: Attach a standard shoe mount adapter to the monopod
- Step 3: Place the Speedlight onto the shoe mount adapter
- Step 4: Secure the Speedlight in place
- Step 5: Adjust the angle and position of the Speedlight
- Conclusion
- FAQs
Attaching a Speedlight to a Monopod
When it comes to capturing the perfect shot, having the right equipment is essential. If you are a photographer who frequently works with a speedlight and a monopod, you might be wondering how to properly attach the speedlight to the monopod to enhance your lighting capabilities. In this article, we will guide you through the process of attaching a speedlight to a monopod, ensuring that you can achieve optimal lighting and stability for your photography needs.
The first step in attaching a speedlight to a monopod is choosing the right speedlight bracket. A speedlight bracket is an essential accessory that securely holds your speedlight and allows you to mount it onto various photography equipment, including monopods. It is important to select a bracket that is compatible with both your speedlight and your monopod to ensure a proper fit and stability.
Once you have chosen the appropriate speedlight bracket, it is time to attach the speedlight to the monopod. Follow these step-by-step instructions:
- Start by setting up your monopod on a stable surface. Extend the monopod to a comfortable height that suits your shooting needs.
- Locate the mounting screw on the speedlight bracket. This is the part that will connect the speedlight to the monopod.
- Screw the bracket onto the bottom of the speedlight, making sure it is securely attached.
- Hold the monopod with one hand and use the other hand to slide the bracket onto the top of the monopod.
- Ensure that the bracket is firmly seated on the monopod. You may need to tighten a knob or screw on the bracket to secure it in place.
- Make any necessary adjustments to the angle and position of the speedlight to achieve the desired lighting effect.
Now that you have successfully attached the speedlight to the monopod, it’s time to put it to use. Here are a few tips to help you make the most of your speedlight on a monopod:
- Experiment with different angles and positions to find the most flattering lighting for your subject.
- Consider using diffusers or reflectors to soften or redirect the light from the speedlight.
- When shooting in low light conditions, increase the power of the speedlight to compensate for the lack of natural light.
- Take advantage of the portability and flexibility of the monopod to easily reposition the speedlight as needed.
- Practice and experiment with different techniques to master the art of using a speedlight on a monopod.
Attaching a speedlight to a monopod opens up a world of creative possibilities in your photography. By following the steps outlined in this article and implementing the tips provided, you can elevate your lighting techniques and capture stunning images. So, grab your speedlight, monopod, and get ready to explore the exciting realm of speedlight photography!
Step 1: Gather the necessary equipment
Before you can attach a speedlight to a monopod, you’ll need to gather a few essential items. Here’s a list of the equipment you’ll need:
1. Speedlight: Make sure you have a compatible speedlight that can be attached to a bracket or mounting plate.
2. Monopod: Choose a sturdy monopod that can support the weight of the speedlight and provide stability during use.
3. Speedlight bracket: A speedlight bracket is a specialized accessory that allows you to attach the speedlight to the monopod securely.
4. Mounting plate: Some speedlight brackets require a mounting plate to connect the bracket to the monopod. Make sure you have the appropriate mounting plate for your specific bracket.
5. Connecting screws: Depending on the speedlight bracket, you may need connecting screws to secure the bracket onto the mounting plate or directly onto the monopod.
6. Allen key or screwdriver: To tighten the screws and ensure a secure attachment, you’ll need the appropriate tool.
By having all of these items ready and easily accessible, you’ll be well-prepared to attach your speedlight to the monopod successfully.
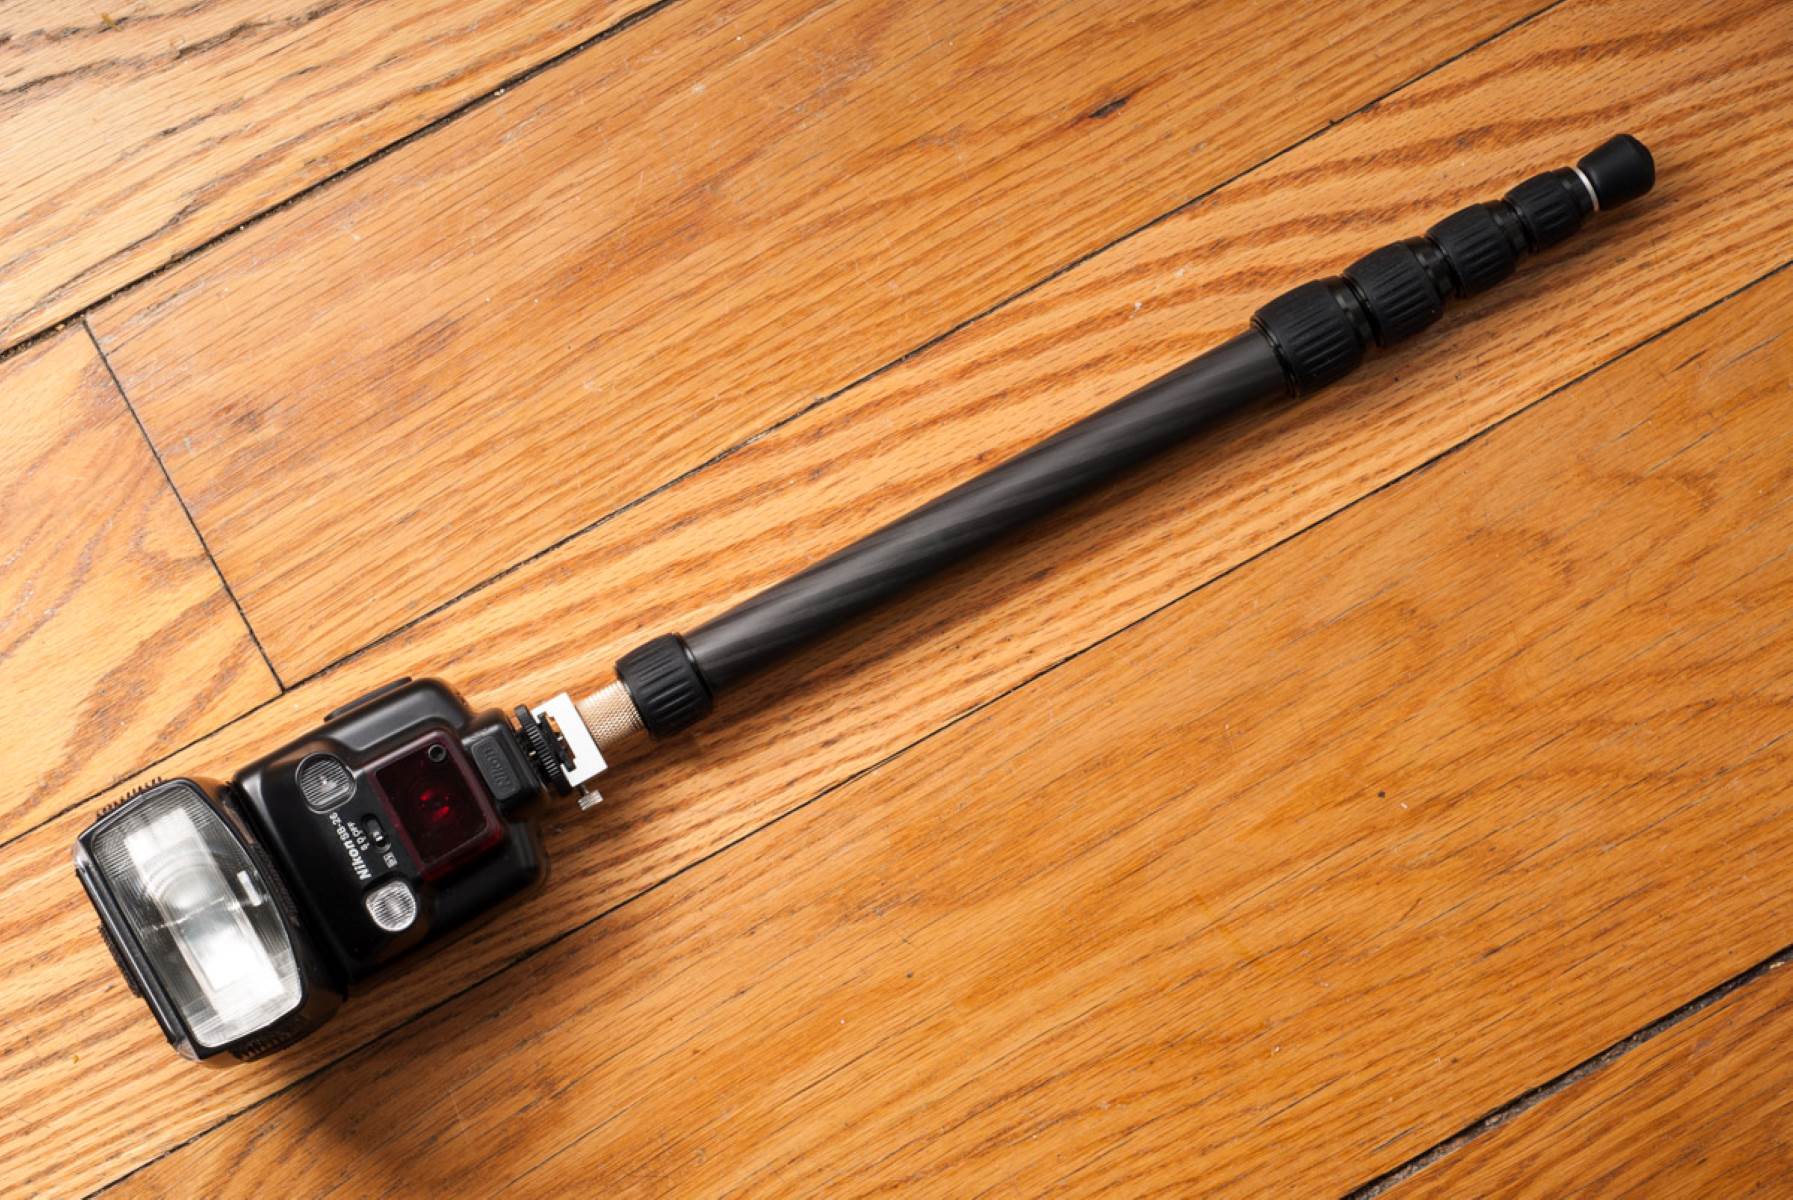
Step 2: Attach a standard shoe mount adapter to the monopod
Now that you have a monopod ready, the next step is to attach a standard shoe mount adapter to it. This adapter serves as a secure connection point for your speedlight.
To attach the shoe mount adapter, follow these steps:
1. Begin by locating the threaded hole on the top of the monopod. This is usually found on the mounting plate or the monopod head.
2. Take the shoe mount adapter and align it with the threaded hole. Make sure that the adapter’s screw fits into the hole properly.
3. Once aligned, gently twist the shoe mount adapter clockwise to tighten it onto the monopod. Be careful not to overtighten as it may damage the threads.
4. Ensure that the shoe mount adapter is secured firmly onto the monopod. Wiggle it slightly to make sure it does not move or loosen.
5. Now that the shoe mount adapter is attached, you are ready to mount your speedlight onto it. The adapter provides a flat surface with a traditional hot shoe mount, allowing you to attach the speedlight easily.
By attaching the shoe mount adapter to the monopod, you create a stable and reliable platform for your speedlight. This setup enables you to have better control over the positioning of your light source while providing flexibility for on-the-go photography.
Step 3: Place the Speedlight onto the shoe mount adapter
Once you have attached the shoe mount adapter to your monopod, it’s time to secure your speedlight onto the adapter. This step is crucial as it ensures the speedlight stays in place while you are shooting. Here’s how you can do it:
1. Start by turning off your speedlight and loosening the locking mechanism on the shoe mount. This will allow you to easily slide your speedlight into the mount.
2. Look for the hot shoe on the bottom of your speedlight. This is the metal contact that will connect to the shoe mount adapter. Align the hot shoe with the adapter’s shoe mount.
3. Gently slide the speedlight onto the shoe mount adapter. As you do this, make sure the metal contacts on the hot shoe are aligned with the corresponding contacts on the adapter. This is essential for proper communication between your camera and speedlight.
4. Once the speedlight is in place, tighten the locking mechanism to secure it onto the shoe mount adapter. Make sure it is tightly fastened to prevent any accidental falls or loosening during your shooting session.
5. Before you start shooting, double-check that the speedlight is securely attached by gently giving it a slight tug. It should not move or come loose.
By following these steps, you can effectively place your speedlight onto the shoe mount adapter, ensuring it stays in place and functions properly throughout your photography session.
Step 4: Secure the Speedlight in place
Once you have attached the speedlight to the monopod using a bracket, it is important to ensure that it is securely in place. This will prevent any unwanted movement or accidents during your photography session. Follow these steps to secure the speedlight:
1. Tighten the Bracket: Start by double-checking that the bracket holding the speedlight is tightly secured to the monopod. Use the necessary screws or fasteners to ensure a snug fit. This will prevent any wobbling or shifting of the speedlight.
2. Lock the Speedlight Shoe: Most speedlights come with a locking mechanism on the shoe mount. Locate the locking lever or switch and engage it to secure the speedlight onto the bracket. This will provide additional stability and prevent the speedlight from accidentally detaching.
3. Attach a Safety Cable: For added security, you can attach a safety cable from the speedlight to the wrist strap or another secure point on your camera bag or clothing. This will act as a fail-safe in case the speedlight becomes dislodged or falls off the bracket.
4. Test for Stability: After securing the speedlight, gently shake the monopod to ensure that everything is stable and in place. If you notice any movement or looseness, carefully re-adjust the bracket and tighten any screws or fasteners as needed.
5. Use a Flash Diffuser: Depending on your shooting conditions and preferences, consider attaching a flash diffuser to the speedlight. This accessory softens the harsh light from the speedlight and gives a more pleasing and natural-looking illumination. It can also help distribute the light more evenly, especially in close-up or portrait photography.
By following these steps and ensuring that your speedlight is securely fastened to the monopod, you can confidently use this setup for various types of photography. Remember to periodically check the tightness of the bracket and the stability of the speedlight throughout your shooting session to avoid any mishaps or accidents.
Step 5: Adjust the angle and position of the Speedlight
Once you have securely attached the Speedlight to the monopod using the chosen bracket, it’s time to adjust the angle and position of the Speedlight. This step is crucial to ensure that you achieve the desired lighting effect and eliminate any shadows or unwanted glare in your photos.
Gently hold the Speedlight and loosen the adjustment knobs present on the bracket. These knobs allow you to tilt, swivel, and rotate the Speedlight for precise positioning. Experiment with different angles and positions to find the one that best suits your subject and composition.
As you adjust the angle, pay close attention to the direction of light and any harsh shadows. By tilting or swiveling the Speedlight, you can control the direction and intensity of the light, creating more flattering and well-balanced photographs.
Another factor to consider is the distance between the Speedlight and your subject. Depending on the effect you want to achieve, you may need to move the Speedlight closer or farther away. Remember that moving the Speedlight closer will result in more intense light, while moving it farther away will soften the light.
Keep in mind that the position and angle of the Speedlight may need to be adjusted throughout your photo shoot, depending on changes in lighting conditions, subject movement, and composition. Continuously evaluate the lighting and make necessary adjustments to ensure optimal results.
Once you have found the desired angle and position, tighten the adjustment knobs on the bracket to secure the Speedlight in place. This will ensure that the Speedlight stays in position even if you move the monopod or change the shooting angle.
By properly adjusting the angle and position of the Speedlight, you can create stunning photographs with professional-looking lighting effects. Take the time to experiment with different settings and angles to enhance your images and unleash your creativity.
Conclusion
In conclusion, attaching a speedlight to a monopod is a simple and effective way to enhance your photography. Whether you are shooting in low-light conditions, need a versatile lighting solution, or want to experiment with off-camera flash techniques, a monopod can provide the stability and flexibility needed for success. By following the step-by-step guide outlined in this article, you can securely mount your speedlight to a monopod and take your images to the next level.
Remember to choose a monopod with a sturdy and adjustable head that can support the weight and provide smooth movements for your speedlight. Additionally, consider investing in a reliable and durable mounting bracket or cold shoe adapter to ensure a secure attachment. With the right equipment and a little practice, you’ll be able to explore new creative possibilities and capture striking images that impress your audience.
So, don’t hesitate to give it a try! Get your speedlight, monopod, and accessories ready, and start exploring the world of off-camera flash photography. Happy shooting!
FAQs
Here are some frequently asked questions about attaching a speedlight to a monopod:
Q: Can I attach a speedlight to any monopod?
A: In most cases, yes! As long as your monopod has a standard mount for attaching a camera or accessories, you should be able to attach a speedlight using an adapter or bracket.
Q: What are the benefits of using a monopod for speedlight photography?
A: Using a monopod with a speedlight can provide additional stability and support, allowing you to capture sharper images, especially in low-light conditions or when shooting with longer focal lengths. It also enables you to position the speedlight at different angles for more creative lighting effects.
Q: How do I attach a speedlight to a monopod?
A: To attach a speedlight to a monopod, you will need a mounting bracket or adapter that is compatible with your speedlight and monopod. Simply secure the speedlight to the bracket/adapter and then attach it to the monopod’s mount. It’s important to ensure that the setup is secure and stable before use.
Q: Do I need any additional accessories for attaching a speedlight to a monopod?
A: Depending on the specific setup, you may need additional accessories such as a flash bracket or a hot shoe mount adapter. These accessories can provide better stability and flexibility while attaching the speedlight to the monopod.
Q: Can I use a wireless trigger system with a speedlight attached to a monopod?
A: Absolutely! With a wireless trigger system, you can remotely trigger the speedlight even when it is attached to a monopod. This allows for more convenient and versatile off-camera lighting setups.