
Are you wondering how to change the stylus on your record player? Look no further, as we’ve got you covered! The stylus, also known as the needle, is a crucial part of the playing mechanism that ensures optimal sound reproduction from your vinyl records. Over time, the stylus can wear out or get damaged, affecting the quality of audio playback. But don’t worry, replacing the stylus is a simple process that you can do yourself. In this article, we will guide you through the step-by-step process of changing the stylus on your record player, allowing you to enjoy your vinyl collection with pristine sound once again. So, grab your record player and let’s get started on this exciting journey of stylus replacement!
Inside This Article
- Step 1: Gather the necessary tools and materials
- Step 2: Power off the record player and remove the current stylus
- Step 3: Select the appropriate replacement stylus
- Step 4: Install the new stylus onto the record player
- Step 5: Test the new stylus and make necessary adjustments
- Step 6: Properly dispose of the old stylus
- Conclusion
- FAQs
Step 1: Gather the necessary tools and materials
Before you begin the process of changing the stylus on your record player, it’s important to gather all the necessary tools and materials. Having everything prepared in advance will make the process much easier and more efficient. Here are the items you will need:
- New stylus: Be sure to have a replacement stylus specifically designed for your record player model. This ensures compatibility and optimal performance.
- Small screwdriver: A small screwdriver is essential for removing the cartridge holding the current stylus. Choose one that fits the screws on your record player for easy removal.
- Tweezers: Tweezers are useful for delicately handling the small parts of the stylus and cartridge assembly.
- Clean cloth: Have a clean cloth ready to properly clean the stylus and cartridge before installation. This ensures optimal sound quality and longevity.
- Owner’s manual: If available, have your record player’s owner’s manual handy. It may provide specific instructions for changing the stylus and additional maintenance tips.
Gathering these tools and materials will ensure a smooth and successful stylus replacement process. With everything ready, you can proceed to the next steps with confidence.
Step 2: Power off the record player and remove the current stylus
When it comes to changing the stylus on a record player, one of the crucial steps is to properly power off the device and remove the existing stylus. This ensures your safety and prevents any accidental damage to the cartridge or turntable.
Here’s a step-by-step guide to help you power off the record player and remove the current stylus:
- Turn off the power: Locate the power switch or button on your record player and make sure to turn it off. This will prevent any electrical accidents or damage to the stylus during the removal process.
- Lift the tonearm: Gently lift the tonearm from its resting position and position it over the platter. Be cautious not to touch the stylus or apply any pressure to it while doing this.
- Identify the stylus: Take a close look at the stylus assembly and locate the point where it attaches to the tonearm. The stylus is a small, needle-like component that is usually secured with a mounting bracket or screw.
- Remove the mounting bracket/screw: Depending on the design of your record player, you might need to unscrew the mounting bracket or release a locking mechanism to detach the stylus from the tonearm. Carefully follow the manufacturer’s instructions to ensure you don’t damage any components.
- Detach the stylus: Once the mounting bracket or screw is loosened, gently slide or lift the stylus out of its position. Take extra care not to twist or exert pressure on the stylus, as this can cause damage to the delicate cartridge.
- Inspect for any damage: Before discarding the old stylus, carefully examine it for any signs of wear, damage, or dirt accumulation. This can give you an idea of the condition of the stylus and cartridge, and help you troubleshoot any audio issues you may have encountered.
By following these steps, you will be able to safely power off your record player and remove the current stylus. Remember to handle the stylus with care to avoid any unnecessary damage, and store it in a safe place if you plan on keeping it as a spare. Next, we will explore the process of selecting the appropriate replacement stylus.
Step 3: Select the appropriate replacement stylus
When it comes to selecting a replacement stylus for your record player, there are a few key factors to consider. The stylus, also known as a needle, is a crucial component that directly touches the record grooves, so choosing the right one is essential for optimal sound quality and longevity of your records.
Here are some important points to keep in mind when selecting a replacement stylus:
- Compatibility: Ensure that the replacement stylus is compatible with your specific record player model. Different turntables require different stylus types, so it’s essential to check the manufacturer’s recommendations or consult the user manual to find the right match.
- Type of stylus: There are various types of styli available, such as spherical, elliptical, and microline. Each type offers different sonic characteristics and trackability. Spherical stylus tips are typically more durable and budget-friendly, while elliptical and microline stylus tips provide better tracking and enhanced audio fidelity.
- Tracking force: The tracking force refers to the amount of pressure exerted by the stylus on the record’s grooves. It is crucial to select a replacement stylus that matches the recommended tracking force for your turntable. Using a stylus with an incorrect tracking force can lead to excessive wear on the record or poor sound quality.
- Brand and quality: Opting for a reputable brand and high-quality replacement stylus is advisable. Well-known brands often offer better build quality, performance, and longevity. It’s worth doing some research, reading customer reviews, and seeking recommendations to ensure you choose a reliable and durable stylus.
- Budget: Consider your budget when selecting a replacement stylus. Prices can vary significantly depending on factors such as brand, stylus type, and quality. Aim to strike a balance between your budget and the desired performance to ensure you get the best value for your money.
Take your time to research and compare different replacement stylus options before making a decision. Reading customer reviews and seeking advice from audiophiles or experts can also provide valuable insights. Remember, selecting the right replacement stylus is pivotal in preserving the audio quality of your records and maximizing your listening experience.
Step 4: Install the new stylus onto the record player
Now that you have selected the appropriate replacement stylus, it’s time to install it onto your record player. This step requires careful handling to ensure proper alignment and functionality. Follow the instructions below to successfully install the new stylus:
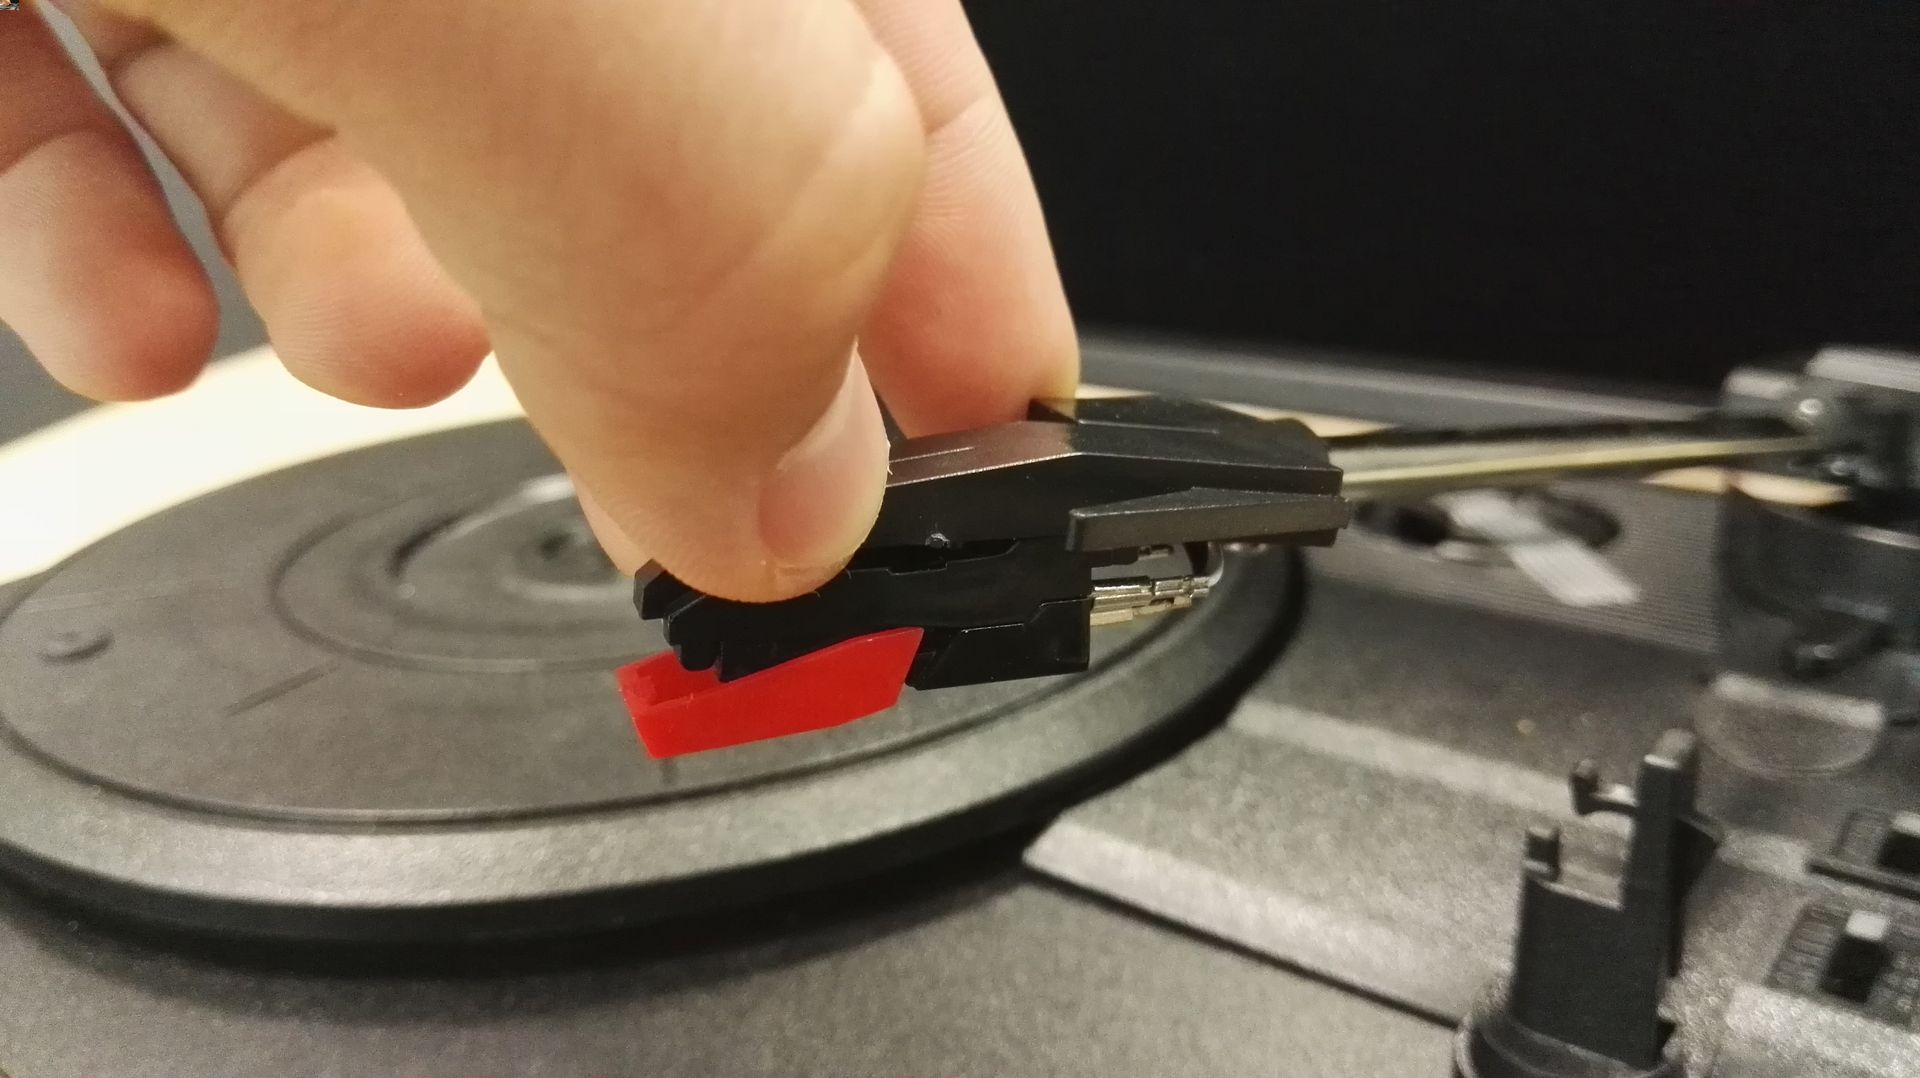
1. Begin by locating the cartridge on your record player. The cartridge is the housing where the stylus is attached. It is typically located at the end of the tonearm.
2. Gently remove the protective cover from the new stylus. Be cautious not to touch the needle tip, as oils from your fingers can impact the sound quality.
3. Align the new stylus with the cartridge, making sure the needle is lined up correctly. Most stylus replacements have a color-coded system, with red for the right channel and green for the left channel. Ensure you match the colors accordingly.
4. Carefully lower the stylus onto the cartridge, making sure it fits snugly into place. Take extra care not to apply too much pressure, as this can damage the delicate components.
5. Once the stylus is installed, gently secure it if there is a locking mechanism. This will prevent it from accidentally coming loose during playback.
6. Double-check the alignment and positioning of the stylus. It should sit parallel to the record surface, with the needle tip resting properly in the groove.
7. Power on your record player and test the new stylus. Play a record and listen carefully for any distortion or skipping. If you notice any issues, stop playback and recheck the alignment and installation. Make necessary adjustments as needed.
By following these steps, you can effectively install a new stylus onto your record player. Remember to handle the stylus with care throughout the process to avoid any damage. Once installed, you can enjoy crisp and clear audio from your favorite vinyl records.
Step 5: Test the new stylus and make necessary adjustments
Once you have successfully installed the new stylus onto your record player, it’s time to test it out and make any necessary adjustments to ensure optimal performance. Testing the new stylus will help you determine if it is aligned correctly and if the tracking force is properly set. Here are the steps to follow:
1. Place a record on the turntable and power on the record player. Choose a record that you are familiar with, as this will allow you to notice any changes in sound quality or performance.
2. Carefully lower the stylus onto the record. Take note of the sound quality and any issues such as skipping or distortion. If you notice any problems, it may indicate that the stylus is not aligned correctly.
3. Check the alignment of the stylus. Using a stylus alignment protractor, verify that the stylus is properly aligned with the grooves on the record. Adjust if necessary, following the instructions provided with the protractor or consult your record player’s manual.
4. Assess the tracking force. Tracking force refers to the amount of pressure exerted by the stylus on the record. Use a tracking force gauge to measure the force applied by the stylus. Refer to the manufacturer’s recommendations for the appropriate tracking force for your specific stylus.
5. Make adjustments to the tracking force if needed. If the tracking force is too high, it can cause excessive wear on your records and may lead to distortion. Conversely, if the tracking force is too low, it can result in skipping or poor sound quality. Refer to your record player’s manual for instructions on adjusting the tracking force.
6. After making any necessary adjustments, retest the stylus by playing a record once again. Listen carefully to ensure that the sound is clear, balanced, and free of any issues. If you are still experiencing problems, consider seeking assistance from a professional or contacting the manufacturer for further guidance.
Remember, the performance of your record player largely depends on the quality and alignment of the stylus. By properly testing and making adjustments as needed, you can ensure that you’re getting the best possible sound reproduction from your records.
Step 6: Properly dispose of the old stylus
Once you have successfully installed the new stylus onto your record player, it’s important to properly dispose of the old one. Although it may seem like a small piece of equipment, the stylus contains delicate components that can pose a risk if not handled and disposed of correctly. Follow these guidelines to ensure safe and responsible disposal:
- Safely remove the old stylus: Carefully detach the old stylus from the cartridge by gently pulling it straight out. Be cautious as the stylus is fragile and can break if mishandled.
- Store the old stylus: After removing the stylus, it’s crucial to store it in a safe place. Use the original protective case if available, or find an appropriate container that can protect the stylus from dust, moisture, and physical damage.
- Research local regulations: Check your local regulations regarding the disposal of electronic waste or hazardous materials. Different jurisdictions may have specific guidelines on how to handle and dispose of small electronic components like phonograph styluses.
- Find a recycling center: Look for electronic recycling centers or drop-off locations in your area. These facilities specialize in processing and recycling various electronic items, ensuring their proper disposal and minimizing environmental impact.
- Consult a professional: If you’re unsure about the correct disposal method, it’s advisable to consult a professional, such as a technician or an expert in record player maintenance. They can provide guidance on the best practices for disposing of the old stylus.
Remember, improper disposal of electronic components and hazardous materials can harm the environment and pose health risks. By taking the time to properly dispose of your old stylus, you’re playing your part in protecting the planet and ensuring the safety of others.
Conclusion
Changing the stylus on a record player might seem daunting at first, but with the right tools and guidance, it can be a straightforward process. By following the step-by-step instructions and taking proper precautions, you can successfully replace the stylus and ensure optimal performance from your record player.
Remember to always consult the manufacturer’s instructions for your specific record player model, as there may be slight variations in the process. Additionally, if you feel unsure or uncomfortable performing the task yourself, it is recommended to seek professional assistance.
With a fresh stylus, you can enjoy listening to your vinyl collection with improved sound quality and reduced wear on your records. So go ahead, dive into the world of record playing, and keep the music spinning!
FAQs
1. Can I change the stylus on my record player?
Yes, you can change the stylus on your record player. The stylus, also known as the needle, is a crucial component responsible for reading the grooves on your vinyl records. Over time, the stylus can wear out or become damaged, resulting in diminished sound quality. Changing the stylus is a relatively simple process that can greatly improve your listening experience.
2. How do I know when it’s time to change my stylus?
There are a few signs that indicate it’s time to change your stylus. First, if you notice a decline in sound quality, such as distorted or muffled audio, it’s likely that the stylus needs to be replaced. Additionally, if you’ve been using the same stylus for an extended period, it’s recommended to change it every 500-1000 hours of use to maintain optimal performance.
3. What tools do I need to change the stylus?
To change the stylus on your record player, you’ll typically need a screwdriver (depending on the model), a replacement stylus, and possibly a pair of tweezers. However, it’s important to consult your record player’s manual or manufacturer’s instructions, as different models may require specific tools or techniques.
4. How do I remove the old stylus?
The process of removing the old stylus varies depending on the design of your record player. In most cases, you’ll need to gently lift the tonearm and locate the stylus assembly. Once you’ve located it, carefully detach the stylus by either sliding it out or unscrewing it, again depending on the specific model. Take caution not to apply excessive force or damage any delicate components.
5. How do I install the new stylus?
Installing the new stylus is essentially the reverse of the removal process. Align the new stylus with the cartridge body and slide it into place. If it requires screwing in, do so gently without overtightening. Make sure it is securely attached and aligned before lowering the tonearm back onto the record. It’s always advisable to refer to the manufacturer’s instructions for precise installation steps.