
If you’re looking to expand your productivity and create a more immersive work or gaming setup, connecting two monitors to your laptop docking station can be a game-changer. With the ability to extend your screen real estate and multitask seamlessly, you’ll be able to work more efficiently and enjoy a more immersive visual experience. In this article, we’ll guide you through the process of connecting two monitors to your laptop docking station, step-by-step. From verifying compatibility to selecting the right cables and configuring your display settings, we’ll cover everything you need to know to set up a dual monitor system. So whether you’re a professional seeking to boost your workflow or a gamer wanting to enhance your gaming experience, let’s dive in and unlock the full potential of your laptop with dual monitors!
Inside This Article
- How to Connect 2 Monitors to Laptop Docking Station
- Overview
- # Step 1: Check docking station compatibility
- # Step 2: Connect the first monitor
- Step 3: Connect the second monitor
- # Step 4: Adjust display settings
- Tips for troubleshooting
- Additional resources and recommendations
- Conclusion
- FAQs
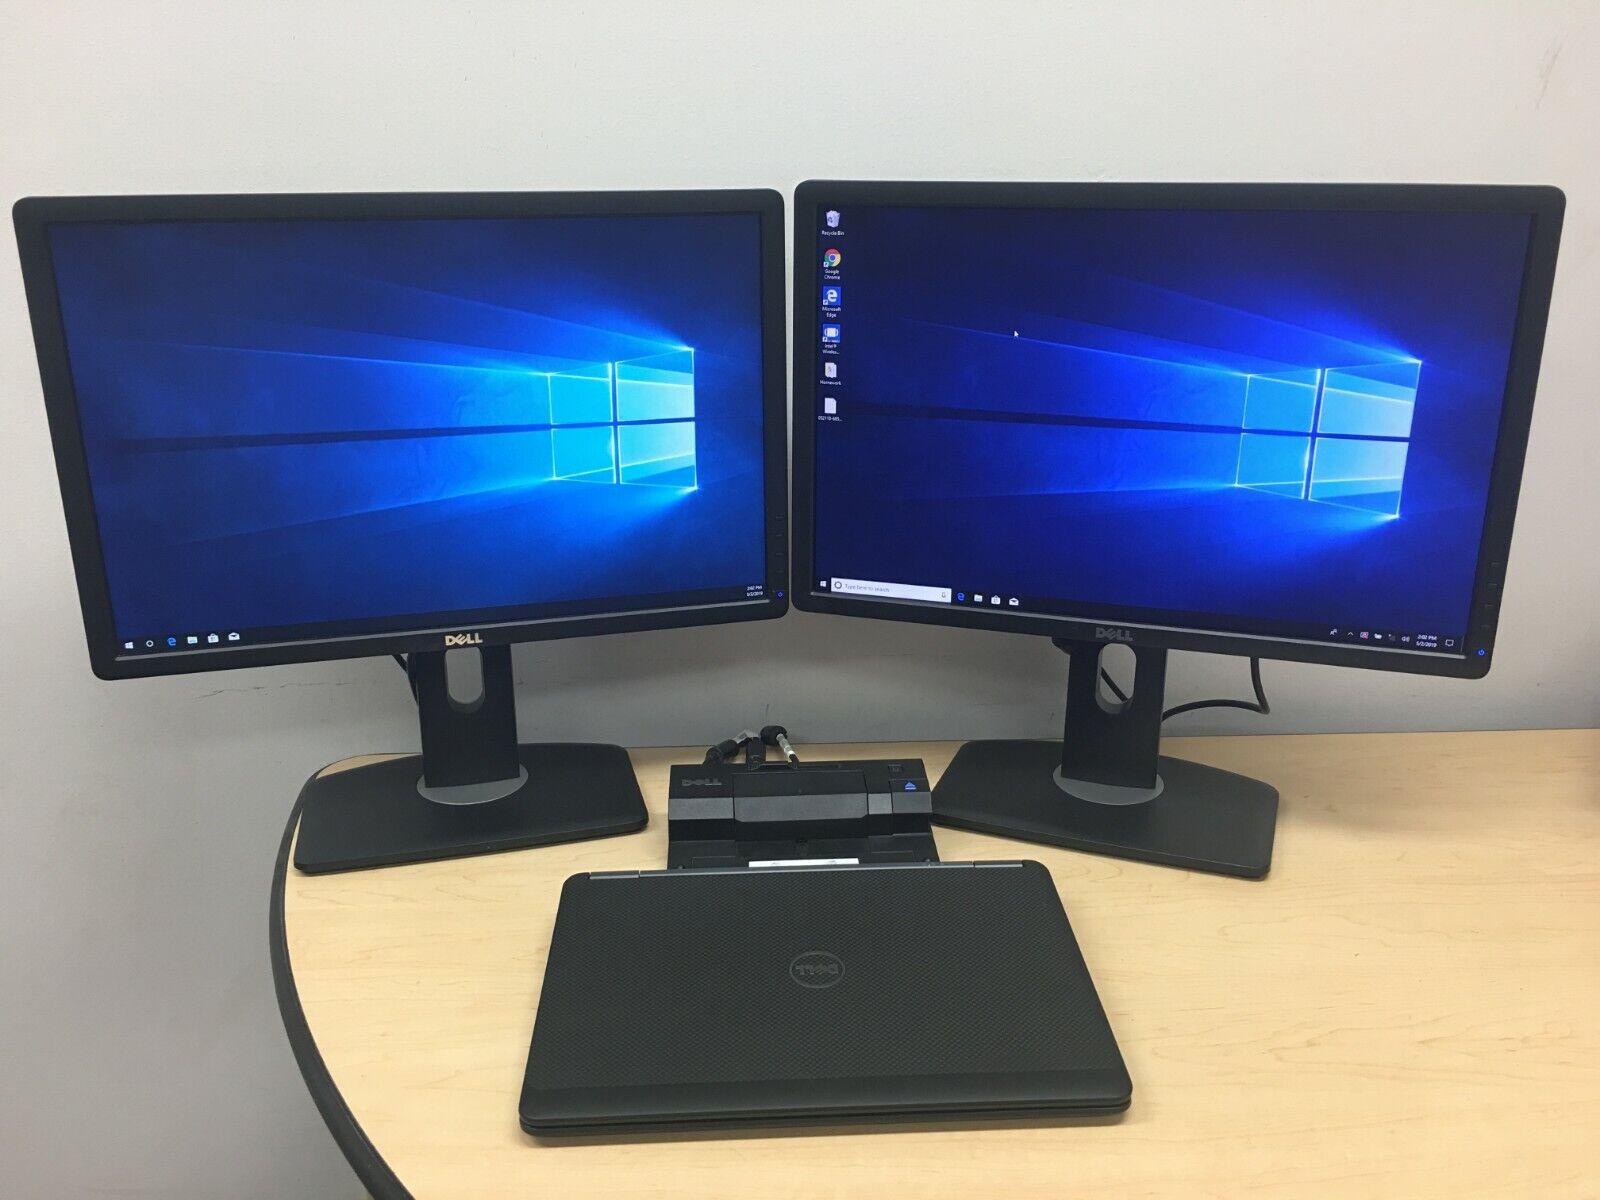
How to Connect 2 Monitors to Laptop Docking Station
Are you looking to expand your laptop’s display and increase your productivity? Connecting two monitors to your laptop docking station can provide you with a versatile and spacious workspace. Whether you’re a graphic designer, video editor, or simply someone who needs extra screen real estate, this guide will walk you through the steps to set up dual monitors with your laptop docking station.
Step 1: Check docking station compatibility
The first step is to ensure that your laptop docking station supports dual monitor setup. Check the documentation or specifications of your docking station to verify if it has multiple video output ports, such as HDMI, DisplayPort, or VGA. Additionally, make sure your laptop supports multiple monitor configurations.
Step 2: Connect the first monitor
Once you have confirmed compatibility, connect the first monitor to your laptop docking station. Locate the video output port on your docking station (such as HDMI or DisplayPort) and plug in one end of the appropriate cable. Then, connect the other end of the cable to the corresponding video input port on your monitor. Ensure the cable is securely plugged in on both ends.
Step 3: Connect the second monitor
With the first monitor successfully connected, it’s time to connect the second monitor. Depending on the available video output ports on your docking station, you may need to use a different cable or adapter for the second monitor. Repeat the same process as in Step 2, ensuring a secure connection between the docking station and the second monitor.
Step 4: Adjust display settings
After connecting both monitors to your laptop docking station, it’s essential to configure the display settings to enable dual monitor functionality. Right-click on the desktop and select “Display settings” or “Screen resolution.” Here, you’ll be able to customize the arrangement and orientation of your dual monitors, as well as adjust resolution and other display settings according to your preferences.
Tips for troubleshooting
If you encounter any issues while setting up dual monitors with your laptop docking station, consider the following troubleshooting tips:
- Ensure that the docking station and monitors are powered on and connected properly.
- Check for any driver updates for your docking station or graphics card, as outdated drivers can sometimes cause compatibility issues.
- Try using different cables or adapters to rule out any potential hardware problems.
- Restart your laptop and docking station to refresh the connections.
- Consult the user manual or contact the manufacturer’s support for further assistance.
Additional resources and recommendations
If you’re still having trouble setting up dual monitors or need further guidance, don’t hesitate to consult the manufacturer’s website or support resources. They may have specific instructions or troubleshooting tips related to your laptop docking station model.
Additionally, investing in a high-quality docking station and reliable cables can ensure a smoother dual monitor setup experience. Do some research, read reviews, and choose products that have good compatibility with your laptop and monitors.
Now that you know the steps to connect two monitors to a laptop docking station, you can enjoy an expanded workspace and enhance your productivity. Take full advantage of the dual monitor setup and make multitasking a breeze.
Overview
Connecting two monitors to a laptop docking station can greatly enhance your productivity and provide you with a more expansive and immersive workspace. With dual monitors, you can extend your desktop, increase screen real estate, and easily multitask between different applications.
While the process may seem daunting at first, it is actually quite straightforward. In this article, we will guide you through the steps to connect two monitors to your laptop docking station, ensuring a seamless setup experience.
Before diving into the specifics, it is important to note that not all laptop docking stations support dual monitor setups. Make sure to check the specifications and compatibility of your docking station before proceeding. Additionally, you’ll need to ensure that your laptop supports dual monitor output.
Once you have verified the compatibility, you can proceed with the step-by-step instructions to connect your monitors to the docking station and configure the display settings.
By the end of this article, you will be able to enjoy the benefits of a dual-monitor setup, maximizing your productivity and efficiency.
# Step 1: Check docking station compatibility
Before you begin the process of connecting two monitors to your laptop docking station, it is essential to ensure compatibility between the docking station and your laptop. Not all docking stations support multiple monitors, so it’s crucial to check the specifications and features of your docking station beforehand.
Firstly, refer to the manufacturer’s website or user manual to determine if your docking station supports dual monitor functionality. Look for information regarding the number of video ports available on the docking station and the maximum resolution supported. This is important because different docking stations may have different limitations.
Secondly, verify the video output ports available on your docking station and compare them to the video inputs on your monitors. Common video output ports include HDMI, DisplayPort, and VGA. Depending on your monitors’ inputs, you may need to use different types of cables or adapters to connect them to the docking station.
Lastly, check if your laptop supports dual monitor output. Some laptops might have limitations on the number of displays they can support simultaneously. Refer to your laptop’s specifications or consult the manufacturer’s website to determine if your laptop is compatible with a dual monitor setup.
By confirming the compatibility between your docking station, laptop, and monitors, you’ll avoid any potential complications and ensure a smooth and successful setup process.
# Step 2: Connect the first monitor
Once you have ensured the compatibility of your laptop docking station, it’s time to connect the first monitor.
1. Start by locating the video output port on your docking station. It is usually labeled with an icon representing a monitor or has the letters “DP,” “HDMI,” or “VGA” next to it.
2. Take one end of your video cable (such as HDMI, DisplayPort, or VGA) and connect it to the corresponding video output port on the docking station. Make sure to insert it firmly to ensure a secure connection.
3. Now, locate the video input port on your first monitor. It is typically located at the back of the monitor and may have labels like “HDMI,” “DP,” or “VGA” next to it.
4. Connect the other end of the video cable to the video input port on the first monitor. Again, ensure that the cable is inserted securely to avoid any loose connections.
5. Once both ends of the video cable are connected, power on your first monitor. Depending on the model, you may need to press the power button located on the monitor itself or use a remote control.
6. After turning on the first monitor, wait for a few moments to allow it to detect the incoming video signal. This process is called establishing a connection or syncing. It may take a few seconds for the screen to display any content.
7. Now, check your laptop’s display settings to ensure that the first monitor is detected and set up correctly. Depending on your operating system, you can usually access display settings by right-clicking on the desktop and selecting “Display settings” or “Screen resolution.”
8. In the display settings, you should be able to see both the laptop’s built-in display and the connected first monitor. Make sure the first monitor is recognized and set as the “Extended display” or “Secondary display.”
9. Adjust the display orientation, resolution, and other settings according to your preferences. You may also need to set the position of the first monitor in relation to the laptop’s built-in display. For example, you can choose to have the first monitor placed on the left, right, above, or below the laptop’s screen.
10. Finally, click “Apply” or “OK” to save the display settings. Your first monitor should now be connected and ready to use as an extended display for your laptop.
Repeat these steps for connecting the second monitor to your laptop docking station. Make sure to use the correct video cable and connect it to the available video output port on the docking station and the corresponding video input port on the monitor.
Once both monitors are connected, you can further customize their settings, arrange them in a specific layout, and enjoy the expanded workspace provided by the dual monitor setup.
Step 3: Connect the second monitor
Now that you have successfully connected the first monitor to your laptop docking station, it’s time to connect the second monitor. Here’s how you can do it:
1. Check the available ports on your docking station to ensure you have the necessary connections for the second monitor. Most docking stations come with multiple video output ports such as HDMI, DisplayPort, or VGA. Make sure your second monitor has a compatible input port.
2. Locate the corresponding video output port on your docking station and insert one end of the appropriate cable into the port. If you’re using HDMI, simply connect the HDMI cable to the HDMI output port on the docking station. If you’re using a different port such as DisplayPort or VGA, use the corresponding cable.
3. Connect the other end of the cable to the input port on your second monitor. Ensure it’s securely plugged in to avoid any loose connections.
4. Once both ends of the cable are connected, turn on your second monitor and make sure it’s set to the correct input source. You may need to use the monitor’s menu buttons to navigate and select the appropriate input source.
5. Now, your second monitor should be connected and ready to use. However, you may need to adjust the display settings on your laptop to extend or duplicate the desktop across both monitors. Refer to the manufacturer’s instructions or your laptop’s documentation on how to modify display settings.
Note: Some docking stations may require specific software installations or firmware updates to enable multiple monitor support. Check the manufacturer’s website or documentation for any additional requirements or instructions.
By following these steps, you can easily connect the second monitor to your laptop docking station. Now you can enjoy the benefits of a dual monitor setup, increasing productivity and enhancing your overall computing experience.
# Step 4: Adjust display settings
Once both monitors are connected to the docking station, it’s time to adjust the display settings to ensure they work harmoniously. Follow these steps to configure the display settings:
1. Right-click on the desktop: Begin by right-clicking on your desktop to access the context menu. From the menu options, select “Display settings” or “Screen resolution.”
2. Identify the connected monitors: The display settings window will appear, showing the layout of your multiple monitors. Each monitor will be represented by a numbered box. Identify the monitors and their corresponding numbers based on the physical connections you made.
3. Arrange the monitors: Click and drag the numbered boxes to arrange them based on how you positioned your physical monitors. This step is crucial as it ensures that your mouse cursor travels smoothly between the monitors without any visual gaps or misalignment.
4. Set the primary monitor: By default, one of the monitors will be designated as the primary monitor. This is the monitor where the Windows taskbar and desktop icons will appear. If you want to change the primary monitor, click on the desired numbered box and check the box that says “Make this my main display.”
5. Adjust the resolution and orientation: Select each monitor individually and use the drop-down menu under “Display resolution” to adjust the resolution settings. It’s recommended to choose the native resolution for optimal image quality. If you have a large or vertical monitor, you may also need to adjust the screen orientation to “Portrait.”
6. Customize other display settings: Depending on your preferences and requirements, you can further customize the display settings. You can adjust the scale and layout, change the color profile, enable or disable extended desktop mode, and more. Feel free to explore the options and make adjustments as needed.
7. Apply and save changes: Once you have made all the desired adjustments, click on the “Apply” button to apply the changes and test the new display settings. If everything looks good, click on the “Keep changes” button to save the settings.
By following these steps, you should now have your two monitors successfully connected to your laptop docking station and properly configured in terms of display settings. Enjoy the expanded screen real estate and increase your productivity with the extended display setup!
Tips for troubleshooting
While connecting 2 monitors to a laptop docking station is a relatively straightforward process, sometimes issues may arise. Here are some tips for troubleshooting common problems:
1. Check the connections: Ensure that all cables are securely connected to the docking station and the monitors. A loose connection can cause display issues. Double-check that the VGA, HDMI, or DisplayPort cables are properly inserted into the respective ports.
2. Update drivers: Outdated or incompatible graphics drivers can cause problems with multiple monitors. Visit the manufacturer’s website and download the latest drivers for your laptop and docking station. Install the drivers and restart the laptop to see if the issue is resolved.
3. Adjust display settings: If the monitors are not displaying correctly or are extending in the wrong direction, adjust the display settings. Right-click on the desktop and select “Display Settings.” Here, you can arrange the displays, change the resolution, and set the primary monitor. Make sure that the settings are configured properly.
4. Check power supply: Ensure that both the docking station and the monitors are receiving power. If the monitors are not turning on or not receiving a signal, check the power cables and make sure the power outlets are working correctly.
5. Use the correct cables: Different monitors and docking stations may require different types of cables. Ensure that you are using the correct cables for your specific setup. For example, if your monitors have HDMI ports, use HDMI cables instead of VGA or DVI cables.
6. Restart the laptop: Sometimes a simple restart can resolve connectivity issues. Restart your laptop with the docking station connected and see if the monitors are detected and working properly after the reboot.
7. Hardware compatibility: Check the compatibility between your laptop, docking station, and the monitors. Ensure that they support multiple monitor setups. Consulting the user manuals or contacting the manufacturers for more information can help you determine the compatibility.
8. Reset the docking station: If all else fails, you can try resetting the docking station. Different docking stations have different reset methods, so consult the user manual or the manufacturer’s website for instructions specific to your docking station model.
By following these troubleshooting tips, you can resolve common issues and successfully connect 2 monitors to a laptop docking station. Remember to always double-check your connections and settings, and ensure that your hardware is compatible. Happy multitasking!
Additional resources and recommendations
When it comes to connecting multiple monitors to your laptop docking station, there are a few additional resources and recommendations that can enhance your experience. Here are some helpful tips:
1. Check your laptop’s graphics card: Make sure your laptop has a compatible graphics card that supports multiple displays. Some older models may have limitations, so it’s important to verify this before attempting to connect multiple monitors.
2. Use the appropriate cables: To connect your monitors to the docking station, ensure you have the correct cables. Most modern monitors use HDMI or DisplayPort connections. Check the specifications of your dock and monitors to determine the necessary cables.
3. Consider a USB docking station: If your laptop does not have a dedicated docking port, a USB docking station can be a convenient solution. These devices enable you to connect multiple monitors, USB peripherals, and other devices through a single USB connection.
4. Use a monitor stand or mount: To optimize your workspace, consider using a monitor stand or mount to position your displays at the desired height and angle. This can improve ergonomics and productivity while also saving valuable desk space.
5. Update your drivers: Ensure that your laptop’s graphics drivers and docking station firmware are up to date. Manufacturers often release updates to improve compatibility and fix bugs, so regularly checking for updates can prevent potential issues.
6. Check your power supply: Connecting multiple monitors may require additional power. Ensure that your docking station and laptop can handle the power load. If necessary, use a powered USB hub or consider using monitors with their own power sources.
7. Consider using a KVM switch: If you frequently switch between multiple computers, a KVM (Keyboard, Video, Mouse) switch can save you the hassle of disconnecting and reconnecting cables. With a KVM switch, you can easily switch between different computers connected to the same monitors.
8. Explore software options: There are various software options available that can enhance your multi-monitor setup. These programs allow you to manage window placement, customize screen configurations, and create virtual desktops, providing a more efficient and streamlined workflow.
9. Seek professional assistance: If you’re unsure about the setup or encountering difficulties, don’t hesitate to seek help from a professional. IT specialists or computer support services can provide guidance and assistance to ensure a successful multi-monitor connection.
10. Practice proper cable management: To maintain a clean and organized workspace, invest in cable management solutions. This will help prevent tangling and tripping hazards, making it easier to manage and maintain your multi-monitor setup.
By following these additional resources and recommendations, you can maximize the potential of your multi-monitor setup and create a more productive and efficient workspace.
Conclusion
In conclusion, connecting two monitors to a laptop docking station can greatly enhance your productivity and multitasking abilities. By utilizing a docking station, you can effortlessly connect multiple monitors to your laptop, expanding your screen real estate and allowing you to work more efficiently.
With the right docking station and the necessary cables, you can enjoy the benefits of a dual-monitor setup, such as improved workflow, better organization, and easier multitasking. Whether you are a graphic designer, programmer, or simply someone who requires a larger workspace, connecting two monitors to your laptop docking station can be a game-changer.
So, follow the steps outlined in this article to set up your dual-monitor system, and start enjoying the benefits of increased productivity and seamless multitasking. With two monitors at your disposal, you’ll never want to go back to a single screen again!
FAQs
1. Can I connect 2 monitors to a laptop docking station?
Yes, it is possible to connect 2 monitors to a laptop docking station. Docking stations are designed to expand the connectivity options of laptops and provide users with the ability to connect multiple external displays for enhanced productivity and multitasking.
2. What are the requirements for connecting 2 monitors to a laptop docking station?
To connect 2 monitors to a laptop docking station, you will typically need two video output ports on the docking station, such as HDMI, DisplayPort, or VGA. Your laptop should also have the necessary graphics capabilities to support dual monitor setups. Additionally, make sure to check the compatibility and specifications of your docking station and monitors to ensure they work together seamlessly.
3. How do I connect the monitors to the laptop docking station?
To connect the monitors to the laptop docking station, follow these steps:
- Identify the video output ports on the docking station.
- Connect one end of the appropriate video cable (HDMI, DisplayPort, VGA) to the video output ports on the docking station.
- Connect the other end of the video cables to the corresponding ports on the monitors.
- Ensure that the monitors are powered on and set to the correct input source.
- Dock your laptop onto the docking station and wait for it to detect the monitors.
- Configure the display settings on your laptop to extend or mirror the display on the connected monitors.
4. Can I use different types of monitors when connecting 2 monitors to a laptop docking station?
Yes, it is possible to use different types of monitors when connecting 2 monitors to a laptop docking station. As long as the docking station and your laptop support the necessary video output ports, you can connect monitors with different display technologies, such as HDMI, DisplayPort, or VGA. However, keep in mind that the resolutions and capabilities of the monitors may affect the overall display experience.
5. What if my laptop does not have compatible video output ports for connecting 2 monitors?
If your laptop does not have compatible video output ports for connecting 2 monitors, you may consider using external adapters or converters to convert the available port to the required video output format. For example, if your laptop only has a single HDMI port and your monitors have DisplayPort inputs, you can use an HDMI-to-DisplayPort adapter to connect one monitor. Alternatively, you can explore the option of using a USB-to-video adapter for additional display connectivity.