
Do you want to share photos, videos, or presentations from your phone on a larger screen? Connecting your phone to a projector is a great way to display your content in a big and engaging way. Whether you’re giving a presentation at work, enjoying a movie night with friends, or showcasing your photography skills, knowing how to connect your phone to a projector can come in handy.
In this article, we will guide you through the process of connecting your phone to a projector, step by step. We’ll cover both wired and wireless options, providing you with different methods to suit your specific needs. By the end, you’ll be able to effortlessly connect your phone to a projector and take your media-sharing experience to the next level.
Inside This Article
- Option 1: Using a Wired Connection
- Option 2: Screen Mirroring with Wireless Connection
- Option 3: Using an HDMI Adapter
- Option 4: Using a USB-C or Lightning to HDMI Cable
- Troubleshooting Tips
- Conclusion
- FAQs
Option 1: Using a Wired Connection
If you want a reliable and lag-free connection between your phone and a projector, using a wired connection is a great option. This method ensures a stable data transfer, making it suitable for presentations, video playback, and gaming.
To connect your phone to a projector with a wired connection, you will require an appropriate cable for your phone’s port. The most common types of cables used for this purpose are HDMI, VGA, and USB-C.
If your phone has an HDMI port, you can directly connect it to the projector using an HDMI cable. Simply plug one end of the cable into your phone’s HDMI port and the other end into the HDMI input on the projector. This will mirror the content of your phone’s screen on the projector, allowing you to enjoy videos, photos, and presentations on a larger display.
On the other hand, if your phone has a VGA port, you will need a VGA adapter or cable. Connect one end of the cable to your phone’s VGA port and the other end to the VGA input on the projector. Many projectors also have HDMI ports, so you may need a VGA-to-HDMI adapter to establish the connection.
For phones with a USB-C port, you can use a USB-C to HDMI adapter or cable. Just plug the USB-C end into your phone’s port and the HDMI end into the projector’s input. This method allows you to enjoy high-quality video output on the projector’s display.
It’s worth noting that some phones might require additional settings to be adjusted for the wired connection to work correctly. Consult your phone’s user manual or manufacturer’s website for any specific instructions.
Overall, using a wired connection provides a reliable and hassle-free method of connecting your phone to a projector. It ensures a stable and high-quality transfer of data, making it an excellent choice for various multimedia purposes.
Option 2: Screen Mirroring with Wireless Connection
Screen mirroring is a convenient way to display the content of your phone on a projector without the need for any cables or adapters. With the advancement in technology, many smartphones are equipped with built-in screen mirroring capabilities. By following a few simple steps, you can easily connect your phone wirelessly to a projector and enjoy a larger display for your content.
The first thing you need to ensure is that your projector supports wireless screen mirroring. Most modern projectors have this feature, but it’s always a good idea to check the specifications or manual to confirm.
Next, ensure that both your phone and projector are connected to the same Wi-Fi network. This is crucial for establishing a wireless connection between the two devices.
Now, on your phone, swipe down from the top of the screen to access the notifications panel. Look for the “Screen Mirroring” or “Cast” option. The name may vary depending on the phone model and operating system.
Tap on the “Screen Mirroring” or “Cast” option, and your phone will start scanning for available devices. Select your projector from the list of available devices. It may take a few seconds to establish the connection.
Once the connection is established, your phone’s screen will be mirrored on the projector. You can now navigate through your phone’s settings, open apps, play videos, or showcase presentations, all directly from your phone.
It’s important to note that some phones may require you to go into the settings menu and enable screen mirroring before you can access it from the notifications panel. Check your phone’s user manual or search online for specific instructions if you’re having trouble finding the option.
Additionally, make sure that your phone’s software is up to date. Manufacturers often release updates that improve the performance and compatibility of screen mirroring features.
Keep in mind that the range of your wireless connection may be limited, so try to keep your phone and the projector within a reasonable distance to maintain a stable connection.
Lastly, it’s worth mentioning that the screen mirroring experience may vary depending on the phone and projector model. Some devices may offer additional features like audio mirroring, which allows you to stream audio through the projector’s speakers. Explore the settings and options available on your specific devices to make the most out of the wireless screen mirroring feature.
By following these steps, you can easily connect your phone to a projector wirelessly and enjoy a larger display for your content, whether it’s for work, entertainment, or education.
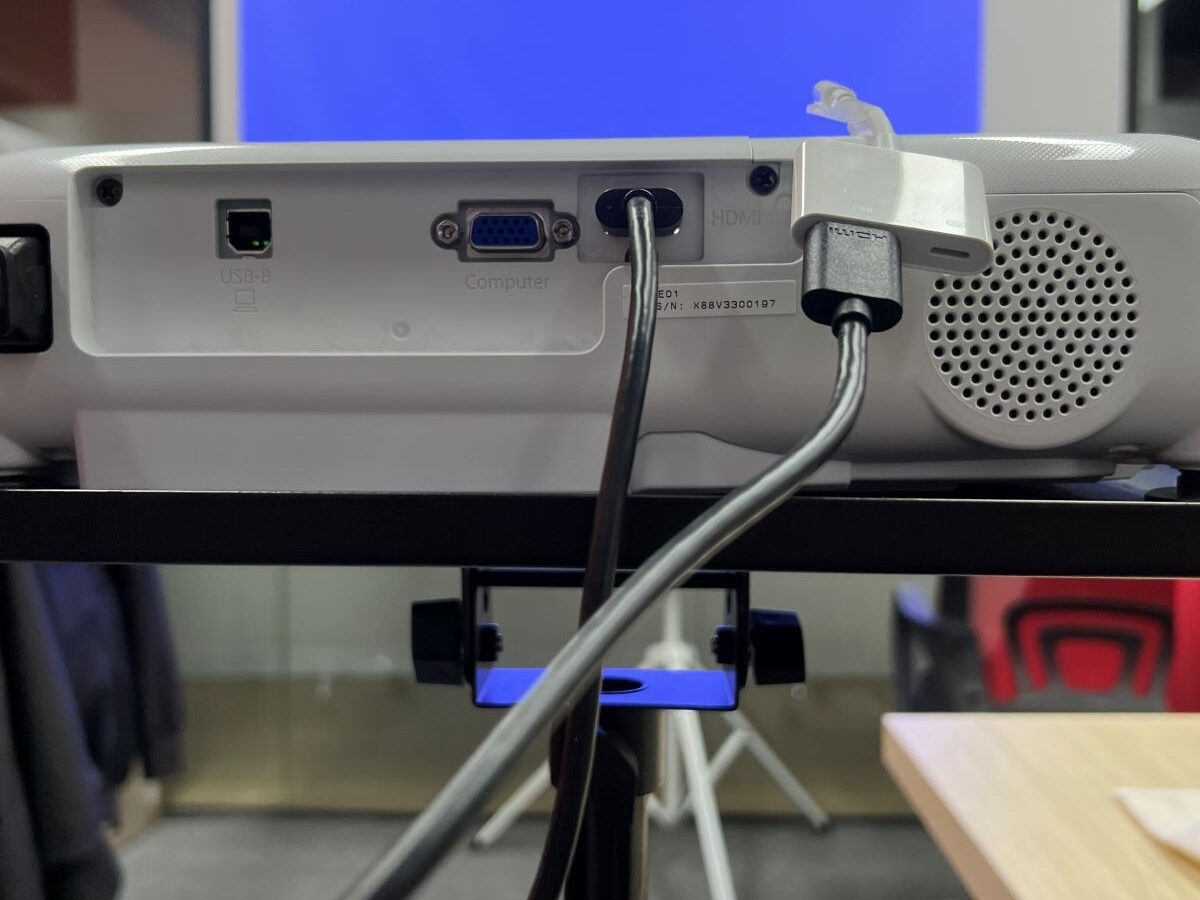
Option 3: Using an HDMI Adapter
If your phone has a USB-C or Lightning port, an HDMI adapter is an excellent option for connecting your phone to a projector. This method allows you to display your phone’s screen on a larger scale, making it ideal for presentations, video streaming, and gaming.
To utilize this option, you will need an HDMI adapter that is compatible with your phone’s port. USB-C to HDMI adapters are readily available for Android phones, while Lightning to HDMI adapters are designed for iPhones and iPads.
Here’s how to connect your phone to a projector using an HDMI adapter:
- Start by connecting one end of the HDMI cable to the HDMI port on the adapter.
- Insert the other end of the HDMI cable into the HDMI input on the projector.
- Connect the USB-C or Lightning end of the adapter to your phone’s charging port.
- Once everything is connected, turn on the projector and set it to the correct input source.
- On your phone, go to the Settings and look for the Display or Screen Mirroring option.
- Select the option that corresponds to your HDMI adapter, and your phone’s screen should now be mirrored on the projector.
With an HDMI adapter, you can enjoy crisp and high-quality visuals on the big screen. Keep in mind that some apps may have restrictions when it comes to screen mirroring, especially if they are copyright-protected or have DRM (Digital Rights Management) in place.
Make sure to check the settings and permissions of the app you’re using to ensure compatibility with screen mirroring. Additionally, consider using a long HDMI cable or an HDMI extender if you need more flexibility in projector placement.
Overall, using an HDMI adapter provides a reliable and straightforward method to connect your phone to a projector. It offers a seamless way to enjoy your content on a larger display and is compatible with a wide range of devices.
Option 4: Using a USB-C or Lightning to HDMI Cable
If you have a phone with a USB-C or Lightning port, you can easily connect it to a projector using a USB-C or Lightning to HDMI cable. This method provides a reliable and high-quality connection, ensuring that your phone’s content is displayed on the big screen with clarity.
To get started, you’ll need to purchase a USB-C or Lightning to HDMI cable that is compatible with your phone model. These cables can usually be found at electronics stores or online retailers. Make sure to choose a cable that is specifically designed for your phone’s port type to ensure compatibility and optimal performance.
Once you have the cable, the setup process is straightforward. Begin by connecting one end of the HDMI cable to the HDMI input port on the projector. Then, plug the other end of the cable into the USB-C or Lightning port on your phone.
Next, turn on the projector and switch its input setting to HDMI. On your phone, you may need to go to the Settings menu and select “Display” or “Screen Mirroring” to enable the connection. Follow the on-screen instructions to complete the setup.
Once the connection is established, you can start mirroring your phone’s display on the projector. Whether you want to share photos, videos, presentations, or even play games, everything will be projected onto the big screen for everyone to see.
One of the advantages of using a USB-C or Lightning to HDMI cable is that it supports both audio and video transmission. This means that the sound from your phone will also be played through the projector’s speakers, enhancing the overall multimedia experience.
Keep in mind that some phones require additional settings to be adjusted for the audio output. You may need to go to the sound settings on your phone and select the HDMI output as the audio source.
It’s important to note that USB-C and Lightning ports are not interchangeable, so make sure you use the appropriate cable for your phone. USB-C is the newer standard, typically found on Android devices, while Lightning is the proprietary port used by Apple devices.
Using a USB-C or Lightning to HDMI cable provides a convenient and reliable way to connect your phone to a projector. Whether you need to present in a meeting, enjoy a movie night with friends, or showcase your work, this option allows you to easily share your phone’s content on a larger screen.
Remember to always check the compatibility of the cable with your phone model and follow the manufacturer’s instructions for best results.
Troubleshooting Tips
Connecting your phone to a projector can sometimes be a bit tricky, and you may encounter some challenges along the way. However, fear not! Here are some troubleshooting tips to help you overcome common issues and ensure a successful connection:
1. Check the compatibility: Before you start troubleshooting, make sure that your phone and the projector are compatible. Not all projectors support all types of phones, so double-check the specifications of both devices.
2. Update software and firmware: Outdated software or firmware can cause compatibility issues. Update your phone’s operating system and the projector’s firmware to ensure they are up to date.
3. Restart all devices: Sometimes, a simple restart can solve the problem. Turn off your phone, the projector, and any other devices involved in the connection. Then, power them back on and try again.
4. Check the cables: If you are using a wired connection, check the cables for any damage or loose connections. Replace the cable if necessary and ensure it is securely plugged into both the phone and the projector.
5. Adjust the settings: On both your phone and the projector, navigate to the settings menu and look for any options related to screen projection or mirroring. Make sure the correct options are selected and any necessary permissions are granted.
6. Verify the inputs and outputs: Ensure that you are connecting the phone to the correct input port on the projector. Similarly, check that the projector is set to display the correct input source.
7. Clear cache and data: If you are experiencing issues with specific apps or files, try clearing the cache and data for those apps on your phone. This can help resolve any conflicts or glitches that might be interfering with the projection.
8. Restart the projector app: If you are using a specific app to connect your phone to the projector, try closing the app and reopening it. Sometimes, a restart of the app can resolve any software-related issues.
9. Switch the connection method: If one method of connection is not working, try switching to a different method, such as using a different cable or opting for wireless screen mirroring instead.
10. Consult the user manuals: If all else fails, refer to the user manuals of both your phone and the projector for more specific troubleshooting steps. You may find additional troubleshooting tips and solutions to common problems.
Remember, troubleshooting can be a process of trial and error. Be patient and try different solutions until you find one that works for your specific setup. With a bit of perseverance, you’ll be able to connect your phone to a projector and enjoy a larger display for your content.
Conclusion
In conclusion, connecting your phone to a projector opens up a world of possibilities for sharing and presenting content. Whether you’re giving a business presentation, enjoying a movie night, or showcasing your creative work, the ability to mirror your phone’s screen on a larger display can greatly enhance the experience. With the availability of various connection methods, such as HDMI, MHL, and wireless solutions like Miracast and AirPlay, it has become easier than ever to connect your phone to a projector.
By following the steps outlined in this guide, you can seamlessly share your phone’s screen and enjoy a bigger, more immersive viewing experience. Remember to choose the appropriate connection method based on your phone’s capabilities and the available ports on the projector. And don’t forget to double-check the compatibility requirements to ensure a smooth and successful connection.
So, whether you’re in a conference room, classroom, or your living room, connecting your phone to a projector is a simple and convenient way to take your media and presentations to the next level.
FAQs
Q: Can I connect my phone to any projector?
A: Yes, most modern projectors feature multiple connectivity options, including HDMI, VGA, and USB. However, it’s essential to check the compatibility of your phone with the projector’s available ports before attempting to connect.
Q: How do I connect my phone to a projector wirelessly?
A: To connect wirelessly, both your phone and the projector must support wireless connectivity options such as Wi-Fi or Bluetooth. You can then use screen mirroring or casting features available on your phone (e.g., AirPlay for iPhone or Miracast for Android) to stream content to the projector.
Q: What cables do I need to connect my phone to a projector?
A: The type of cable you’ll need depends on the ports available on your phone and the projector. Some common cables include HDMI-to-HDMI, USB-to-HDMI, USB-C-to-HDMI, or USB-C-to-VGA. Check the ports on both devices and ensure you have the corresponding cable.
Q: Can I connect my iPhone to a projector?
A: Yes, you can connect an iPhone to a projector. For newer iPhone models with a Lightning port, you will need a Lightning-to-HDMI or Lightning-to-VGA adapter, along with the necessary HDMI or VGA cable. For older iPhone models with a 30-pin connector, you will need a 30-pin-to-HDMI or 30-pin-to-VGA adapter.
Q: How do I adjust the display settings when connecting my phone to a projector?
A: Once your phone is connected to the projector, go to the display settings on your phone and make sure it is set to mirror or duplicate the screen. Adjust the screen resolution and other display settings to optimize the projection quality.