
The battery is a crucial component of any mobile device, including cell phones. It powers the device and ensures smooth operation. However, there are instances where disconnecting the battery becomes necessary. Whether you need to replace a faulty battery, perform a hard reset, or carry out repairs, knowing how to disconnect the battery safely is essential.
In this article, we will guide you through the process of disconnecting the battery from your cell phone step by step. We will provide you with the necessary information and precautions to ensure a smooth and hassle-free procedure. So, whether you are a DIY enthusiast or simply want to learn more about mobile phone maintenance, read on to discover how to safely disconnect the battery of your mobile device.
Inside This Article
- Disconnecting the Battery Safely
- Tools and Materials Needed
- Step-by-Step Guide to Disconnecting the Battery
- Precautions to Take
- Additional Tips and Warnings
- Conclusion
- FAQs
Disconnecting the Battery Safely
Disconnecting the battery is a task that may seem simple, but it’s important to approach it with caution to avoid any accidents or damage. Whether you’re replacing a battery or performing maintenance on your vehicle, following the proper steps can ensure a safe and smooth process. In this article, we will guide you through the necessary precautions and steps to disconnecting a battery safely.
Before you begin, it’s essential to gather the necessary tools and materials. These typically include safety gloves, safety glasses, a wrench or socket set, and a battery terminal puller (if needed). Having these items on hand will make the process more efficient and help protect you from any potential harm.
Now, let’s dive into the step-by-step guide on how to disconnect a battery:
- Start by identifying the negative (-) terminal and the positive (+) terminal on the battery. These are usually indicated by a minus sign and a plus sign or color-coded red (positive) and black (negative).
- Put on your safety gloves and glasses for added protection.
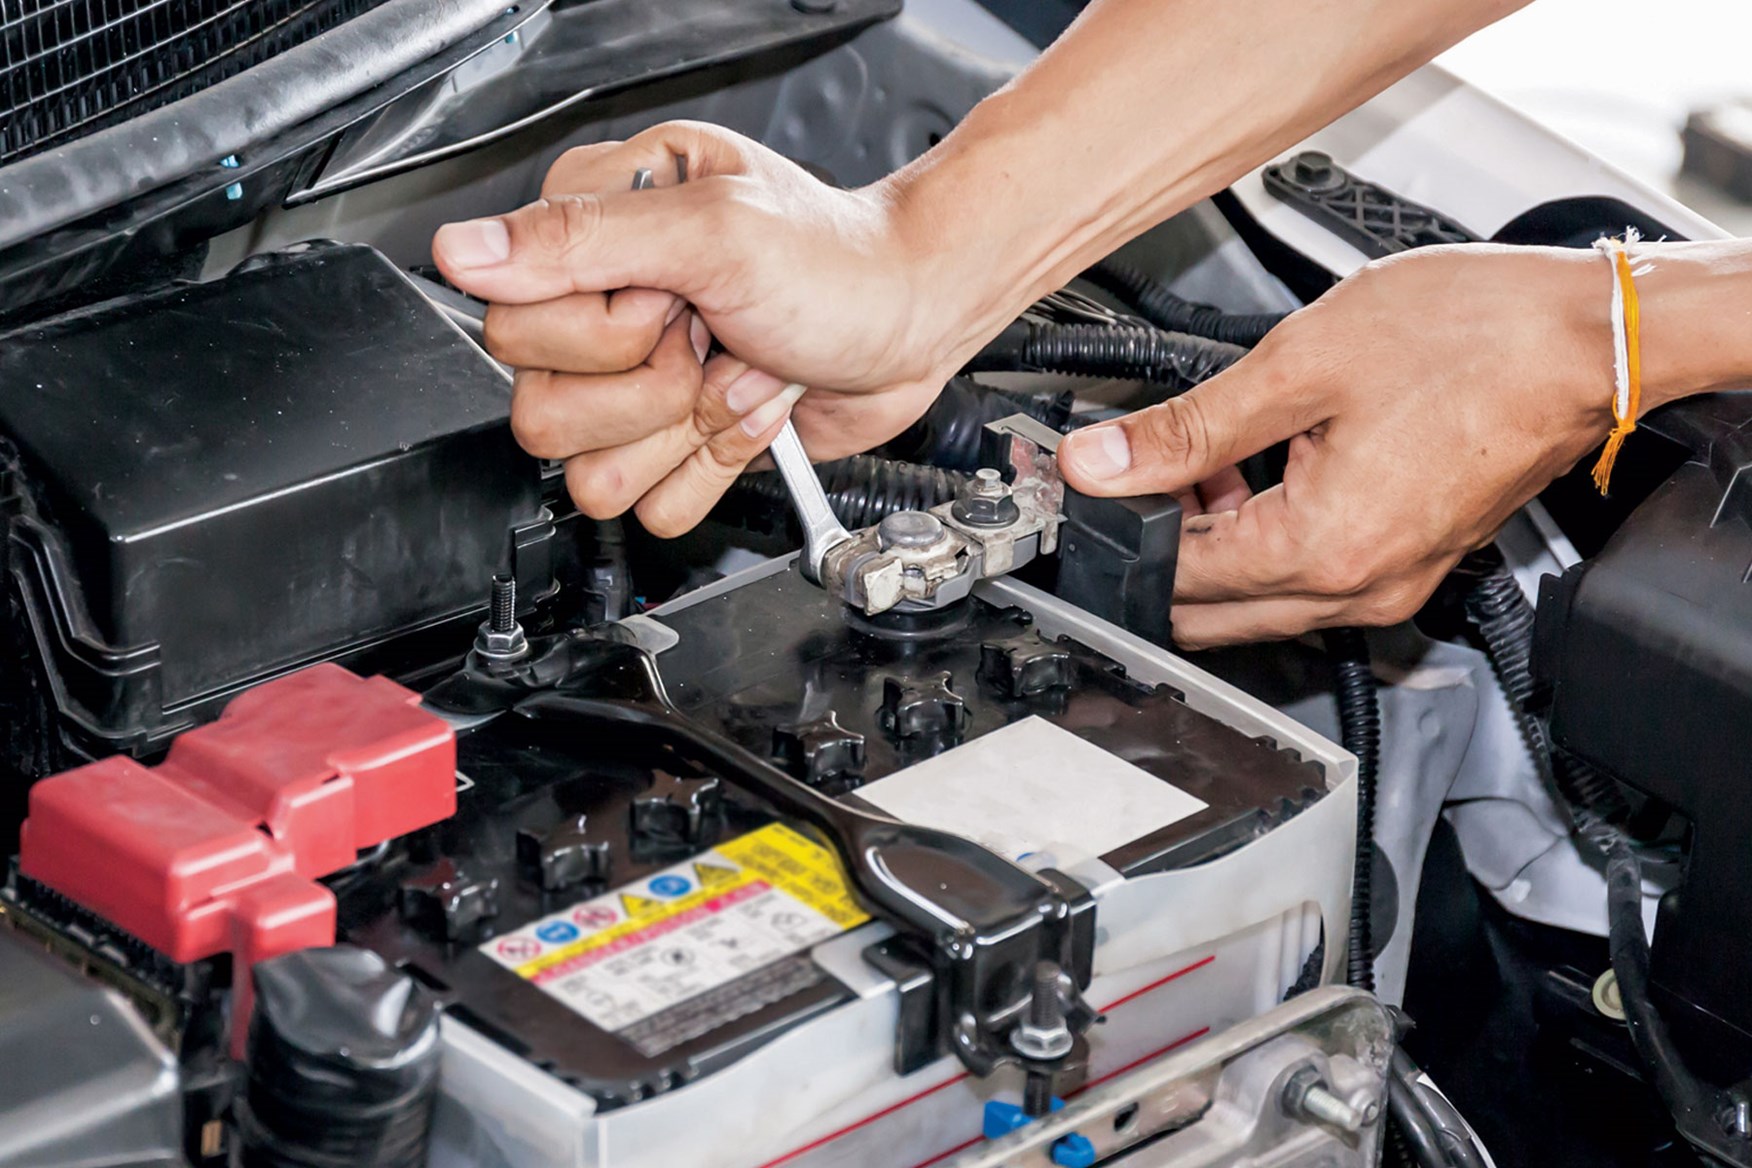
- Using a wrench or socket set, loosen the nut connecting the negative terminal clamp to the battery’s negative post. This is typically the black cable.
- Once the nut is loose, carefully remove the negative terminal clamp from the battery post. Take note not to touch any other metal surfaces or the positive terminal with the negative terminal clamp.
- Repeat the same process for the positive terminal clamp, which is typically the red cable. Loosen the nut and remove the positive terminal clamp from the battery’s positive post.
- Ensure that both terminal clamps are securely disconnected and won’t accidentally make contact with the battery posts.
With the battery safely disconnected, you can now perform any necessary maintenance or battery replacement. However, it’s important to keep a few precautions in mind:
- Always follow the manufacturer’s instructions and any specific guidelines for your vehicle.
- If you’re replacing the battery, make sure to match the new battery’s specifications to the old one.
- Take care to avoid any sparks or open flames near the battery, as this can be dangerous.
- Handle the disconnected battery with care and avoid dropping or damaging it.
- Once you’re ready to reconnect the battery, reverse the steps above, starting with the positive terminal and then the negative terminal.
By following these steps and taking necessary precautions, you can confidently and safely disconnect the battery for maintenance or replacement purposes. Always prioritize your safety and consult a professional if you’re unsure about any aspect of the process.
Tools and Materials Needed
Before you begin disconnecting your battery, it is important to gather the necessary tools and materials. Here is a list of what you will need:
- Socket wrench or adjustable wrench
- Protective gloves
- Safety glasses
- Battery terminal puller or adjustable pliers
- Clean cloth or rag
- Anti-corrosion battery spray or petroleum jelly (optional)
The socket wrench or adjustable wrench will be used to loosen and remove the battery terminals. It is important to use the correct size wrench to avoid damaging the terminals.
Protective gloves and safety glasses are essential when working with a battery. They will protect your hands and eyes from any corrosive battery acid or debris that may be present.
A battery terminal puller or adjustable pliers will be needed to safely remove the battery terminals from their posts. The puller or pliers will help loosen the terminals without causing any damage.
Having a clean cloth or rag on hand is important to wipe away any dirt, grime, or battery acid that may be present on the battery or terminals. Keeping the battery and terminals clean will help ensure a proper connection when reconnecting them.
Finally, an optional tool you may want to have is an anti-corrosion battery spray or petroleum jelly. Applying a thin coating of spray or petroleum jelly to the battery terminals after disconnecting them can help prevent corrosion and extend the life of your battery.
Having these tools and materials ready before you begin will make the battery disconnect process much smoother and safer.
Step-by-Step Guide to Disconnecting the Battery
Disconnecting the battery in your vehicle is a simple yet important task that may be necessary for various reasons. Whether you need to replace the battery, perform maintenance on your vehicle’s electrical system, or simply want to disconnect it while it’s not in use, it’s essential to do it safely and correctly. Here is a step-by-step guide to help you through the process:
Step 1: Gather the necessary tools and materials
Before you begin, make sure you have all the tools and materials you will need. This typically includes a pair of safety gloves, a wrench or socket set, and an insulated battery terminal wrench or pliers to disconnect the battery terminals.
Step 2: Park your vehicle in a safe location
Ensure that your vehicle is parked on a level surface and engage the parking brake. It is also advisable to wear safety goggles to protect your eyes from any potential battery acid splashes.
Step 3: Identify the positive and negative terminals
Locate the battery in your vehicle’s engine bay. Identify the positive terminal (marked with a “+” sign) and the negative terminal (marked with a “-” sign). It’s crucial to disconnect the negative terminal first to avoid any electrical mishaps.
Step 4: Disconnect the negative terminal
Using the insulated battery terminal wrench or pliers, loosen the nut on the negative terminal and carefully remove the cable. Insulate the cable end with a piece of electrical tape to prevent accidental contact with the battery during the rest of the process.
Step 5: Disconnect the positive terminal
Now that the negative terminal is safely disconnected, move on to the positive terminal. Follow the same process as before, loosening the nut and removing the cable while keeping it insulated with electrical tape.
Step 6: Inspect the battery and cables
Now that the battery is disconnected, take a moment to inspect both the battery and the cables for any signs of damage or corrosion. Clean the battery terminals with a wire brush if necessary to ensure a good connection when reconnected.
Step 7: Reconnecting the battery
If you are disconnecting the battery temporarily, make sure to reconnect the positive terminal first, followed by the negative terminal. Ensure that the connections are tight and secure to prevent any electrical issues.
Step 8: Dispose of the old battery properly (if needed)
If you are replacing the battery, it’s essential to dispose of the old battery safely. Many automotive stores or recycling centers accept used batteries for proper disposal. Avoid disposing of batteries in regular household waste.
By following these step-by-step instructions, you can safely and effectively disconnect the battery in your vehicle. Remember to exercise caution and take necessary precautions to avoid any accidents or damage to your vehicle’s electrical system.
Precautions to Take
When disconnecting the battery, it’s important to take certain precautions to ensure your safety and prevent damage to your vehicle. Here are some essential precautions to keep in mind:
-
Always wear safety goggles and gloves to protect your eyes and hands from any potential hazards.
-
Before starting the disconnection process, make sure the ignition is turned off and the vehicle is in park or neutral with the parking brake engaged.
-
Identify the negative terminal (-) and positive terminal (+) on the battery. The negative terminal is typically marked with a “-” symbol or the letters “NEG,” while the positive terminal is usually marked with a “+” symbol or the letters “POS.”
-
Begin by disconnecting the negative terminal first. This reduces the risk of short circuits and electrical sparks. Use a wrench or socket to loosen the nut holding the negative cable onto the negative terminal. Once the nut is loose, carefully remove the cable and set it aside.
-
After disconnecting the negative terminal, move on to the positive terminal. Use the same wrench or socket to loosen the nut holding the positive cable onto the positive terminal. Once the nut is loose, remove the cable from the positive terminal and place it away from the battery.
-
When removing the battery cables, ensure they are kept away from the battery terminals and each other. This prevents accidental contact and potential electrical discharge.
-
Inspect the battery terminals and cables for any signs of corrosion or damage. If corrosion is present, clean the terminals and cables with a mixture of baking soda and water. Scrub the affected areas with a wire brush until clean, then rinse with water and dry thoroughly.
-
Once the battery is disconnected, handle it with care. Batteries are heavy and contain chemicals that can be harmful if mishandled. Lift the battery using both hands, keeping it level and steady. Avoid tipping or dropping the battery.
-
If you are planning to dispose of the battery, do so following proper guidelines and regulations. Many auto parts stores or recycling centers accept used batteries for recycling.
-
When reinstalling the battery, ensure the terminals are securely tightened. Make sure the positive cable is connected first, followed by the negative cable. Use the same wrench or socket to tighten the nuts onto the terminals.
-
After reconnecting the battery, double-check that all connections are secure and there is no loose wiring.
By taking these precautions, you can safely disconnect your vehicle’s battery without any mishaps. Remember to always exercise caution and follow the manufacturer’s instructions for your specific vehicle model.
Additional Tips and Warnings
When disconnecting a battery, there are a few additional tips and warnings to keep in mind to ensure a safe and efficient process. Follow these guidelines to avoid any potential mishaps:
1. Protective Gear: Always wear protective gear, such as gloves and safety glasses, when working with batteries. This will protect your hands from any acid or corrosion, and your eyes from potential splashes.
2. Battery Terminal Covers: Before starting the disconnection process, it’s important to remove any battery terminal covers that may be in place. These covers protect the terminals from dirt and moisture and need to be removed to access the terminals.
3. Proper Terminal Order: When disconnecting the battery, always start with the negative terminal first. This will help prevent any accidental grounding and reduce the risk of short circuits or electrical shock.
4. Tighten Terminal Connections: After disconnecting the battery, make sure to tighten the terminal connections. Loose connections can cause electrical problems and reduce the battery’s performance.
5. Keep Tools Away: Avoid placing any tools or other metallic objects near the battery. Accidental contact between a tool and the battery terminals can cause sparks, leading to a potential fire hazard.
6. Dispose of Old Batteries Properly: If you are replacing an old battery, it’s essential to dispose of it properly. Many automotive stores or recycling centers accept old batteries for safe disposal.
7. Check Battery Condition: Before reconnecting the battery or installing a new one, inspect the wiring and connectors for any signs of damage or corrosion. Clean or repair as necessary before reconnecting.
8. Follow Manufacturer Instructions: Always refer to the vehicle’s owner manual or the battery manufacturer’s instructions for specific guidelines and precautions.
Remember, safety should be the top priority when working with batteries. If you are uncertain about any aspect of disconnecting or handling a battery, it’s best to consult a professional or seek assistance.
Conclusion
Disconnecting the battery in your vehicle is a relatively straightforward process that can be done in a few simple steps. Whether you need to replace the battery, perform maintenance on the electrical system, or work on other components in your car, it is important to disconnect the battery to ensure safety and prevent any electrical mishaps.
Remember to always follow the manufacturer’s instructions and wear appropriate safety gear when working on your vehicle’s battery. By taking the necessary precautions and following the correct procedures, you can safely disconnect the battery and carry out any necessary repairs or maintenance with confidence.
Should you encounter any issues or require further assistance, consider consulting a professional mechanic or reaching out to the vehicle’s manufacturer for guidance.
FAQs
1. Why should I disconnect the battery?
Disconnecting the battery is necessary for various reasons. It can help prevent electrical shorts, reduce the risk of accidental discharge, and ensure safety during maintenance or repairs that involve the electrical system.
2. When should I disconnect the battery?
You may need to disconnect the battery in several situations, such as when you’re replacing a component that requires power interruption, performing extensive electrical work, storing a vehicle for a prolonged period, or jump-starting a dead battery.
3. How do I disconnect the battery properly?
To disconnect the battery, start by turning off the engine and removing the keys from the ignition. Locate the battery terminals – the positive (+) and negative (-) posts. Use a suitable wrench or pliers to loosen and remove the cables, starting with the negative cable, then the positive cable. Ensure that the cables don’t come into contact with each other or any metal surfaces to prevent short circuits.
4. Should I disconnect the positive or negative terminal first?
It’s generally recommended to disconnect the negative (black or minus) terminal first before the positive (red or plus) terminal. This order minimizes the risk of electrical shock or short circuits, as removing the negative terminal cuts off the flow of current from the battery to the vehicle’s electrical system.
5. What precautions should I take when disconnecting the battery?
When disconnecting the battery, always wear protective gloves and eye protection to shield yourself from acid or sparks. Make sure all electrical loads, such as headlights or radios, are turned off. Avoid touching the terminals simultaneously, as it can lead to a short circuit. It’s also a good idea to keep the battery area clean and free of dirt or debris, as these can cause electrical issues.