
Installing a threadless headset and fork onto your bike can be a daunting task, but with the right tools and a step-by-step guide, you’ll have it done in no time. This key component of your bike is crucial for smooth steering and stability, especially when tackling rough terrain or high-speed descents. Whether you’re a seasoned cyclist or a beginner, understanding how to properly install a threadless headset and fork is essential knowledge to maintain the performance and safety of your bike. In this article, we will walk you through the process, providing clear instructions and tips to ensure a successful installation. So, let’s get started and give your bike the upgrade it deserves!
Inside This Article
- Threadless Headset and Fork Installation Guide
- Tools and Materials Needed
- Removing the Old Headset and Fork
- Installing the Threadless Headset
- Conclusion
- FAQs
Threadless Headset and Fork Installation Guide
In order to install a threadless headset and fork on your bike, you will need the following tools and materials:
- Adjustable wrench
- Hex wrench set
- Threadless headset installation tool
- Fork crown race installation tool
- Grease
- Threadless headset
- Fork
- Stem
- Handlebars
Now, with all the necessary tools and materials ready, let’s get started with the installation:
Removing the Old Headset and Fork
The first step is to remove the old headset and fork from your bike. Start by loosening the stem bolts using an adjustable wrench or hex wrench. Once the stem is loose, remove the handlebars from the stem and set them aside. Next, use an adjustable wrench to loosen and remove the locknut and upper cup of the old headset. Take out the old fork by sliding it out of the head tube and set it aside.
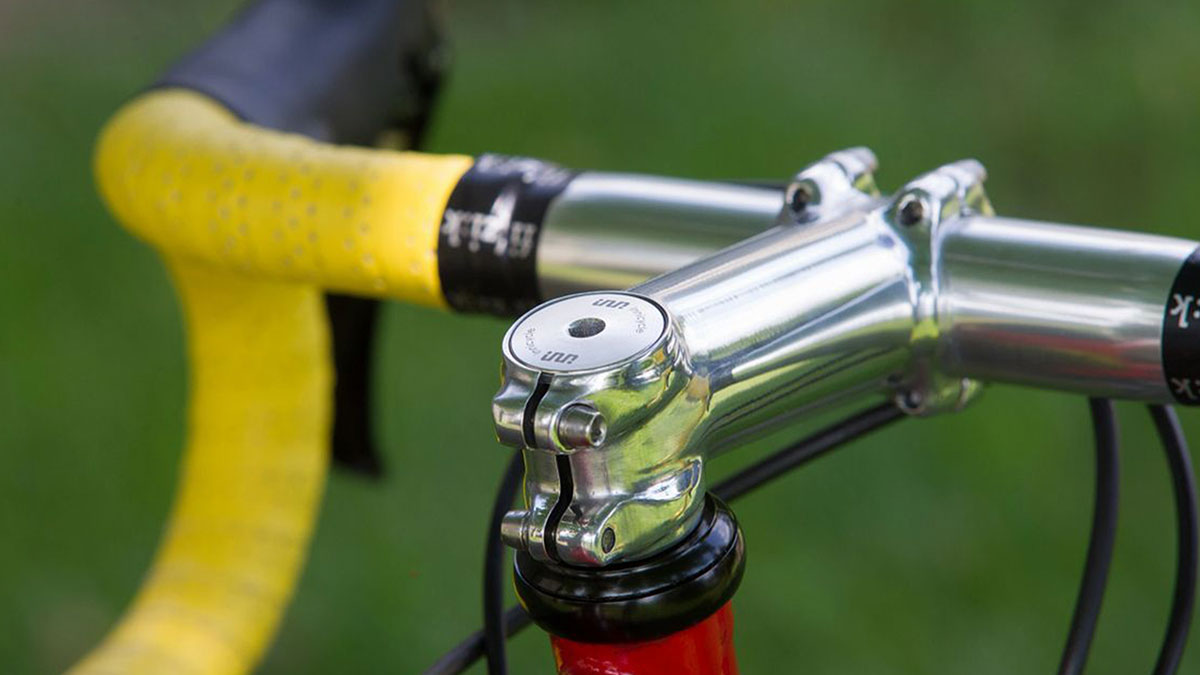
Installing the Threadless Headset
Now that the old headset and fork are removed, it’s time to install the threadless headset. Begin by applying a thin layer of grease to both the inside of the head tube and the outside of the headset cups. Place the bottom cup onto the fork’s steerer tube, making sure it sits flush against the crown of the fork. Use a headset installation tool to press the cup into the head tube until it is fully seated.
Next, install the upper headset bearing onto the steerer tube, making sure it is positioned correctly. Slide the fork’s steerer tube into the head tube, aligning the lower bearing with the bottom cup. Slowly push the fork into the head tube until the lower bearing is fully seated in the cup.
Installing the Fork
With the headset in place, it’s time to install the fork. Slide the fork’s steerer tube through the stem, making sure it is properly aligned. Tighten the stem bolts to secure the fork and ensure it is centered. Reattach the handlebars to the stem, tightening the bolts to the manufacturer’s recommended torque.
Once everything is securely in place, make sure to adjust the headset tension. This can be done by loosening the stem bolts slightly and tightening the top cap until there is no play in the headset, but it also rotates smoothly. Once the tension is properly adjusted, tighten the stem bolts to secure the headset and fork.
Finally, make any necessary adjustments to the handlebar position and angle, ensuring that they are comfortable and aligned with your riding style. Double-check all the bolts and make sure they are tightened to the recommended torque specifications.
With the threadless headset and fork properly installed, you are now ready to hit the road or trail with confidence, knowing that your bike’s steering system is secure and efficient.
Tools and Materials Needed
In order to successfully install a threadless headset and fork, you will need the following tools and materials:
1. Allen wrench set: This will be necessary for loosening and tightening various bolts and screws throughout the installation process.
2. Bike grease: Applying grease to the various components will help ensure smooth operation and prevent corrosion.
3. Threadless headset: This is the component that allows the fork to turn smoothly and connect to the handlebars.
4. Fork: The fork is responsible for connecting the front wheel to the frame of the bike.
5. Headset press (optional): If you have access to a headset press, it can make the installation process easier and more precise.
6. Crown race installation tool (optional): This tool is used specifically for installing the crown race onto the fork.
7. Adjustable wrench: This versatile tool will be useful for adjusting and tightening certain components.
8. Hammer: A hammer may be needed to gently tap certain parts into place during the installation process.
Removing the Old Headset and Fork
When it comes to installing a threadless headset and fork on your bike, the first step is to remove the old headset and fork. This process involves several steps to ensure a smooth transition to the new components. Follow the guide below to effectively remove the old headset and fork:
- Begin by loosening the stem bolts using an allen wrench. This will allow you to remove the handlebars from the stem. Carefully slide the handlebars off the stem and set them aside.
- Once the handlebars are removed, you can proceed to take off the stem. Loosen the bolts or bolts securing the stem to the fork steerer tube. Gently wiggle the stem back and forth to loosen it, and then slide it off the fork steerer tube.
- Next, remove any spacers that are present on the fork steerer tube. These spacers are used to adjust the height of the handlebars and may vary depending on your bike’s setup. Carefully slide the spacers off the steerer tube and set them aside.
- Using an allen wrench or similar tool, unscrew the top cap that is located on top of the headset stack. Once the top cap is removed, you will see the compression plug that sits inside the steerer tube. Take out the compression plug and set it aside.
- Now it’s time to remove the old fork from the head tube. Slowly pull the fork out of the head tube, being mindful of any cables or housing that may be attached. Gently wiggle the fork if necessary to loosen it before fully removing it.
- After removing the fork, take the opportunity to clean the head tube and fork crown area. Use a clean cloth or rag to wipe away any dirt or debris that may have accumulated. This will ensure a clean surface for installing the new headset and fork.
By following these steps, you will successfully remove the old headset and fork from your bike. Now you’re ready to move on to the next steps in the installation process and get your bike ready for the road ahead.
Installing the Threadless Headset
Installing a threadless headset is an essential step in setting up your bike’s steering system. Follow these steps to ensure a smooth and accurate installation:
1. Apply a thin layer of grease to the inside of the head tube. This will help prevent corrosion and ensure smooth movement of the headset components.
2. Insert the lower headset bearing into the head tube. Make sure it is aligned properly and securely seated in place.
3. If your fork requires a crown race, install it onto the fork steerer tube using a crown race installation tool if necessary. The crown race should fit snugly onto the fork steerer tube, providing a smooth surface for the lower headset bearing to rest on.
4. Place the fork steerer tube into the head tube, aligning the lower headset bearing with the head tube. Make sure the fork steerer tube is inserted all the way down until it reaches the bottom of the head tube.
5. Slide the upper headset bearing and any required spacers onto the fork steerer tube. The spacers are used to adjust the height of the handlebars and can be added or removed as needed.
6. Screw the top cap onto the fork steerer tube, but do not tighten it fully. The top cap helps to preload the headset, ensuring proper alignment and eliminating any play in the headset.
7. Press down on the fork several times to properly align the headset bearings. This slight movement will help settle the bearings into their correct position.
8. Finally, tighten the top cap to eliminate any play in the headset, but still allow for smooth steering. Use an appropriately sized Allen wrench to tighten the bolt on the top cap gradually and evenly. Be careful not to overtighten, as this can damage the headset or make it difficult to steer.
By following these steps, you can install a threadless headset and ensure a stable and reliable steering system for your bike. Remember to periodically check and maintain your headset to keep it in optimal condition.
Conclusion
Installing a threadless headset and fork may seem like a daunting task, but with the right tools and a step-by-step guide, it becomes much more manageable. By following the instructions outlined in this article, you can confidently install these components and ensure a safe and smooth ride on your bike.
Remember to thoroughly read the manufacturer’s instructions specific to your headset and fork before starting the installation process. Take the time to gather all the necessary tools and materials, and don’t hesitate to seek professional assistance if you encounter any difficulties.
With proper installation, your threadless headset and fork will provide better stability, improved handling, and enhanced performance, allowing you to fully enjoy your cycling adventures. So go ahead, gather your tools, follow the steps, and get ready for a smoother and more comfortable ride!
FAQs
1. What is a threadless headset and fork?
A threadless headset and fork are components commonly found on bicycles, particularly those used for off-road cycling or with modern designs. They are a type of headset and fork system that does not rely on threaded connections. Instead, they use a clamp called a stem to secure the fork to the headset, providing a stiffer and more durable setup.
2. How do I know if I need to install a threadless headset and fork?
If you’re upgrading or building a new bicycle, and the frame comes with appropriate fittings for a threadless headset and fork, then it is recommended to use them. Additionally, if you’re looking for improved steering precision, easier maintenance, and increased durability, a threadless headset and fork can be a great choice.
3. Can I install a threadless headset and fork on my existing bike?
It depends on the compatibility of your bike’s frame and existing components. Traditional threaded forks and headsets cannot be retrofitted with a threadless system without significant modification. It’s best to consult with a professional bike mechanic or check the frame manufacturer’s specifications before attempting any modifications.
4. What tools do I need to install a threadless headset and fork?
To install a threadless headset and fork, you will need a few specific tools, including a headset press, crown race setting tool, torque wrench, Allen wrenches, and possibly a fork cutting guide and hacksaw if you need to trim the fork steerer tube. It’s important to have the right tools to ensure a proper and safe installation.
5. Should I seek professional help to install a threadless headset and fork?
While it is possible to install a threadless headset and fork yourself if you have the necessary tools and experience, it is generally recommended to seek professional help, especially if you’re not familiar with bike maintenance and mechanics. Professional bike shops have the expertise and tools to ensure a precise and safe installation.