
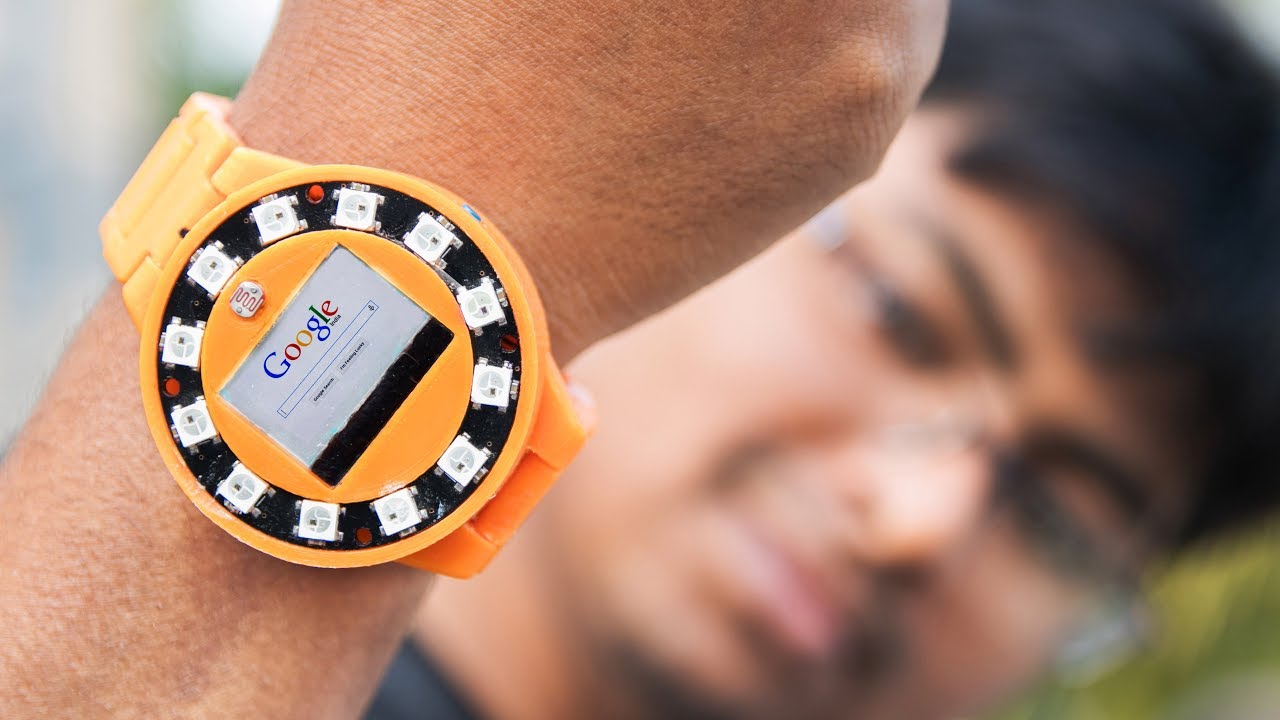
Welcome to the world of DIY technology! If you’ve ever wished you could have your very own smartwatch without breaking the bank, you’re in luck. In this article, we will guide you through the process of making your own DIY smartwatch right from the comfort of your home. By following a few simple steps, you’ll be able to create a personalized wearable device that suits your style and functionality needs.
Whether you’re a tech-savvy enthusiast or a casual tinkerer, this DIY project will allow you to unleash your creativity and explore the exciting world of smartwatches. Not only will you gain a deeper understanding of how these innovative gadgets work, but you’ll also have the satisfaction of wearing a one-of-a-kind timepiece on your wrist. So, let’s grab our tools and get ready to embark on this fun and rewarding journey of making a DIY smartwatch!
Inside This Article
- Materials Needed
- Steps to Make a DIY Smartwatch at Home
- Programming the Smartwatch
- Adding Additional Features
- Testing and Using the DIY Smartwatch
- Conclusion
- FAQs
Materials Needed
Creating your own DIY smartwatch at home is an exciting project that requires a few materials to get started. Here is a list of the essentials you’ll need:
- Microcontroller: The brain of your smartwatch. Opt for popular options such as Arduino or Raspberry Pi.
- Display: Choose a small-sized OLED or LCD screen that’s compatible with your microcontroller.
- Battery: A rechargeable battery with sufficient capacity to power your smartwatch.
- Bluetooth Module: This allows for connectivity with your smartphone and enables you to receive notifications.
- Sensors: Consider including sensors like heart rate monitor, accelerometer, and gyroscope for added functionality.
- Buttons: Decide on the number and placement of buttons for user interaction.
- Watch Strap: Choose a comfortable strap that suits your style and wrist size.
- Enclosure: You can 3D print or use a pre-built enclosure to house all the components securely.
- Wires and Soldering Tools: Necessary for connecting components and ensuring a secure and reliable connection.
- PCB Boards: Optional if you want to design and fabricate your own printed circuit board.
Remember, this list of materials is a good starting point, and depending on the features and design you have in mind for your DIY smartwatch, you may need to add or modify the components. It’s important to have a clear plan and consider your skill level and available resources before diving into this project.
Steps to Make a DIY Smartwatch at Home
Are you a tech enthusiast looking to explore the world of smartwatches? Creating your own DIY smartwatch can be a fun and rewarding project. Not only will it give you a better understanding of how these devices work, but it will also allow you to customize it to your liking. Here are the steps to make a DIY smartwatch at home:
1. Gather the necessary materials: To begin your DIY smartwatch project, you will need a few essential materials. These include a microcontroller board (such as Arduino or Raspberry Pi), a small LCD or OLED display, a battery, a watch strap, buttons or a touch screen, and various connectors and wires.
2. Design the watch body: The next step is to design the watch body. You can either create a 3D design using computer-aided design (CAD) software or handcraft the watch case using materials like plastic or metal. Make sure to consider the size and shape of the components you will be using to ensure they fit inside the watch body.
3. Assemble the components: Once you have designed the watch body, it’s time to assemble the components. Begin by attaching the microcontroller board to the watch case and connecting it to the display, battery, buttons or touch screen, and other necessary components. Pay attention to the wiring and make sure everything is properly connected.
4. Write the code: Now comes the programming part. Depending on the microcontroller board you are using, you will need to write the code to control the display, handle user input, and perform various functions. There are plenty of online resources and tutorials available to help you with coding for smartwatches.
5. Customize the watch interface: With the basic functionality in place, you can now customize the watch interface. Choose the layout, fonts, colors, and widgets to create a visually appealing and user-friendly interface. You can also add features like displaying the time, weather information, or notifications from your smartphone.
6. Test and refine: It’s time to test your DIY smartwatch and make any necessary refinements. Check if all the features and functions are working correctly. Make adjustments to the code or hardware if needed. Remember, testing and refining is an iterative process, so be patient and keep improving your smartwatch.
7. Add additional features (optional): Once you have the basic smartwatch functionality, you can explore adding additional features. These could include fitness tracking capabilities, heart rate monitoring, GPS tracking, or even integrating voice control. The possibilities are endless, so let your creativity soar!
8. Finalize the watch: After testing and adding any additional features, you can finalize your DIY smartwatch. Make sure all the components are secure and properly attached to the watch body. Double-check the wiring and connections to ensure everything is secure and functioning as intended.
9. Wear and enjoy: Congratulations! Your DIY smartwatch is ready to be worn and enjoyed. Strap it on your wrist and marvel at the fact that you created your very own wearable tech device. Show it off to your friends and family, and inspire others to embark on their own DIY smartwatch journey.
Creating a DIY smartwatch at home may require some technical knowledge and patience, but the end result is definitely worth it. Not only will you have a unique timepiece to wear, but you will also have gained valuable skills in electronics, programming, and design. So why wait? Get started on your DIY smartwatch project and let your creativity shine!
Programming the Smartwatch
Once you have assembled the hardware components of your DIY smartwatch, it’s time to dive into programming it. The programming aspect is crucial as it allows you to customize the functionalities and interactions of your smartwatch. Here’s a step-by-step guide on how to program your smartwatch:
1. Set up the development environment: Before you start coding, make sure you have the necessary software and tools installed. This includes an integrated development environment (IDE) like Arduino IDE for Arduino-based smartwatches or platform-specific SDKs for other types of smartwatches.
2. Understand the programming language: Depending on the platform you are using, you’ll need to be familiar with the programming language it supports. For Arduino-based smartwatches, you’ll be using Arduino programming language which is similar to C/C++. Other smartwatch platforms may use languages like Java or Swift.
3. Start with basic functions: Begin by coding the basic functions such as displaying time, setting alarms, or tracking steps. This will help you get a better understanding of how the smartwatch operates and how to interact with its features.
4. Add advanced features: Once you have the basic functions working, you can start adding more advanced features to your smartwatch. This can include integrating sensors to measure heart rate or temperature, connecting to Bluetooth for phone notifications, or implementing gesture controls.
5. Test and debug: As you write the code, it’s essential to test and debug it regularly. Use the debugging tools in your IDE or print debugging statements to the serial monitor to identify and fix any issues or bugs in your code.
6. Customize the user interface: Depending on the capabilities of your smartwatch, you may have the option to customize the user interface. This can involve designing and implementing different watch faces, changing color schemes, or adding interactive elements.
7. Optimize battery life: Smartwatches are often limited by their battery life. Pay attention to power optimization techniques, such as reducing the use of unnecessary sensors or optimizing code execution, to ensure your smartwatch lasts longer between charges.
8. Collaborate and learn from the community: The DIY smartwatch community is active and filled with passionate enthusiasts. Join forums, participate in online communities, and share your projects to learn from others and get feedback on your programming skills.
By following these steps and putting your programming skills to use, you can unleash the full potential of your DIY smartwatch and create a personalized wearable device that meets your unique needs and preferences.
Adding Additional Features
Once you have successfully assembled the basic components of your DIY smartwatch, you can take it a step further by adding some additional features to enhance its functionality and user experience. Here are a few ideas to get you started:
- Heart Rate Monitor: Integrating a heart rate monitor into your DIY smartwatch can provide valuable health data and make it a useful fitness companion. You can use a heart rate sensor module, connect it to your microcontroller or development board, and program it to display real-time heart rate measurements.
- Step Counter: By incorporating a step counter or pedometer feature, you can turn your DIY smartwatch into a fitness tracker. Utilize an accelerometer or a dedicated step counter module to track the number of steps taken and display it on your smartwatch’s screen.
- GPS Tracking: If you want to take your smartwatch to the next level, consider adding GPS functionality. This feature enables your DIY smartwatch to track your location, making it ideal for outdoor activities, navigation, and fitness tracking. You will need a GPS module and the necessary programming to implement this feature.
- Notifications: By integrating Bluetooth connectivity and app support, you can receive notifications from your smartphone directly on your smartwatch. Configure your DIY smartwatch to display incoming calls, messages, emails, and other notifications, allowing you to stay connected without constantly checking your phone.
- Touchscreen Interface: If you’re up for the challenge, consider adding a touchscreen interface to your DIY smartwatch. This will enable more intuitive and interactive control, allowing users to navigate through menus, select options, and perform various actions directly on the smartwatch display.
These are just a few examples of the additional features you can add to your DIY smartwatch. The possibilities are virtually endless, and you can customize your smartwatch based on your specific needs and preferences. Just remember to consider the hardware requirements, programming complexity, and compatibility with your chosen microcontroller or development board.
Adding these extra features will not only make your DIY smartwatch more functional but also more exciting to use. Get creative, explore different possibilities, and have fun while enhancing your homemade smartwatch!
Testing and Using the DIY Smartwatch
Now that you have successfully built your DIY smartwatch, it’s time to put it to the test and see how well it performs. Here are a few steps to follow for testing and using your homemade smartwatch:
1. Power on the Smartwatch:
Make sure the smartwatch is fully charged and turn it on by pressing the power button. You should see the display light up, indicating that it is ready for use.
2. Set Up Bluetooth Connectivity:
Enable Bluetooth on your smartphone or tablet and pair it with your DIY smartwatch. This will allow you to receive notifications, control music playback, and even make or receive calls directly from your smartwatch.
3. Test Basic Functions:
Start by testing the basic functions of your smartwatch, such as checking the time, date, and weather information. You can also try out the fitness tracking features, such as counting steps or monitoring heart rate, if your DIY smartwatch is equipped with these capabilities.
4. Experiment with App Compatibility:
If you have programmed your smartwatch to work with specific apps, now is the time to test them out. Check if you can receive notifications from social media, messaging apps, or email clients. Additionally, explore any other app functionalities that you have implemented in your DIY smartwatch.
5. Customize Watch Faces and Display:
One of the advantages of a DIY smartwatch is the ability to customize the watch faces and display according to your preferences. Experiment with different watch face designs, colors, and layouts to make your smartwatch truly unique.
6. Assess Battery Life:
Keep an eye on the battery life of your smartwatch. Monitor how long it lasts on a single charge and make adjustments if necessary to optimize battery usage. You may need to fine-tune certain features or reduce screen brightness to extend battery life.
7. Troubleshoot and Update:
If you encounter any issues or bugs while using your DIY smartwatch, troubleshoot them by referring to the documentation or online resources. It’s also a good idea to check for firmware or software updates periodically to ensure your smartwatch is running the latest version.
8. Enjoy Your DIY Smartwatch:
Once you have tested and become familiar with the functions and capabilities of your DIY smartwatch, it’s time to enjoy using it in your daily life. Wear it with pride and show off your craftsmanship to friends and family.
Remember, building a DIY smartwatch requires time, effort, and technical skills. Enjoy the process of creating, testing, and using your homemade device, and don’t shy away from experimenting and adding new features as you continue to enhance your smartwatch.
Conclusion
Creating your own DIY smartwatch at home can be a rewarding and fun experience. By following the step-by-step instructions in this article, you can customize and personalize a smartwatch that caters to your unique needs and style. Not only will you save money by building it yourself, but you will also gain a deeper understanding of how smartwatches work.
Remember to gather all the necessary components, follow safety guidelines, and refer to online resources for additional support. Be patient, as assembling a smartwatch requires precise handling and attention to detail. Once your DIY smartwatch is up and running, you can enjoy the convenience and functionality it offers, all while showcasing your creative skills.
So why wait? Dive into this exciting DIY project and unleash your inner tech enthusiast. With your DIY smartwatch, you’ll be able to stay connected, track your fitness goals, receive notifications, and more, all from the comfort of your wrist!
FAQs
Q: Is it possible to make a DIY smartwatch at home?
A: Absolutely! With the right tools, resources, and a bit of patience, you can create your own smartwatch at home. It may require some technical expertise, but there are plenty of DIY smartwatch kits available online to help you get started.
Q: What components do I need to build a DIY smartwatch?
A: Building a DIY smartwatch requires several key components, including a microcontroller or a development board, a display screen, a battery, Bluetooth or Wi-Fi module for connectivity, sensors for tracking data, and a customizable watch strap. You’ll also need basic soldering tools, wires, and a micro-USB cable for programming and power.
Q: What programming language do I need to learn to build a DIY smartwatch?
A: To build a DIY smartwatch, you will need to learn a programming language like C or C++. These languages are commonly used for embedded systems and microcontroller programming. Additionally, you may also need to familiarize yourself with libraries and frameworks specific to the microcontroller or development board you are using.
Q: Can I customize the features and functionalities of my DIY smartwatch?
A: Yes, one of the main advantages of building your own smartwatch is the ability to customize it according to your preferences. Depending on the programming skills and components you choose, you can add features such as fitness tracking, heart rate monitoring, notification alerts, or even integrate it with your smart home devices.
Q: Are DIY smartwatches as functional as commercially available ones?
A: While DIY smartwatches can offer a wide range of functionalities, they may not be on par with commercially available ones in terms of design aesthetics, interface responsiveness, or advanced features. However, building your own smartwatch can be a rewarding and educational experience, allowing you to tailor it to your specific needs and learn more about electronics and programming.