
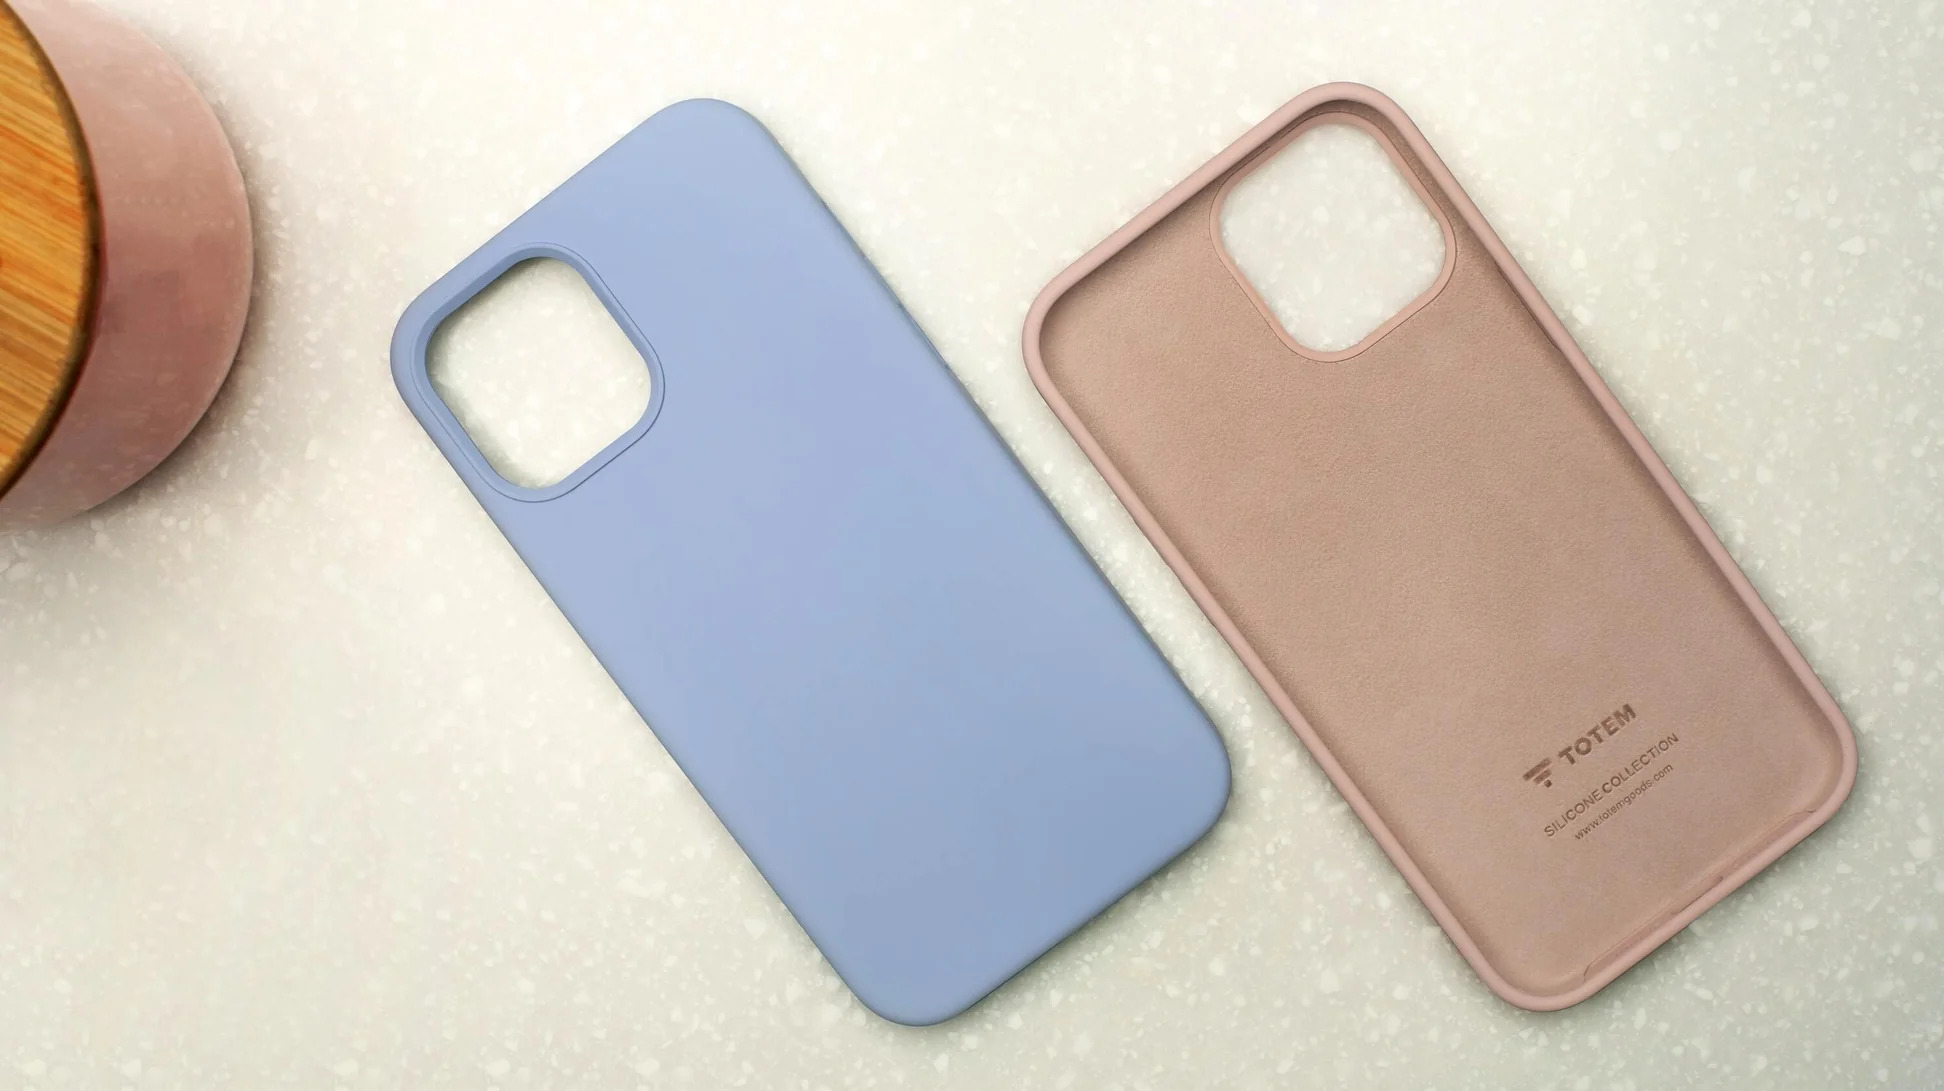
In today’s digital age, our smartphones have become an integral part of our daily lives. We rely on our mobile devices for communication, productivity, entertainment, and so much more. And what better way to protect and personalize our beloved smartphones than with a silicone phone case?
Silicone phone cases offer a perfect blend of style, functionality, and durability. They not only shield our phones from accidental drops, scratches, and spills but also allow us to express our unique personality through a wide range of designs and color options. The best part? You can even make your own silicone phone case right at home!
In this comprehensive guide, we will walk you through the step-by-step process of creating your very own silicone phone case from scratch. We will cover everything from gathering the necessary materials to molding the case and adding personal touches. So, let’s dive in and learn how to make a silicone phone case that is truly one-of-a-kind!
Inside This Article
- Materials Needed
- Step 1: Designing the Phone Case
- Step 2: Preparing the Silicone Mixture
- Step 3: Pouring the Mixture into the Mold
- Step 4: Curing the Silicone
- Step 5: Removing the Case from the Mold
- Step 6: Trimming and Finishing Touches
- Step 7: Testing the Fit on Your Phone
- Step 8: Adding Personalization or Decorative Elements
- Step 9: Applying a Protective Coating (Optional)
- Conclusion
- FAQs
Materials Needed
Before you start making your own silicone phone case, gather the following materials:
- Silicone mold: You can purchase a silicone mold specifically designed for phone cases or use a mold that fits the dimensions of your phone.
- Two-part silicone mixture: Look for a high-quality silicone mixture that cures quickly and provides a durable finish.
- Pigments or dyes: If you want to add color to your phone case, choose pigments or dyes that are compatible with silicone.
- Stirring sticks or spatulas: These will be used to mix the silicone compound.
- Measuring cups: Ensure that you have precise measurements by using measuring cups or syringes.
- Release agent: Apply a release agent to the mold to ensure easy removal of the cured silicone phone case.
- Protective gloves: It’s important to wear gloves to protect your hands and avoid any skin contact with the silicone mixture.
- Protective eyewear: Shield your eyes from any accidental splashes or contact with the silicone mixture.
- Sanding tools: To smooth out any imperfections in the final product, have various grades of sandpaper or sanding tools on hand.
- Phone case accessories: Depending on your design preferences, you may want to gather additional accessories such as rhinestones, decals, or charms.
Once you have collected these materials, you are ready to begin the process of making your own personalized silicone phone case.
Step 1: Designing the Phone Case
Designing the phone case is the first and most crucial step in creating a custom silicone phone case. This is where you can let your creativity shine and personalize your case to reflect your style and personality. Here are a few tips to help you get started:
- Choose a Design: Think about the overall look and theme you want for your phone case. Consider colors, patterns, and any specific elements or images you want to incorporate. You can sketch your design on paper or use graphic design software to create a digital mockup.
- Select the Phone Model: Ensure that you know the specific model of your phone, as phone cases are designed to fit different models. Take accurate measurements or refer to the manufacturer’s specifications to determine the exact dimensions of your phone.
- Consider the Phone’s Features: Take into account the placement of buttons, ports, and cameras on your phone. You will need to make sure that the design of your phone case accommodates these features, allowing easy access and functionality.
- Gather Materials: Aside from the silicone mixture and mold (which we will discuss in later steps), you may need additional materials for your design. These can include art supplies like markers, paints, or stickers, or even accessories like rhinestones or decals. Make sure you have everything you need before moving on to the next step.
Remember, the design possibilities for your custom silicone phone case are virtually endless. So, take your time, experiment, and have fun creating a unique and personalized design that will make your phone stand out from the crowd.
Step 2: Preparing the Silicone Mixture
Now that you have your phone case design ready, it’s time to prepare the silicone mixture. Here’s what you’ll need:
- Silicone base
- Catalyst
- Pigment (optional)
- Measuring cups
- Stirring stick
- Mixing container
First, follow the instructions provided by the manufacturer of the silicone base regarding the proper ratio of base to catalyst. This is crucial to ensure that your silicone cures correctly. Measure out the appropriate amounts of base and catalyst using your measuring cups.
If you want to add some color to your phone case, you can mix in a small amount of pigment at this stage. Mix it well to ensure an even distribution of color throughout the silicone.
Once your base, catalyst, and pigment (if using) are ready, pour them into a mixing container. Use a stir stick to thoroughly blend the components together. Be sure to follow the manufacturer’s instructions regarding mixing time and technique, as this may vary depending on the brand of silicone you’re using.
It’s crucial to work quickly during this step, as the silicone mixture will start to cure once the catalyst is added. Avoid excessive stirring or introducing air bubbles, as they can affect the final result. Once the silicone mixture is well mixed, move on to the next step: pouring it into the mold.
Step 3: Pouring the Mixture into the Mold
Now that you have prepared the silicone mixture, it’s time to pour it into the mold. Follow these steps to ensure a successful pouring process:
- Prepare the mold: Before pouring the silicone mixture, make sure that the mold is clean and free from any debris. Apply a thin layer of mold release agent to prevent the silicone from sticking to the mold.
- Mix the silicone: Give the silicone mixture one final stir to ensure that it is well mixed. This will help to achieve a consistent texture and avoid any lumps or air bubbles in the final product.
- Pour into the mold: Slowly and steadily pour the silicone mixture into the mold. Start from one corner and allow the mixture to flow and fill the mold evenly. Take your time to prevent any spills or overflow.
- Avoid air bubbles: To minimize the formation of air bubbles, you can gently tap the mold on a solid surface to help release any trapped air. Alternatively, you can use a vacuum chamber or a mold vibrating machine to remove air bubbles from the mixture.
- Fill the mold completely: Ensure that the silicone mixture fills the mold completely, reaching all the corners and edges. This will ensure that the final phone case has a smooth and uniform surface.
- Level the surface: Use a flat tool or spatula to level the surface of the poured silicone mixture. This will help to create a clean and even finish for your phone case.
Once you have poured the silicone mixture into the mold and leveled the surface, it’s time to move on to the next step: curing the silicone.
Step 4: Curing the Silicone
After pouring the mixture into the mold, the next step in making a silicone phone case is to allow the silicone to cure. The curing process is essential as it transforms the liquid silicone mixture into a solid and durable material that will protect your phone. Here’s how you can effectively cure the silicone:
- Follow the instructions: Different silicone mixes have different curing times and temperatures. It is crucial to carefully read and follow the instructions provided by the manufacturer of the silicone kit you are using. These instructions will guide you on the appropriate curing time and temperature.
- Set up the curing environment: The curing process requires a controlled environment. Find a clean and dry area where the phone case can cure undisturbed. Ensure the temperature and humidity in the room are within the recommended range provided in the instructions.
- Allow sufficient curing time: Silicone typically takes several hours to cure completely. It is important not to rush this step as it ensures the strength and durability of the case. Leave the mold undisturbed in the curing environment, allowing enough time for the silicone to cure fully.
- Check for curing completion: To determine if the silicone has cured, gently touch the surface of the case. If it feels firm and no longer tacky, it’s likely that the silicone has fully cured. You can also refer to the instructions for additional guidance on checking the curing completion.
- Additional curing if needed: In some cases, the silicone may still feel slightly soft after the recommended curing time. If this happens, it is advisable to allow additional curing time. You can extend the curing time by a few hours or even overnight to ensure the silicone reaches its optimal hardness.
By following these steps and allowing the silicone to cure properly, you will ensure that your phone case is strong and durable enough to provide effective protection for your device. Remember to always refer to the instructions provided by the manufacturer of your silicone kit for specific curing guidelines.
Step 5: Removing the Case from the Mold
Once the silicone has fully cured, it’s time to remove the phone case from the mold. Follow these steps to ensure a successful removal:
- Carefully separate the mold by gently pressing on the edges and pulling it apart. Be cautious not to apply too much force, as this might damage the phone case.
- If the case seems slightly stuck in the mold, use a non-sharp tool, such as a plastic pry tool or a wooden stick, to loosen it. Work slowly and gradually to prevent any accidental breakage.
- Once the case is detached from the mold, inspect it for any imperfections or excess silicone. Use a pair of scissors or a craft knife to trim off any rough edges or overflow.
- Gently clean the newly removed case with a damp cloth or gentle soap and water. This will help remove any release agent residue or dust particles that might be on the surface.
It’s important to note that the removed case might still be slightly flexible at this stage. This is normal since silicone takes some time to achieve full hardness. However, as it continues to cure and air-dry, the case will become sturdier and more rigid.
By following these steps, you can safely and successfully remove the silicone phone case from the mold. Now, let’s move on to the next step in the process.
Step 6: Trimming and Finishing Touches
Once you have successfully removed the phone case from the mold, you’ll need to trim any excess silicone and add the finishing touches to ensure a professional look. Here’s how you can do it:
- Trimming: Use a sharp pair of scissors or a craft knife to carefully trim any excess silicone around the edges of the case. Take your time and make precise cuts to achieve a clean and symmetrical look.
- Sanding: If there are any rough edges or imperfections on the surface of the case, you can use fine-grit sandpaper to gently smooth them out. Be careful not to apply too much pressure or sand for too long, as this can damage the silicone.
- Polishing: For a glossy finish, you can use a silicone-friendly polish. Apply a small amount of polish to a clean cloth and gently buff the surface of the case in circular motions. This will give your phone case a smooth and shiny appearance.
- Adding Additional Elements: If you want to personalize your phone case or add some decorative elements, now is the time to do so. You can use paint, markers, stickers, or even apply a decal to customize the case to your liking. Let your creativity shine and make your phone case unique!
Remember to handle the phone case with care during the trimming and finishing process to prevent any accidental damage. Take your time and pay attention to the details to achieve a professional-looking result.
Step 7: Testing the Fit on Your Phone
After completing the previous steps and allowing the silicone case to fully cure, it’s time to test the fit on your phone. This step is crucial to ensure that the case fits securely and provides adequate protection for your device.
Begin by carefully removing any excess silicone or mold release agent from the case, using a sharp knife or sandpaper if necessary. Be sure to smooth out any rough edges or imperfections, as they can affect the fit of the case.
Next, align the openings on the case, such as the camera cutout and charging port, with the corresponding features on your phone. Gently slide the phone into the case, ensuring that it fits snugly and securely.
If the case is too tight or doesn’t fit properly, you may need to make adjustments. You can use sandpaper or a file to carefully widen the openings or trim excess material. Just remember to make small adjustments at a time and test the fit after each modification to avoid any irreversible damage to the case.
Once you are satisfied with the fit, remove the phone from the case and give it a thorough cleaning. Wipe away any dust or debris and ensure that the phone’s surface is dry before reinserting it into the case.
Testing the fit on your phone is a crucial step before you start using the silicone case regularly. It ensures that your phone is properly protected and that the case doesn’t interfere with any important features or functions. Take your time during this step to ensure a perfect fit.
Step 8: Adding Personalization or Decorative Elements
Now that you have created a customized silicone phone case, it’s time to add some personalization or decorative elements to make it truly unique. Here are some creative ideas to consider:
- Custom Decals or Stickers: You can purchase pre-designed decals or stickers that can be applied to your phone case. These can range from stylish patterns to your favorite quotes or images. Make sure to clean the case surface before applying the decals for better adhesion.
- Painting: If you have artistic skills, you can use acrylic paints or fabric markers to hand-paint designs on your silicone phone case. This allows you to create intricate designs or even personalized portraits. Be sure to use paint that is suitable for silicone surfaces.
- Embellishments: Adding small embellishments like rhinestones, beads, or charms can give your phone case a glamorous or playful touch. Use a strong adhesive to secure them to the silicone surface.
- Photo Inserts: Some silicone phone cases have a clear window or a removable panel where you can insert a photo or a printed design of your choice. This allows you to showcase your favorite memories or artwork.
- Resin or Epoxy Coating: For a glossy and durable finish, you can apply a thin layer of resin or epoxy on top of your silicone phone case. This not only provides extra protection but also gives a professional-looking shine to your design.
Remember to let any paints, adhesives, or coatings dry completely before using your phone case. You may also want to follow any specific instructions provided with the materials you are using to ensure the best results.
Don’t be afraid to experiment and get creative with your design choices. The possibilities are endless, and you can always change or update the decorations to match your evolving style.
Once you are satisfied with the final look of your customized silicone phone case, it’s time to enjoy the satisfaction of having a one-of-a-kind accessory for your smartphone.
Step 9: Applying a Protective Coating (Optional)
After you have finished designing, pouring, curing, removing, trimming, and personalizing your silicone phone case, you have the option to apply a protective coating. This extra step can help increase the durability and longevity of your phone case, as well as enhance its overall appearance. Here’s how you can apply a protective coating to your silicone phone case:
- Select a suitable coating: There are various types of coatings available in the market, such as clear sealants or spray-on polyurethane. Choose a coating that is compatible with silicone and provides the level of protection you desire.
- Clean the phone case: Before applying the protective coating, make sure the phone case is clean and free from any dust, dirt, or fingerprints. You can use a mild soap and water solution to gently clean the surface, or use a silicone cleaner specifically designed for this purpose.
- Prepare the coating: Follow the manufacturer’s instructions to prepare the protective coating. This may involve mixing different components or diluting the coating solution with a specific ratio of solvent.
- Apply the coating: Use a clean, soft brush or a foam applicator to apply a thin and even layer of the protective coating onto the surface of the phone case. Start from one edge and gradually work your way across the entire surface, ensuring complete coverage.
- Allow drying and curing: Let the protective coating dry and cure according to the instructions provided by the manufacturer. This may involve allowing it to air-dry for a specific duration or using a heat source to speed up the curing process.
- Check for touch-ups: Once the initial coat has dried, inspect the phone case for any areas that may require touch-ups or additional coating. Apply a second coat if necessary, following the same application process as before.
- Final curing: After applying any touch-ups, allow the final coating to fully dry and cure. This ensures that the protective coating forms a solid and durable layer on the surface of your silicone phone case.
By applying a protective coating to your silicone phone case, you can provide an extra layer of protection against scratches, UV damage, and general wear and tear. It also adds a glossy or matte finish, depending on the type of coating used, giving your phone case a polished and professional look. Remember to follow the manufacturer’s instructions for the specific coating you choose and allow sufficient curing time to achieve the best results.
Conclusion
In conclusion, making a silicone phone case is a creative and practical way to personalize and protect your device. With the right materials and a little bit of patience, you can create a unique accessory that reflects your style and personality. Whether you’re a DIY enthusiast or just looking for a fun project, making your own silicone phone case can be a rewarding experience.
Not only does it allow you to showcase your creativity, but it also gives you the opportunity to customize your case to perfectly fit your phone. Additionally, silicone is a durable and flexible material that provides excellent protection against scratches, bumps, and drops. By making your own silicone phone case, you can ensure that your device is kept safe and stylish.
Remember to follow the steps carefully, choose high-quality silicone, and take your time to achieve the desired results. With a little practice, you’ll be able to master the art of making silicone phone cases and even experiment with different designs and colors. So why settle for generic cases when you can create something truly unique?
Start creating your own silicone phone case today and add a personal touch to your beloved device!
FAQs
1. Can I make a silicone phone case at home?
Absolutely! Making a silicone phone case at home is a fun and creative DIY project. With the right materials and tools, you can customize and create your own unique phone case designs. Just make sure to follow the instructions carefully and take necessary safety precautions.
2. What materials do I need to make a silicone phone case?
To make a silicone phone case, you will need silicone mold-making material, a curing agent, a release agent, a mixing tool, and the desired colorants or additives (if you want to add some flair to your case). Additionally, you will need a phone case template or an existing phone case to create the mold.
3. How long does it take for the silicone phone case to cure?
The curing time for a silicone phone case will depend on the specific product and instructions provided by the manufacturer. Generally, it can take anywhere from a few hours to a day for the silicone to fully cure and set. It is crucial to follow the recommended curing time to achieve the best results.
4. Can I reuse the silicone mold after making a phone case?
Yes, most silicone molds can be reused multiple times. Once you have removed the cured silicone phone case from the mold, make sure to clean it thoroughly to remove any residue or remnants. Store the mold in a safe place, away from direct sunlight or extreme temperatures, to extend its lifespan and usability.
5. How do I clean and maintain my silicone phone case?
Cleaning and maintaining a silicone phone case is relatively easy. You can simply wipe it with a damp cloth or use mild soap and water to remove any dirt or smudges. Avoid using harsh chemicals or abrasive materials that could damage the silicone. Additionally, keep your phone case away from sharp objects or excessive heat to prevent any potential damage.