
Are you excited about getting your hands on the latest iPhone 14? As you unbox your new device, one crucial step you need to take is setting up your SIM card. The SIM card enables you to connect to your mobile network and enjoy calling, texting, and using data services.
In this article, we will guide you through the process of setting up your SIM card on the iPhone 14, ensuring a smooth and hassle-free experience. From locating the SIM card slot to activating your card and configuring network settings, we will cover it all.
Whether you’re a first-time iPhone user or upgrading from a previous model, this step-by-step guide will help you get your iPhone 14 up and running in no time. So, let’s dive in and learn how to set up your SIM card on the magnificent iPhone 14!
Inside This Article
- Step 1: Check SIM Card Compatibility
- Step 2: Power Off Your iPhone 14
- Step 3: Locate the SIM Card Tray
- Step 4: Insert the SIM Card
- Step 5: Power On Your iPhone 14
- Step 6: Activate Your SIM Card
- Step 7: Set Up Cellular Data and Calls
- Conclusion
- FAQs
Step 1: Check SIM Card Compatibility
Before you begin setting up your SIM card on your iPhone 14, it’s important to ensure that your SIM card is compatible with your device. iPhones typically use nano-SIM cards, so make sure you have the correct size for your iPhone 14 model.
If you’re not sure which SIM card size you have, you can refer to the user manual or check the specifications on the manufacturer’s website. Alternatively, you can contact your mobile service provider and provide them with your iPhone 14 model to confirm the compatible SIM card size.
It’s worth noting that iPhone models released after 2018, including the iPhone 14, support eSIM technology. This means you have the option to use an embedded SIM instead of a physical SIM card. However, not all mobile service providers offer eSIM support, so it’s essential to check with your provider if eSIM is available for your iPhone 14.
Once you have confirmed the compatibility of your SIM card or selected the appropriate eSIM option, you’re ready to proceed with the setup process for your iPhone 14.
Step 2: Power Off Your iPhone 14
Before proceeding with the SIM card installation process, it is crucial to power off your iPhone 14. This ensures that you do not accidentally disrupt any ongoing operations or damage the device during the procedure. To power off your iPhone 14, follow these simple steps:
1. Locate the power button, which is typically located on the right side of the device.
2. Press and hold the power button until the “Slide to power off” slider appears on the screen.
3. Slide the slider to the right to power off your iPhone 14.
Once you have successfully powered off your iPhone 14, you can safely proceed to the next step of installing the SIM card. It is important to note that the power-off process may vary slightly depending on the iPhone model you own, but the general steps remain the same.
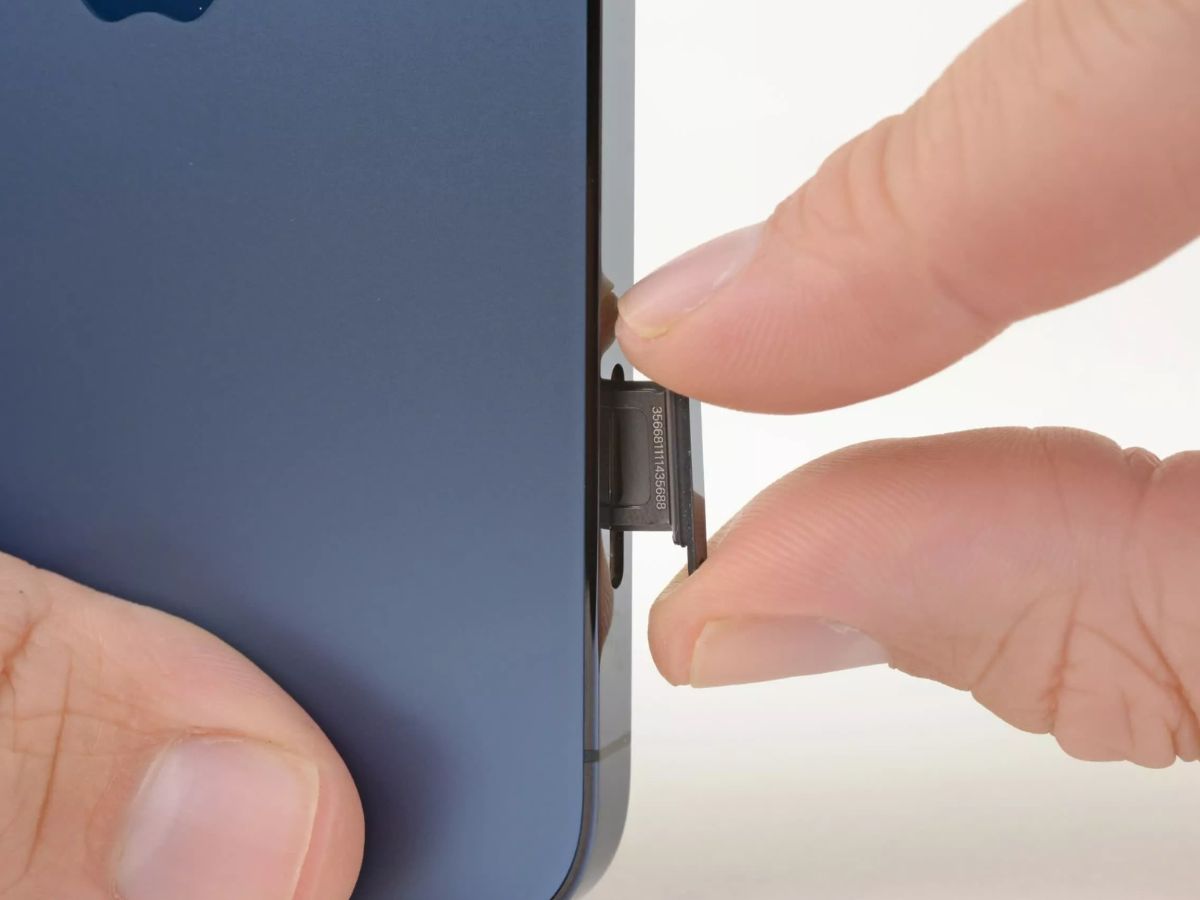
Step 3: Locate the SIM Card Tray
Now that you have verified the compatibility of your SIM card and powered off your iPhone 14, it’s time to locate the SIM card tray. The SIM card tray is a small and slender tray that holds your SIM card securely in place. To find it, you’ll need to locate the SIM card slot, which is usually located on the side of your iPhone 14.
Take a close look at the sides of your iPhone 14 and you will notice a small pinhole or a small rectangular slot. This is where your SIM card tray is located. The exact location may vary depending on the model of your iPhone 14, so be sure to consult the user manual or look for the SIM card tray diagram online if you’re unsure.
Once you have identified the location of the SIM card tray, it’s time to prepare for the next step – inserting the SIM card into the tray. But before we proceed, it’s important to emphasize the need for caution. The SIM card tray and the surrounding area are delicate, so handle them with care to avoid any damage.
Now that you know where the SIM card tray is located, let’s move on to the next step of the setup process – inserting the SIM card. But before we do that, let’s briefly recap what we’ve covered so far.
Step 4: Insert the SIM Card
Inserting the SIM card into your iPhone 14 is a simple process that requires a few easy steps. Follow the guide below to ensure a successful SIM card installation.
1. Locate the SIM card tray: The SIM card tray is usually located on the side or top of your iPhone 14. Use the SIM card removal tool or a paperclip to gently eject the tray.
2. Align the SIM card: Place your SIM card on the tray, ensuring that the metal contacts on the card are facing downwards. Make sure that the cut corner of the SIM card aligns with the notch on the tray.
3. Insert the SIM card: Carefully slide the tray back into the iPhone 14 until it is securely in place. Be gentle to avoid damaging the SIM card or the tray.
4. Replace the tray: Once the SIM card tray is fully inserted, push it in until it clicks into place. This ensures that the tray is locked and prevents accidental ejection of the SIM card.
5. Power on your iPhone 14: Now that the SIM card is properly inserted, power on your iPhone 14 by pressing the power button. Wait a moment for the device to start up and recognize the SIM card.
6. Check for network connectivity: After your iPhone 14 has started up, check for network connectivity by looking for the cellular signal bars at the top-left corner of the screen. If you see the bars, it means the SIM card has been successfully recognized and you are ready to proceed.
Congratulations! You have successfully inserted your SIM card into your iPhone 14. Now you can enjoy making calls, sending messages, and browsing the internet with your new device.
Step 5: Power On Your iPhone 14
Once you have successfully inserted the SIM card into your iPhone 14, it’s time to power on your device. Turning on your iPhone is a simple process that will bring your device to life and enable you to access all its features and functionalities.
To power on your iPhone 14, locate the power button. On most iPhone models, including the iPhone 14, the power button is positioned on the right side of the device. It is usually marked with a small icon resembling a circular button or a power symbol.
Gently press and hold the power button for a few seconds until you see the Apple logo appear on the screen. The Apple logo indicates that your iPhone is booting up and initializing the necessary software.
Once you see the Apple logo, release the power button and wait for your iPhone 14 to complete the startup process. This typically takes a few moments, during which your device may display a loading screen or a progress bar.
If you have properly inserted your SIM card and your iPhone 14 is successfully powered on, you will be prompted to follow a series of on-screen instructions to set up your device. These instructions will guide you through the process of configuring your iPhone, connecting to a Wi-Fi network, and signing in with your Apple ID.
After completing the setup process, your iPhone 14 will be ready to use with the SIM card you inserted earlier. You can start making calls, sending text messages, accessing the internet, and downloading apps from the App Store.
Remember to keep your SIM card tray closed to ensure a secure connection and prevent any damage to the SIM card slot. If you ever need to remove or replace the SIM card, make sure your iPhone is powered off before doing so.
Now that your iPhone 14 is powered on and set up with your SIM card, you can start enjoying the full capabilities of your device. From staying connected with friends and family to managing your work on the go, your iPhone 14 is a powerful tool that opens up a world of possibilities.
Step 6: Activate Your SIM Card
Once you have successfully inserted the SIM card into your iPhone 14, the next step is to activate it. Activation is necessary to connect to your cellular network and start making calls, sending messages, and using cellular data. Here’s how to activate your SIM card:
1. Turn on your iPhone 14 by pressing and holding the power button until the Apple logo appears on the screen.
2. You will be prompted with a message saying “No SIM card installed” or “SIM card not recognized.” Don’t worry, this is normal since you’ve just inserted the SIM card.
3. Follow the on-screen instructions to activate your SIM card. Your iPhone may automatically detect the SIM card and initiate the activation process. If not, you may need to manually activate it.
4. If your SIM card requires activation, you may need to contact your mobile carrier for assistance. They will guide you through the activation process and provide any necessary activation codes or instructions.
5. Once your SIM card is activated, you will see a signal indicator on the status bar of your iPhone screen. This indicates that your iPhone is connected to the cellular network.
6. Confirm that your cellular data and calling features are working properly. You can do this by opening a web browser and visiting a website or making a test call to ensure that everything is functioning correctly.
7. If you encounter any issues during the activation process, such as a “SIM not supported” message or difficulty connecting to the network, double-check that your SIM card is installed correctly, and contact your mobile carrier for further assistance.
Activating your SIM card is an essential step to enable cellular services on your iPhone 14. By following these instructions, you should be able to successfully activate your SIM card and start enjoying all the features and capabilities of your new device.
Step 7: Set Up Cellular Data and Calls
Once you have successfully inserted your SIM card into your iPhone 14, the next step is to set up cellular data and calls. This is an essential part of the setup process as it enables you to connect to your mobile network provider and enjoy all the features and functionalities of your device.
To begin the process, navigate to the “Settings” app on your iPhone 14. You can easily locate this app on your home screen by looking for the gray icon with gears on it. Tap on it to access the settings.
In the Settings menu, scroll down and tap on the “Cellular” option. This will open up a new menu where you can configure your cellular data and calls settings.
Under the “Cellular” menu, you will find various options to customize your cellular settings. The first option you will see is the “Cellular Data” toggle. Make sure that this toggle is switched on to enable cellular data on your device.
Below the “Cellular Data” toggle, you will find the option to select your preferred cellular network. If you have multiple SIM cards installed in your device, you can choose which SIM card you want to use for cellular data and calls.
Tap on the “Cellular Plans” option to manage your cellular data plans. This will allow you to review your data usage, check your current plan, and even purchase additional data if needed.
Next, you can configure your data roaming settings. Data roaming enables you to use your cellular data while you are traveling abroad. You can choose to enable or disable data roaming based on your preferences and the policies of your mobile network provider.
If you need to set up your visual voicemail, you can do so by tapping on the “Voicemail” option. This will guide you through the process of setting up your voicemail greeting and accessing your voicemail messages.
Lastly, you can configure your personal hotspot settings. The personal hotspot feature allows you to share your iPhone 14’s internet connection with other devices, such as laptops or tablets. You can set up a password and customize the name of your hotspot to secure and identify your connection.
Once you have adjusted all the necessary settings to your preferences, you can exit the “Settings” app. Your iPhone 14 is now ready to connect to your mobile network provider and start using cellular data and making calls.
It’s important to note that some cellular options may vary depending on your mobile network provider and the specific plan you have. If you encounter any difficulties or have any questions, don’t hesitate to reach out to your network provider or refer to the user manual that came with your iPhone 14.
Conclusion
Setting up a SIM card on your iPhone 14 is a straightforward process that allows you to access cellular networks and enjoy all the features and benefits of your device. By following the steps outlined in this article, you can easily insert the SIM card into the iPhone 14 and activate it to start making calls, sending messages, and accessing mobile data.
Remember to choose the right size SIM card for your iPhone 14, whether it’s a nano-SIM or an eSIM. If you encounter any issues during the setup process, refer to the FAQs section in this article for troubleshooting tips and solutions.
With your SIM card successfully set up, you can now fully utilize your iPhone 14’s cellular capabilities, stay connected with family and friends, and enjoy a seamless mobile experience. Whether it’s for work or play, your iPhone 14 is now ready to take on the world with its reliable connectivity and powerful features.
So go ahead, insert your SIM card, activate it, and embark on your iPhone 14 journey. Stay connected and make the most out of your device!
FAQs
1. How do I set up a SIM card on iPhone 14?
Setting up a SIM card on an iPhone 14 is a fairly straightforward process. Begin by locating the SIM card slot on your iPhone. It is usually found on the side or the top of the device, depending on the model. Next, insert a SIM eject tool or a paperclip into the small hole near the slot to open it. Gently remove the existing SIM card or insert a new one, making sure it is properly aligned with the tray. Then, carefully reinsert the tray back into the iPhone. Finally, power on your device and follow the on-screen instructions to complete the setup process.
2. Can I use my existing SIM card with iPhone 14?
Yes, you can use your existing SIM card with the iPhone 14 as long as it is compatible with the device. The iPhone 14 supports nano-SIM cards, which have become the standard for most modern smartphones. If your current SIM card is a nano-SIM, you can simply insert it into the SIM card slot on the iPhone 14 and set it up as mentioned above. However, if your SIM card is a different size, such as micro-SIM or standard SIM, you may need to contact your mobile service provider to obtain a nano-SIM card or use a SIM card adapter.
3. How do I activate my SIM card on iPhone 14?
Once you have inserted the SIM card into your iPhone 14, it will typically prompt you to activate it during the setup process. This can be done by following the on-screen instructions and providing the necessary information, such as your phone number and account details. If the activation process does not automatically start, you may need to contact your mobile service provider for assistance. They will guide you through the activation process and ensure that your SIM card is linked to your iPhone 14 correctly.
4. What should I do if my iPhone 14 does not recognize the SIM card?
If your iPhone 14 does not recognize the SIM card, there are a few troubleshooting steps you can try. First, make sure that the SIM card is properly inserted into the SIM card slot and that the tray is fully secured. If the SIM card is in place correctly, try restarting your iPhone. Sometimes, a simple reboot can resolve any temporary software glitches. If the issue persists, make sure that the SIM card is functioning properly by testing it in another compatible device. If the SIM card works in another device, it may be an issue with the iPhone itself. In such cases, consider contacting Apple Support or visiting an authorized service center for further assistance.
5. Can I use multiple SIM cards with iPhone 14?
Yes, the iPhone 14 supports dual SIM functionality, allowing you to use multiple SIM cards simultaneously. This feature is especially useful for individuals who have multiple phone numbers or travel frequently to different countries. With dual SIM capability, you can have two active phone lines on your iPhone 14, making it convenient to manage personal and business contacts separately. The iPhone 14 supports one physical nano-SIM card slot and an eSIM embedded within the device. You can activate both SIM cards and manage them through the settings menu to specify which SIM to use for calls, messages, and data.