
The iPhone 13 is the latest flagship device from Apple, known for its powerful performance and innovative features. One of the essential tasks when setting up a new iPhone 13 is inserting the SIM card. The SIM card is what enables your phone to connect to a cellular network, allowing you to make calls, send messages, and access the internet. While the process may seem straightforward, there are a few important steps to follow to properly insert a SIM card into the iPhone 13. In this article, we will guide you through the process and provide you with all the information you need to know to successfully insert a SIM card into your iPhone 13. So, let’s get started and ensure that your iPhone 13 is ready to connect to your mobile network.
Inside This Article
- Overview of iPhone 13
- Step-by-step Guide to Inserting a SIM Card into iPhone 13
- Troubleshooting Common Issues with SIM Card Installation on iPhone 13
- Conclusion
- FAQs
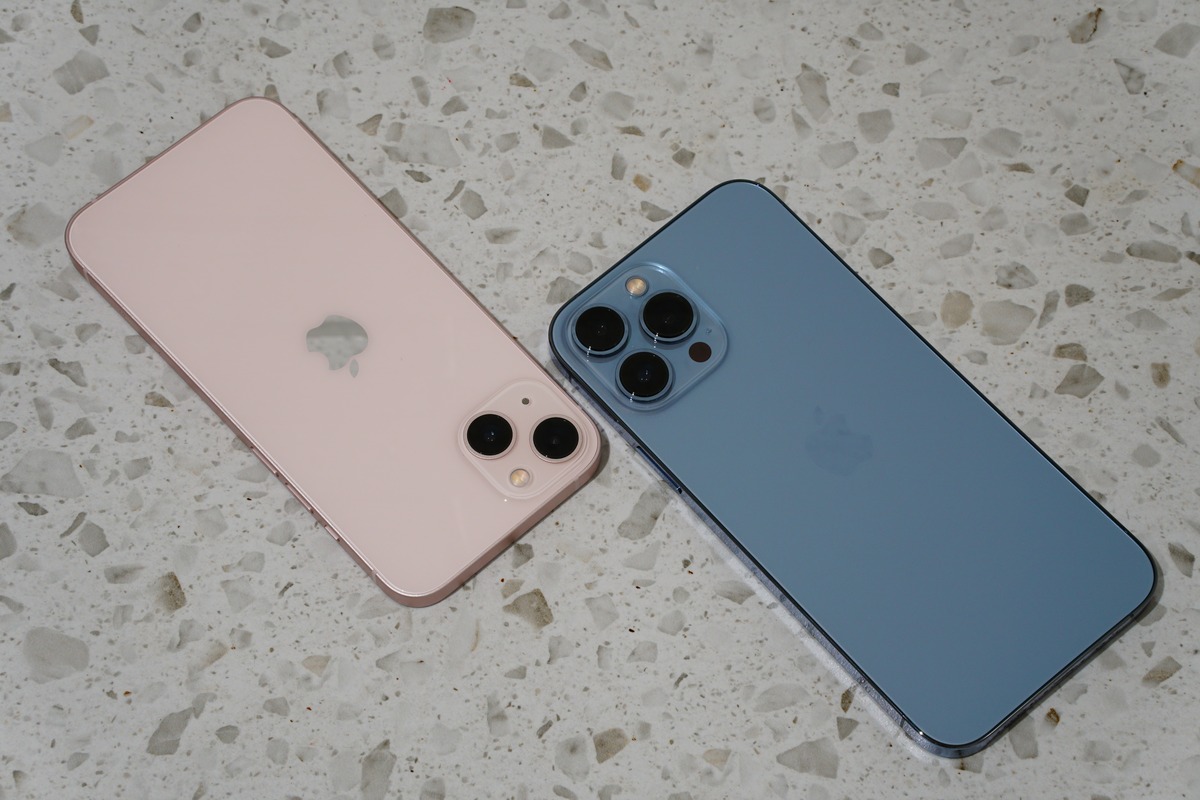
Overview of iPhone 13
The iPhone 13 is the latest flagship smartphone from Apple, offering a host of advanced features and impressive specifications. Released in September 2021, the iPhone 13 comes in four models: iPhone 13, iPhone 13 mini, iPhone 13 Pro, and iPhone 13 Pro Max. Building on the success of its predecessors, the iPhone 13 boasts a sleek design, powerful performance, and an array of cutting-edge technologies.
With the iPhone 13, Apple has introduced its A15 Bionic chip, a powerful processor that delivers exceptional speed and efficiency. This enables faster app launches, smoother multitasking, and enhanced graphics performance. Coupled with improved battery life, the iPhone 13 ensures that users can enjoy their favorite apps, games, and media for longer periods without worrying about running out of power.
The iPhone 13 also features a stunning Super Retina XDR display, providing vibrant colors and deep blacks for an immersive visual experience. The screen sizes vary across the models, with the iPhone 13 and iPhone 13 mini offering 6.1-inch and 5.4-inch displays, respectively, while the iPhone 13 Pro and iPhone 13 Pro Max feature larger 6.1-inch and 6.7-inch displays.
One of the highlights of the iPhone 13 is its advanced camera system. With upgraded sensors, improved image processing, and enhanced optical image stabilization, the iPhone 13 captures stunning photos and videos in various lighting conditions. It also introduces new features like Photographic Styles and Cinematic mode, allowing users to unleash their creativity and produce professional-quality content.
Furthermore, the iPhone 13 incorporates 5G connectivity, providing faster download and upload speeds, improved video streaming quality, and seamless browsing. Users can enjoy faster web browsing, lag-free gaming, and smoother video calls, taking advantage of the growing 5G network coverage around the world.
In terms of storage options, the iPhone 13 offers various capacities ranging from 128GB to 1TB, ensuring ample space to store apps, photos, videos, and other files. Additionally, the iPhone 13 retains features like Face ID for secure biometric authentication, water and dust resistance, and support for MagSafe accessories.
Overall, the iPhone 13 is a feature-packed smartphone that caters to the needs and demands of tech-savvy individuals. It combines powerful performance, stunning visuals, advanced camera capabilities, and seamless connectivity, making it a worthy upgrade for iPhone enthusiasts and new users alike.
Step-by-step Guide to Inserting a SIM Card into iPhone 13
Inserting a SIM card into the iPhone 13 is a straightforward process that allows you to connect to a cellular network and enjoy the full functionality of your device. Follow the step-by-step guide below to ensure a successful SIM card installation.
-
- Step 1: Power off your iPhone 13
Before you begin, make sure your iPhone 13 is powered off. This will prevent any potential damage to your device or the SIM card during the installation process.
-
- Step 2: Locate the SIM card tray
Take a moment to locate the SIM card tray on your iPhone 13. The tray is typically located on the right side of the device, near the volume buttons.
-
- Step 3: Insert the SIM eject tool
Take the SIM eject tool that came with your iPhone 13, or use a small paperclip if the tool is not available. Insert the tool into the small hole on the SIM card tray to pop it open.
-
- Step 4: Remove the SIM card tray
Gently pull out the SIM card tray using the SIM eject tool or your fingers. Be careful not to apply too much pressure to avoid damaging the tray or the device.
-
- Step 5: Place the SIM card in the tray
Take your SIM card and carefully place it into the SIM card tray, ensuring that the gold contacts on the SIM card align with the contacts on the tray. Make sure the SIM card is properly seated and lies flat in the tray.
-
- Step 6: Reinsert the SIM card tray
Gently push the SIM card tray back into the iPhone 13 until it is flush with the device. Ensure that the tray is securely inserted to avoid any connectivity issues.
-
- Step 7: Power on your iPhone 13
Once the SIM card tray is reinserted, power on your iPhone 13 by pressing and holding the power button located on the right side of the device. Follow the on-screen prompts to set up your device.
That’s it! You have successfully inserted a SIM card into your iPhone 13. Now you can enjoy all the features and capabilities of your device with a cellular connection.
If you encounter any difficulties during the process, consult the troubleshooting section below or reach out to Apple support for assistance.
Troubleshooting Common Issues with SIM Card Installation on iPhone 13
While inserting a SIM card into your iPhone 13 is a fairly straightforward process, there may be instances where you encounter some common issues. Don’t worry, though – these problems can usually be resolved with a few simple troubleshooting steps. In this section, we will address some of the common issues you may face and provide solutions to help you resolve them.
1. SIM Card Not Detected:
If your iPhone 13 is not detecting the SIM card, the first thing you should do is check if the SIM card is properly inserted. Ensure that the SIM card is correctly aligned and securely inserted into the SIM card tray. Additionally, make sure the SIM card is not damaged or expired. If the issue persists, try restarting your iPhone 13 and check if the SIM card is recognized.
2. No Network Connection:
If you’re having trouble connecting to a cellular network after inserting the SIM card, make sure that your iPhone 13 is not in Airplane Mode. You can check this by swiping down from the top-right corner of the screen to open the Control Center. Look for the Airplane Mode icon and make sure it is turned off. If the problem persists, try removing and reinserting the SIM card, or reset the network settings on your iPhone 13 by going to “Settings” > “General” > “Reset” > “Reset Network Settings.
3. SIM PIN Required:
If your SIM card has a PIN associated with it, your iPhone 13 may prompt you to enter the PIN after inserting the SIM. Enter the correct PIN to unlock the SIM card and establish a network connection. If you don’t know the PIN or have forgotten it, you can obtain it from your mobile service provider.
4. SIM Card Rejected:
In some cases, your iPhone 13 may display a “SIM Card Rejected” message. This can happen if the SIM card is not compatible with your iPhone model or if it is not activated. Make sure that your SIM card is compatible with the iPhone 13 and that it is activated by your mobile service provider. If you are still experiencing issues, contact your service provider for assistance.
5. Request SIM Unlock:
If you are using a locked iPhone or if your iPhone was previously used with a different carrier, you may need to request a SIM unlock. Contact your mobile service provider and provide them with your IMEI number, which can be found in the phone settings or by dialing *#06#. Follow the instructions provided by your service provider to unlock your iPhone for use with different SIM cards.
6. Contact Apple Support:
If you have tried the troubleshooting steps mentioned above and are still experiencing issues with SIM card installation on your iPhone 13, it may be best to contact Apple Support or visit an Apple Store. They can provide further assistance and guidance to resolve the problem.
With the troubleshooting steps mentioned in this section, you should be able to resolve common issues that may arise during SIM card installation on your iPhone 13. Remember to always handle the SIM card with care and consult the Apple Support if you need additional help or encounter any other difficulties.
Conclusion
In conclusion, learning how to put in a SIM card on your iPhone 13 is a simple and essential skill for any smartphone user. Whether you are upgrading to a new device or switching carriers, inserting a SIM card allows you to connect to your network and enjoy all the features and services your phone has to offer.
By following the step-by-step guide provided in this article, you can easily locate the SIM card tray, open it using a SIM ejector tool or a paperclip, insert the SIM card correctly, and secure it back into the phone. Remember to deactivate your old SIM card, activate the new one, and complete the necessary setup process to ensure seamless connectivity.
With your SIM card properly installed, you can take full advantage of your iPhone 13’s capabilities, such as making calls, sending messages, browsing the internet, and enjoying various apps and services. Now, you are ready to explore all the amazing features and possibilities that your mobile device has to offer!
FAQs
Q: How do I insert a SIM card into the iPhone 13?
A: To insert a SIM card into the iPhone 13, follow these steps:
- Locate the SIM card tray on the side of the device. It is usually found on the right-hand side.
- Using the SIM ejector tool or a small paperclip, gently push it into the small hole on the SIM card tray to eject it.
- Remove the SIM card tray from the device.
- Place the SIM card into the tray. Make sure the gold contacts are facing downwards and are aligned with the SIM card slot.
- Gently push the SIM card tray back into the device until it is flush with the side of the iPhone.
Q: Can I use a nano-SIM card in the iPhone 13?
A: Yes, the iPhone 13 is compatible with a nano-SIM card. The nano-SIM card is the smallest type of SIM card and is commonly used in most modern smartphones, including the iPhone 13. Make sure to align the nano-SIM card properly in the SIM card tray before inserting it into the device.
Q: Can I use an eSIM instead of a physical SIM card in the iPhone 13?
A: Yes, the iPhone 13 supports eSIM functionality. An eSIM, or embedded SIM, is a digital SIM card that eliminates the need for a physical SIM card. To activate an eSIM, you will need to contact your mobile service provider and follow their instructions to set it up on your iPhone 13.
Q: How do I remove the SIM card from my iPhone 13?
A: To remove the SIM card from the iPhone 13, follow these steps:
- Locate the SIM card tray on the side of the device. It is usually found on the right-hand side.
- Using the SIM ejector tool or a small paperclip, gently push it into the small hole on the SIM card tray to eject it.
- Remove the SIM card tray from the device.
- Take out the SIM card from the tray.
- Insert the SIM card tray back into the device.
Q: Can I use a different size SIM card with an adapter in the iPhone 13?
A: Yes, it is possible to use a different size SIM card with the help of an adapter. If you have a micro-SIM or a standard SIM card, you can use an adapter to convert it into a nano-SIM card size, which is compatible with the iPhone 13. However, ensure that the adapter is inserted properly and securely into the SIM card tray to avoid any complications.