
In today’s interconnected world, cell phones have become an indispensable part of our lives. From making calls and sending text messages to browsing the internet and capturing memories, our reliance on mobile devices is constantly increasing. And with the rise of smartphones, the demand for mobile accessories has also skyrocketed. One essential accessory that every cell phone user needs is a reliable and efficient headlight connector. Whether it’s for charging your device or connecting it to other devices, a high-quality headlight connector is crucial to ensure seamless connectivity and hassle-free usage. But how do you know if your headlight connector is working properly? In this article, we will guide you on how to test your headlight connector to ensure it is functioning optimally. So let’s dive in and learn how to keep your cell phone connected at all times!
Inside This Article
- Understanding the Headlight Connector
- Tools and Equipment Required for Testing
- Step-by-Step Guide to Testing the Headlight Connector
- Common Problems and Troubleshooting Tips
- Conclusion
- FAQs
Understanding the Headlight Connector
The headlight connector is an integral part of the vehicle’s lighting system. It serves as a link between the headlight bulb and the vehicle’s wiring harness. The connector ensures a secure and reliable electrical connection, allowing the headlight to receive power and function properly.
Headlight connectors come in different shapes and sizes, depending on the make and model of the vehicle. They are typically made of durable materials that can withstand the high temperatures generated by the headlight bulb.
It’s essential to have a good understanding of the headlight connector, as it plays a crucial role in maintaining proper headlight functionality. Familiarizing yourself with the different types of connectors and their specific features will enable you to diagnose and troubleshoot any potential issues that may arise.
One of the most common types of headlight connectors is the H4 connector. This connector is widely used in many vehicles and has three pins for connecting the high beam, low beam, and ground circuits. Another common type is the H7 connector, which is primarily used for halogen headlight bulbs.
When inspecting the headlight connector, it’s essential to check for any signs of damage or corrosion. A damaged or corroded connector can result in poor electrical contact, leading to dim or flickering headlights. If you notice any signs of damage, it’s recommended to replace the connector to ensure optimal headlight performance.
Understanding the headlight connector also involves knowing how to properly install and secure it. When replacing a headlight bulb, make sure to align the pins on the bulb with the corresponding slots in the connector. This will ensure a snug fit and prevent any loose connections.
Additionally, it’s important to ensure that the connector is firmly attached to the wiring harness. Loose connectors can cause intermittent electrical contact, resulting in inconsistent headlight performance. Double-check the connection and secure it properly to avoid any issues.
Tools and Equipment Required for Testing
When it comes to testing a headlight connector, having the right tools and equipment is key to a successful diagnosis. Here are the essential items you will need:
1. Multimeter: A multimeter is a versatile device that can measure voltage, current, and resistance. It is indispensable for testing electrical connections and components.
2. Test light: A test light is a handy tool that can quickly determine if power is present in a circuit. It consists of a bulb connected to a probe and a ground wire.
3. Wire strippers: Wire strippers are necessary for removing the insulation from the wires in the headlight connector. This allows you to access the inner conductive material.
4. Electrical tape: Electrical tape is used to insulate any exposed wires or connections after testing. It provides protection against short circuits and ensures electrical safety.
5. Safety goggles: Safety goggles should be worn to protect your eyes from any potential hazards, such as sparks or debris, during the testing process.
6. Gloves: Wearing gloves is crucial to protect your hands from electrical shocks and to ensure a secure grip on the tools.
7. Headlight connector diagram or schematic: A diagram or schematic of the headlight connector can be useful for identifying the different wires and their functions.
8. Vehicle owner’s manual: The owner’s manual of your vehicle may contain specific instructions on testing the headlight connector or troubleshooting electrical issues.
Having these tools and equipment ready will make the headlight connector testing process smoother and more efficient, enabling you to diagnose any issues accurately and determine the necessary repairs or replacements.
Step-by-Step Guide to Testing the Headlight Connector
When it comes to troubleshooting headlight issues, one potential culprit to consider is a faulty headlight connector. Over time, these connectors can become corroded or damaged, leading to poor electrical connections and dim or flickering headlights. In this step-by-step guide, we’ll walk you through the process of testing the headlight connector to determine whether it’s the source of the problem.
1. Gather the Necessary Tools and Equipment:
Before you begin testing the headlight connector, it’s important to collect the necessary tools and equipment. You’ll need a multimeter, a set of test leads, and a wiring diagram for your specific vehicle. Additionally, have a clean cloth or brush on hand to remove any dirt or debris that may be obstructing the connector.
2. Inspect the Headlight Connector:
Start by visually inspecting the headlight connector for any signs of damage or corrosion. Look for bent pins, frayed wires, or any other visible issues that could be affecting the electrical connection. If you notice any problems, such as loose pins or broken wires, you may need to replace the connector entirely.
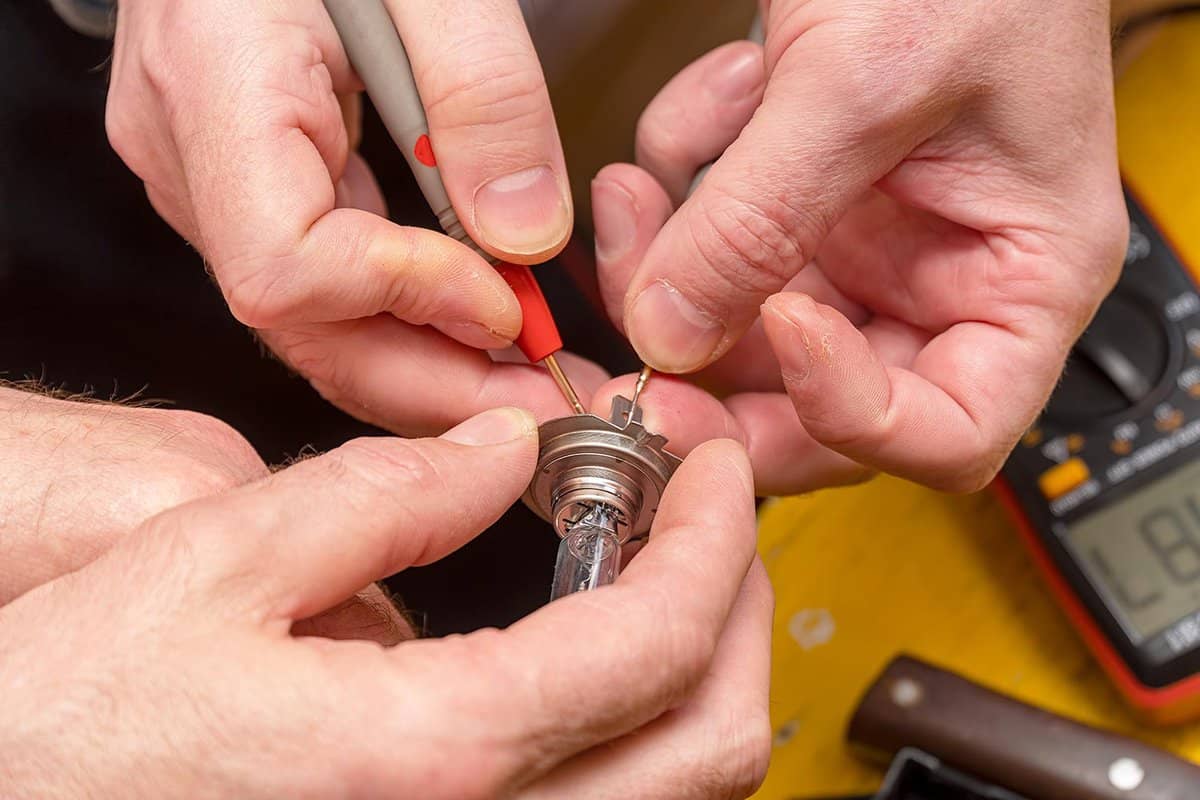
3. Check for Power:
Next, set your multimeter to the voltage setting and connect the test leads to the appropriate terminals on the headlight connector. With the headlights turned on, carefully touch the test leads to the corresponding pins or wires to check for power. A reading of around 12 volts indicates that the power is reaching the connector properly.
4. Test the Ground Connection:
In most headlight connectors, there is a separate wire for the ground connection. To test this, set your multimeter to the continuity setting and connect one test lead to a known ground, such as the vehicle chassis, and the other lead to the ground wire on the headlight connector. If there is a solid connection, the multimeter will emit a beep or show continuity on the display.
5. Wiggle Test:
One common issue with headlight connectors is a poor connection caused by loose or worn out pins. Perform a wiggle test by gently wiggling the connector while the headlights are on. If the lights flicker or go out completely during the test, it’s a sign that the connection needs to be repaired or the connector replaced.
6. Clean or Repair the Connector:
If you’ve identified any issues during the testing process, it’s time to clean or repair the headlight connector. Use a clean cloth or brush to remove any dirt or debris that may be obstructing the pins or wires. For damaged connectors, you may need to replace specific pins or wires to restore the electrical connection.
7. Re-test the Headlight Functionality:
After cleaning or repairing the headlight connector, re-test the functionality of the headlights. Turn them on and observe their brightness and stability. If the headlights are now functioning properly, you’ve successfully resolved the issue with the headlight connector.
By following this step-by-step guide, you can effectively test the headlight connector and identify any potential issues. Remember to exercise caution and consult the wiring diagram for your specific vehicle to ensure accurate testing and avoid any damage. If you’re unsure about any step of the process, it’s always recommended to seek professional assistance from a qualified mechanic.
Common Problems and Troubleshooting Tips
While testing the headlight connectors, you may come across a few common problems. These issues can affect the overall performance of your headlights and can lead to a diminished driving experience. Here are some troubleshooting tips to help you address these problems:
1. Corrosion: One common issue with headlight connectors is corrosion. Over time, moisture and dirt can build up in the connector, causing corrosion to form on the metal contacts. This can result in a poor connection and lead to dim or flickering headlights. To resolve this problem, you can clean the connector with a wire brush and apply a dielectric grease to prevent further corrosion.
2. Loose Connections: Another common problem is loose connections. If the headlight connector is not properly secured, it can lead to intermittent power supply or even a complete loss of headlights. Ensure that the connector is firmly attached and check for any loose or damaged wires. If necessary, you may need to replace the connector to establish a secure connection.
3. Burnt Out Wires: In some cases, the wires within the headlight connector may become burnt out, resulting in a lack of power to the headlights. You can check for any signs of burnt or melted wires and replace them if necessary. It is also important to inspect the wiring harness for any damage or frayed wires that may need to be repaired or replaced.
4. Faulty Bulb Socket: A faulty bulb socket can also cause issues with the headlights. If the connector is not providing a proper connection to the bulb, it can result in flickering or uneven lighting. You can test the socket by using a multimeter or by swapping the bulb with a known working one. If the issue persists, you may need to replace the socket.
5. Electrical Short Circuit: In rare cases, an electrical short circuit can occur within the headlight connector, leading to erratic behavior or a complete failure of the headlights. This can be caused by faulty wiring or a damaged connector. If you suspect a short circuit, it is best to consult a professional for a thorough diagnosis and repair.
By addressing these common problems and following the troubleshooting tips, you can ensure that your headlight connectors are in optimal condition and provide you with reliable and efficient lighting on the road.
Conclusion
Testing the headlight connector is an essential step in troubleshooting any headlight-related issues in your vehicle. By following the steps outlined in this article, you can effectively determine if the connector is functioning properly or if it needs to be replaced.
Remember, safety should always be your top priority when working with electrical components. Ensure that the vehicle’s ignition is off and the battery is disconnected before conducting any tests. Additionally, if you encounter any difficulties or are unsure about any aspect of the testing process, it is recommended to consult a professional mechanic.
Regularly checking and testing the headlight connector can help prevent potential accidents and ensure optimal visibility while driving. Incorporating this maintenance task into your routine can save you time, money, and the hassle of dealing with a malfunctioning headlight system. With a little effort and attention to detail, you can keep your headlights shining bright for safe and enjoyable travels.
FAQs
1. Why is it important to test the headlight connector?
Testing the headlight connector is important to ensure that the electrical connection is functioning properly. A faulty connector can result in dim or flickering headlights, reduced visibility, and potential safety hazards. Testing the connector helps identify any issues that need to be addressed for optimal headlight performance.
2. How can I test the headlight connector?
To test the headlight connector, start by visually inspecting it for any signs of damage, such as loose or corroded wires. Next, use a multimeter to measure the voltage at the connector terminals. Connect the multimeter leads to the appropriate terminals and check for a stable voltage reading. If the reading fluctuates or shows no voltage, it may indicate a faulty connector that needs to be repaired or replaced.
3. What are some common symptoms of a faulty headlight connector?
Some common symptoms of a faulty headlight connector include dim or flickering headlights, intermittent light output, a sudden loss of light, or complete headlight failure. Additionally, if you notice melted or burnt wiring near the connector, it is a clear indication of a problem that should be addressed promptly.
4. Can I repair a damaged headlight connector?
In some cases, a damaged headlight connector can be repaired, especially if the issue is due to loose or corroded wires. However, if the damage is extensive or the connector is beyond repair, it is recommended to replace the connector to ensure a reliable and long-lasting connection.
5. Where can I find replacement headlight connectors?
Replacement headlight connectors can be found at various automotive supply stores, online marketplaces, and through authorized dealers or manufacturers. It is important to choose a connector that is compatible with your specific vehicle make and model to ensure proper fit and functionality.