
Selfie sticks have revolutionized the way we capture our favorite moments. These nifty accessories have become a must-have for selfie enthusiasts worldwide, enabling us to take incredible photos from unique angles. However, using a selfie stick with a button can take your selfie game to a whole new level. With just a click of a button, you can easily snap the perfect shot without having to touch your phone. In this article, we will guide you through the simple steps of using a selfie stick with a button, empowering you to capture stunning selfies effortlessly. Whether you’re a seasoned selfie stick user or a newbie looking to up your selfie game, our comprehensive guide is here to help. Say goodbye to awkwardly fumbling with your phone and hello to capturing picture-perfect moments with ease using a selfie stick with a button.
Inside This Article
- Introduction
- Choosing the Right Selfie Stick
- Connecting Your Phone to the Selfie Stick
- Adjusting the Selfie Stick Length
- Introduction
- Choosing the Right Selfie Stick
- Connecting Your Phone to the Selfie Stick
- Adjusting the Selfie Stick Length
- Using the Selfie Stick Button to Take Photos
- Conclusion
- FAQs
Introduction
Welcome to the world of selfie sticks, the must-have accessory for capturing perfect selfies and group photos. With the advancement of technology, smartphones have become an integral part of our lives, and taking selfies has become a popular trend. However, holding the phone at arm’s length can be challenging, especially when you want to capture a wider view or include more people in the frame.
This is where selfie sticks come to the rescue. A selfie stick is a telescopic pole that allows you to extend the reach of your phone, allowing you to take selfies from various angles and distances. What sets a selfie stick with a button apart is its convenience and ease of use. Instead of relying on the camera timer or using the volume button on your phone to take a selfie, selfie sticks with buttons offer a dedicated shutter button right in your hand.
Using a selfie stick with a button can greatly enhance your selfie-taking experience. It allows you to take photos without the need to touch the screen, avoiding any chances of shaky hands or accidental touches. Whether you are a seasoned selfie enthusiast or just someone looking to up their selfie game, knowing how to use a selfie stick with a button is essential.
In this article, we will guide you through the process of using a selfie stick with a button. From choosing the right selfie stick to connecting your phone and adjusting the length, we will cover all the necessary steps to ensure you can capture amazing selfies effortlessly.
So, whether you’re traveling, attending an event, or simply want to capture your best angles, grab your selfie stick with a button, and let’s dive into the world of stunning selfies!
Choosing the Right Selfie Stick
When it comes to capturing the perfect selfie, having the right tools can make all the difference. And one of the essential tools for any selfie enthusiast is a good selfie stick. However, with so many options available in the market, choosing the right selfie stick can seem like a daunting task. But worry not, as I’m here to guide you through the process of finding the perfect selfie stick to meet your needs.
The first thing to consider when choosing a selfie stick is compatibility with your phone. Most selfie sticks are designed to work with both Android and iOS devices, but it’s always a good idea to double-check the compatibility before making a purchase. Look for a selfie stick that has adjustable phone holder to accommodate different phone sizes.
Another important factor to consider is the length of the selfie stick. You want a stick that can extend to a comfortable length to capture wide-angle shots or group selfies, but still compact enough to carry around easily. Look for a selfie stick with telescopic design, allowing you to easily adjust its length to your desired preference.
Additionally, pay attention to the build quality of the selfie stick. You want a stick that is sturdy and durable, capable of holding your phone securely without any wobbling or risk of accidental drops. Look for selfie sticks made from high-quality materials like aluminum or stainless steel, as they ensure longevity and reliability.
Another consideration is the type of selfie stick you prefer. There are traditional selfie sticks that require a manual connection to your phone’s camera via the headphone jack or Bluetooth, and there are also wireless selfie sticks that connect to your phone wirelessly via Bluetooth. Decide which type works best for your needs and preferences.
Lastly, don’t forget to consider additional features that might enhance your selfie experience. Some selfie sticks come with built-in rechargeable batteries to power the Bluetooth connection, while others offer features like remote control buttons or built-in tripods for added stability.
By considering these factors and doing a little research, you can select a selfie stick that suits your needs perfectly. Remember, a good selfie stick can elevate your selfie game and help you capture those memorable moments with ease.
Connecting Your Phone to the Selfie Stick
Once you have chosen the perfect selfie stick for your needs, the next step is to connect your phone to it. This process may vary slightly depending on the type and model of your selfie stick, but the general steps remain the same.
1. Check the compatibility: Before connecting your phone to the selfie stick, ensure that the stick is compatible with your phone. Most selfie sticks have a universal phone mount that can accommodate smartphones of various sizes. However, it’s always a good idea to double-check the specifications provided by the manufacturer to ensure compatibility.
2. Extend the stick: Extend the selfie stick to its maximum length. This will give you enough space to securely attach your phone and allow for a wider range of motion when taking selfies or videos.
3. Attach your phone: Locate the phone mount on the selfie stick. This is usually a spring-loaded clamp or an adjustable bracket. Gently open the phone mount to accommodate your phone and place your phone into it horizontally or vertically, depending on your preference. Make sure your phone is securely held in place but avoid overtightening the mount, as it may damage your phone.
4. Adjust the angle: Once your phone is attached to the selfie stick, you may need to adjust the angle for the perfect shot. Most selfie sticks allow you to tilt and rotate the phone mount to achieve the desired angle. Experiment with different angles to find the one that suits your needs.
5. Connect the cable (if applicable): Some selfie sticks come with a cable that you can connect to your phone’s headphone jack or charging port. This cable serves as a remote shutter release, allowing you to capture photos by pressing a button on the selfie stick handle. If your selfie stick has this feature, connect the cable to your phone before using the stick.
6. Pair with Bluetooth (if applicable): If your selfie stick is Bluetooth-enabled, you will need to pair it with your phone. Turn on the Bluetooth on your phone and follow the instructions provided by the manufacturer to establish the connection. Once paired, you can use the selfie stick’s built-in remote control or a dedicated app to trigger the camera shutter.
Connecting your phone to a selfie stick is a straightforward process that should only take a few moments. By following these steps, you can ensure a secure attachment and have full control over capturing your perfect selfies and videos.
Adjusting the Selfie Stick Length
One of the key features of a selfie stick is its adjustable length, allowing you to capture the perfect angle and distance for your selfies. Here are the steps to adjust the length of your selfie stick:
- Unlock the lock mechanism: Most selfie sticks have a locking mechanism that keeps the stick securely in place. Look for a small clamp or twist-lock mechanism near the handle of the stick. To adjust the length, you’ll need to unlock this mechanism first.
- Extend or retract the stick: Once the lock mechanism is unlocked, you can extend or retract the stick to your desired length. Gently pull the stick apart to extend it or push the sections back together to retract it. Most selfie sticks have multiple telescopic sections, allowing you to adjust the length with precision.
- Lock the stick in place: After adjusting the length, make sure to lock the stick in place to prevent it from sliding or collapsing accidentally. Follow the instructions provided with your specific selfie stick model to lock it securely. It may involve twisting a locking mechanism or tightening a clamp.
Remember, it’s essential to adjust the length of your selfie stick carefully. If the stick is too short, you may end up with awkward angles or cropped-out subjects in your photos. On the other hand, if the stick is too long, it can become unstable or unwieldy.
Experiment with different lengths and find the sweet spot that works best for your needs. Whether you prefer a shorter stick for close-up selfies or a longer stick for capturing wider backgrounds, adjusting the length of your selfie stick allows you to customize your photography experience.
Keep in mind that some selfie sticks come with built-in length-adjusting mechanisms, while others require manual adjustments. Choose a selfie stick that offers easy and intuitive length adjustments to make your selfie-taking process smooth and efficient.
Introduction
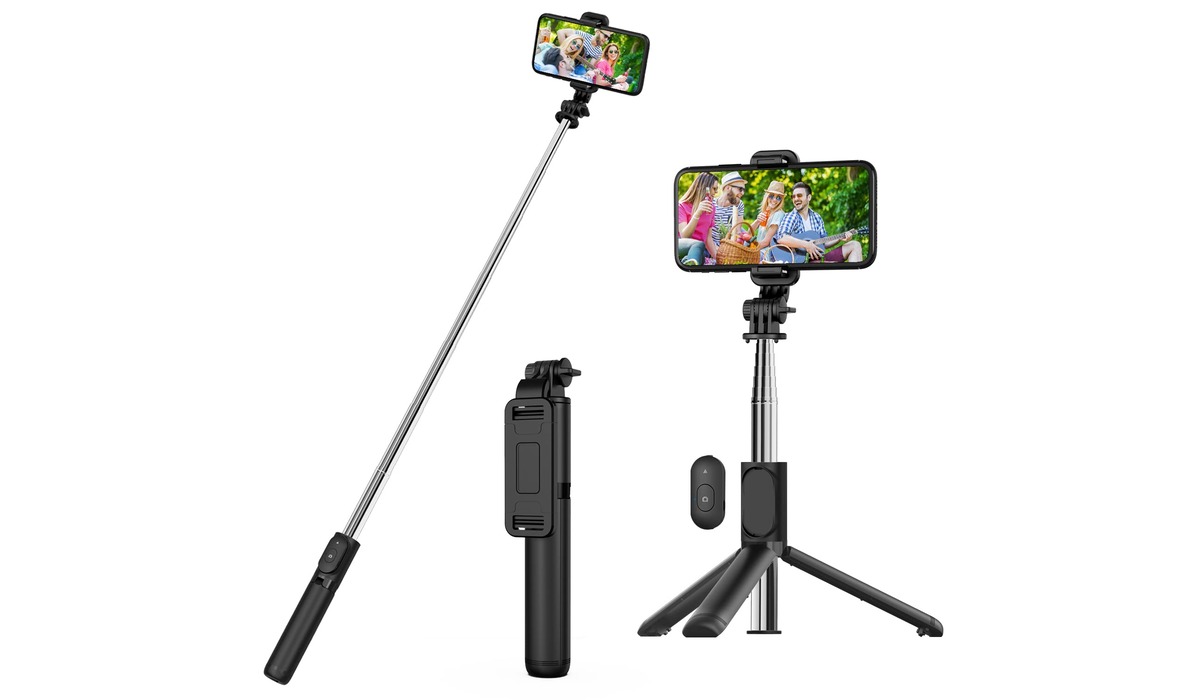
Selfie sticks have become incredibly popular accessories for capturing the perfect self-portraits, group photos, and stunning landscapes. With advancements in technology, selfie sticks now come with a convenient button that allows you to remotely trigger your phone’s camera shutter. This article will guide you on how to properly use a selfie stick with a button, from choosing the right one to capturing amazing photos effortlessly.
Choosing the Right Selfie Stick
When selecting a selfie stick, there are a few key factors to consider. Firstly, ensure that the selfie stick is compatible with your phone’s operating system. Most selfie sticks are designed to work with both iOS and Android devices, but it’s always best to double-check compatibility to avoid any issues.
Next, pay attention to the build quality and stability of the selfie stick. Look for sturdy materials, such as aluminum or carbon fiber, which offer durability and lightweight portability. Additionally, consider the length and extension capabilities of the selfie stick, as this will determine the range and angles you can capture. Some selfie sticks even offer rotation capabilities, allowing for greater flexibility in capturing the perfect shot.
Lastly, don’t forget to check if the selfie stick includes a button for remote camera control. This feature will simplify the process of taking photos and eliminate the need to reach for your phone’s screen, resulting in more stable and visually appealing shots.
Connecting Your Phone to the Selfie Stick
The process of connecting your phone to a selfie stick with a button is usually quick and straightforward. Start by extending the selfie stick to your desired length. Next, locate the phone holder mount on the top of the selfie stick and open it up. Place your phone horizontally or vertically into the mount, ensuring it’s securely held in place.
Once your phone is securely attached, look for the button on the handle of the selfie stick. On most models, this button functions as a Bluetooth remote control. Turn on the Bluetooth settings on your phone and sync it with the selfie stick. This will allow the button to trigger your phone’s camera shutter remotely.
Adjusting the Selfie Stick Length
Adjusting the length of your selfie stick is essential for capturing different perspectives and getting the perfect shot. Most selfie sticks have telescopic extensions that allow you to extend or retract the stick to your desired length. To adjust the length, locate the locking mechanism on the stick, usually a twist lock or a clamp. Unlock the mechanism and extend the stick to your desired length, making sure it’s securely locked in place.
It’s important to find the right balance between a comfortable grip and the desired distance from your subject. Experimenting with different lengths will help you capture unique angles and create visually appealing compositions.
Using the Selfie Stick Button to Take Photos
Once your phone is connected to the selfie stick and adjusted to the desired length, you’re ready to start capturing photos using the button on the handle. With your phone’s camera app open, frame the shot by extending the selfie stick away from you or angling it to capture the desired scene.
Press the button on the handle of the selfie stick, and you’ll see your phone’s camera shutter activate, capturing the image. The remote button provides a convenient way to trigger the camera without having to touch your phone, resulting in more stable images and reducing the risk of blurry photos caused by shaky hands.
Remember to experiment with different angles, perspectives, and poses to unleash your creativity and capture the best shots. Selfie sticks with buttons offer a simple and efficient way to capture memorable moments with ease. So, go out there and confidently use your selfie stick to take stunning photos that you can cherish for years to come!
Conclusion
In conclusion, using a selfie stick with a button can greatly enhance your mobile photography experience and help you capture stunning selfies and group photos effortlessly. By following a few simple steps, you can master the art of using a selfie stick with a button.
Firstly, ensure that your selfie stick is compatible with your mobile device. Make sure it has a secure and adjustable holder to fit different phone sizes. Secondly, connect your phone either wirelessly or using a wired connection, depending on the type of selfie stick. Pairing your device with the selfie stick is a breeze and usually requires just a few seconds.
Once your phone is securely attached to the selfie stick, extend the stick to your desired length and position it at the perfect angle for your shot. Now, you can press the button on the handle of the stick to capture your photo. The button serves as a remote shutter and allows you to take photos without touching your phone.
Using a selfie stick with a button adds convenience and versatility to your mobile photography. It allows you to capture not only selfies but also group photos and stunning landscapes with ease. So, next time you’re out exploring or celebrating with friends, consider using a selfie stick with a button to capture those precious moments.
Remember to always use your selfie stick responsibly, respecting the privacy and personal space of others. With practice and a little creativity, you can take your mobile photography to the next level and create amazing memories that will last a lifetime.
FAQs
1. How do I use a selfie stick with a button?
Using a selfie stick with a button is a simple process. Here are the steps:
- Extend the selfie stick to its full length.
- Attach your phone to the phone holder on the top of the stick.
- Connect your phone to the selfie stick using a compatible cable or Bluetooth. If using a cable, plug one end into your phone’s headphone jack or lightning port.
- Open your phone’s camera app and switch it to selfie mode.
- Position yourself in the frame and press the button located on the handle of the selfie stick to capture a photo or start recording a video.
- Adjust the angle and position of the selfie stick as needed to capture the perfect shot.
2. Are selfie sticks compatible with all phones?
Selfie sticks are generally compatible with most smartphones, including Android and iOS devices. However, it’s essential to check if the selfie stick you’re using supports the size and weight of your phone. Some selfie sticks come with adjustable phone holders that accommodate various phone sizes. It’s also a good idea to make sure your phone’s operating system is compatible with the selfie stick’s connection method, such as Bluetooth or a wired connection.
3. Can I use a selfie stick with a case on my phone?
Yes, you can use a selfie stick with a case on your phone. Most selfie sticks have adjustable phone holders that can accommodate phones with cases. However, it’s worth noting that bulky or heavily reinforced cases may interfere with the stability or balance of the selfie stick. If possible, opt for a slim and lightweight case to ensure easy attachment to the selfie stick and stable positioning during use.
4. Is it safe to use a selfie stick?
When used responsibly and with caution, selfie sticks are generally safe to use. However, it’s important to exercise a few precautions to prevent accidents or injuries. Avoid extending the selfie stick too forcefully or beyond its recommended length to maintain its stability. Be mindful of your surroundings and avoid using a selfie stick in crowded or busy areas where it may become a safety hazard. Additionally, be cautious when holding the extended selfie stick, especially in windy conditions, to prevent the risk of dropping your phone or causing damage.
5. Can I use a selfie stick for group photos?
Yes, a selfie stick is a great tool for taking group photos. Its extended reach allows you to include more people in the frame, eliminating the need for someone to be left out or the use of timers. Simply extend the selfie stick, position everyone in the frame, and press the button to capture the photo. Some selfie sticks even come with a remote control functionality, allowing you to trigger the camera shutter wirelessly for added convenience.