
Are you tired of struggling to find a safe and convenient place to mount your phone while driving? Look no further than the Popsocket car mount! This innovative and versatile mobile accessory is designed to make your life easier on the go. Whether you need to use your phone’s GPS, take hands-free calls, or simply keep your device within reach, the Popsocket car mount has got you covered.
In this article, we will guide you through everything you need to know about using the Popsocket car mount. From installation and positioning to tips for maximizing its functionality, we’ll ensure that you can take full advantage of this handy accessory. So, let’s dive in and explore how the Popsocket car mount can transform your driving experience and make your journeys safer and more convenient.
Inside This Article
- Popsocket Car Mount – Overview
- Step 1: Prepare Your Car Surface
- Step 2: Secure the Popsocket Car Mount
- Step 3: Adjust and Position the Popsocket
- Step 4: Mount Your Device onto the Popsocket
- Step 5: Adjust the Viewing Angle
- Step 6: Removing the Popsocket Car Mount
- Conclusion
- FAQs
Popsocket Car Mount – Overview
The Popsocket Car Mount is a versatile and convenient mobile accessory that allows you to securely mount your device in your car. Whether you are using your phone for navigation, hands-free calling, or streaming music, the Popsocket Car Mount provides a safe and reliable solution to keep your device within easy reach while on the road.
Designed to work with Popsockets, which are collapsible grips that attach to the back of your phone, the Popsocket Car Mount offers a secure grip and easy accessibility. The mount itself attaches to your car’s dashboard or windshield, providing a stable platform for your device.
With its simple and user-friendly design, the Popsocket Car Mount is suitable for use with a wide range of car models and phone sizes. Whether you have a compact sedan or a spacious SUV, the mount can be adjusted to ensure optimal positioning and comfort while driving.
One of the advantages of the Popsocket Car Mount is its ease of installation. With just a few simple steps, you can have the mount securely attached to your car’s surface and ready to use.
So, if you are a frequent traveler or rely on your phone for navigation, the Popsocket Car Mount is a must-have accessory to enhance your driving experience and keep your device safe and easily accessible.
Step 1: Prepare Your Car Surface
Before attaching the Popsocket Car Mount to your car, it’s important to ensure that the surface is clean and free from any dust or debris. This will help to create a strong and secure bond between the mount and your car’s surface.
Start by gathering a few supplies – a clean cloth, rubbing alcohol, and water. Begin by wiping down the surface where you plan to attach the Popsocket Car Mount with a damp cloth. This will help to remove any surface-level dirt or dust.
Next, take a small amount of rubbing alcohol and apply it to the cloth or a cotton ball. Gently wipe the car surface with the alcohol-soaked cloth, focusing on the area where you plan to place the mount. This step will further help to remove any residue or grease that might hinder the adhesive’s effectiveness.
Once you have wiped down the surface with alcohol, use a clean, dry cloth to remove any excess moisture. You want the surface to be completely dry before applying the Popsocket Car Mount to ensure a strong bond.
It’s worth noting that the Popsocket Car Mount is designed to adhere to a variety of surfaces, including plastic, glass, and metal. However, for best results, it is recommended to choose a smooth and flat surface. Avoid applying the mount to textured or curved surfaces, as it may not provide optimal grip and stability.
By thoroughly preparing your car surface before attaching the Popsocket Car Mount, you’ll create a strong foundation for mounting your device securely while driving.
Step 2: Secure the Popsocket Car Mount
Once you have prepared the surface of your car, it’s time to securely attach the Popsocket Car Mount. Follow these steps to ensure a stable and reliable mount:
- Clean the Mounting Surface: Before attaching the Popsocket Car Mount, make sure the surface is clean and free from any dust or debris. Use a cleaning agent and a microfiber cloth to wipe down the area where you plan to install the mount.
- Remove the Protective Film: The Popsocket Car Mount typically comes with a protective film on the adhesive side. Peel off the film to expose the adhesive surface that will stick to the car.
- Position the Mount: Decide on the ideal location for your Popsocket Car Mount. It’s recommended to choose a spot that is within easy reach and provides a clear view of your device. The dashboard or windshield are popular choices.
- Press Firmly: Once you have determined the placement, press the Popsocket Car Mount firmly against the mounting surface. Apply even pressure for a few seconds to ensure a secure bond.
- Wait for the Adhesive to Set: Allow the adhesive to set and cure according to the manufacturer’s instructions. This usually takes about 24 hours, but it’s best to check the specific recommendations for the product you are using.
By following these steps, you can ensure that your Popsocket Car Mount is securely attached to your car, providing a stable and reliable platform to mount your device.
Step 3: Adjust and Position the Popsocket
Now that you have securely mounted the Popsocket Car Mount, it’s time to adjust and position the Popsocket itself. Here’s how:
- With your device still detached, hold onto the stem of the Popsocket and twist it counterclockwise to loosen its grip.
- Once the Popsocket is loose, you can extend or retract it according to your desired position. If you prefer to have your device closer to your line of sight, extend the Popsocket. Conversely, if you want it positioned lower or farther away, retract it.
- After adjusting the length, twist the Popsocket clockwise to lock it in place. Make sure it is securely tightened to prevent any unintentional movement while driving.
- Next, you can also adjust the angle of the Popsocket to achieve the most comfortable viewing position. Simply hold the Popsocket and rotate it clockwise or counterclockwise to find the optimal angle.
- Once you have positioned the Popsocket to your liking, give it a gentle tug to ensure it is firmly in place. You should feel it securely attached to the dashboard mount.
By customizing the position and angle of the Popsocket, you can have your device conveniently positioned for easy access and optimal visibility while driving.
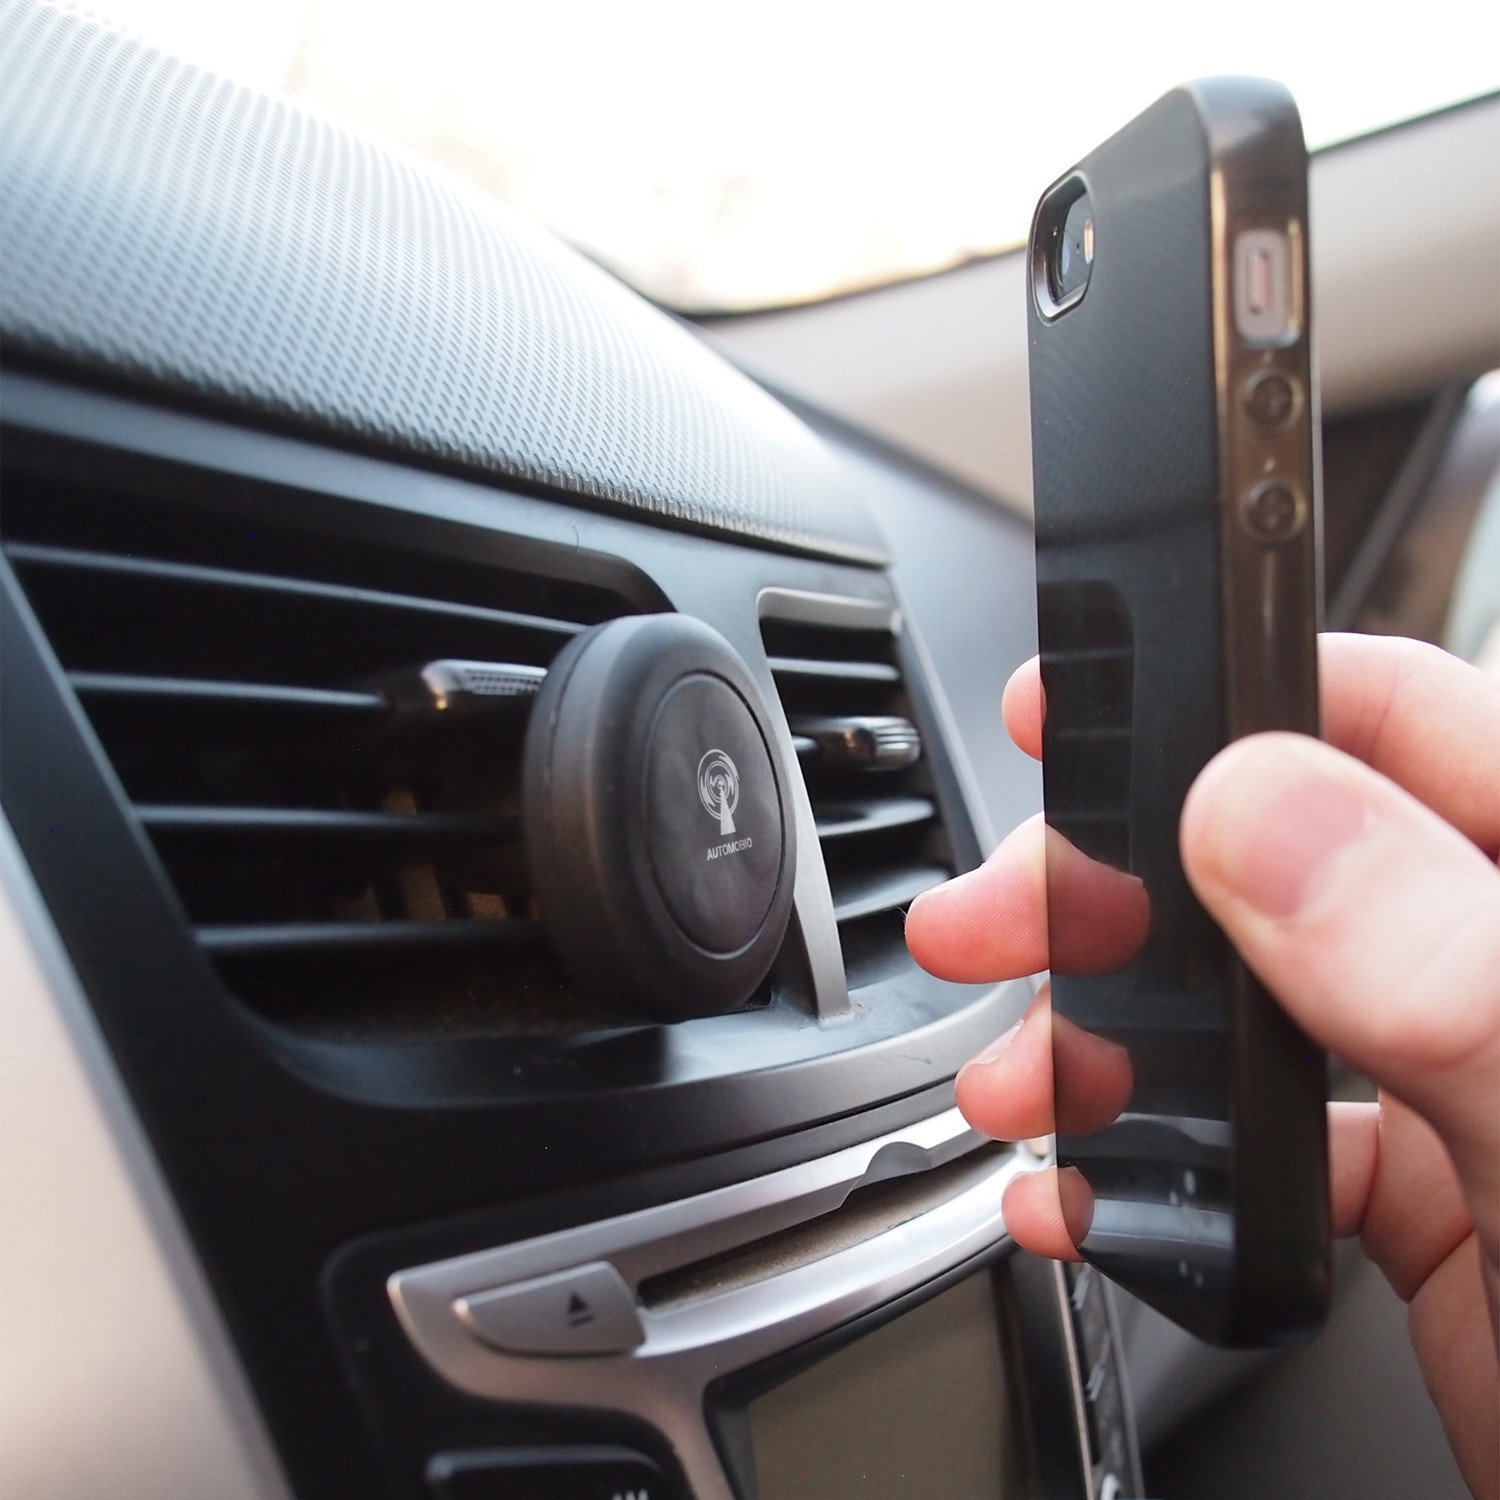
Step 4: Mount Your Device onto the Popsocket
Now that you have successfully attached the Popsocket Car Mount to your car and adjusted its position, it’s time to mount your device onto the Popsocket. Here’s how you can do it:
- Clean the back of your device: Before attaching it to the Popsocket, make sure the back of your device is clean and free from any dirt or debris. Use a soft, lint-free cloth or a screen cleaning wipe to wipe down the surface.
- Peel off the adhesive backing: The Popsocket has a strong adhesive backing that will securely hold your device in place. Gently peel off the adhesive backing to expose the sticky surface.
- Position your device: Decide where you want to place your device on the Popsocket. The ideal position is usually in the center, towards the bottom of the Popsocket. This provides a stable and balanced grip when holding your device.
- Press your device onto the Popsocket: Once you have determined the position, slowly and carefully press your device onto the sticky surface of the Popsocket. Apply gentle pressure to ensure it adheres properly.
- Allow it to set: Give it some time for the adhesive to set and bond with your device. This will ensure a secure attachment and prevent any accidental slippage.
It’s important to note that the Popsocket is designed to securely hold your device, but it is not meant to support heavy or larger devices such as tablets. Make sure your device is within the recommended weight and size limits.
Once your device is mounted onto the Popsocket, you can now enjoy the convenience of having a secure and hands-free grip while using your phone in the car. Whether you need to navigate, make hands-free calls, or even take selfies, the Popsocket Car Mount provides a versatile and safe solution.
Keep in mind that when choosing a mounting position for your device on the Popsocket, it’s essential to consider the laws and regulations regarding the use of mobile devices while driving in your area. Always prioritize safety and follow any applicable laws.
Step 5: Adjust the Viewing Angle
After successfully mounting your device onto the Popsocket car mount, the next step is to adjust the viewing angle to your preference. This will ensure optimal visibility and comfort while using your device on the road.
Here are the steps to adjust the viewing angle:
- Start by loosening the locking mechanism of the Popsocket car mount. This can usually be done by twisting or pressing a release button, depending on the specific model.
- Once the lock is loosened, you will be able to swivel the mount in different directions. Experiment with different angles until you find one that suits your needs.
- Tighten the lock to secure the desired viewing angle. Make sure it is tight enough to prevent any accidental movement during your drive.
- Test the viewing angle by placing your device in the mount and adjusting it as needed. Ensure that the screen is easily visible and accessible while keeping your eyes on the road.
- If you find that the initial position is not comfortable or does not provide clear visibility, you can repeat the process and readjust the angle until it meets your requirements.
It is important to note that the specific adjustments may vary depending on the type and model of the Popsocket car mount you are using. Always refer to the manufacturer’s instructions for detailed guidance on adjusting the viewing angle.
Remember to prioritize safety while adjusting the viewing angle. Avoid making any adjustments while driving, as this can be a distraction and compromise your safety. If you need to readjust the angle, find a safe place to pull over before making any changes.
By taking the time to adjust the viewing angle, you can ensure that your device is positioned at the optimal angle to enhance your driving experience and make it easier to access and use your device while on the road.
Step 6: Removing the Popsocket Car Mount
When it’s time to remove the Popsocket car mount, you’ll be pleased to know that it’s a simple and straightforward process. Here are the steps to follow:
- Start by gently prying the edges of the adhesive base using a flat tool, such as a credit card or a plastic spatula. Be careful not to scratch or damage your car’s surface while doing this.
- Slowly peel off the adhesive base, applying even pressure as you go. If there is any resistance, use your tool to help loosen the grip.
- Once the adhesive base is removed, you may notice some residue left behind. To clean it, use a mild adhesive remover or isopropyl alcohol. Apply the solution to a clean cloth and gently rub the residue until it is gone.
- Finally, wipe down the area with a clean, dry cloth to ensure that it is free from any remaining residue or cleaner.
By following these steps, you can easily remove the Popsocket car mount without leaving any traces behind. It’s important to note that once the adhesive is removed, it cannot be reused, so make sure you have a replacement adhesive ready if you plan on reattaching the mount in the future.
Removing the Popsocket car mount is especially useful if you want to switch it to a different car or if you no longer need it. It’s a versatile accessory that can adapt to your changing needs and preferences.
Remember to always read the manufacturer’s instructions and guidelines when installing, using, and removing the Popsocket car mount. These guidelines are designed to ensure that you get the best performance and longevity out of your mount.
Now that you know how to remove the Popsocket car mount, you have the flexibility to use it whenever and wherever you need it. Whether you’re on a long road trip or simply using GPS navigation, the Popsocket car mount provides a secure and convenient way to keep your device within reach while driving.
Conclusion
In conclusion, the Popsocket Car Mount is a versatile and practical accessory for anyone on the go. Its innovative design allows for easy attachment and detachment, ensuring a secure hold on your mobile device while driving. Whether you need to navigate using GPS, make hands-free calls, or simply enjoy your favorite music, the Popsocket Car Mount offers a convenient solution.
By using the Popsocket Car Mount, you can keep your hands on the wheel and your focus on the road, promoting safety and reducing distractions. Its adjustable and rotating features allow for optimal positioning, ensuring that you can easily view your device’s screen without obstructing your view of the road.
With its strong adhesive and durable construction, the Popsocket Car Mount is built to withstand the bumps and vibrations of daily driving. Its compatibility with most mobile phones and cases makes it a versatile choice for individuals seeking a reliable car mount option.
Make your driving experience more convenient and safer with the Popsocket Car Mount. Invest in this smart and functional accessory, and you’ll never have to worry about fumbling with your phone while driving again. Enjoy the benefits of hands-free technology and stay focused on the road ahead with the Popsocket Car Mount.
FAQs
1. How do I attach a Popsocket Car Mount to my car?
2. Can I use a Popsocket Car Mount with my phone case?
3. Will the Popsocket Car Mount hold my phone securely while driving?
4. Can I adjust the angle of the Popsocket Car Mount?
5. Is the Popsocket Car Mount compatible with all types of phones?