
Are you wondering how to transfer photos from your iPhone to your iPad? In this digital age, capturing and sharing memorable moments through photos has become a daily routine for many of us. Whether it’s capturing a breathtaking sunset, taking a selfie, or snapping a picture of your favorite dish, having an efficient way to transfer photos between your Apple devices is essential.
In this article, we will explore five easy and convenient methods to transfer your photos from your iPhone to your iPad. Whether you want to transfer a single photo or an entire album, we’ve got you covered. Say goodbye to the hassle of emailing photos or using cloud storage services, as we delve into the different options available to seamlessly transfer your precious memories from your iPhone to your iPad.
Inside This Article
AirDrop
AirDrop is a convenient and fast way to transfer photos from your iPhone to your iPad. With just a few taps, you can wirelessly send pictures between your devices without the need for cables or an internet connection. Here are five easy steps to transfer photos using AirDrop:
- Make sure both your iPhone and iPad have AirDrop enabled. To do this, swipe up from the bottom of the screen to open Control Center. Tap on the “AirDrop” icon and select either “Contacts Only” or “Everyone” to allow access.
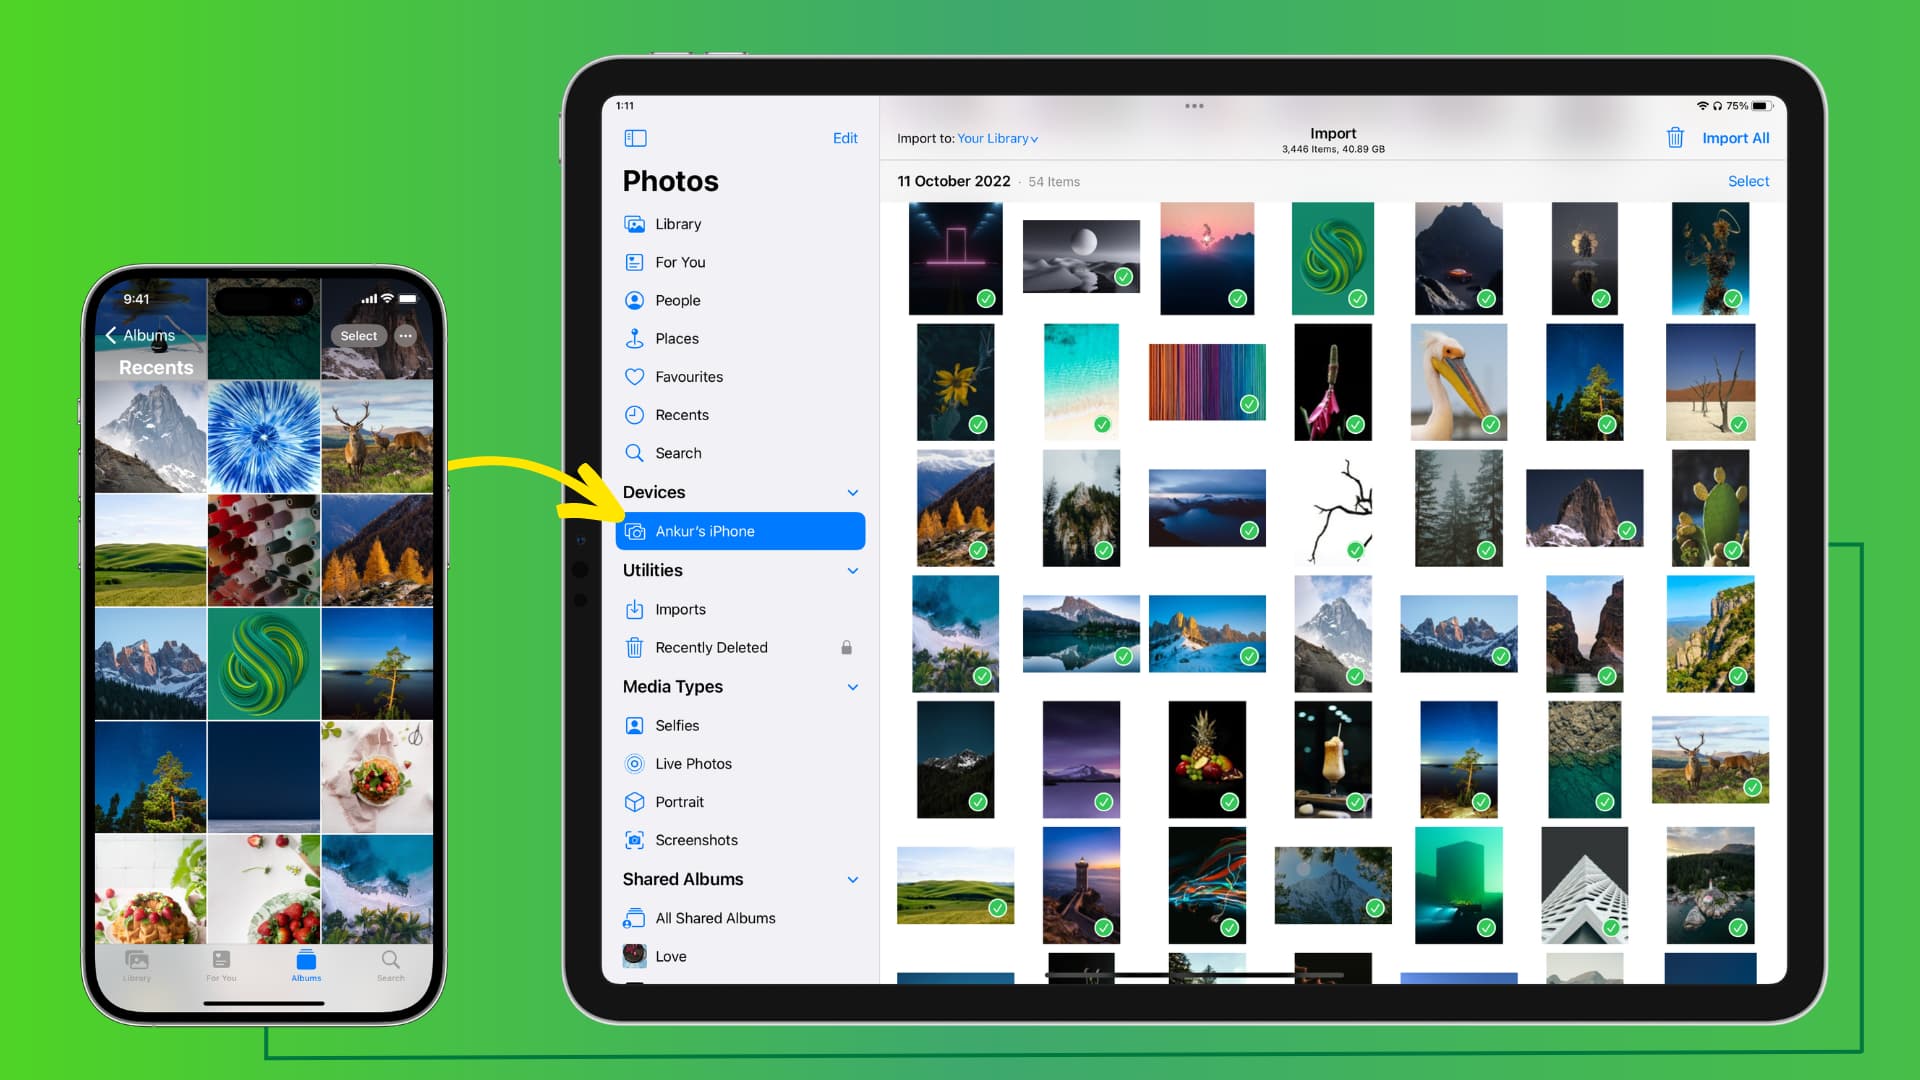
- Open the “Photos” app on your iPhone and navigate to the album or folder containing the photos you want to transfer.
- Select the photos you want to send by tapping on the “Select” button located in the top right corner of the screen. You can choose multiple photos by tapping on each one individually or by using the “Select All” option.
- Tap on the “Share” button, usually represented by a square with an arrow pointing upwards. A list of sharing options will appear.
- Scroll through the options and locate the device you want to transfer the photos to. Tap on the device’s name to initiate the transfer. You may need to confirm the transfer on the receiving device.
AirDrop uses Bluetooth and Wi-Fi to establish a direct connection between your iPhone and iPad, ensuring a secure and speedy transfer. It’s a convenient feature that eliminates the need for cables or complicated setup processes. Plus, it works seamlessly across Apple devices, making it a perfect choice for iPhone-to-iPad photo transfers.
Please note that AirDrop requires both devices to be within close proximity to each other, typically within 30 feet. Additionally, ensure that both devices have sufficient battery life and are connected to a stable Wi-Fi network for optimal performance.
iCloud Photo Library
iCloud Photo Library is a convenient way to transfer photos from your iPhone to your iPad seamlessly. It is an integrated feature that automatically syncs your photos across all your Apple devices. Here’s how you can use iCloud Photo Library to transfer your photos:
1. Enable iCloud Photo Library: Go to the Settings app on both your iPhone and iPad. Tap on your Apple ID at the top, then go to iCloud > Photos, and toggle on the “iCloud Photo Library” option.
2. Allow Photos to Upload: Once iCloud Photo Library is enabled, your photos will start uploading to your iCloud account. Make sure you have a stable internet connection to ensure efficient transfer.
3. Access Photos on iPad: On your iPad, open the Photos app. You should see all your synced photos from your iPhone in the “All Photos” tab. If you have organized your photos into albums, you can find them under the “Albums” tab.
4. Download Photos: If you want to download specific photos to your iPad, simply tap on the photo to open it, then tap on the Share button (the square with an arrow pointing upwards). From the sharing options, select “Save Image” to save it directly to your iPad’s camera roll.
5. Automatic Syncing: Going forward, any new photos you capture on your iPhone will automatically sync to your iPad through iCloud Photo Library. This ensures that both devices have the most up-to-date photo collection.
With iCloud Photo Library, you don’t have to manually transfer photos between your iPhone and iPad. The continuous syncing feature keeps your photo library consistent on all your Apple devices, saving you time and effort.
iTunes Sync
If you’re looking to transfer your photos from your iPhone to your iPad, one seamless option is to use iTunes Sync. iTunes Sync allows you to connect your devices to a computer and transfer files, including photos, between them. Here’s a step-by-step guide on how to transfer photos from your iPhone to your iPad using iTunes Sync:
Step 1: Connect your iPhone and iPad to the computer using their respective USB cables.
Step 2: Launch iTunes on your computer. If it doesn’t open automatically, you can manually open it.
Step 3: In iTunes, click on the device icon for your iPhone located at the top left corner of the window.
Step 4: In the left sidebar, click on “Photos.”
Step 5: Check the box next to “Sync Photos.”
Step 6: From the drop-down menu, select “Choose folder…”
Step 7: Select the folder on your computer where your iPhone photos are stored.
Step 8: Click on the “Apply” button at the bottom right corner of the window.
Step 9: iTunes will start syncing the selected photos from your iPhone to your computer.
Step 10: Disconnect your iPhone from the computer and connect your iPad.
Step 11: Repeat steps 3 to 5 for your iPad.
Step 12: Select the same folder on your computer where your iPhone photos are stored.
Step 13: Click on the “Apply” button.
Step 14: iTunes will start syncing the selected photos from your computer to your iPad.
And that’s it! Your photos will now be transferred from your iPhone to your iPad using iTunes Sync. Keep in mind that it may take some time depending on the number of photos being synced and the speed of your computer.
iTunes Sync is a reliable method for transferring photos between your iPhone and iPad. However, it requires a computer and the iTunes software. If you prefer a wireless and more convenient option, consider using AirDrop or iCloud Photo Library.
Google Photos
When it comes to transferring photos from your iPhone to iPad, Google Photos is a versatile and popular option. This free app offers seamless cloud storage and syncing capabilities, making it easy to access and transfer your photos across devices.
To get started, you’ll need to download the Google Photos app from the App Store on both your iPhone and iPad. Once installed, follow these steps:
- Sign in: Open the Google Photos app on your iPhone and sign in with your Google account.
- Backup photos: Enable the option to automatically back up your photos to Google Photos. This will ensure that all your iPhone photos are securely stored in the cloud.
- Download photos on iPad: On your iPad, open the Google Photos app and sign in with the same Google account. Allow the app to sync and download your photos from the cloud.
Once your photos are synced, you can easily access them on your iPad through the Google Photos app. The app offers a user-friendly interface, allowing you to browse and organize your photos with ease.
To transfer photos from your iPhone to iPad using Google Photos, follow these additional steps:
- Select Photos: In the Google Photos app on your iPhone, select the photos you want to transfer to your iPad. You can choose individual photos or select multiple photos at once.
- Tap Share: After selecting the photos, tap the share icon, which looks like a square with an upward arrow.
- Choose iPad: From the sharing options, select your iPad. This will initiate the transfer process.
- Confirm the transfer: On your iPad, you’ll receive a notification asking you to confirm the transfer of the selected photos. Tap “Accept” to proceed.
Google Photos will then begin transferring the selected photos from your iPhone to your iPad. The speed of the transfer will depend on the size of the photos and the strength of your internet connection.
It’s worth noting that Google Photos offers unlimited free storage for high-quality photos, with some limitations for original quality photos. However, if you have a large number of photos or videos, you may need to consider purchasing additional storage through Google One.
Overall, Google Photos provides a convenient and efficient way to transfer photos from your iPhone to iPad. With its cloud-based storage and synchronization features, you can easily access and manage your photos across multiple devices.
Conclusion
Transferring photos from your iPhone to your iPad can be made simple and hassle-free with the right methods. Whether you choose to use iCloud, AirDrop, iTunes, third-party apps, or a combination of these options, you can easily share your cherished memories between your devices.
By utilizing the convenience of wireless technology and cloud storage, you can effortlessly transfer your photos in just a few steps. Whether you’re looking to share photos with friends and family, backup your precious moments, or simply enjoy your pictures on a larger screen, these methods have you covered.
Remember to consider factors such as the size of your photo library, available storage space, and your preferred method of transfer when deciding which option works best for you. So, go ahead and start enjoying your photos on your iPad, and let the memories come to life.
FAQs
Here are some frequently asked questions about transferring photos from iPhone to iPad:
1. Can I transfer photos from iPhone to iPad using iCloud?
Yes, you can transfer photos from iPhone to iPad using iCloud. Simply enable iCloud Photo Library on both devices and ensure that they are signed in to the same iCloud account. Once the photos are synced to iCloud, they will be available on both your iPhone and iPad.
2. Is there a way to transfer photos from iPhone to iPad without using iCloud?
Absolutely! If you prefer not to use iCloud, you can use AirDrop to transfer photos from your iPhone to iPad. Both devices need to have AirDrop enabled, and you can then select the photos you want to transfer and send them directly to your iPad.
3. Are there any third-party apps that can help with transferring photos between iPhone and iPad?
Yes, there are several third-party apps available on the App Store that can aid in transferring photos between iPhone and iPad. Some popular options include Dropbox, Google Drive, and Microsoft OneDrive. These apps allow you to upload your photos to the cloud and access them on both devices.
4. Can I transfer photos from iPhone to iPad using a USB cable?
No, you cannot directly transfer photos from iPhone to iPad using a USB cable. Unlike some Android devices, iPhones do not support file transfer over USB connections. However, you can use iCloud, AirDrop, or third-party apps to transfer photos wirelessly between iPhone and iPad.
5. What is the quickest and easiest way to transfer a large number of photos from iPhone to iPad?
If you have a large number of photos to transfer, using iCloud Photo Library or a third-party cloud storage app is the quickest and easiest way. By uploading your photos to the cloud, you can access them on both devices without the need for physical transfer or connectivity.