
Printing documents and photos from your iPhone or iPad has never been easier thanks to AirPrint, a wireless printing technology developed by Apple. With AirPrint, you can wirelessly connect your iOS devices to compatible printers and effortlessly print your files in just a few simple steps.
Whether you need to print important documents for work or school, or want to create physical copies of your favorite memories captured on your iPhone or iPad, AirPrint simplifies the printing process and eliminates the need for complex configurations or the hassle of transferring files to a computer.
In this article, we will guide you through the steps to use AirPrint effectively, from setting up your device and printer to troubleshooting any issues that may arise. Whether you’re a seasoned iOS user or a novice, you’ll be able to unleash the power of AirPrint and transform your iPhone or iPad into a versatile printing tool.
Inside This Article
- How to Use AirPrint to Print from Your iPhone or iPad (2023)
- Overview
- Setting Up AirPrint
- Printing from Your iPhone or iPad
- Troubleshooting and Tips
- Conclusion
- FAQs
How to Use AirPrint to Print from Your iPhone or iPad (2023)
Welcome to the digital era where the power of smartphones and tablets allows us to accomplish tasks that were once unimaginable. One such task is printing directly from our iPhones or iPads. Thanks to AirPrint, an Apple technology that enables wireless printing, you can now easily print documents, photos, and more right from your iPhone or iPad. In this article, we will guide you on how to use AirPrint to print from your iPhone or iPad, making your life more convenient and productive.
Setting Up AirPrint
The first step in using AirPrint is ensuring that your printer is AirPrint compatible. Most modern printers have AirPrint functionality built-in, but if you’re not sure, you can check the manufacturer’s website or the printer’s manual. Once you have confirmed that your printer supports AirPrint, follow these simple steps to set it up:
- Connect your printer to your home Wi-Fi network. This usually involves going into your printer’s settings menu and selecting your network from the available options.
- On your iPhone or iPad, ensure that you are connected to the same Wi-Fi network as your printer.
- Open the document, photo, or file you want to print on your iPhone or iPad.
- Tap the “Share” button, usually represented by a square with an arrow pointing upwards.
- In the sharing options, locate and tap the “Print” option. This will open the AirPrint printer selection screen.
- Choose your printer from the list of available printers. You may need to wait for a moment while your device discovers the printers on the network.
- Adjust any print settings, such as the number of copies or the paper size, if needed.
- Finally, tap the “Print” button to send the print job to your selected printer. Sit back and let AirPrint work its magic!
Printing from Your iPhone or iPad
Now that you have set up AirPrint, printing from your iPhone or iPad is a breeze. Here are a few tips to help you make the most out of AirPrint:
- Printing Documents: With AirPrint, you can print various types of documents, including PDF, Word, Excel, and PowerPoint files. Simply open the document in the respective app and follow the steps mentioned earlier to print it.
- Printing Photos: AirPrint allows you to print photos directly from your iPhone or iPad’s Photos app. Open the photo you want to print, tap the “Share” button, select “Print,” and choose your printer
- Printing Webpages: If you come across an interesting webpage that you want to print, simply tap the Share button and select the “Print” option. AirPrint will take care of the rest.
Troubleshooting and Tips
In some cases, you may encounter issues while using AirPrint. Here are a few troubleshooting tips to help you overcome common problems:
- Ensure Wi-Fi Connectivity: Make sure that both your iPhone or iPad and the printer are connected to the same Wi-Fi network.
- Update Firmware: Check if there are any firmware updates available for your printer. Updating the firmware can often resolve compatibility issues.
- Restart Devices: Sometimes, a simple restart of your iPhone or iPad and the printer can fix connectivity problems.
- Check Printer Settings: Verify that your printer has enough paper and ink, and double-check any settings that may affect the printing process.
Congratulations! You are now equipped with the knowledge to use AirPrint and print directly from your iPhone or iPad. With this impressive feature at your fingertips, you can take full advantage of your Apple device’s functionalities and streamline your workflow. Say goodbye to complicated printing setups and embrace the simplicity of AirPrint.
Overview
Printing documents and photos directly from your iPhone or iPad has become easier than ever with the introduction of AirPrint. AirPrint is a convenient feature that allows you to wirelessly print from your Apple devices without the need for additional software or drivers. Whether you need to print an important document for work or a memorable photo from your vacation, AirPrint makes it effortless.
By leveraging the power of Wi-Fi and Bluetooth technology, AirPrint enables you to connect your compatible iPhone or iPad to a wireless printer and print with just a few taps. No more hassle of transferring files to a computer or dealing with complex printer settings. With AirPrint, you can print directly from your Apple device and enjoy a seamless printing experience.
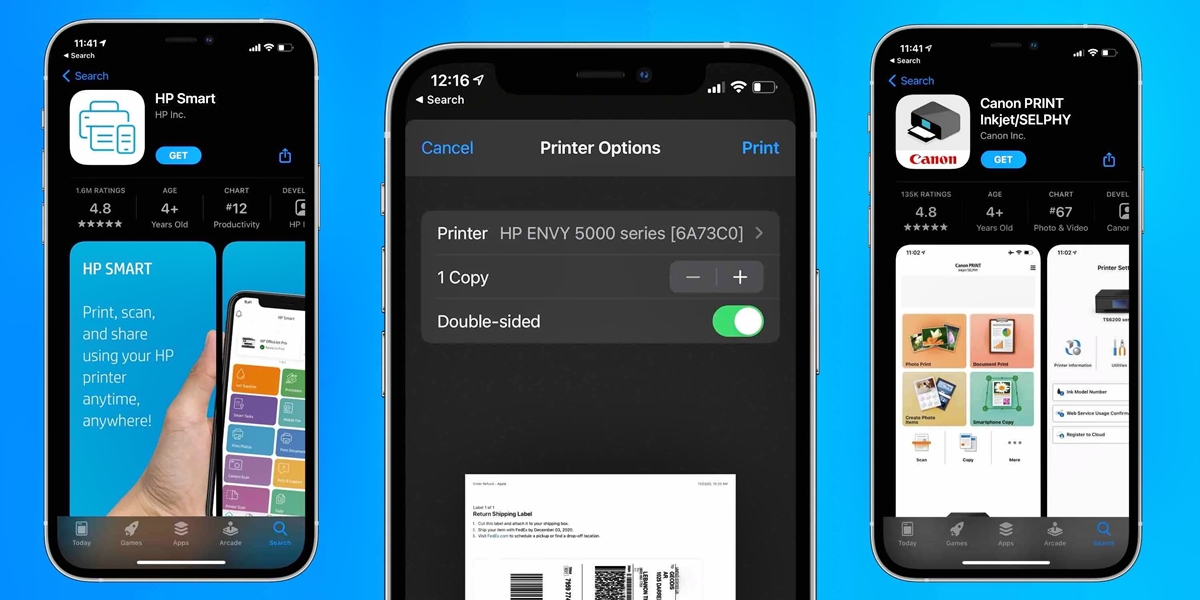
One of the major advantages of AirPrint is its compatibility with a wide range of printers. Many leading printer manufacturers have embraced this technology, making it easier for users to find a printer that supports AirPrint. Whether you have an HP, Epson, Canon, or Brother printer, chances are it is compatible with AirPrint. This ensures that you can experience the convenience of wireless printing regardless of the printer brand you own.
Another great feature of AirPrint is its ease of use. Printing from your iPhone or iPad is as simple as selecting the content you want to print and tapping the print button. AirPrint automatically detects nearby Wi-Fi printers, eliminating the need for manual setup. This quick and intuitive process allows you to print your documents or photos in a matter of seconds, saving you valuable time and effort.
AirPrint also offers a range of customization options, allowing you to adjust settings such as paper size, orientation, and number of copies directly from your Apple device. This level of control empowers you to customize your printouts according to your specific requirements. Whether you are printing a single-page document or multiple copies of a photo, AirPrint gives you the flexibility to tailor your print settings to suit your needs.
With AirPrint, you can also enjoy the benefits of advanced printing features such as duplex printing, which allows you to print on both sides of the paper, saving paper and reducing waste. Additionally, you can take advantage of the convenience of cloud printing, allowing you to seamlessly print documents stored in your iCloud or other cloud storage services.
Setting Up AirPrint
Setting up AirPrint on your iPhone or iPad is a simple process that allows you to print wirelessly to compatible printers. Follow the steps below to get started:
Step 1: Check Printer Compatibility
The first thing you need to do is ensure that your printer is compatible with AirPrint. Most newer models from popular printer manufacturers like HP, Epson, Canon, and Brother support AirPrint. Make sure your printer is connected to the same Wi-Fi network as your iPhone or iPad.
Step 2: Update Software
Next, make sure that your iPhone or iPad is running the latest software update. AirPrint requires iOS 4.2 or later, so if you haven’t updated recently, go to Settings > General > Software Update and install any available updates.
Step 3: Connect to Wi-Fi
Ensure that your iPhone or iPad is connected to the same Wi-Fi network as your printer. Open the Settings app, tap Wi-Fi, and select the network that your printer is connected to. If you’re not sure which network your printer is on, check the printer’s manual or the printer’s control panel.
Step 4: Enable AirPrint
Now it’s time to enable AirPrint on your printer. Open the Settings app on your iPhone or iPad, tap on “Printers,” and select your printer from the list of available printers. If you don’t see your printer listed, make sure it is turned on and connected to the Wi-Fi network.
Step 5: Test the Connection
Once you have enabled AirPrint and selected your printer, it’s a good idea to test the connection. Open any app that supports printing, such as Mail or Safari, and tap on the share button. Look for the print option and tap on it. If your printer is detected, you can proceed to print wirelessly.
Step 6: Print a Test Page
To ensure that everything is set up correctly, print a test page. Open any app that supports printing, select the content you want to print, and tap on the share button. Choose the print option, select your printer, and tap on the print button. If the test page prints successfully, you’re all set to enjoy wireless printing with AirPrint!
That’s it! You have successfully set up AirPrint on your iPhone or iPad. Now you can conveniently print documents, photos, emails, and more directly from your device without the need for cables or additional software.
Printing from Your iPhone or iPad
Printing from your iPhone or iPad is a convenient way to transform your digital files into hard copies. Whether you need to print documents, photos, or other files, your iPhone or iPad can easily connect to a printer wirelessly using AirPrint. Here’s a step-by-step guide on how to print from your iPhone or iPad.
Step 1: Ensure Compatibility
The first step is to make sure that the printer you wish to use is AirPrint-compatible. Most modern printers support AirPrint, but it’s always a good idea to double-check. Look for the AirPrint logo on the printer or consult the printer’s manual or manufacturer’s website for confirmation.
Step 2: Connect to the Same Wi-Fi Network
Next, ensure that your iPhone or iPad is connected to the same Wi-Fi network as the printer. AirPrint requires both devices to be connected to the same network for printing to work. Open the Wi-Fi settings on your device and connect to the appropriate network if you haven’t already.
Step 3: Select the Content to Print
Now, locate the content that you wish to print from your iPhone or iPad. This could be a document, photo, email, web page, or any other compatible file. Once you’ve found the content, open it on your device.
Step 4: Access the Print Menu
To access the print options, tap the share button on your iPhone or iPad. It is usually represented by a square with an upward-pointing arrow. This will open a menu with various sharing options. Scroll through the options until you see the “Print” option and tap on it.
Step 5: Select Printer and Adjust Settings
After tapping on the “Print” option, your device will search for AirPrint-compatible printers nearby. Once the printers are detected, select the printer you wish to use. You may also need to adjust the print settings, such as the number of copies, page range, or paper size, depending on your requirements.
Step 6: Start the Print Job
Once you have selected the printer and adjusted the settings, you are ready to start the print job. Simply tap the “Print” button to send the file to the printer. Your iPhone or iPad will communicate with the printer and initiate the printing process. You can monitor the progress of the print job from the print queue.
Step 7: Collect Your Printout
Once the print job is completed, go to the printer and collect your printout. Depending on the printer model, the printed document may be available in the output tray or another designated location. Take care to handle the papers gently and avoid smudging the printout.
Step 8: Review and Adjust Print Settings (optional)
If you need to review or adjust the print settings for future print jobs, you can do so from the Settings app on your iPhone or iPad. Navigate to “Settings,” then “Printers & Scanners,” and select the printer you used. You can change options like paper size, color or black and white printing, and other preferences.
With these steps, you can easily print from your iPhone or iPad using AirPrint. Enjoy the convenience of turning your digital files into physical copies with just a few taps on your device.
Troubleshooting and Tips
Despite its convenience, sometimes you may encounter issues when using AirPrint to print from your iPhone or iPad. Here are some troubleshooting steps and tips to help you resolve any problems:
- Check the printer compatibility: Make sure that your printer supports AirPrint. It should be connected to the same Wi-Fi network as your iPhone or iPad.
- Restart your devices: Sometimes, a simple restart can solve connectivity issues. Turn off your iPhone or iPad, as well as your printer. Wait for a few seconds, and then turn them back on.
- Update the software: Ensure that both your iPhone or iPad and your printer have the latest software updates installed. Outdated software can cause compatibility issues.
- Ensure Wi-Fi connectivity: Check if your iPhone or iPad is connected to the correct Wi-Fi network. Sometimes, the device might connect to a different network, causing printing problems. Resetting your Wi-Fi settings can often help resolve this issue.
- Reset network settings: If you’re still experiencing connectivity issues, try resetting your network settings on your iPhone or iPad. Go to Settings > General > Reset > Reset Network Settings. Note that this will remove your saved Wi-Fi passwords, so make sure to have them handy.
- Force close the printing app: If a specific app is giving you trouble while printing, try force closing it and reopening it. This can sometimes resolve any temporary glitches.
- Clear printing queue: If you notice that your printer is not responding or stuck on a previous print job, try clearing the print queue. Go to the printing options in your iPhone or iPad, find the print job, and cancel or delete it. Then resend the print job.
- Reset the printer: If none of the above steps work, you may need to reset your printer. Refer to your printer’s manual or manufacturer’s website for instructions on how to perform a reset. Keep in mind that this will erase any custom settings on your printer.
- Contact technical support: If you have tried all troubleshooting steps and are still unable to print using AirPrint, it’s best to reach out to the technical support of your printer manufacturer or Apple Support for further assistance.
By following these troubleshooting steps and tips, you can overcome any issues you may encounter while using AirPrint to print from your iPhone or iPad. Enjoy the convenience of wireless printing and make your life easier!
Conclusion
In conclusion, AirPrint is a convenient and seamless way to print directly from your iPhone or iPad. Its integration into iOS devices eliminates the need for additional software or drivers, making it incredibly user-friendly. Whether you’re printing documents, photos, or emails, AirPrint streamlines the process, saving you time and effort.
With its wireless functionality, you can print from anywhere within your Wi-Fi network, providing flexibility and convenience. Additionally, AirPrint supports a wide range of printer models, allowing for compatibility with various brands and manufacturers.
By following the simple steps outlined earlier, you can easily set up and use AirPrint to print wirelessly from your iPhone or iPad. Say goodbye to the hassle of transferring files to a computer or dealing with complicated printing solutions. With AirPrint, printing from your mobile device has never been easier.
So, harness the power of AirPrint and enjoy the convenience of printing directly from your iPhone or iPad. Get started today and experience the simplicity and efficiency of wireless printing.
FAQs
1. Can I print from my iPhone or iPad using AirPrint?
Absolutely! AirPrint is a built-in feature on iOS devices, allowing you to print wirelessly to compatible printers.
2. How do I know if my printer supports AirPrint?
To check if your printer is compatible with AirPrint, consult the manufacturer’s specifications or look for the AirPrint logo on the printer packaging. Additionally, you can visit Apple’s official website for a list of supported printers.
3. Do I need any additional software to use AirPrint?
No, you don’t need any additional software. AirPrint is integrated into the iOS operating system, so as long as your printer supports AirPrint, you can print directly from your iPhone or iPad without installing any extra apps.
4. How do I set up AirPrint on my iPhone or iPad?
Setting up AirPrint is a breeze. First, ensure that your iOS device and printer are connected to the same Wi-Fi network. Then, go to the app or document you want to print, tap the share icon, and select the Print option. Choose your printer from the list of available devices, customize any print settings if necessary, and hit the Print button to start printing.
5. Can I print photos, emails, and documents from any app?
Yes, AirPrint works with a wide range of apps, including the default Photos, Mail, and Safari apps, as well as third-party apps that support printing. Simply follow the same steps mentioned earlier to print from any compatible app on your iPhone or iPad.