
Are you tired of the same old contact poster on your iPhone? Do you wish you could give it a personal touch and make it truly yours? Well, you’re in luck! With the latest iOS 17 update, Apple has introduced a fantastic new feature that allows you to customize someone else’s contact poster on your iPhone. Whether it’s a family member, friend, or even a celebrity, you can now put your own stamp on their contact poster.
In this article, we will guide you through the step-by-step process of customizing someone else’s contact poster on your iPhone. We’ll show you how to add your own photos, change the background, and even include personalized messages. With a few simple taps, you can transform the contact poster into a work of art that reflects your unique style and personality. So, let’s get started and make your contacts truly stand out on your iPhone!
Inside This Article
- Overview
- Step 1: Choose a contact poster template
- Step 2: Customize the contact information
- Step 3: Edit the Background and Colors
- Step 4: Add personal touches and decorations
- Step 5: Save and share the customized contact poster
- Conclusion
- FAQs
Overview
Customizing someone else’s contact poster on your iPhone (iOS 17) is a fun and creative way to showcase your personal style while making it easy for others to contact you. With the ability to choose from a variety of templates and customize the contact information, background, colors, and even add personal touches, you can create a unique and eye-catching contact poster that reflects your individuality.
Whether you want to promote your business, share your social media handles, or simply make it more convenient for people to reach you, customizing a contact poster is a simple and effective solution. Plus, it’s a great way to stand out from the crowd and make a lasting impression.
In this article, we’ll guide you through the step-by-step process of customizing someone else’s contact poster on your iPhone, using the latest iOS 17. So grab your iPhone, unleash your creativity, and let’s get started!
Step 1: Choose a contact poster template
Creating a customized contact poster for your iPhone is a fun and creative way to personalize your device. The first step in the process is to choose a contact poster template that suits your style and preferences. Luckily, on iOS 17, there are a variety of pre-designed templates available for you to choose from.
When selecting a template, consider factors such as the layout, color scheme, and design elements. Think about the overall aesthetic you want to achieve and how the template can help you showcase your contact information in an engaging and visually appealing manner.
Take some time to explore the different options available. You can browse through a collection of templates that range from minimalistic and sleek designs to bold and vibrant ones. Whether you prefer a professional look or a more artsy and creative style, there is a template out there that can perfectly reflect your personality.
Additionally, consider the practicality of the template. Look for layouts that allow you to display essential contact information such as your name, phone number, email address, and social media handles. You may also want to check if the template provides space for a profile picture or additional details that you want to include.
Once you have chosen a template that captures your attention, you are ready to move on to the next step: customizing the contact information. But before that, let’s dive into the exciting world of contact poster customization!
Step 2: Customize the contact information
Once you have chosen the contact poster template that suits your style and preferences, it’s time to personalize it with your own contact information. Customizing the contact information allows you to make the poster truly yours and ensure that people have the correct details to get in touch with you.
Here are a few simple steps to help you customize the contact information on your iPhone:
- Open the contact poster editor: Open the contact poster app on your iPhone and navigate to the editing section where you can customize the information.
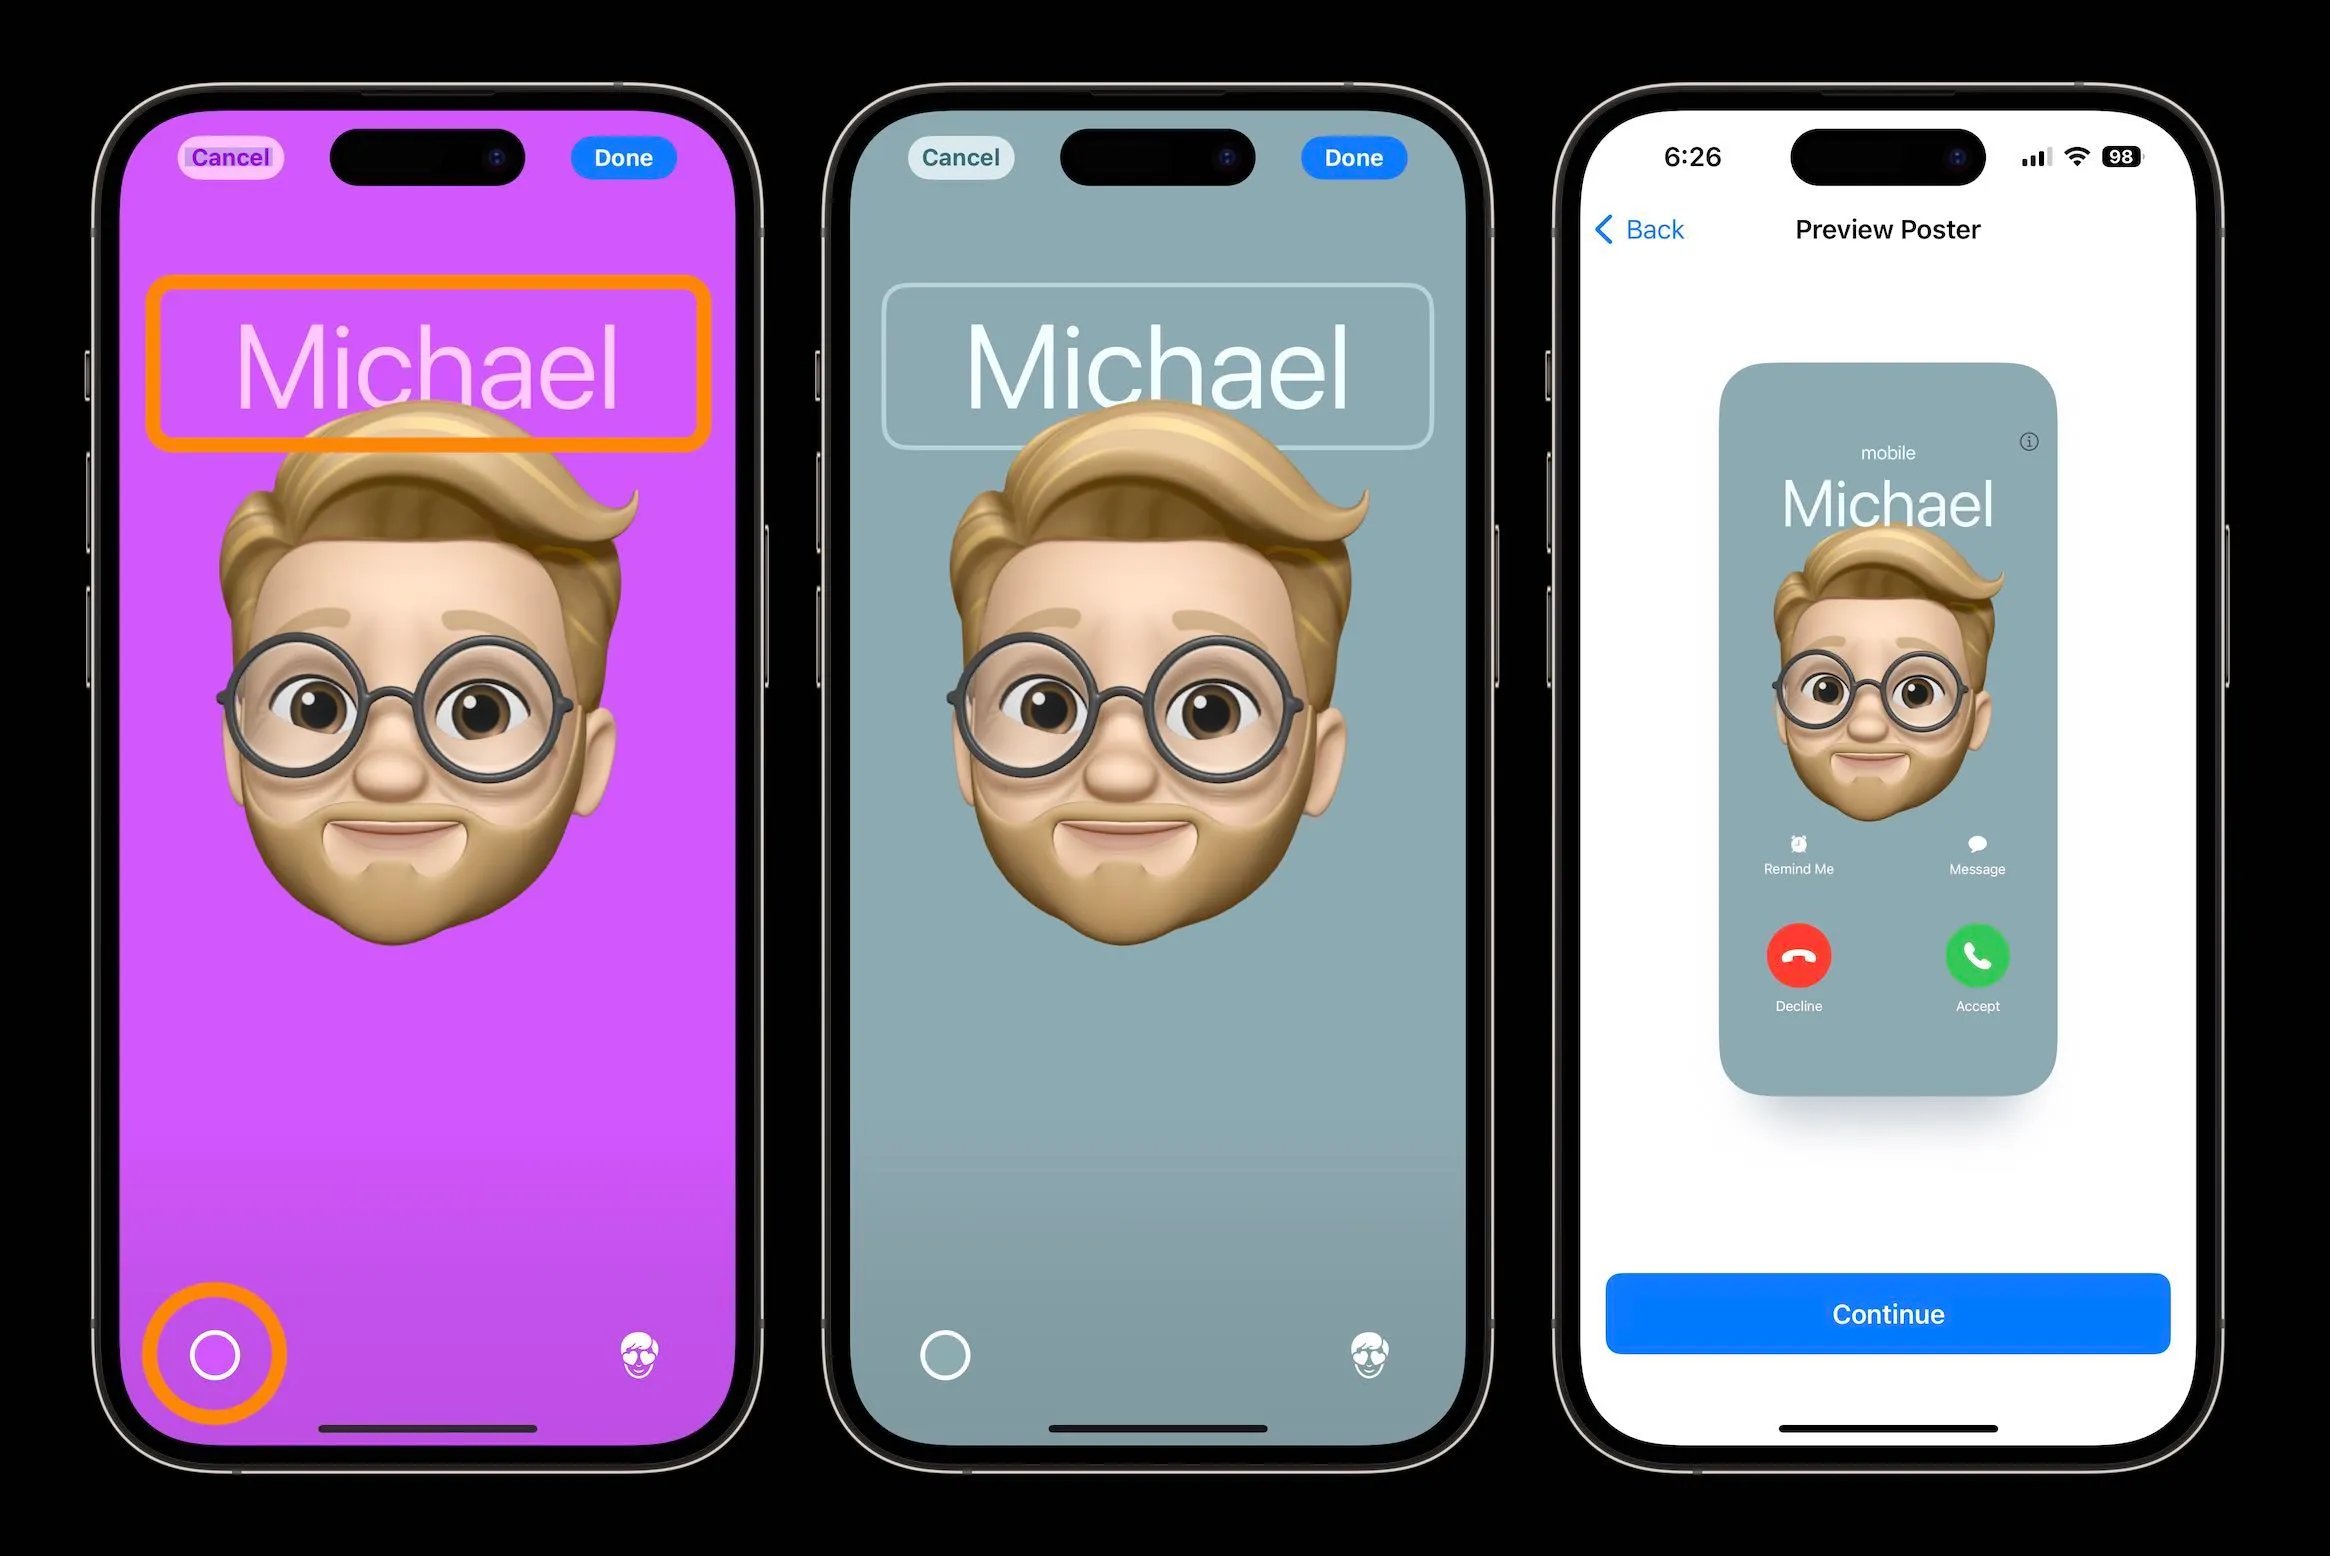
- Enter your name: Begin by entering your name into the designated field. You can choose to use your full name or just your first name, depending on your preference.
- Add your phone number: Input your phone number, ensuring that it is accurate and up-to-date. Remember to include the appropriate country code if necessary.
- Include your email address: Provide your email address so that people can reach out to you electronically. Double-check for any typos or errors to ensure accurate communication.
- Input your social media handles: If you’re comfortable sharing your social media profiles, such as Instagram, Twitter, or LinkedIn, enter them in the designated fields. This allows people to connect with you through various platforms.
- Include your website or blog: If you have a personal website or blog, include the URL so that interested individuals can explore more about you and your work.
Remember, it’s important to review all the contact information you enter to ensure its accuracy. Double-check for any errors or misspellings before proceeding to the next step.
Next, let’s move on to Step 3, where we will learn how to edit the background and colors of your contact poster to make it even more visually appealing.
Step 3: Edit the Background and Colors
One of the key aspects of customizing someone else’s contact poster on your iPhone is editing the background and colors. This step allows you to add a personal touch and make the poster truly your own. Here’s how you can do it:
1. Choose a Background: Start by selecting a background image or color that complements your style or the intended purpose of the poster. You can choose from a variety of pre-existing options or even add your own image from your iPhone’s camera roll.
2. Adjust the Background: Once you’ve selected a background, you can fine-tune its appearance. You may want to adjust the brightness, contrast, or saturation to make the background stand out or create a more subtle effect. Experiment with different settings until you achieve the desired result.
3. Customize Colors: In addition to the background, you can also customize the colors of the contact details and other elements on the poster. This allows you to match the colors to your preferences or to create a visually cohesive design. You can choose from a wide range of color palettes or even create your own custom colors.
4. Apply Themes: Many contact poster customization apps offer pre-designed themes that can instantly change the overall look and feel of the poster. Themes can include unique backgrounds, fonts, and color schemes that are professionally curated to achieve a specific aesthetic or purpose.
5. Use Gradient Effects: To add visual interest to the poster, you can apply gradient effects to the background or specific elements. Gradient effects create a smooth transition between two or more colors, giving your poster a modern and stylish look.
6. Experiment and Preview: Don’t be afraid to experiment with different backgrounds and color combinations. Most customization apps allow you to preview your changes in real-time, so you can immediately see how each modification affects the overall appearance of the poster. This gives you the freedom to make adjustments until you are satisfied with the final result.
By editing the background and colors of the contact poster, you can transform a template into a unique and personalized creation. It allows you to showcase your individual style and preferences, making the poster truly stand out. So go ahead, get creative, and make your contact poster one-of-a-kind.
Step 4: Add personal touches and decorations
Once you have selected a contact poster template and customized the contact information, it’s time to add your personal touches and decorations to make it truly unique. This step allows you to express your creativity and make the poster reflect your style and personality.
Here are some ideas to help you add personal touches and decorations to your contact poster:
- Choose a font: Select a font that represents your style and complements the overall design of the poster. Whether you prefer something elegant, funky, or bold, the font can greatly enhance the visual appeal of the poster.
- Add images or icons: Consider adding images or icons that align with your personal interests or represent your profession or hobbies. If you’re a nature lover, you can include images of flowers or landscapes. If you enjoy sports, you can add icons related to your favorite sport.
- Use colors strategically: Experiment with different colors to make certain elements of the poster stand out. You can use contrasting colors to highlight the contact information or create a color scheme that matches your personal branding.
- Add decorative elements: Spruce up the poster by adding decorative elements such as borders, frames, or patterns. These can add visual interest and make the poster more appealing to the eye.
- Include a personal message: Customize the poster further by including a personal message or quote that resonates with you. This can serve as an additional way to leave a lasting impression on the recipient.
Remember, the goal is to make the contact poster unique and reflect your individuality. Don’t be afraid to experiment and have fun with different design elements. The more personal touches and decorations you add, the more memorable and impactful the poster will be.
Step 5: Save and share the customized contact poster
Once you have personalized and perfected your contact poster, it’s time to save and share your creation. Follow these simple steps to ensure that your customized contact poster reaches as many people as possible.
1. Tap the “Save” button: Look for the save icon, usually represented by a floppy disk or a cloud with an arrow pointing down. Tap on it to save your customized contact poster to your device’s photo library.
2. Choose your sharing method: There are multiple ways to share your contact poster with others. Here are a few common methods:
- Social Media: Tap the share icon (typically an arrow pointing out of a box) and select your preferred social media platform. Add a caption or message if desired, and then post it for your friends and followers to see.
- Messaging Apps: Open your favorite messaging app and start a new conversation with the person or group you want to share the contact poster with. Tap the attachment icon (usually a paperclip) and select the contact poster from your photo library. Send the message and wait for the reaction!
- Email: If you prefer to share your contact poster via email, you can attach the saved image directly to your message. Compose your email, attach the contact poster file, add any additional information or comments, and hit send.
3. Print and display: If you want to go old-school, you can also print out your customized contact poster. Transfer the image file to your computer, open it, and then print it out on a sheet of paper or even on a sticker sheet. Finally, find a prominent place to display your poster, such as a bulletin board, office cubicle, or even on the fridge at home.
4. Update regularly: Keep in mind that contact information might change over time. Make it a habit to update and reprint your contact poster whenever necessary to ensure that you always have the most current information available.
By following these steps, you can easily save and share your customized contact poster with others. Whether it’s for professional networking, personal use, or as a creative way to stay connected, your contact poster is sure to make a lasting impression.
Customizing someone else’s contact poster on your iPhone can be a fun and creative way to personalize your device and showcase your individual style. With the iOS 17 update, you have access to a wide range of customization options, allowing you to modify the appearance and layout of contact posters to your liking. Whether you prefer to add a unique theme, change the colors, or include personalized graphics, the possibilities are endless.
By following the steps outlined in this article, you’ll be able to transform a generic contact poster into a personalized masterpiece that reflects your personality and preferences. So go ahead, unleash your creativity, and make your contacts stand out on your iPhone with a custom contact poster. With just a few taps and tweaks, you can turn your iPhone into a true representation of your style and taste.
FAQs
1. Can I customize someone else’s contact poster on my iPhone (iOS 17)?
2. Is it legal to customize someone else’s contact poster without their permission?
3. Can I transfer the customized contact poster to another iPhone?
4. What should I do if I want to revert back to the original contact poster?
5. Can I share the customized contact poster with others?