
Importing photos from your iPhone to a Windows 11 or Windows 10 PC can be a quick and convenient way to transfer your treasured memories. Whether you want to free up space on your iPhone or simply want to have a backup of your photos on your computer, there are several solutions available to make the process seamless.
In this article, we will explore four different methods that you can use to import photos from your iPhone to your Windows 11 or Windows 10 PC. From using the native Windows Photos app to third-party software and cloud services, we will cover a range of options to suit your preferences.
Whether you are a tech-savvy user or a beginner, we have you covered with step-by-step instructions and helpful tips to ensure a successful transfer of your photos. So, let’s dive in and discover how you can easily import your iPhone photos to your Windows PC.
Inside This Article
- Solution 1: Using File Explorer
- Solution 2: Using Windows Photos App
- Solution 3: Using iCloud for Windows
- Solution 4: Using Third-Party Software
- Conclusion
- FAQs
Solution 1: Using File Explorer
When it comes to importing photos from your iPhone to Windows 11/10, one of the simplest and most straightforward methods is using File Explorer. This built-in file management tool on Windows allows you to easily access and transfer files between devices.
To get started, follow these steps:
- Connect your iPhone to your computer using a USB cable.
- Unlock your iPhone and trust the computer if prompted.
- On your Windows PC, press the Windows key + E to open File Explorer.
- Under “This PC” or “My Computer,” you should see your iPhone listed as a connected device. Click on it to access the device’s storage.
- Navigate to the “DCIM” folder, which stands for “Digital Camera Images.” This folder is where your iPhone stores all the photos and videos you capture.
- You can now select the photos you want to import by either dragging and dropping them to a desired folder on your computer or by copying and pasting them.
It’s worth noting that depending on the number and size of the photos you’re importing, the process might take some time. Additionally, make sure you have enough storage space on your computer to accommodate the imported photos.
Using File Explorer is a convenient option because it doesn’t require any additional software or applications. It gives you direct access to your iPhone’s storage, allowing you to manage and transfer your photos easily.
Solution 2: Using Windows Photos App
If you’re looking for a simple and integrated solution to import photos from your iPhone to a Windows 11 or Windows 10 PC, the Windows Photos app is a great option. This app comes pre-installed on most Windows systems and offers a convenient way to manage and transfer your photos.
The Windows Photos app utilizes the built-in capability of Windows to recognize and import photos from connected devices such as your iPhone. To import photos using this method, follow these steps:
- Connect your iPhone to your Windows PC using a USB cable.
- On your PC, open the Windows Photos app. You can find it by searching for “Photos” in the Start menu.
- In the Photos app, click on “Import” located at the top-right corner of the window. The app will automatically detect your connected iPhone.
- Select the photos you want to import by clicking on them, or if you want to import all the photos, click on “Import all new items.”
- Choose a destination folder on your PC where you want to save the imported photos.
- Click on “Import” to start the transfer process. The Photos app will display a progress bar to keep you updated on the import progress.
- Once the import is complete, you can access your imported photos in the destination folder on your PC.
Using the Windows Photos app to import photos from your iPhone to your Windows PC is a straightforward and efficient method. It offers a seamless experience and allows you to easily organize and manage your photos within the app.
However, keep in mind that the Windows Photos app may not offer as extensive editing and organizational features as some third-party software. If you require more advanced photo editing or organization capabilities, you might want to consider using other options, such as iCloud for Windows or third-party software.
Solution 3: Using iCloud for Windows
If you’re an iPhone user and want a seamless way to import your photos to a Windows 11/10 computer, using iCloud for Windows is a fantastic option. iCloud is Apple’s cloud storage service, and with the iCloud for Windows application, you can easily sync and access your photos across multiple devices.
Here’s a step-by-step guide on how to import photos from iPhone to Windows 11/10 using iCloud for Windows:
- Install iCloud for Windows: First, ensure you have the iCloud for Windows application installed on your computer. If not, download it from the official Apple website and follow the installation instructions.
- Sign in to iCloud: Open the iCloud for Windows application, and sign in using your Apple ID and password.
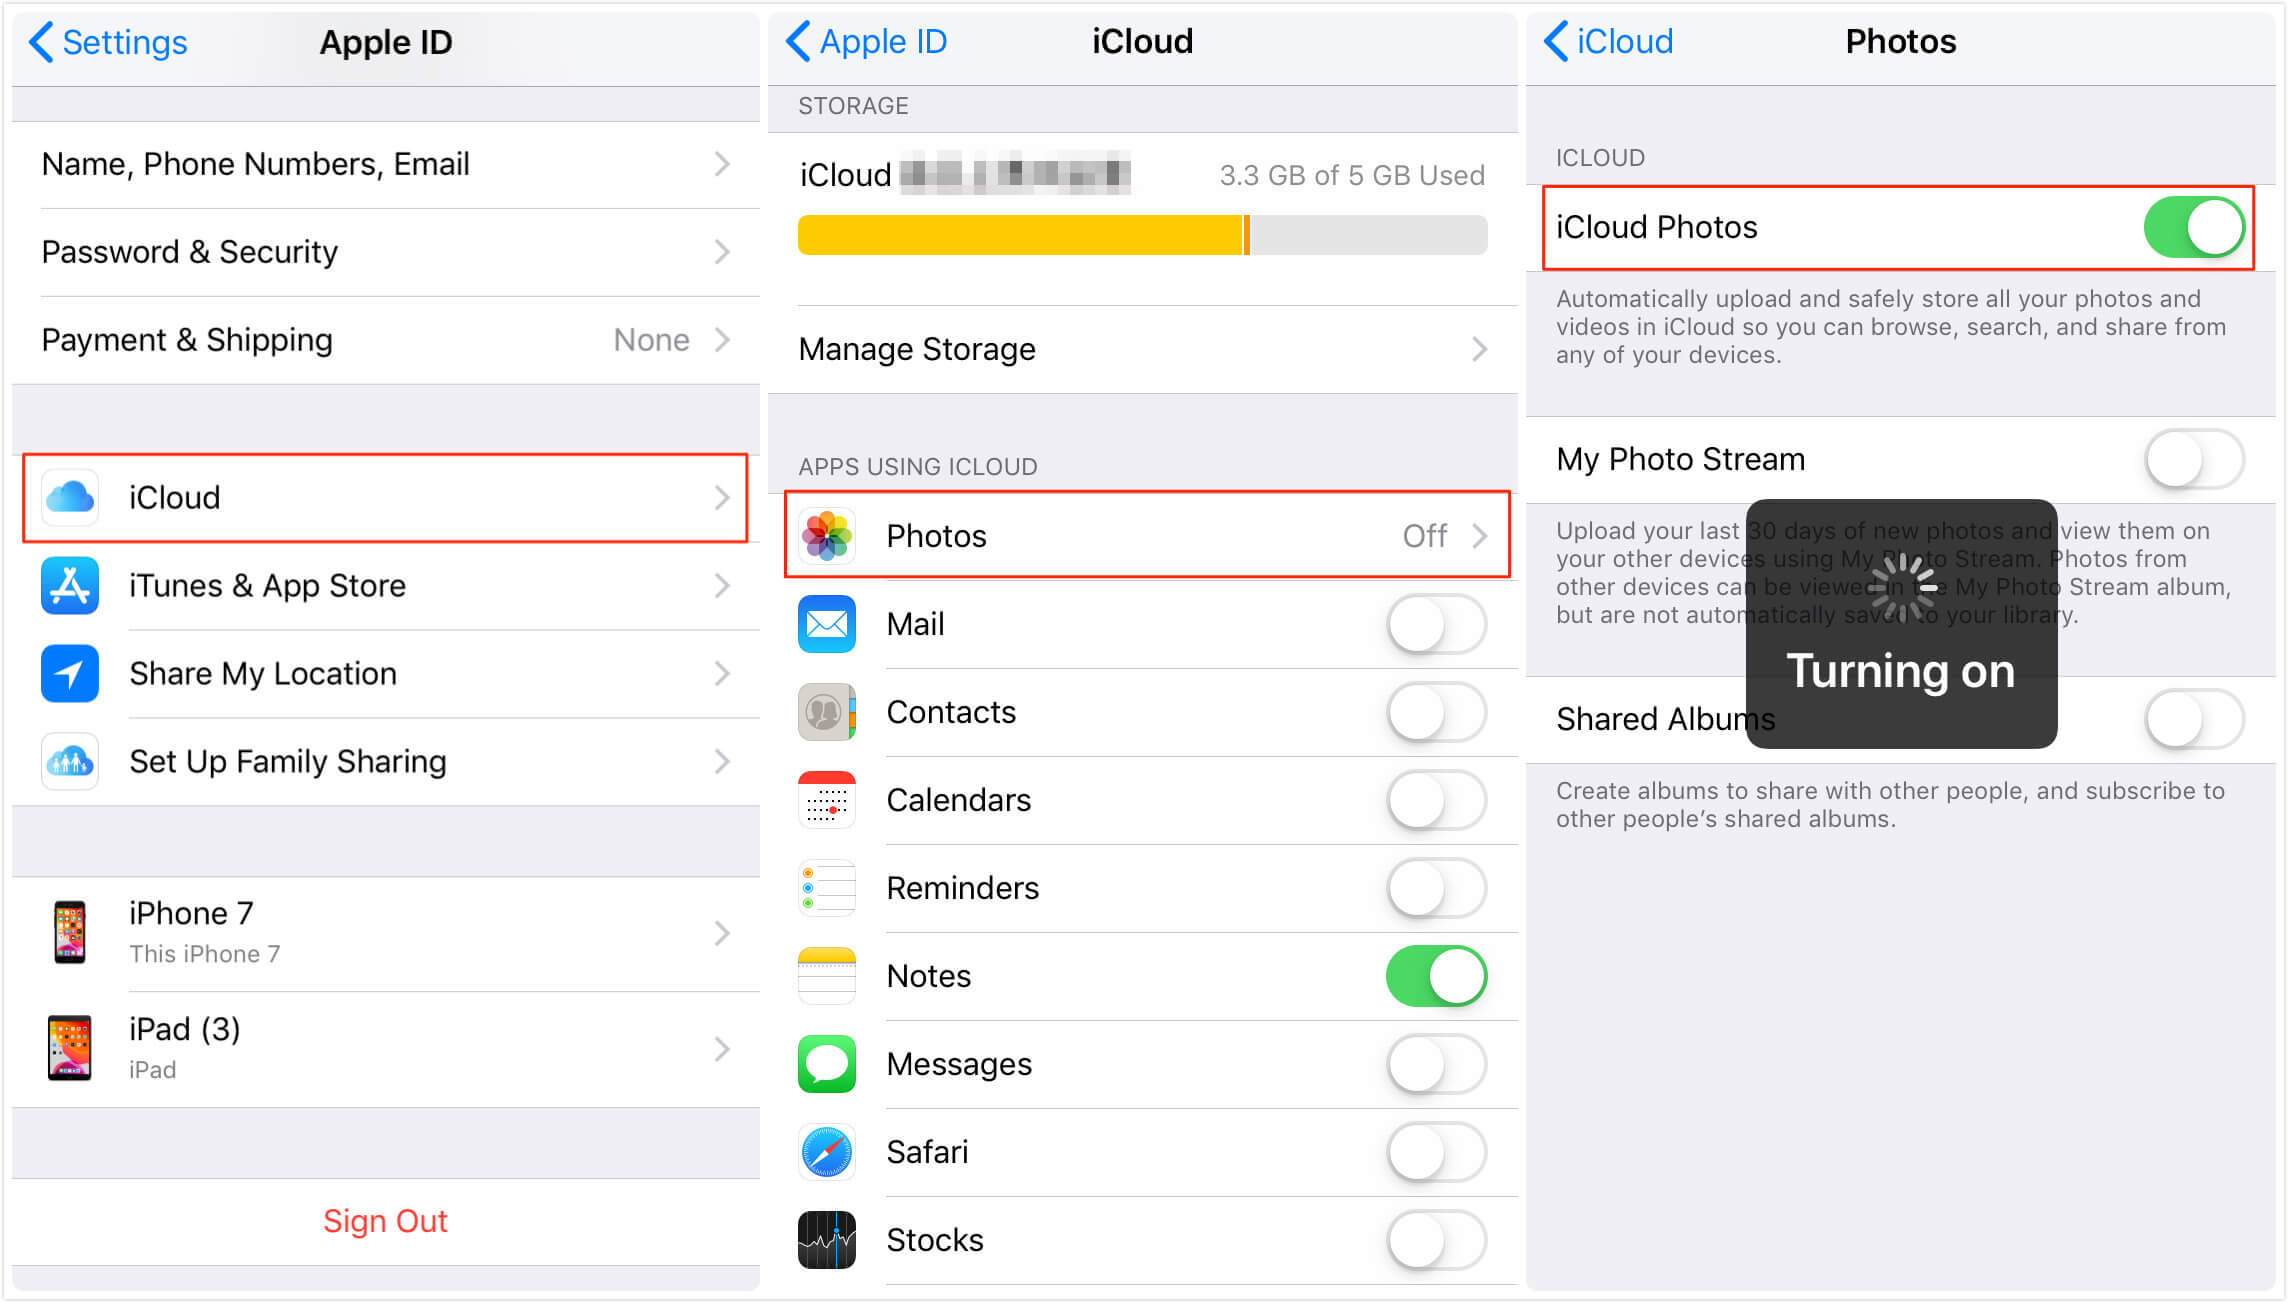
- Select Photos: In the iCloud for Windows application, you’ll see various options of content to sync. Make sure the “Photos” option is selected.
- Choose Download Photos: Under the “Photos Options” section, click on the “Options” button next to “Photos.” Here, you can choose to download all your photos or select specific albums to sync with your computer.
- Customize Download Location: By default, iCloud for Windows saves your photos to the default Pictures folder. If you want to select a different location, click on the “Change” button and browse to the desired folder.
- Start Downloading: Once you’ve chosen the download options and location, click on the “Apply” button to start the synchronization process. iCloud for Windows will begin downloading your selected photos to your computer.
- Access Your Photos: Once the download is complete, you can access your imported photos by navigating to the designated download location on your computer. They will be organized in folders based on the albums or date.
Using iCloud for Windows provides a convenient way to import your iPhone photos to your Windows 11/10 computer. It ensures that your photos are safely stored on iCloud and easily accessible across all your devices.
However, keep in mind that iCloud for Windows has a limited amount of free storage. If you exceed your storage limit, you may need to upgrade your iCloud plan or consider alternative methods for transferring your photos.
Now that you know how to use iCloud for Windows to import your iPhone photos, you can seamlessly transfer your cherished memories to your Windows computer with just a few clicks!
Solution 4: Using Third-Party Software
If you’re looking for an alternative method to import photos from your iPhone to Windows 11/10, using third-party software can be a great option. There are several software programs available that offer user-friendly interfaces and additional features for managing and transferring your iPhone photos.
One popular choice is Syncios Mobile Manager, which enables you to transfer and manage various types of data, including photos, between your iPhone and Windows computer. With Syncios, you can easily import photos from your iPhone to your Windows 11/10 PC with just a few simple steps.
Here’s how to use Syncios to import photos:
- Download and install the Syncios Mobile Manager software on your Windows computer.
- Connect your iPhone to your computer using a USB cable.
- Launch Syncios and wait for it to detect your device.
- Click on the “Photos” tab in Syncios, and you will be able to see all the albums and photos on your iPhone.
- Select the photos you want to import by clicking on the checkboxes next to each photo.
- Click on the “Export” button and choose the destination folder on your Windows 11/10 PC where you want to save the imported photos.
- Syncios will start transferring the selected photos from your iPhone to your Windows computer.
- Once the transfer is complete, you can find the imported photos in the destination folder you selected.
Another popular option is iMazing, which offers a comprehensive set of tools for managing iPhone data. With iMazing, you can easily import photos from your iPhone to your Windows computer and even transfer them directly to specific apps or folders.
To import photos using iMazing, follow these steps:
- Download and install iMazing on your Windows 11/10 computer.
- Connect your iPhone to your computer using a USB cable.
- Launch iMazing and wait for it to detect your device.
- Select your device in iMazing’s sidebar, then click on the “Photos” tab.
- You can now browse and select the photos you want to import from your iPhone.
- Click on the “Export to Folder” button and choose the destination folder on your Windows computer to save the imported photos.
- iMazing will start transferring the selected photos from your iPhone to your Windows computer.
- Once the transfer is complete, you can find the imported photos in the destination folder you selected.
Using third-party software like Syncios Mobile Manager or iMazing provides you with more flexibility and control over the photo import process. They often offer additional features like photo editing, organizing albums, and managing other types of data on your iPhone. So, if you’re looking for a more advanced and customizable solution, consider using third-party software to import photos from your iPhone to Windows 11/10.
Conclusion
Importing photos from your iPhone to Windows 11/10 is an essential task for anyone who wants to transfer and backup their precious memories. Fortunately, there are multiple solutions available to make this process a breeze. Whether you prefer using the built-in Photos app, iCloud Photos, File Explorer, or a third-party software like iMobie AnyTrans, you have options to choose from based on your needs and preferences.
By following the step-by-step instructions provided in this guide, you can easily import photos from your iPhone to your Windows PC. Remember to keep your software and devices updated for the best compatibility and performance. With a few clicks, you can ensure that your precious memories are safely stored on your computer, ready to be accessed and cherished whenever you want.
So, don’t let the fear of losing your iPhone photos hold you back. Start exploring your options today, and enjoy the freedom of managing your photos across different platforms effortlessly.
FAQs
1. Can I import photos from my iPhone to Windows 11/10 without using any special software?
Absolutely! Windows 11/10 has built-in capabilities to import photos from your iPhone. You can simply connect your iPhone to your computer using a USB cable and follow a few easy steps to transfer your photos.
2. What if I want to transfer photos wirelessly from my iPhone to Windows 11/10?
If you prefer a wireless transfer, you can use the iCloud Photos feature. First, make sure you have iCloud installed on your Windows 11/10 PC. Then, enable the iCloud Photos option on your iPhone. Your photos will automatically sync with your PC, allowing you to access them wirelessly.
3. Are there any third-party apps that can help with importing photos from iPhone to Windows 11/10?
Yes, there are several third-party apps available that can simplify the process of importing photos from your iPhone to Windows 11/10. Apps like Google Photos, Dropbox, and Adobe Lightroom offer easy-to-use interfaces and seamless photo syncing capabilities.
4. Can I select specific photos to import from my iPhone to Windows 11/10?
Absolutely! When connected to your computer, Windows 11/10’s Photos app allows you to select specific photos or entire albums to import. This gives you full control over which photos you want to transfer to your PC.
5. What if I want to preserve the original quality of my photos when importing them to Windows 11/10?
To preserve the original quality of your photos, it’s recommended to use the native Photos app on Windows 11/10. This app ensures that the photos are imported in their original resolution and format. However, if you choose to use a third-party app, make sure to check their settings to ensure the best quality transfer.