
Do you ever find yourself recording a video on your iPhone, only to realize later that it’s oriented in the wrong direction? It can be frustrating when you try to watch the video, only to have to tilt your head or rotate your device to see it properly. But fear not, because the iPhone Photos app has a solution – you can easily rotate your videos with just a few simple steps.
In this article, we will walk you through the process of rotating a video using the iPhone Photos app. Whether you want to rotate a video you just recorded, or you have an existing video that needs some adjustment, we’ve got you covered. By the end, you’ll be able to effortlessly rotate your videos and enjoy them in their correct orientation.
Inside This Article
- How to Rotate a Video on iPhone Photos App (2023)
- Opening the Photos App
- Selecting the Video to Rotate
- Rotating the Video
- Saving the Rotated Video
- Conclusion
- FAQs
How to Rotate a Video on iPhone Photos App (2023)
Rotating a video on your iPhone can be a useful feature when you find that the orientation of your recorded video is not correct. Fortunately, the Photos app on your iPhone provides a simple and intuitive way to rotate your videos. In this article, we will guide you through the process of rotating a video on the iPhone Photos app so that you can easily adjust and align your videos to the correct orientation.
To begin, open the Photos app on your iPhone. This app is pre-installed on all iPhones and can be easily accessed from your home screen. Once you have located the app, tap on the icon to open it. The Photos app will display all the photos and videos stored on your device.
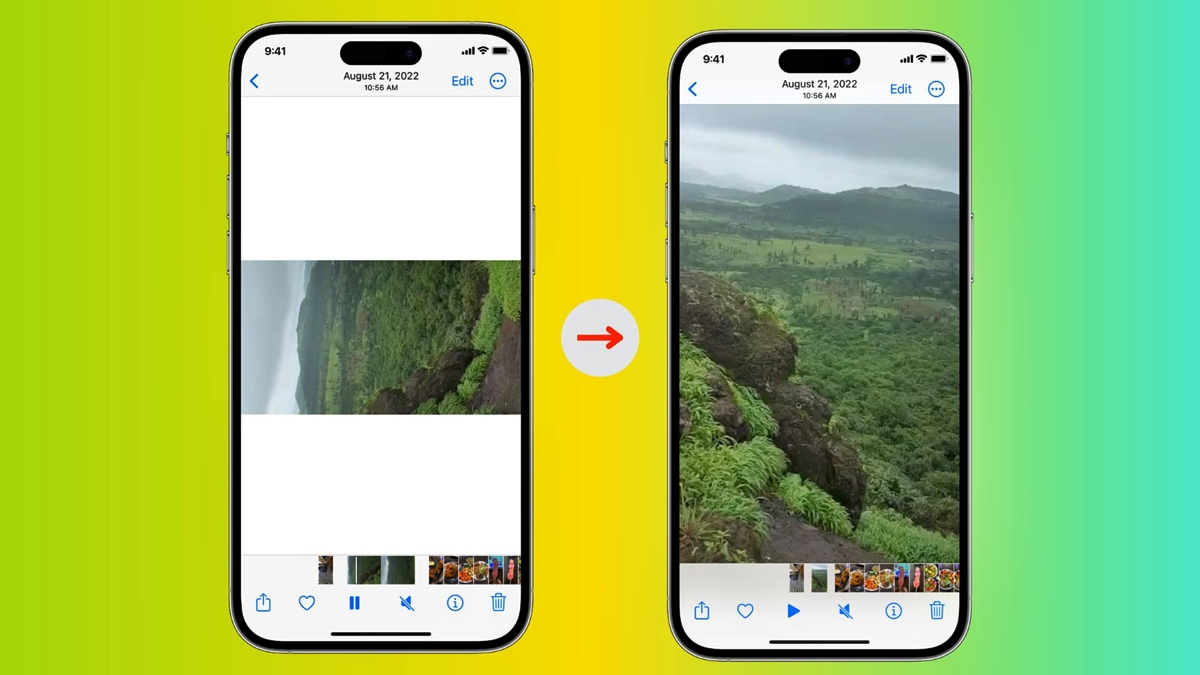
Next, navigate to the video that you want to rotate. You can do this by either scrolling through your photo library or using the search feature in the app. Once you have found the video, tap on it to open it in full screen.
Now that you have the video open, look for the editing tools at the bottom of the screen. Tap on the “Edit” button, which is represented by a series of sliders. The editing screen will appear, giving you access to several different editing options.
Locate the rotation tool, which is represented by a set of arrows forming a circle. Tap on this tool to activate it. Once activated, you will be able to rotate the video by simply using a two-finger gesture. Place two fingers on the video and rotate them in the desired direction to adjust the orientation of the video.
Take your time to rotate the video until it aligns with the correct orientation. You can rotate the video clockwise or counterclockwise, depending on your preference and the desired result. As you rotate the video, you can preview the changes in real-time to ensure that you are getting the desired outcome.
Once you are satisfied with the rotation, tap on the “Done” button located in the bottom-right corner of the screen. This will apply the rotation to the video and return you to the main editing screen.
Finally, to save the rotated video, tap on the “Save Video” button in the bottom-right corner of the screen. The Photos app will process the changes and save the rotated video to your camera roll. You can now access and share the rotated video just like any other video on your iPhone.
Opening the Photos App
To begin the process of rotating a video on the iPhone Photos app, you’ll first need to open the app on your device. The Photos app is a pre-installed application that comes as part of the iOS operating system, providing you with easy access to all the photos and videos on your iPhone.
To open the Photos app, simply locate the icon on your home screen, which resembles a colorful flower. Tap on the icon to launch the app. If you can’t find it on your home screen, you can also swipe down on any screen to access the search function, and type in “Photos” to locate and open the app.
Once you tap on the app icon or open it through the search function, the Photos app will open, displaying your photo and video library. Here, you can find all the media files stored on your iPhone, organized by date and location.
With the Photos app open, you are now ready to proceed to the next step of selecting the specific video that you want to rotate.
Selecting the Video to Rotate
Once you have opened the Photos app on your iPhone, it’s time to locate and select the video you want to rotate. Follow these simple steps:
- Tap on the “Albums” tab at the bottom of the screen to access your albums.
- Scroll through the list of albums and tap on the one where your desired video is located. It could be the “Videos” album, or you may need to navigate to a specific album where the video is stored.
- Browse through the videos in the album to find the one you want to rotate. You can swipe left or right to move between videos.
- Once you have found the video, tap on it to open it in the video player.
In case you are unable to locate the video you want to rotate, make sure you are looking in the correct album or use the search feature at the top of the screen to search for the specific video by name or keywords.
Rotating the Video
Now that you have selected the video you want to rotate in the Photos app on your iPhone, it’s time to perform the actual rotation. The process is straightforward and can be done with just a few simple steps.
1. Once you have the video open, tap on the “Edit” button located at the top-right corner of the screen. This will take you to the editing interface.
2. At the bottom of the editing interface, you will find a set of tools. Swipe left until you see the “Crop & Rotate” option. Tap on it to access the rotation controls.
3. To rotate the video, use your fingers to perform a rotating motion on the video preview. You can rotate it left or right, depending on the desired orientation. As you rotate the video, the changes will be reflected in real-time on the preview screen.
4. Keep rotating the video until you achieve the desired orientation or angle. You can rotate it multiple times to get the perfect angle.
5. If you want to reset the video to its original orientation, simply tap on the “Reset” button located at the bottom-right corner of the screen.
6. Once you are satisfied with the rotation, tap on the “Done” button at the bottom-right corner of the screen to save the changes.
7. After tapping “Done,” the Photos app will process the video and save the rotated version. This may take a few moments, depending on the length and size of the video.
And that’s it! You have successfully rotated the video using the Photos app on your iPhone. Now you can enjoy watching the video in the correct orientation or share it with others without any viewing issues.
Saving the Rotated Video
Once you have successfully rotated the video to your desired orientation using the Photos app on your iPhone, the next step is to save the rotated video. Follow these simple steps to save the changes and preserve the rotated video:
Step 1: After rotating the video, tap the “Done” button located at the bottom right corner of the screen. This will take you back to the video editing interface.
Step 2: At the bottom left corner of the screen, you will see the option “Save as New Clip.” Tap on this option to create a new copy of the video with your desired rotation.
Step 3: A pop-up dialog will appear, allowing you to give a name to your newly rotated video. Type in a suitable name for the video and tap “Save” to proceed.
Step 4: The Photos app will now save the rotated video as a separate file in your library. This ensures that your original video remains intact while the rotated version is readily accessible.
Step 5: Once the video is saved, you can find it in your library under the “Albums” tab. It will be categorized under the “Videos” folder or any other custom folder you have created.
Step 6: You can now freely share, upload, or view the rotated video without worrying about its orientation. The saved copy will maintain the rotation you applied throughout all platforms and devices.
Remember, by saving the rotated video as a new clip, you can always go back to the original video and repeat the process if you need to rotate it differently in the future.
After exploring the various methods to rotate a video on the iPhone Photos app, it is clear that this built-in feature offers a convenient solution for making adjustments to your videos. Whether you want to correct the orientation or simply add a creative twist, the Photos app provides a user-friendly interface with intuitive controls.
By following the step-by-step instructions, you can easily rotate your videos with just a few taps. This eliminates the need for third-party apps or complex editing software, saving you time and ensuring that your videos are ready to be shared or enjoyed without any hassle.
Don’t let a sideways or upside-down video ruin your viewing experience. Take advantage of the iPhone Photos app’s rotation functionality to bring your videos to life. With just a little editing, you can ensure that your videos are correctly oriented and enhance the overall quality of your content.
So, grab your iPhone, open the Photos app, and start rotating your videos like a pro. Enjoy the seamless experience of capturing, editing, and sharing your special moments with the world!
FAQs
1. Can I rotate a video using the Photos app on iPhone?
Yes, you can easily rotate a video using the Photos app on your iPhone. The Photos app provides basic editing tools to enhance your videos, including the ability to rotate them.
2. How do I rotate a video on the iPhone Photos app?
To rotate a video on the iPhone Photos app, follow these steps:
- Open the Photos app on your iPhone.
- Select the video you want to rotate.
- Tap on the “Edit” option on the top right corner of the screen.
- Locate the rotation tool, which looks like a square with an arrow inside, and tap on it.
- Each tap will rotate the video by 90 degrees. Keep tapping until the video is rotated to your desired orientation.
- Tap on “Done” to save the rotated video.
3. Will rotating a video affect its quality?
No, rotating a video using the Photos app on your iPhone will not affect its quality. The rotation process does not involve any compression or loss of quality. The app simply adjusts the orientation of the video without degrading its resolution or clarity.
4. Can I rotate a video to any desired angle on the iPhone Photos app?
The rotation tool in the iPhone Photos app allows you to rotate a video in 90-degree increments. You can rotate it 90 degrees clockwise or counterclockwise, but you cannot rotate it to any arbitrary angle. However, these 90-degree rotations should be sufficient to achieve your desired orientation.
5. Can I undo the rotation of a video in the iPhone Photos app?
Yes, you can undo the rotation of a video in the iPhone Photos app. After rotating the video, simply tap on the “Revert” option that appears when you are in the editing mode. This will restore the video to its original orientation before you made any changes.