
If you’ve ever dropped your Android phone and experienced the heart-stopping moment of staring at a cracked or shattered screen, you know the frustration and inconvenience it can bring. A broken screen not only affects the device’s aesthetics but also hampers its functionality, making it difficult to use or completely unresponsive. However, there’s no need to panic just yet. In this article, we’ll explore various methods to fix a broken screen on an Android phone, ranging from DIY solutions to professional repairs. Whether you have a hairline crack or a fully shattered screen, we’ve got you covered with tips, tricks, and recommendations. So, let’s dive in and discover how you can restore your Android phone’s screen to its former glory!
Inside This Article
- Assessing the Damage
- Backing Up Your Data
- Replacing the Screen Yourself
- Seeking Professional Help
- Conclusion
- FAQs
Assessing the Damage
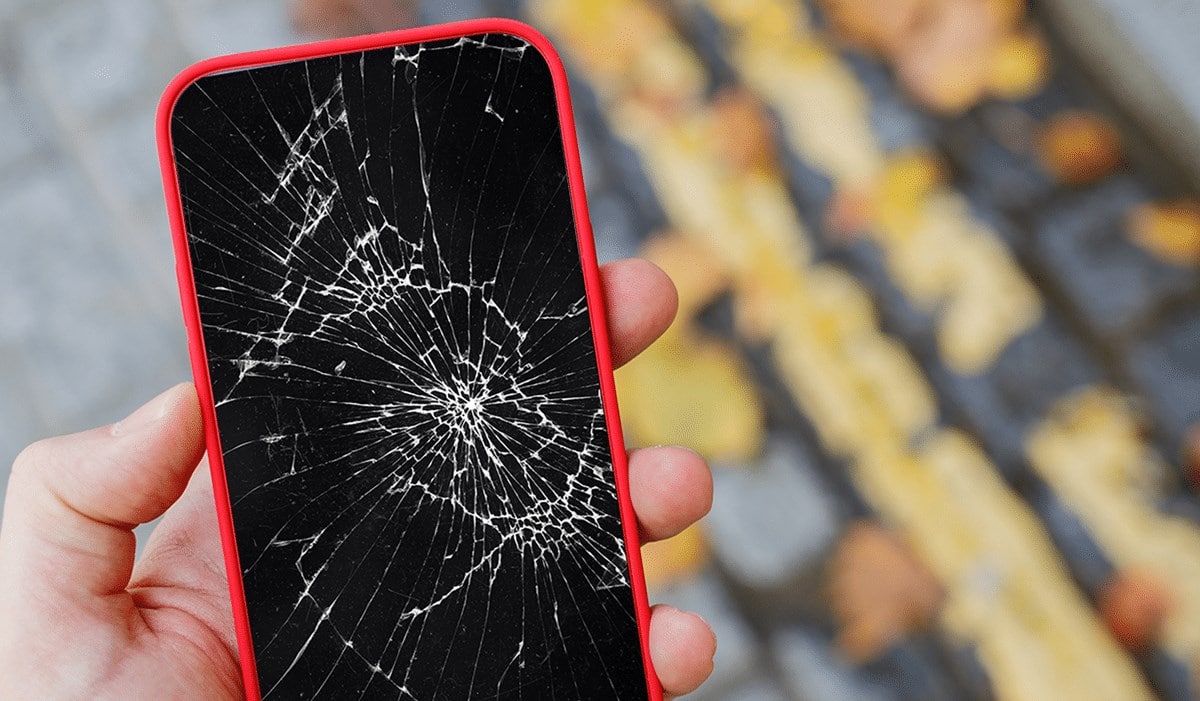
Accidents happen, and one of the most common mishaps that occur with smartphones is a broken screen. Whether it’s a small crack or a completely shattered display, assessing the damage is the first step in determining the best course of action to fix your Android phone.
Start by carefully examining your phone’s screen. Look for any visible cracks or damage to the glass or LCD panel. Run your finger across the screen to check for any irregularities or raised areas. If the touch sensitivity is affected, take note of it as well.
Next, power on your phone. Check if the display is functioning properly. Look for any distorted or blacked-out areas on the screen. Pay attention to any strange colors or lines appearing that weren’t there before. These indicators can help you determine the severity of the damage.
If your screen remains black or unresponsive, it could be due to a more significant issue, such as damage to the internal components or a loose connection. In such cases, it’s advisable to seek professional help to avoid further damage.
It’s important to note that even if the damage appears minimal, it can worsen over time. A small crack can spread across the screen or affect the touch sensitivity of your device. Therefore, it’s always recommended to address the issue sooner rather than later.
Assessing the damage is crucial in determining whether you can attempt a DIY repair or if professional assistance is required. It will also provide you with a clear understanding of the extent of the problem, enabling you to make an informed decision about the next steps to take.
Backing Up Your Data
When your Android phone’s screen is broken, one of the first steps you should take is to back up your data. This ensures that you don’t lose any important files or information during the repair process. Here are some steps you can follow to safely back up your data:
1. Connect to a Computer: Use a USB cable to connect your Android phone to a computer. Make sure the computer recognizes your device and allows you to access its files.
2. Enable USB Debugging: In order to access your phone’s files and back them up, you need to enable USB debugging. Go to the developer options settings on your phone, and enable USB debugging mode.
3. Copy Important Files: Once your phone is connected to the computer and USB debugging is enabled, you can start copying important files such as photos, videos, contacts, documents, and any other data you want to save. Simply navigate to the appropriate folders on your phone and copy the files to a designated folder on your computer.
4. Use Cloud Storage: Another option for backing up your data is to use cloud storage services like Google Drive or Dropbox. Install the respective app on your phone and upload your files to the cloud. This ensures that your data is safely stored online and can be accessed from any device.
5. Sync with Google Account: Make sure that your Android phone is synced with your Google account. This will automatically back up important data such as contacts, calendar events, app data, and more. You can check your sync settings in the Google Account section of your phone’s settings.
Backing up your data is crucial before attempting any screen repair on your Android phone. It ensures that even if something goes wrong during the repair process, you won’t lose any important files or data. Take the necessary steps to back up your data and proceed with confidence.
Replacing the Screen Yourself
Replacing the screen on your Android phone can be a cost-effective alternative to seeking professional help. While it may seem like a daunting task, with the right tools and a step-by-step guide, you can successfully replace the broken screen yourself. Here’s how:
1. Gather the necessary tools: Before you begin, make sure you have all the tools required for the job. This typically includes a replacement screen, a screwdriver set, a pry tool, adhesive strips, and a heat gun or hairdryer.
2. Disconnect the power source: Ensure that your Android phone is turned off and remove the battery, if possible. This will minimize the risk of electric shock and prevent any accidental damage.
3. Remove the back cover: Carefully pry off the back cover of your phone using a pry tool or your fingernail. Take your time and be gentle to avoid causing any additional damage.
4. Disconnect the cables: Once the back cover is off, locate the ribbon cables connecting the broken screen to the motherboard. Carefully detach these cables using a pry tool or tweezers, ensuring not to apply excessive force.
5. Remove the broken screen: Most screens are held in place with adhesive strips or screws. Carefully remove these to detach the broken screen from the phone’s frame. Take note of their placement as you will need to reattach them later.
6. Install the new screen: Take your replacement screen and align it with the frame of your phone. Carefully connect the ribbon cables to the corresponding connectors on the motherboard. Gently press the new screen into place and ensure it is properly secured.
7. Reattach the cables and components: Carefully reconnect the ribbon cables and secure them in place. Reinstall any screws or adhesive strips that were removed during the screen removal process. Make sure all the connections are secure and the new screen is properly aligned.
8. Test the new screen: Before fully reassembling your phone, connect the battery and power it on to test the new screen. Check for any abnormalities or malfunctions, such as dead pixels or touch sensitivity issues. If everything looks good, proceed to the next step.
9. Reassemble your Android phone: Once you are confident that the new screen is working as intended, carefully reattach the back cover. Press down firmly to ensure it is securely in place and that there are no gaps or loose parts.
10. Test again and enjoy your repaired phone: After reassembling your Android phone, power it on again and thoroughly test all its functions. If everything is functioning properly, congratulations! You have successfully replaced the broken screen on your Android phone.
Remember, the process of replacing the screen yourself requires patience and attention to detail. If you feel unsure or uncomfortable at any point, it’s always advisable to seek professional help to avoid further damage. However, with the right tools and careful execution, you can save money and feel accomplished by fixing your Android phone yourself.
Seeking Professional Help
If you feel uncomfortable or unsure about replacing the broken screen on your Android phone yourself, it’s always a good idea to seek professional help. There are skilled technicians who specialize in mobile phone repairs and can safely and efficiently replace the broken screen for you.
Here are some reasons why seeking professional help may be the best option:
- Expertise: Professional technicians have the knowledge and experience to handle various types of phone repairs, including screen replacements. They are trained to perform the job correctly and ensure that your phone functions properly after the repair.
- Quality Parts: Reputable repair shops use high-quality replacement screens that are sourced from reliable suppliers. This ensures that your phone’s screen will be replaced with a genuine and durable component.
- Warranty: Many professional repair services offer a warranty on their work. This means that if any issues arise with the replaced screen within a specified period of time, the repair will be covered at no additional cost to you.
- Time and Convenience: Taking your phone to a professional repair service saves you time and effort. They have the necessary tools and equipment to complete the screen replacement quickly and efficiently, allowing you to get your phone back in working condition without delay.
- Peace of Mind: When you entrust your broken phone to professionals, you can have peace of mind knowing that the repair will be done correctly. This eliminates the risk of causing further damage to your device if you were to attempt the repair yourself.
If you decide to seek professional help, it’s essential to research and choose a reputable repair service. Look for customer reviews, certifications, and warranties offered by the repair shop to ensure you are getting reliable service.
Remember, while seeking professional help may come at a cost, it is often the safest and most efficient way to fix a broken screen on your Android phone.
Conclusion
Dealing with a broken screen on your Android phone can be frustrating and inconvenient, but with the right knowledge, you can find solutions to fix the issue. Whether it’s a small crack or a completely shattered display, there are steps you can take to get your phone up and running again.
Start by assessing the damage and determining the severity of the issue. Then, consider your options, such as DIY repairs or seeking professional assistance. Remember to back up your data before attempting any fixes to avoid losing important information.
By following the steps outlined in this article, you can increase the chances of successfully repairing your broken screen. However, if all else fails, it may be time to consider replacing your device or investing in a new phone.
Remember, accidents happen, and a broken screen isn’t the end of the world. Stay informed, be proactive, and utilize the resources available to you to restore your Android phone to its former glory.
FAQs
1. Can a broken screen on an Android phone be fixed?
Yes, a broken screen on an Android phone can be fixed. There are professional repair services that specialize in screen replacements for Android phones. Alternatively, if you’re comfortable with DIY projects, you can purchase a replacement screen and follow online tutorials to replace it yourself.
2. How much does it cost to fix a broken screen on an Android phone?
The cost of fixing a broken screen on an Android phone can vary depending on the model of the phone and the repair service you choose. On average, screen repairs can range from $100 to $300. It’s best to contact a few repair services and get quotes to compare prices.
3. Is it worth fixing a broken screen on an Android phone?
Whether it’s worth fixing a broken screen on an Android phone depends on several factors. If the phone is relatively new or expensive, repairing the screen can be a cost-effective choice compared to buying a new phone. However, if the phone is older or not worth much, it might be more practical to invest in a new device.
4. Are there temporary fixes for a broken screen on an Android phone?
Yes, there are temporary fixes for a broken screen on an Android phone. If the touch functionality is still intact, you can enable a virtual on-screen keyboard to continue using the phone. Additionally, applying a screen protector or using clear tape can help prevent further damage and keep the broken pieces in place temporarily.
5. Can I still use my Android phone with a broken screen?
You can still use your Android phone with a broken screen, depending on the severity of the damage. If the touch functionality is not affected, you can navigate the device using other areas of the screen or connect a mouse via USB OTG. However, if the screen is completely unresponsive, it might be difficult to access and use the phone effectively.