
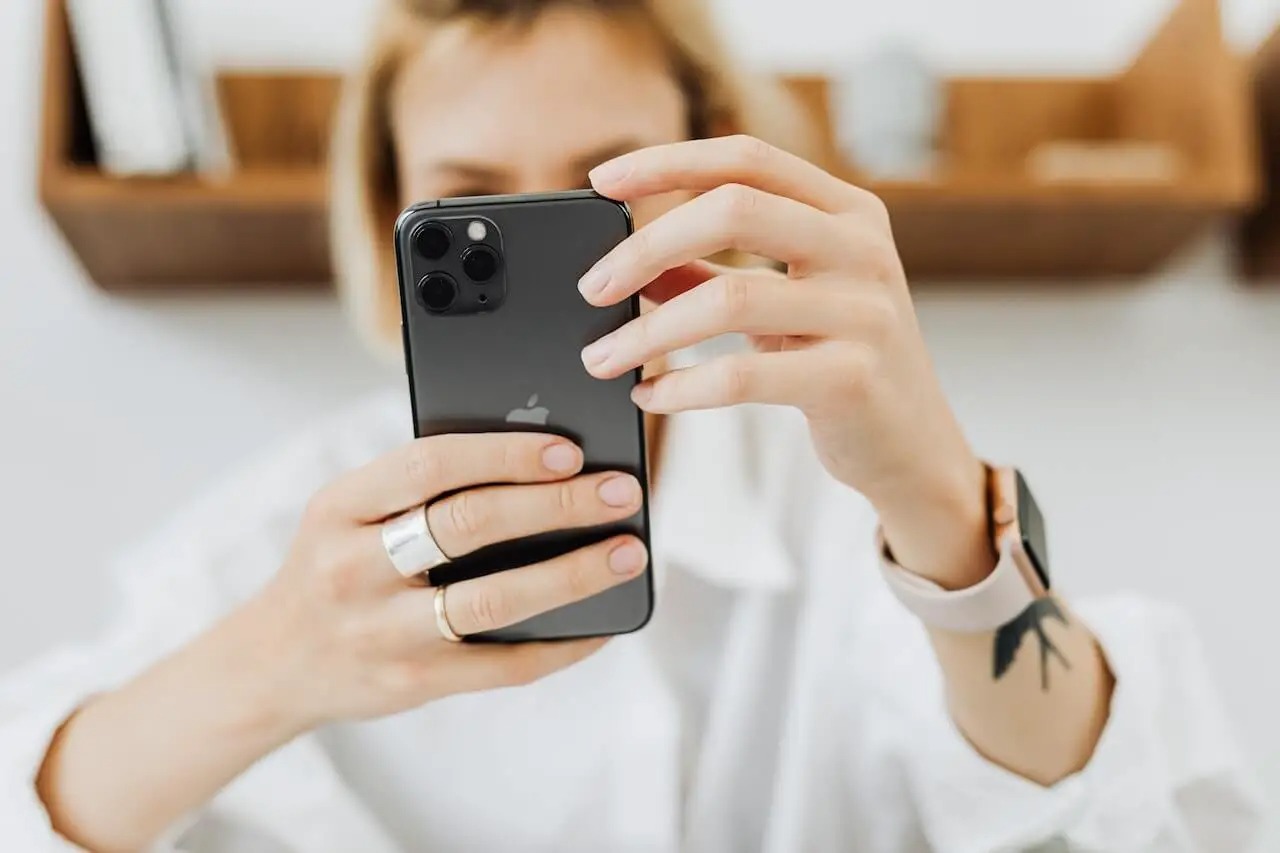
Are you ready for a new phone? Whether you’re looking for an upgrade or simply want to switch to a different device, knowing how to change your MetroPCS phone can be a game changer. As one of the leading mobile carriers in the United States, MetroPCS offers a wide range of smartphones to meet your needs. But before you jump right into the process, it’s important to understand the steps involved and make sure you have everything you need. In this article, we will guide you through the process of changing your MetroPCS phone, from selecting the right device to transferring your data and getting activated. Let’s dive in and discover the exciting world of new mobile phones!
Inside This Article
- Overview
- Step 1: Check Device Compatibility
- Step 2: Backup Your Data
- Step 3: Gather necessary information
- Step 4: Purchase a New Phone
- Step 5: Activate the new phone
- Step 6: Transfer your data
- Step 7: Test your new phone
- Step 8: Dispose of the old device properly
- Troubleshooting Tips
- Conclusion
- FAQs
Overview
Are you tired of your old Metropcs phone and looking to make a change? Whether you want the latest model, need better performance, or simply want a fresh look, switching your Metropcs phone is easier than you might think. This comprehensive guide will walk you through the step-by-step process of changing your Metropcs phone, ensuring a seamless transition and minimal disruption to your mobile experience.
From checking device compatibility to transferring your data, we will cover all the essential steps to help you switch to a new Metropcs phone effortlessly. So, let’s dive in and explore the exciting journey of upgrading your device!
Before we proceed, let’s clarify something important. Metropcs is a popular mobile carrier known for its affordable plans and reliable network. Whether you’re an existing Metropcs customer or eager to become one, this guide will assist you in navigating the process of changing your phone within the Metropcs network.
Step 1: Check Device Compatibility
Before making any changes to your MetroPCS phone, it’s essential to ensure that the new device you want to switch to is compatible with the MetroPCS network. Not all phones are compatible, so it’s crucial to check beforehand to avoid any issues.
Firstly, you should verify if the new phone supports the network bands that MetroPCS operates on. You can usually find this information on the manufacturer’s website or by contacting the device seller. MetroPCS uses GSM, CDMA, and LTE technologies, so make sure the phone you want to switch to is compatible with these networks.
Additionally, MetroPCS may have specific requirements for the devices that can be activated on their network. These requirements can vary based on factors such as the phone’s operating system and hardware specifications. To check if your phone meets these requirements, visit the MetroPCS website or contact their customer support for assistance.
It’s also important to consider whether your new phone is unlocked or tied to a specific carrier. Unlocking the phone allows you to use it with any carrier, including MetroPCS. If your phone is locked to another carrier, you may have to contact them to request an unlock before switching to MetroPCS. Keep in mind that some carriers have eligibility requirements and fees for unlocking phones.
By checking the device compatibility, you can ensure a seamless transition to your new MetroPCS phone without any connectivity or functionality issues. Taking the time to verify compatibility will save you time and frustration down the line.
Step 2: Backup Your Data
When changing your MetroPCS phone, it’s crucial to back up your data to ensure that you don’t lose any important information. Backing up your data will allow you to easily transfer your contacts, photos, videos, and other files from your old phone to your new one.
The first step in backing up your data is to connect your old phone to a computer using a USB cable. Once connected, you can access your phone’s storage and manually backup the files you want to keep. Simply copy and paste the desired files to a designated folder on your computer.
Alternatively, you can use cloud-based backup services such as Google Drive, Dropbox, or iCloud to automatically sync and store your files. These services provide an easy and convenient way to backup your data wirelessly. Simply enable the backup options on your old phone, and it will automatically sync your data to the cloud.
Ensure that you have enough storage space on your cloud account to accommodate your data. If needed, consider upgrading your storage plan to avoid any limitations. This will ensure that all your files are safely stored and ready to be transferred to your new phone.
Before proceeding with the backup process, it’s important to organize your files and delete any unnecessary data. This will help free up storage space on both your old phone and the cloud, making the backup process more efficient.
Remember to include your contacts in the backup process. You can either sync your contacts with your Google or iCloud account or export them as a vCard file, which can be easily imported to your new phone. Having a backup of your contacts ensures that you won’t lose any important phone numbers or email addresses.
Once you have completed the backup process, double-check to ensure that all your files are successfully stored in the designated location, whether it’s on your computer or in the cloud. Taking this extra precaution will give you peace of mind knowing that your data is safely backed up.
By following these steps to back up your data, you can ensure a seamless transition to your new MetroPCS phone without the risk of losing any important files.
Step 3: Gather necessary information
Before you proceed with changing your MetroPCS phone, it is important to gather all the necessary information to ensure a smooth transition. Here are the key details you need to collect:
- Account Information: Make sure you have your MetroPCS account details handy, including your account number and PIN. This information is crucial for the activation process of your new phone.
- Device Compatibility: Check if your current phone number and plan are eligible for a phone upgrade. You can do this by visiting the MetroPCS website or contacting their customer support. This will help you determine if you can switch to a different device without any issues.
- New Phone Specifications: Research and decide on the specific phone model you want to switch to. Consider factors such as the operating system, camera quality, storage capacity, and overall features that align with your needs and preferences.
- Transferable Data: Take stock of the data on your current phone that you want to transfer to the new device. This may include contacts, photos, messages, apps, and other important files.
- Unlock Status: If you plan to switch to a phone from another carrier, check if your current phone is unlocked. Locked phones are often tied to a specific carrier and may require unlocking before they can be used with a different carrier.
- Payment Options: Determine how you will pay for your new phone. This could involve purchasing it outright, opting for a monthly payment plan, or considering any trade-in options that may be available.
By gathering all the necessary information in advance, you will be well-prepared to proceed with the next steps of changing your MetroPCS phone. This will help streamline the process and minimize any potential hiccups along the way.
Step 4: Purchase a New Phone
When it comes to changing your MetroPCS phone, one of the most exciting steps is purchasing a new device. With a wide range of options available, you have the opportunity to upgrade to a more advanced smartphone, choose a different brand, or opt for a model with enhanced features.
Before making your purchase, take some time to consider your needs and preferences. Think about the operating system you prefer, the size and resolution of the screen, the camera quality, battery life, and any specific features or functionalities that are important to you.
You can shop for a new MetroPCS phone online or visit a local store. Online shopping offers the convenience of browsing through various models, comparing prices, and reading customer reviews. On the other hand, visiting a store allows you to get a hands-on experience with the devices and seek assistance from the knowledgeable staff.
When choosing a new phone, it’s also important to check its compatibility with the MetroPCS network. MetroPCS primarily operates on the GSM network, so ensure that the phone you select supports GSM bands. This will ensure a seamless transition and guarantee that you can fully utilize MetroPCS services.
Once you find the perfect phone for your needs, it’s time to make the purchase. Follow the instructions provided by the retailer, whether it’s completing the transaction online or visiting the store’s checkout counter. Be sure to provide accurate shipping and billing information to avoid any delays or complications.
Remember to keep track of your purchase receipt and any warranty information that comes with the new phone. These documents will be valuable in case you encounter any issues or need to contact customer support in the future.
Now that you have successfully purchased a new MetroPCS phone, it’s time to move on to the next step: activating your new device. This will allow you to start enjoying all the features and benefits that come with your new phone.
Step 5: Activate the new phone
Once you have purchased your new phone, the next step is to activate it. This process ensures that your new device is ready to use with your MetroPCS service. Follow these steps to activate your new phone:
1. Power on the new phone: Press and hold the power button until the device turns on. If prompted, enter any necessary setup information such as language preference and Wi-Fi connection details.
2. Insert your MetroPCS SIM card: Locate the SIM card tray on your new phone and insert the MetroPCS SIM card provided by your carrier. The placement of the SIM card tray may vary depending on the phone model, so consult the user manual if needed.
3. Enter the necessary activation details: Once your new phone is powered on and the SIM card is inserted, you may be prompted to enter your MetroPCS account information, including your phone number and PIN. Follow the on-screen instructions to complete the activation process. If you are unsure about your account details, reach out to MetroPCS customer support for assistance.
4. Wait for activation: After entering the required information, your new phone will undergo the activation process. This may take a few minutes, so be patient and wait for the confirmation message or on-screen notification indicating that your phone has been successfully activated.
5. Test your new phone: Once the activation is complete, make a test call or send a text message to ensure that your new phone is fully functional. Additionally, you can access the internet or use any other features to verify that everything is working as expected.
6. Set up additional features and preferences: Once your new phone is activated and tested, take the time to personalize it by adjusting settings, installing apps, and transferring any additional data or files. This will help you make the most out of your new device and ensure a seamless transition from your old phone.
By following these steps, you can successfully activate your new MetroPCS phone and start enjoying the full range of features and services it offers.
Step 6: Transfer your data
Once you have activated your new MetroPCS phone, the next step is to transfer your data from your old phone to the new one. This ensures that you don’t lose any important contacts, messages, photos, or other files during the transition. Here are a few methods you can use to transfer your data seamlessly:
Method 1: Backup and Restore
One of the easiest ways to transfer your data is to backup your old phone and then restore it onto your new MetroPCS device. Most smartphones come with built-in backup and restore options that allow you to create a backup of your data and settings. Simply follow the instructions provided by your phone’s manufacturer to create a backup and transfer it to your new device.
Method 2: Transfer via Cloud Storage
Another convenient way to transfer your data is by using cloud storage services. Popular options include Google Drive, Dropbox, and OneDrive. Simply upload your files, contacts, and any other relevant data to your cloud storage account on your old phone, and then sign in to the same account on your new phone to access and sync the data. This method is particularly useful if you have a large amount of data to transfer.
Method 3: Transfer via Sync Software
Many smartphone manufacturers offer their own sync software that allows you to transfer data between devices. For example, Samsung provides a utility called Smart Switch, which enables you to easily transfer your contacts, messages, photos, and more from an old Samsung phone to a new one. Check if your phone manufacturer has a similar software and follow the instructions provided to transfer your data.
Method 4: Transfer via SD Card or USB Cable
If both your old and new phones support expandable storage via SD card, you can transfer your data by simply moving the SD card from your old phone to the new one. This method works well for transferring photos, videos, and documents. Alternatively, you can use a USB cable to connect both phones and transfer the data directly.
Method 5: Manual Transfer
If none of the above methods are available or suitable for your situation, you can manually transfer your data by copying files, contacts, and other data from your old phone to a computer or external storage device, and then transferring them to your new MetroPCS phone. This method may require more time and effort, but it ensures that you have complete control over the transfer process.
Remember to also transfer any SIM card or SD card from your old phone to your new device if applicable. Once you have successfully transferred your data, take some time to explore the features and settings on your new MetroPCS phone. Familiarize yourself with its functionalities and enjoy the seamless experience of your upgraded device.
Step 7: Test your new phone
After successfully activating and transferring your data to your new Metropcs phone, it’s time to put it to the test. Testing your new phone will ensure that everything is working properly and that you can fully enjoy all the features and functionalities it offers. Here are a few things you can do to test your new phone:
1. Make a test call: Dial a friend or family member’s number to ensure that the call quality is clear and that you can hear them properly. Test the speakerphone as well to make sure it is working correctly.
2. Send a text message: Send a text message to someone to check if the messaging app is functioning as expected. Ensure that you can send and receive messages without any issues.
3. Connect to Wi-Fi: If your new phone supports Wi-Fi connectivity, try connecting to a Wi-Fi network to ensure that it can establish a stable connection. Browse the internet and stream videos to test the speed and reliability of the Wi-Fi connection.
4. Test the camera: Capture a few photos and videos with your new phone’s camera to see if the image quality meets your expectations. Switch between different camera modes and settings to explore the full potential of the camera.
5. Check app compatibility: Install and open your favorite apps to ensure they are compatible with your new phone. Test their functionality to make sure they work smoothly without any glitches or crashes.
6. Test the battery life: Use your new phone throughout the day and monitor its battery life. Check if it lasts as long as expected and if the charging time is reasonable.
7. Explore additional features: Depending on the model of your new Metropcs phone, it may have additional features such as fingerprint sensors, facial recognition, or gesture control. Take the time to explore these features and ensure they work as intended.
By performing these tests, you can identify any potential issues with your new phone and address them promptly. If you encounter any problems during the testing process, you can reach out to Metropcs customer support for assistance.
Step 8: Dispose of the old device properly
Once you have successfully transferred all your data to your new phone and ensured that everything is working seamlessly, it’s time to think about the proper disposal of your old device. While it may be tempting to simply throw it in the trash or let it gather dust in a drawer, it’s important to handle the disposal in an environmentally-friendly and responsible manner.
Here are some steps you can follow to dispose of your old device properly:
- Remove personal data: Before you part ways with your old phone, make sure to remove any personal information or sensitive data from it. Perform a factory reset to wipe all data and settings. This will help protect your privacy and prevent any potential data breaches.
- Donate or sell: If your phone is still in good working condition, consider donating or selling it. Look for local organizations or charities that accept old devices or consider using online marketplaces to sell your phone. This way, someone else can benefit from your old device, and you can make some extra money.
- Recycle: If your phone is damaged or no longer functional, recycling is the best option. Many electronic waste recycling centers accept old phones and other electronic devices. These centers have the expertise to properly dispose of the components and recover any reusable materials, reducing the environmental impact.
- Dispose of the battery separately: If your phone has a removable battery, remove it before recycling or disposing of the device. Lithium-ion batteries require special handling due to their potential to cause fires. Look for battery recycling programs in your area or contact your local waste management authorities for proper disposal guidelines.
- Check with your service provider: Some mobile service providers have their own recycling programs or trade-in options. Contact your service provider to see if they offer any incentives or options for properly disposing of your old device. They may also provide you with information on how to safely package and send your old device to them.
By following these steps, you can ensure that your old phone doesn’t end up in a landfill, where it can release harmful substances into the environment. Instead, through recycling, donation, or proper disposal, you contribute to sustainability and make a positive impact.
Troubleshooting Tips
While changing your MetroPCS phone is usually a straightforward process, there may be some issues that arise during or after the transition. Here are some troubleshooting tips to help you overcome any potential hurdles:
1. No Signal: If you’re experiencing a lack of signal on your new phone, make sure that it is properly activated. You can contact MetroPCS customer service to ensure that your new device is activated correctly and that all network settings are properly configured.
2. Compatibility Issues: Before selecting a new phone, it’s important to check its compatibility with the MetroPCS network. In some cases, certain phone models may not work with MetroPCS due to differences in network technology. If you encounter compatibility issues, consider exchanging the device for one that is compatible.
3. Data Transfer Problems: If you’re having trouble transferring your data from the old phone to the new one, ensure that you have followed all the necessary steps correctly. Double-check that you’ve backed up your data and that the transfer process is completed accurately. In case of any issues, consult the user manual of both the old and new devices or contact MetroPCS customer support for assistance.
4. Battery Drain: If you notice that the battery of your new phone is draining faster than expected, there are a few things you can try. First, check for any apps or features that are consuming excessive power and disable or restrict them. You can also adjust your phone’s battery settings to optimize power usage. If the problem persists, consider contacting MetroPCS support for further guidance.
5. Network Connectivity: If you’re having difficulty connecting to the internet or experiencing slow data speeds on your new phone, check the network settings. Ensure that mobile data is enabled, and try toggling Airplane Mode on and off. If the problem persists, reset the network settings or reach out to MetroPCS customer support for assistance.
6. Application Compatibility: Some applications may not function properly on certain phone models due to hardware or software limitations. If you encounter issues with specific apps on your new phone, try updating them to the latest version or reinstalling them. If the problem persists, contact the app developer or MetroPCS support for further assistance.
7. Hardware or Software Problems: If your new phone experiences persistent issues, such as freezing, crashing, or unresponsiveness, try restarting it or performing a factory reset. Be cautious when performing a factory reset, as it will erase all data on the device. If the problem persists, contact MetroPCS customer support or visit a service center for professional assistance.
By following these troubleshooting tips, you can resolve common issues that may arise when changing your MetroPCS phone. However, if you continue to experience difficulties, don’t hesitate to reach out to MetroPCS customer support for expert assistance.
Conclusion
In conclusion, changing your MetroPCS phone is a fairly straightforward process that allows you to upgrade your device or switch to a different model. Whether you choose to purchase a phone directly from MetroPCS or bring your own unlocked device, the steps involved in transferring your service and activating the new phone are relatively simple. By following the detailed instructions provided by MetroPCS and ensuring that your new phone is compatible with their network, you can seamlessly transition to a new device without any hassle.
Remember to back up your important data and contacts before initiating the phone change, and be sure to transfer your MetroPCS account details to the new device. Take advantage of the various resources available on the MetroPCS website or reach out to their customer support if you encounter any difficulties during the process. Enjoy your new MetroPCS phone and all the features and benefits it has to offer!
FAQs
Q: Can I change my MetroPCS phone?
A: Yes, you can change your MetroPCS phone. MetroPCS allows customers to switch their devices as long as they are compatible with the MetroPCS network.
Q: What do I need to change my MetroPCS phone?
A: To change your MetroPCS phone, you will need a new compatible device, a MetroPCS SIM card, and an active MetroPCS account.
Q: How do I check if a phone is compatible with MetroPCS?
A: To check if a phone is compatible with MetroPCS, you can visit the MetroPCS website or contact customer support. Alternatively, you can bring the phone to a MetroPCS store to have it checked by a representative.
Q: Can I keep my phone number when changing my MetroPCS phone?
A: Yes, you can keep your phone number when changing your MetroPCS phone. This process is known as porting, where your existing phone number is transferred to the new device.
Q: How can I transfer my data to the new MetroPCS phone?
A: To transfer your data to the new MetroPCS phone, you can use methods such as backing up your data to a cloud service or using a computer to transfer files. Additionally, some phones offer built-in transfer tools that make the process easier.