
Welcome to our comprehensive guide on how to copy SIM card contacts to an Android phone. As cell phone technology continues to advance, it is becoming increasingly common for individuals to switch to Android devices and transfer their contacts from their old SIM cards. With so many contact details stored on your SIM card, it can be a daunting task to manually input each one into your new Android phone. However, fret not! In this article, we will provide you with step-by-step instructions for seamlessly transferring your SIM card contacts to your Android device. Say goodbye to the time-consuming and tedious process of manually inputting contacts, and say hello to a quick and hassle-free transfer. So grab your Android phone and SIM card, and let’s get started!
Inside This Article
- Importing SIM Card Contacts to Android Phone
- #1. Check SIM Card Compatibility
- # 2. Export SIM Card Contacts
- # 3. Import SIM Card Contacts to Android Phone
- # 4. Sync SIM Card Contacts with Google Account
- Conclusion
- FAQs
Importing SIM Card Contacts to Android Phone
If you’ve recently switched to a new Android phone or need to transfer your SIM card contacts to your existing Android device, you’ve come to the right place. Importing SIM card contacts to an Android phone is a simple process that can save you time and effort, ensuring that your contacts are easily accessible on your new device.
Here’s a step-by-step guide on how to import SIM card contacts to an Android phone:
- Check SIM Card Compatibility: Before proceeding with the import, make sure that your Android phone is compatible with the type of SIM card you have. Most Android devices support standard SIM cards, but some may require micro or nano SIM cards. Check your phone’s specifications or consult your device’s manual for more information.
- Export SIM Card Contacts: Next, you’ll need to export your contacts from your SIM card. On your old phone, go to the contacts or settings menu and look for the option to import/export contacts. Choose the option to export contacts to the SIM card. This will create a backup file with your contacts’ information.
- Import SIM Card Contacts to Android Phone: Once you have exported the contacts to your SIM card, remove the SIM card from your old phone and insert it into your new Android phone. Power on the device and go to the contacts or settings menu. Look for the option to import contacts from the SIM card. Select this option and wait for the import process to complete. Your contacts should now be available on your new Android device.
- Sync SIM Card Contacts with Google Account: To ensure that your contacts are backed up and synced across all your devices, it’s recommended to sync them with your Google account. On your Android phone, go to the contacts or settings menu and select the option to sync contacts with your Google account. This will upload your SIM card contacts to your Google account, making them easily accessible on any Android device linked to your account.
By following these simple steps, you can easily import your SIM card contacts to your Android phone and have them readily available whenever you need them. Whether you’re switching phones or simply want to have a backup of your contacts, this process ensures a seamless transition and peace of mind knowing that your valuable contacts are safe.
#1. Check SIM Card Compatibility
Before you proceed with transferring your SIM card contacts to your Android phone, it’s essential to ensure compatibility between your SIM card and your Android device. Here are a few steps to help you check the compatibility:
1.1 Determine the SIM card size: Android devices typically support different SIM card sizes, such as standard SIM, micro SIM, or nano SIM. Check the SIM card slot on your Android phone and determine the appropriate size.
1.2 Verify SIM card technology: SIM cards come in different technologies, such as 2G, 3G, and 4G. Ensure that your Android phone supports the SIM card technology you’re currently using by consulting the device specifications or contacting the manufacturer.
1.3 Unlock your SIM card: In some cases, your SIM card may be locked to a specific network. Make sure your SIM card is unlocked so that it can be used with any compatible Android device. Contact your mobile carrier to request an unlock if necessary.
By confirming the compatibility of your SIM card with your Android phone, you can proceed with confidence knowing that the transfer process will go smoothly.
# 2. Export SIM Card Contacts
If you’ve decided to switch to an Android phone and want to transfer your contacts from your SIM card, you’ll need to export them first. Luckily, the process is quite simple and can be done in a few easy steps.
To export your SIM card contacts, follow these steps:
- Insert your SIM card into your current phone.
- Go to the contacts app on your phone and open the settings menu.
- Look for the option to import/export contacts and tap on it.
- Choose the export option and select the location where you want to save the exported contacts (e.g., SD card or internal storage).
- Confirm the export and wait for the process to complete.
Once the export is finished, you’ll have a file containing all your SIM card contacts. This file can then be easily transferred to your new Android phone.
Keep in mind that the exact steps may vary slightly depending on the make and model of your phone. However, the general process should be similar across different devices.
# 3. Import SIM Card Contacts to Android Phone
Once you have exported the contacts from your SIM card, you can now import them to your Android phone. Here’s a step-by-step guide to help you through the process:
1. Open the “Contacts” app on your Android phone. This app is usually pre-installed on most Android devices and can be accessed from the app drawer.
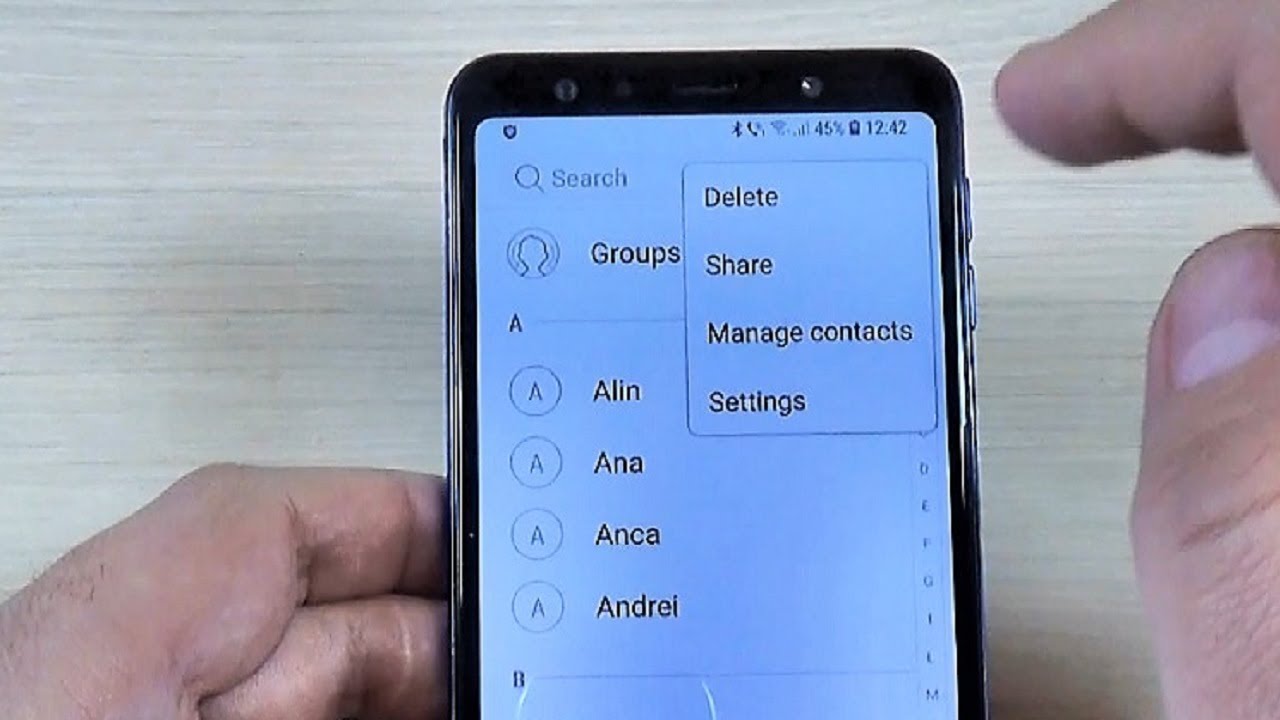
2. Tap on the three-dot menu icon or the settings gear icon, depending on your device, to access the app’s settings.
3. Look for and select the “Import/Export” or “Manage Contacts” option from the settings menu. This will vary slightly depending on the make and model of your Android phone.
4. Choose the option to import contacts from a SIM card. Again, the wording may vary, but it should be something along the lines of “Import from SIM card” or “Import contacts.”
5. Your Android phone will now detect the SIM card and begin importing the contacts. This process may take a few moments, depending on the number of contacts you have.
6. Once the import is complete, you will see a notification or confirmation message on your screen. Your SIM card contacts are now successfully imported to your Android phone.
7. To ensure that your contacts are properly synced and backed up, consider linking your Android phone to your Google account. This will allow you to access your contacts from any device, as well as provide a convenient backup in case of data loss.
That’s it! You have successfully imported your SIM card contacts to your Android phone. Enjoy easy access to your contacts without having to switch between devices.
If you encounter any issues during the import process or if you have any questions, consult your Android device’s user manual or reach out to the manufacturer’s support team for further assistance.
# 4. Sync SIM Card Contacts with Google Account
Syncing your SIM card contacts with your Google account is a convenient way to ensure that your contacts are always backed up and easily accessible across multiple devices. By syncing your SIM card contacts with Google, you can avoid the risk of losing important contact information and effortlessly transfer your contacts to a new Android phone. Here’s how you can sync your SIM card contacts with your Google account:
1. Open the Contacts app on your Android phone. You may find it in your app drawer or on your home screen.
2. Tap on the menu icon in the top left corner of the screen. It may appear as three horizontal lines or as a hamburger icon.
3. From the menu options, select “Settings” or “Manage Contacts”. The specific wording may vary based on your device and Android version.
4. Look for the option to “Import/Export Contacts” or “Import/Export”. Tap on it to proceed.
5. Choose the option to “Export to Google” or “Sync with Google”. This will initiate the process of syncing your SIM card contacts with your Google account.
6. If prompted, sign in to your Google account or add a new account if you don’t have one already.
7. Follow the on-screen instructions to complete the sync process. Allow the app to access your contacts and grant any necessary permissions.
8. Once the sync is complete, your SIM card contacts will be backed up and synced to your Google account. You can now access them on any device connected to your Google account, such as another Android phone, tablet, or even a computer.
Remember that after syncing your SIM card contacts with Google, any changes or additions you make to your contacts will automatically be updated across all devices. This ensures that you always have the most up-to-date contact information at your fingertips.
Syncing your SIM card contacts with Google is a simple and effective way to manage your contacts and keep them secure. By following these steps, you’ll have peace of mind knowing that your important contacts are protected and easily accessible whenever you need them.
Conclusion
Copying SIM card contacts to an Android phone is a straightforward process that ensures you have all your important contacts readily available. Whether you’re switching to a new device or want to back up your contacts, following the steps outlined in this article will help you accomplish this task seamlessly.
By using the built-in tools provided by Android, such as the Contacts app or the SIM card manager, you can easily import your SIM card contacts and have them synced to your Android phone. This allows for easy access and management of your contacts, ensuring that you never lose important information.
Remember to regularly back up your contacts to avoid any data loss and make it easier to transfer them to new devices in the future. With the convenience and flexibility offered by Android, managing your contacts has never been easier.
So go ahead and give it a try. Enjoy the peace of mind that comes with having your contacts securely stored on your Android phone, ready to be accessed whenever you need them.
FAQs
1. Can I copy my SIM card contacts to an Android phone?
Yes, you can easily copy your SIM card contacts to an Android phone. Android devices offer multiple methods to transfer contacts, including using the built-in contacts app, importing from a SIM card, or using third-party apps.
2. How do I copy SIM card contacts to an Android phone?
To copy SIM card contacts to an Android phone, follow these steps:
- Open the Contacts app on your Android phone.
- Tap on the three-dot menu icon and select “Settings” or “Import/Export.”
- Choose the option to import contacts from the SIM card.
- Select the contacts you want to copy and tap on the “Import” or “Copy” button.
3. Do I need a special app to copy SIM card contacts?
No, you don’t necessarily need a special app to copy SIM card contacts to an Android phone. Most Android devices come with a built-in contacts app that offers the option to import contacts from a SIM card. However, if you prefer a different method or want additional features, there are third-party apps available on the Google Play Store that can assist you in transferring your contacts.
4. Will copying SIM card contacts to an Android phone overwrite existing contacts?
It depends on the specific settings and options you choose during the import process. By default, Android will prompt you to merge or overwrite existing contacts with the imported ones. However, you can usually customize these settings to avoid duplication or choose specific contacts to import and merge.
5. Can I transfer SIM card contacts from one Android phone to another?
Yes, you can transfer SIM card contacts from one Android phone to another. The process is similar to copying SIM card contacts to an Android phone. You can use the built-in contacts app or third-party apps to import contacts from the SIM card on the source phone, and then export or sync those contacts to the new Android phone.