
Dialing out on a Cisco phone may seem intimidating for those who are new to the device or unfamiliar with its features. However, once you understand the process, making outbound calls becomes a breeze. With its advanced technology and user-friendly interface, a Cisco phone offers a seamless communication experience.
In this article, we will provide you with a comprehensive guide on how to dial out on a Cisco phone. From navigating the keypad to accessing speed-dial numbers and using calling features, we will cover all the essential steps to help you confidently make calls using your Cisco phone.
Whether you are a business professional looking to communicate with clients or a home user in need of a reliable means of communication, learning how to dial out on a Cisco phone is an essential skill. So, let’s dive in and master this valuable capability together.
Inside This Article
- Setting up the Cisco Phone
- Making a Call on the Cisco Phone
- Transferring a Call on the Cisco Phone
- Using Additional Features on the Cisco Phone
- Conclusion
- FAQs
Setting up the Cisco Phone
Setting up your Cisco Phone is the first step towards harnessing its full potential. By following these simple steps, you will be able to configure your phone and get ready to make and receive calls.
1. Connect the power adapter: Begin by connecting the power adapter to your Cisco Phone. Ensure that the power adapter is securely plugged into both the phone and a power outlet.
2. Connect to the network: Connect your Cisco Phone to your local network by plugging the Ethernet cable into the corresponding port on the back of the phone. The other end of the cable should be connected to a network switch or router.
3. Power on the phone: Once the power adapter and network connection are in place, power on the Cisco Phone. Wait for it to boot up, which may take a few minutes.
4. Enter login details: After the Cisco Phone has powered on, you will be prompted to enter your login details. These may include your username, extension number, and password. Follow the on-screen instructions to complete the login process.
5. Customize settings: Once you have successfully logged in, take the time to customize your Cisco Phone settings. This can include adjusting the ringtone volume, setting up call forwarding, and personalizing display options.
6. Test your phone: To ensure that everything is working properly, make a test call. Dial a phone number and check if you can hear the other party clearly and if they can hear you.
By following these steps, you can set up your Cisco Phone and start utilizing its features to enhance your communication experience.
Making a Call on the Cisco Phone
Making a call on a Cisco phone is a simple and straightforward process. Whether you need to connect with a colleague or reach out to a client, follow these steps to dial out on a Cisco phone:
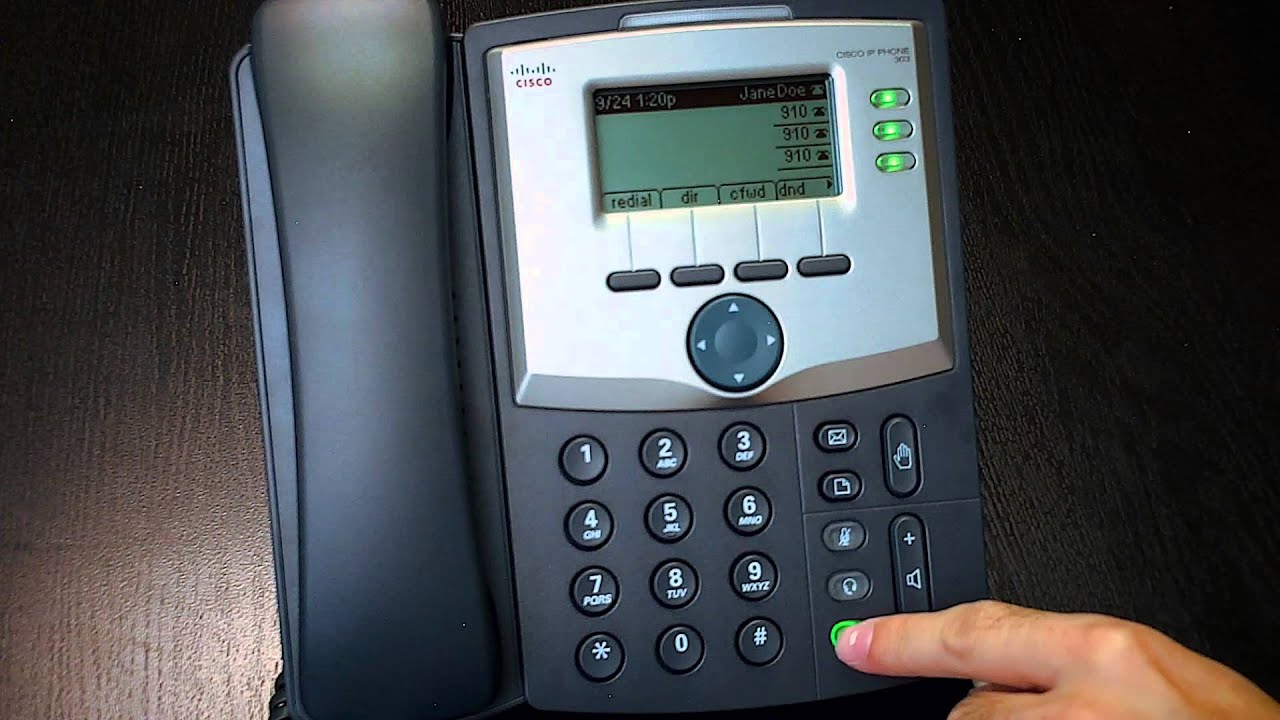
- First, pick up the handset or press the “Speaker” button to activate the speakerphone.
- Next, you will see a dial pad on the Cisco phone’s display. Use the keypad to enter the phone number you wish to call.
- If you are dialing a number outside your organization’s network, make sure to include the desired area code and any necessary prefixes (e.g., country code or international access code).
- Once you’ve entered the complete phone number, press the green “Call” button. This will initiate the call.
- If you are using a speed dial or a contact from your Cisco phone’s directory, simply press the corresponding speed dial button or select the contact from the directory to initiate the call.
Now that you know how to dial out on a Cisco phone, you’re ready to connect with your desired contact quickly and easily. Remember to hang up the handset or press the “End Call” button to terminate the call when you’re finished.
Transferring a Call on the Cisco Phone
Transferring a call on the Cisco Phone is a simple and efficient way to redirect a call to another person or extension within your organization. Whether you need to transfer a call to a colleague, a department, or even a different office location, the Cisco Phone offers several options to facilitate seamless call transfers.
Here’s a step-by-step guide on how to transfer a call on the Cisco Phone:
- Pick up the handset or press the “Conference” or “Transfer” button on your Cisco Phone.
- Dial the extension or phone number to which you want to transfer the call. You can enter the extension manually or select it from your contacts list if available.
- Wait for the person on the other end to answer the call.
- When the person answers, you have the option to either announce the call or directly transfer it without any announcement.
- If you choose to announce the call, inform the person who is receiving the call about the caller’s name and purpose of the call if necessary.
- To complete the transfer, hang up the phone or press the “Transfer” or “End Transfer” button on your Cisco Phone. The call is now transferred to the intended recipient.
It’s important to note that some Cisco Phone models may have slightly different button configurations or navigation options. Refer to your specific phone model’s user manual or contact your IT department for any variations in the transfer process.
If you need to transfer a call to multiple extensions simultaneously, you can utilize the “Conference” feature on the Cisco Phone. This allows you to add multiple parties to the call and then transfer it to all participants simultaneously.
Transferring calls on the Cisco Phone not only saves time but also ensures efficient communication within your organization. It allows you to redirect calls to the right person or department, ensuring that callers receive the assistance they need promptly.
Using Additional Features on the Cisco Phone
Aside from making and receiving calls, Cisco phones offer a range of additional features that can enhance your communication experience. Whether you’re in a busy office or working remotely, these features can help you streamline your workflow and improve your productivity. Let’s explore some of the key additional features available on Cisco phones.
1. Voicemail: Cisco phones come with a built-in voicemail feature that allows callers to leave you messages when you’re unavailable. You can easily access your voicemail to listen to and manage the messages through a simple interface on your phone.
2. Call Forwarding: With call forwarding, you can redirect calls from your Cisco phone to another phone number or extension. This feature is ideal for times when you’re away from your desk or need to temporarily redirect your calls to a colleague or a voicemail box.
3. Call Waiting: When you’re on a call and another call comes in, the call waiting feature notifies you of the incoming call. You can choose to put your current call on hold and answer the new call or ignore the new call and let it go to voicemail.
4. Conference Calls: Cisco phones support conference calls, allowing you to connect with multiple participants in a single call. You can initiate a conference call by dialing the first participant, then adding more participants to the call. This feature is particularly useful for remote collaboration or team meetings.
5. Speed Dial: The speed dial feature allows you to assign frequently dialed numbers to specific keys on your Cisco phone. By simply pressing the assigned key, you can quickly dial the desired number. This feature saves time and eliminates the need to manually enter long phone numbers.
6. Call History: The call history feature on Cisco phones keeps a record of your incoming, outgoing, and missed calls. It provides a convenient way to review your call activity and easily redial or return missed calls directly from the call history log.
7. Do Not Disturb (DND): When you don’t want to be interrupted, the DND feature can be activated on your Cisco phone. This temporarily blocks incoming calls, ensuring you can focus on tasks without disruptions. It’s a valuable feature for times when you need uninterrupted concentration.
8. Call Park: Call park allows you to “park” a call on a specific extension and then retrieve it from another phone. This feature is useful in shared office spaces or when you need to transfer a call to a specific department or individual.
9. Intercom: The intercom feature enables you to make announcements or have quick voice conversations within your organization. It provides a convenient way to communicate with colleagues without making a traditional phone call.
With these additional features at your disposal, you can leverage the full capabilities of your Cisco phone and customize your communication experience according to your needs. Take the time to explore and familiarize yourself with these features, and you’ll find that your Cisco phone becomes an even more valuable tool in your day-to-day work.
Conclusion
In conclusion, dialing out on a Cisco phone is a simple and efficient process that allows users to connect with others effortlessly. By following the steps outlined in this article, you can confidently navigate the dialing menu and make calls without any hassle.
Remember to familiarize yourself with your Cisco phone’s features and functionalities, as they may vary slightly depending on the model. If you encounter any difficulties or have specific questions regarding dialing out on your Cisco phone, don’t hesitate to consult the user manual or reach out to Cisco’s customer support for assistance.
Whether you’re dialing out to a coworker, client, family member, or friend, using a Cisco phone ensures clear and reliable communication. Enjoy the convenience and connectivity that this powerful device offers, and make the most out of your communication experience.
FAQs
1. How do I dial out on a Cisco phone?
To dial out on a Cisco phone, follow these steps:
– Lift the handset or press the speakerphone button to activate the phone.
– If the phone supports direct dialing, you can simply enter the phone number using the keypad. Otherwise, you may need to dial a prefix or access code before entering the number.
– Press the appropriate key or button (e.g. “Dial,” “Call,” or a specific line button) to initiate the outgoing call.
– Wait for the call to be connected and start ringing on the recipient’s end.
– Once the call is connected, you can begin speaking through the handset or speakerphone.
2. Can I dial international numbers on a Cisco phone?
Yes, you can dial international numbers on a Cisco phone. The process is similar to dialing regular numbers, but you’ll need to include the appropriate country code before the phone number. Check with your company’s IT department or phone system administrator for any specific dialing instructions or restrictions related to international calls.
3. How do I use the speed dial feature on a Cisco phone?
To use the speed dial feature on a Cisco phone, you can typically do the following:
– Press the speed dial button or key assigned to the specific contact or number you want to call.
– Alternatively, you may need to enter a speed dial code followed by a specific number on the keypad. Refer to your phone’s user manual or check with your IT department for detailed instructions on programming and using speed dial numbers.
4. Can I redial the last called number on a Cisco phone?
Yes, you can usually redial the last called number on a Cisco phone using a dedicated redial button or a specific key combination. Alternatively, you may need to access the phone’s call history or select the “Redial” option from the menu.
5. How do I place a call on hold on a Cisco phone?
To place a call on hold on a Cisco phone, you can generally follow these steps:
– During an active call, press the “Hold” button or key.
– The call will be put on hold, and the other party will hear hold music or a pre-recorded message.
– To retrieve the call, press the appropriate button or key (e.g. “Resume” or “Hold”) to reconnect with the caller.